
A Toyota Tundra exhaust leak can show up as a sharp cold-start tick, louder exhaust, soot around a joint, an unusual exhaust odor, or a check-engine light. If exhaust fumes enter the cabin, pull over safely, shut the truck off, get into fresh air, and arrange an inspection. Diagnosis also depends on the truck’s generation: older V8 Tundras and 2022-and-newer twin-turbo V6 models do not use the same engine-side exhaust layout.
Last updated: September 19, 2026. Reviewed against current Toyota owner information, current Tundra powertrain information, and CDC carbon-monoxide guidance.
Quick Answer
A Toyota Tundra exhaust leak may cause a cold-start tick, hissing or rumbling, soot near a flange, exhaust odor, abnormal fuel-trim readings, or a check-engine light. Stop driving if fumes enter the cabin. With the exhaust completely cool, inspect visible manifolds or engine-side joints, flanges, pipes, welds, clamps, and hangers. If the leak is not obvious, have a qualified shop locate it with an appropriate controlled leak test.
Key Takeaways
- A ticking sound that is loudest during a cold start can suggest an engine-side exhaust leak, but sound alone does not prove a cracked manifold or gasket.
- Exhaust fumes inside the cabin require immediate attention because carbon monoxide in exhaust is colorless and odorless.
- Common leak points include engine-side exhaust joints, gaskets, flanges, pipe welds, flex sections where fitted, clamps, and corroded tubing.
- A diagnostic trouble code can support the diagnosis, but no single OBD-II code confirms a physical exhaust leak.
- Do not apply older V8 “manifold tick” advice automatically to a 2022-and-newer Tundra; the twin-turbo V6 uses different engine-side exhaust architecture.
At a Glance
| Time Required | About 15 to 30 minutes for a basic cold inspection; professional diagnosis may take longer. |
| Difficulty | Beginner for visual checks; intermediate to advanced for most repairs. |
| Tools Needed | Flashlight, gloves, wheel chocks, inspection mirror, and an optional OBD-II scanner. Use approved jack stands if the truck must be raised. |
| Cost | Varies widely by model year, engine, leak location, rust, broken fasteners, parts choice, and local labor rates. |
What Is an Exhaust Leak in a Toyota Tundra?
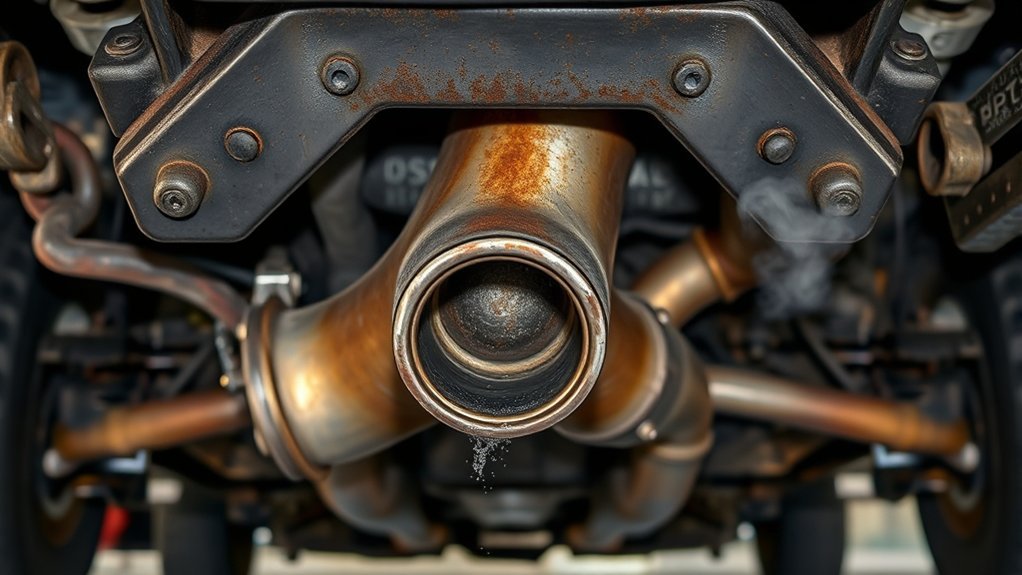
An exhaust leak occurs when combustion gases escape before reaching the intended tailpipe outlet. Depending on the Tundra’s generation and engine, a leak may develop at an engine-side exhaust joint, gasket, flange, pipe, weld, catalytic-converter connection, muffler, or another sealed connection. For a component-by-component overview, see this Toyota Tundra exhaust system guide.
A leak near the engine often produces a sharp ticking or tapping sound. A leak farther downstream may sound more like a hiss, rasp, rumble, or unusually loud exhaust note.
Older V8 Tundras are commonly associated in owner and repair discussions with cold-start exhaust-manifold ticking, but that sound is still only a diagnostic clue. Injector, valvetrain, ignition, and other mechanical noises can sound similar.
Generation Matters: Older V8 vs. 2022+ Twin-Turbo V6
Do not apply an older V8 manifold diagnosis to every Tundra. Toyota’s 2022 Tundra engineering overview describes the redesigned truck’s twin-turbo V6 and its integrated exhaust-manifold/cylinder-head design. Toyota’s current 2026 Tundra information continues to list i-FORCE and i-FORCE MAX twin-turbo V6 powertrains.
That difference matters during diagnosis. A cold-start ticking pattern associated with an older V8 does not automatically identify the failed part on a 2022-and-newer truck. Use service information for the exact model year, engine, drivetrain, and VIN before removing engine-side exhaust or turbo-related components.
A change in exhaust sound or an exhaust odor inside the truck deserves prompt attention, even when the engine still appears to run normally.
Is a Toyota Tundra Exhaust Leak Dangerous?
Yes. An exhaust leak can become a health and safety problem. Carbon monoxide in exhaust is colorless and odorless. Toyota’s Tundra exhaust-gas precautions warn owners about exhaust entering the vehicle and call for inspection when the exhaust system has a hole, loose connection, or abnormal sound. The CDC also warns that even a small automotive exhaust leak can allow carbon monoxide to build up inside a vehicle.
Warning: If exhaust fumes enter the cabin, pull over in a safe outdoor location, shut off the engine, exit the vehicle, and arrange an inspection or tow. Opening the windows may increase ventilation, but it does not repair the leak.
Move into fresh air if anyone near the running truck develops headache, dizziness, weakness, upset stomach, vomiting, chest pain, confusion, fainting, or unusual drowsiness. Seek prompt medical help for suspected carbon-monoxide exposure and call emergency services for severe symptoms.
Never run the truck in an attached garage, even with the garage door open. Do not crawl beneath a running truck, and never rely on the factory jack alone to support the vehicle.
Common Symptoms of an Exhaust Leak in Toyota Tundras
An exhaust leak can produce one or several symptoms. The exact signs depend on the leak’s size, position, engine, and model year.
- Cold-start ticking: A sharp tick near an engine-side exhaust joint may be loudest immediately after startup and soften as components heat and expand.
- Louder exhaust: A pipe, flange, muffler, or connection leak may create a hiss, puff, rasp, or deep rumble.
- Soot marks: Dry black or gray deposits around a flange, crack, weld, or gasket can help identify the path of escaping gas.
- Exhaust odor: You may notice an unusual smell around the engine bay, beneath the cab, or inside the truck. Remember that carbon monoxide itself has no odor.
- Fuel-trim or drivability changes: A leak ahead of an upstream oxygen or air-fuel-ratio sensor can interfere with exhaust feedback used for engine control.
- Check-engine light: Depending on the model and leak location, an exhaust leak can contribute to fuel-trim or sensor-related faults. The stored code still needs proper diagnosis.
- Failed emissions inspection: A leak or related monitored fault may increase emissions or prevent the truck from completing an inspection successfully.
Note: A small leak well behind the engine-management sensors may mainly change exhaust noise. A leak ahead of an upstream oxygen or air-fuel-ratio sensor is more likely to interfere with sensor feedback and fuel-trim diagnosis.
Common Causes of Exhaust Leaks in Toyota Tundras
Heat, vibration, corrosion, impact damage, and previous repair work can all create an exhaust leak. The applicable components vary by generation, but common causes include:
- Cracked engine-side exhaust component: Repeated heating and cooling can stress manifolds, integrated exhaust passages, welded sections, or nearby joints depending on the engine design.
- Failed gasket: Gasket deterioration, flange movement, or incorrect installation can allow gas to escape at a sealed joint.
- Broken or loose studs or fasteners: Corrosion and heat cycles can damage hardware or prevent a flange from clamping evenly.
- Leaking flange or pipe gasket: Donut gaskets and flat flange gaskets can wear, crush, shift, or be omitted during previous work.
- Cracked pipe or weld: Road impact, vibration, rust, or metal fatigue can create a pinhole or split.
- Damaged flex section: Where fitted, a flex joint can crack internally or separate at its braid or weld.
- Failed clamp or slip joint: A loose, distorted, or corroded connection may no longer seal.
- Corroded muffler or resonator: Water, road salt, and age can rust thin metal from the inside or outside.
- Previous installation errors: Misaligned pipes, reused gaskets, uneven fastener tightening, missing gaskets, or incorrect components can create recurring leaks.
A failed oxygen or air-fuel-ratio sensor is not a physical cause of an exhaust leak. However, a leak ahead of a sensor can introduce outside air into the exhaust stream and distort the reading the control system receives.
How to Diagnose an Exhaust Leak in Your Tundra
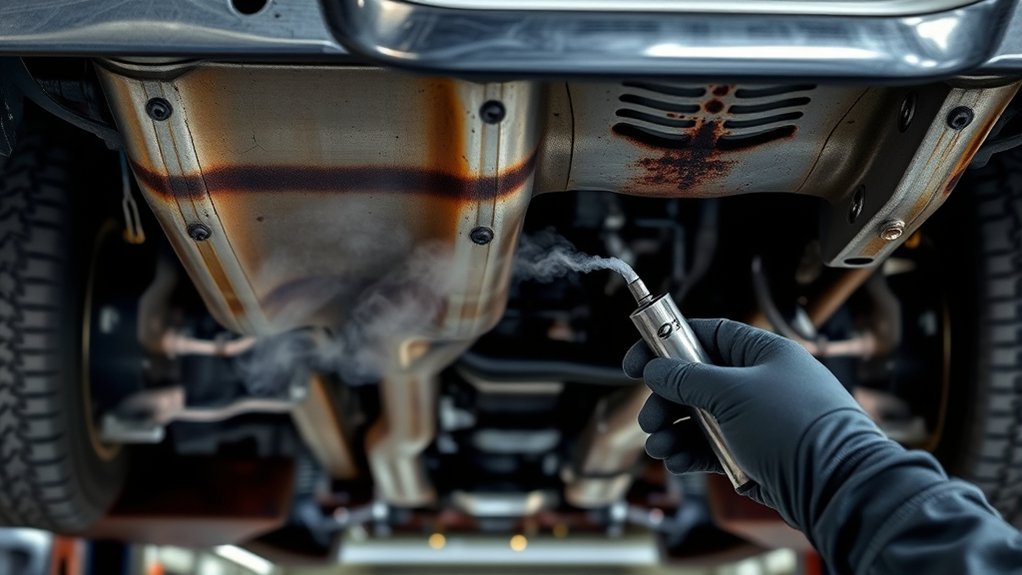
Start with the least invasive checks. Do not loosen components, overtighten fasteners, or apply sealant until you know where the leak originates.
1. Decide Whether the Truck Is Safe to Inspect
Do not keep the engine running if fumes enter the cabin, the exhaust hangs loose, a component glows red, the truck has severe power loss, or anyone experiences possible carbon-monoxide symptoms. Arrange professional service or towing.
2. Listen During a Cold Start
Park outdoors, apply the parking brake, and keep clear of belts, fans, hot turbo or exhaust hardware, and other moving components. Have another person start the cold engine while you listen from a safe position beside the truck.
An engine-side leak can create a fast metallic tick that follows engine speed. A downstream leak may create a puffing or hissing sound. Shut the engine off before placing your hands or tools near exhaust components.
Pro Tip: Record the first 30 seconds of a cold start with your phone. Also note whether the sound is cold-only or remains warm, which side is loudest, whether it changes with RPM or load, whether you smell exhaust, and which codes are stored. Those details can help a repair shop reproduce an intermittent leak.
3. Inspect the Cold Exhaust System
Wait until the engine, turbo-related hardware where fitted, catalytic converters, and exhaust pipes are completely cool. Use a flashlight and inspection mirror to examine the accessible portions of the system.
- Engine-side exhaust joints or manifolds applicable to your engine
- Engine-to-pipe or turbo-related exhaust connections where applicable
- Visible studs, nuts, bolts, brackets, and heat shields
- Catalytic-converter flanges and welds
- Pipe seams, bends, clamps, and hangers
- Muffler and resonator seams
- Areas with dry soot, cracking, corrosion, or heat discoloration
Look for cracks, missing hardware, separated joints, fresh impact marks, heavy rust, or a pipe resting against another component.
4. Read OBD-II Codes and Fuel-Trim Data
Use an OBD-II scanner if the check-engine light is on. Depending on the engine and model year, an exhaust leak can contribute to fuel-trim or sensor-related faults. Toyota service information for applicable Tundra engines includes an exhaust-system gas leak among possible P0171/P0174 trouble areas. A code still does not prove where the leak is or that the named sensor has failed.
Record confirmed and pending codes plus freeze-frame data before clearing anything. A technician may compare fuel trims at idle and higher engine speeds, inspect sensor data, and rule out intake leaks, ignition faults, air-metering problems, or fuel-delivery faults. For broader code interpretation, see the common Toyota Tundra OBD2 codes guide.
5. Request a Professional Controlled Leak Test
If the leak is too small to locate visually, a repair shop may use a controlled smoke or low-pressure leak test on a cool exhaust system with the engine off. Escaping smoke can help reveal small cracks, leaking flanges, or poorly sealed joints.
Do not pressurize the exhaust with a leaf blower, unrestricted compressed air, or a household shop vacuum. A qualified shop can choose a leak-detection method and pressure appropriate for the vehicle and diagnostic equipment.
| Diagnostic Clue | What It May Suggest | Next Step |
|---|---|---|
| Sharp cold-start tick near the engine | Engine-side exhaust joint, gasket, fastener, injector, valvetrain, or another mechanical noise | Identify the sound location, inspect for soot, and confirm the leak before ordering parts |
| Leak ahead of an upstream O2/A/F sensor | Possible sensor-feedback or fuel-trim disturbance in addition to exhaust noise | Locate and repair the leak, then reevaluate scan data before replacing a sensor |
| Deep rumble under the cab or toward the rear | Pipe, muffler, clamp, flange, or downstream joint leak | Inspect downstream tubing, joints, and hangers |
| Soot at a joint | Escaping gas at a gasket, flange, weld, or crack | Check alignment, sealing surfaces, gasket condition, and hardware |
| P0171/P0174 or sensor-related fault | Possible exhaust leak, intake leak, sensor/circuit fault, air-metering error, or fuel problem | Review live data and follow the model-specific diagnostic procedure before replacing parts |
| Cabin fumes | Possible exhaust entry into the passenger area | Stop driving and arrange immediate inspection |
Exhaust Leak or Engine Tick?
An engine-side exhaust leak can sound similar to normal injector operation, valvetrain noise, an ignition arc, or a lubrication-related tick. Sound alone is not enough to identify the failed component.
- Exhaust leak: Often sounds like a sharp pulse near an engine-side joint or flange. It may leave soot and may change as components warm.
- Injector noise: Usually creates a steady, light clicking from the top of the engine and may occur on a properly running truck.
- Valvetrain noise: Often comes from the cylinder-head or valve-cover area and may remain after the engine warms.
- Oil-pressure-related noise: May accompany a low oil level, warning light, or delayed oil-pressure buildup and requires separate diagnosis.
- Ignition arc: May sound like a snap. Do not touch ignition components while the engine runs.
Do not assume every fading cold-start tick comes from an exhaust manifold. Confirm the sound’s location, identify the truck’s engine and generation, and look for physical evidence before ordering parts.
Repairing Exhaust Leaks: DIY or Professional?
The right repair depends on the leak’s location, your experience, available access, corrosion, engine design, and whether heat-cycled fasteners are likely to break.
Assessing Repair Complexity
| Repair | DIY Suitability | Main Risks |
|---|---|---|
| Accessible downstream clamp or bolt-on connection | Possible for an experienced DIYer | Incorrect alignment, reused gasket, poor support, or unsafe lifting |
| Exhaust hanger replacement | Often manageable with safe access | Hot components, falling exhaust sections, or damaged mounts |
| Older-style manifold or engine-side gasket replacement | Intermediate to advanced | Limited access, broken studs, warped sealing surfaces, and incorrect torque |
| Engine-side or turbo-related exhaust work on 2022+ models | Professional service usually appropriate | High heat, model-specific architecture, sensor or turbo-related components, limited access, and incorrect assembly |
| Welding a pipe or flange | Professional fabrication | Fire, fuel-system proximity, thin corroded metal, and poor weld penetration |
| Catalytic-converter connection repair | Professional recommended | Emissions compliance, sensor damage, theft-related damage, and high heat |
Choosing the Correct Repair
A proper repair may involve replacing a gasket, damaged engine-side component, pipe section, clamp, hanger, flange hardware, or another failed part. The shop should also correct pipe misalignment or failed supports that placed stress on the leaking joint.
Do not cover an engine-side crack with generic epoxy or silicone. These products may fail under exhaust heat and movement. An exhaust-rated bandage or patch may provide limited temporary service on a suitable downstream pipe, but it should not become a permanent substitute for replacing structurally weakened metal.
Use parts designed for the truck’s exact year, engine, cab, wheelbase, drivetrain, and emissions configuration. Aftermarket headers, manifolds, downpipes, or other engine-side exhaust parts may change noise, fitment, sensor position, turbo-related routing, and emissions compliance. Confirm local requirements before installation.
Post-Repair Checks
After completing the repair, confirm that:
- No soot or smoke escapes from the repaired joint
- The cold-start tick, hiss, or exhaust rumble has stopped
- Pipes, shields, and engine-side exhaust components have proper clearance
- Hangers support the exhaust without binding
- Sensor wiring stays away from hot or moving parts
- No exhaust odor enters the cabin
- Stored codes are documented before they are cleared
- Relevant codes and fuel-trim concerns do not return after the repair
- Readiness monitors complete before an emissions inspection when required
Preventive Maintenance Tips for Your Tundra’s Exhaust System
You cannot prevent every crack, gasket failure, or impact-related leak, but regular inspection can reveal damage before it spreads.
Regular Visual Inspections
Check the exhaust when the truck is cool and safely parked. Look for:
- Fresh soot around engine-side joints, flanges, or welds
- Rust scaling, holes, or split seams
- Missing or damaged hangers
- Pipes touching the frame, body, heat shields, suspension, or other components
- Loose heat shields or brackets
- Impact damage after off-road driving or striking road debris
- New ticking, hissing, rattling, or rumbling sounds
Salt, moisture, mud, and repeated short-trip use can contribute to corrosion. Rinse accumulated salt and mud from the underbody as appropriate for your local conditions and the vehicle-cleaning instructions for your model.
Routine Component Tightening
Inspecting hardware does not mean randomly tightening every exhaust nut or bolt. Exhaust fasteners may be corroded, heat-damaged, single-use, or tightened to a specific torque and sequence.
If a joint needs repair, use the service procedure and specifications for your exact model. Replace damaged studs, distorted nuts, specified single-use hardware, and crushed gaskets as required instead of overtightening them. Excess force can strip threads, snap a fastener, or distort a flange.
Use Quality Replacement Parts
Choose replacement components with the correct dimensions, flange design, sensor ports, heat shielding, emissions application, and engine fitment. Toyota Genuine Parts can provide factory-style fit, while reputable aftermarket components may also work when they correctly match the vehicle and applicable emissions rules.
Use new gaskets and specified locking or replacement hardware when the service procedure calls for them. Reusing a compressed gasket or installing an exhaust section under tension can create another leak.
Note: Check your VIN through Toyota’s official recall lookup. You can also use NHTSA’s recall and safety-issues database for recalls, investigations, complaints, and manufacturer communications. A general Tundra exhaust concern does not automatically mean your individual truck has an open recall.
Cost of Repairing Exhaust Leaks in Toyota Tundras
No single price range accurately covers every Tundra exhaust leak. A small accessible downstream connection can require limited labor, while engine-side work may involve difficult access, broken hardware, corrosion removal, sensors, heat shields, turbo-related components on newer trucks, and several replacement parts.
| Cost Factor | Why It Matters |
|---|---|
| Model year and engine | Exhaust layouts, engine-side architecture, sensors, access, and parts differ between Tundra generations and engines. |
| Leak location | An accessible downstream joint generally requires less disassembly than an engine-side leak. |
| Corrosion | Rusted hardware can add removal time or require replacement pipe sections. |
| Broken fasteners | Extraction or thread repair can add substantial labor. |
| Parts selection | Engine-side components, converters, pipes, gaskets, sensors, shields, and hardware have different costs and compliance requirements. |
| Local labor rate | Dealer and independent-shop rates vary by region. |
Ask for a written estimate that separates diagnosis, labor, parts, taxes, and possible broken-fastener or corrosion work. Confirm whether the repair includes new required gaskets and hardware, a post-repair leak check, code verification, and any required emissions testing.
Frequently Asked Questions
What symptoms can a Toyota Tundra exhaust leak cause?
A Tundra exhaust leak may cause ticking, hissing, louder exhaust, soot near a joint, cabin fumes, fuel-trim changes, or a check-engine light. The symptoms depend on the leak’s location, size, engine, and model year.
Can an exhaust leak cause P0171 or P0174 on a Toyota Tundra?
Yes, an exhaust-system gas leak is one possible trouble area listed in Toyota service information for P0171/P0174 on applicable Tundra engines. Intake leaks, air-metering faults, fuel-pressure problems, sensor or circuit faults, and other causes can set the same codes, so the leak must be confirmed before parts are replaced.
How can you tell an exhaust leak from a lifter or valvetrain tick?
An exhaust tick often sounds sharpest near an engine-side exhaust joint and may leave soot. It may also change as the exhaust heats. Valvetrain noise comes from the cylinder-head or valve-cover area and may remain when warm. Sound alone is not conclusive, so confirm the location and inspect for physical evidence.
Is it okay to drive a Toyota Tundra with an exhaust leak?
Do not continue driving if fumes enter the cabin, the exhaust hangs loose, the truck has severe power loss, or anyone develops possible carbon-monoxide symptoms. Even when those warning signs are absent, arrange prompt inspection because the leak can worsen or affect nearby sensors, wiring, heat-sensitive components, or emissions performance.
Can an exhaust leak turn on the check-engine light?
Yes. A leak in a location that affects oxygen or air-fuel-ratio sensor feedback can contribute to fuel-trim or sensor-related faults. However, the same codes can have intake, wiring, sensor, fuel-delivery, ignition, or mechanical causes, so scan the truck and test the system before replacing parts.
Can you repair a Tundra exhaust leak with tape, epoxy, or sealant?
An exhaust-rated product may temporarily seal a small, suitable downstream pipe leak. Do not use generic epoxy or silicone on an engine-side exhaust component, catalytic-converter joint, badly rusted pipe, or structural crack. Replace or professionally repair the failed component.
Conclusion
A Toyota Tundra exhaust leak can range from a noisy downstream joint to an engine-side leak that affects sensor feedback, emissions, or cabin safety. Treat a cold-start tick as a clue rather than proof, and identify the truck’s generation before applying older V8 manifold advice to a 2022-and-newer twin-turbo V6.
Inspect only when the system is cool, document any OBD-II codes before clearing them, and use a qualified shop when the leak cannot be located safely. Stop driving and arrange prompt service when exhaust fumes enter the cabin or anyone develops possible carbon-monoxide symptoms. Correct diagnosis prevents wasted money on sensors, random fastener tightening, or temporary patches that do not repair the actual failure.
Sources
- Toyota 2003 Tundra Owner’s Manual — first-generation exhaust-system and carbon-monoxide safety guidance
- Toyota 2022 Tundra Owner’s Manual — Exhaust Gas Precautions — modern Tundra exhaust-gas safety guidance
- Toyota Manuals and Warranties — model-specific owner manuals and warranty information
- Toyota 2022 Tundra Engineering Overview — twin-turbo V6 and engine-side exhaust design information
- Toyota 2026 Tundra — current i-FORCE and i-FORCE MAX powertrain information
- Toyota Technical Information System — factory service information and diagnostic resources
- Toyota Recall Lookup — VIN-based Toyota recalls and service campaigns
- CDC Carbon Monoxide Poisoning Basics — carbon-monoxide risks, symptoms, and automotive exhaust guidance
- EPA On-Board Diagnostics FAQ — how OBD systems detect and report emissions-related faults
- NHTSA Recall Lookup — recalls, investigations, complaints, and manufacturer communications
