To reduce propeller shadows in drone footage, first change the relationship between the sun, the propellers, and the camera: yaw the drone, alter the flight path, or tilt the gimbal so direct sunlight no longer passes through the spinning blades before reaching the lens. If bright conditions force an unnecessarily fast video shutter, a compatible ND filter can help you use the shutter speed you want. Inspect the propellers and gimbal if the artifact looks more like vibration than flicker, and use post-production only for mild residual problems.
Last updated: September 21, 2026.
Quick Answer
To reduce propeller shadows in drone footage, change your flight direction or gimbal angle until direct sunlight no longer passes through the propellers into the lens. In bright conditions, use a compatible ND filter when needed to reach your preferred video shutter speed without overexposing. A model-compatible lens hood may help with off-axis stray light, but it is a secondary fix. Mild remaining flicker can sometimes be reduced in editing.
Key Takeaways
- Propeller shadows occur when spinning blades repeatedly interrupt direct light before it reaches the camera.
- Changing flight direction, aircraft yaw, or gimbal angle is usually the first fix to try.
- Low-angle sunlight around sunrise and sunset commonly makes prop-shadow flicker easier to trigger.
- ND filters control incoming light and help you hold a chosen video shutter speed; they do not physically remove the cause of the shadow.
- Diagnose prop shadow separately from visible propellers, vibration or jello, and exposure pumping before changing settings.
At a Glance
| Time Required | 5 to 15 minutes of flight planning and testing, plus editing time if flicker remains |
| Difficulty | Beginner to intermediate |
| Tools Needed | Drone, camera app, optional compatible ND filter, optional model-compatible lens hood, editing software |
| Cost | Free if flight-position changes solve it; optional filters, hoods, or editing tools may add cost |
What Causes Propeller Shadows in Drone Footage?
Propeller shadow is a repeating light-and-dark artifact created when spinning blades pass through direct sunlight before that light reaches the camera. Depending on shutter speed, frame rate, sun angle, and aircraft position, it may appear as horizontal bands, pulsing brightness, or rapid flicker rather than as a recognizable blade-shaped shadow.
The strongest clue is directionality. If the artifact appears while the drone faces or banks into a particular sun angle and disappears after you yaw the aircraft or change the gimbal angle, prop shadow is a likely cause. If the picture instead bends or wobbles continuously, vibration or rolling-shutter “jello” may be responsible.
Use this comparison before troubleshooting:
| What You See | Likely Cause | First Test |
|---|---|---|
| Repeating dark bands or brightness pulses tied to sun direction | Propeller shadow | Yaw the drone or change gimbal angle |
| Blade tips physically visible at the top of the frame | Propellers entering the field of view | Tilt the camera down or reduce aggressive forward pitch |
| Wavy or gelatin-like deformation | Vibration or rolling-shutter jello | Inspect propellers, gimbal, mounts, and vibration sources |
| Whole-frame brightness slowly rises and falls as the scene changes | Auto-exposure pumping | Test manual exposure or exposure lock |
Causes of Prop Shadows
The root cause of propeller shadow is direct light crossing the rotating propeller path before reaching the camera. Several variables determine whether the camera records that interruption as faint flicker or obvious bands.
The most important variables are sun position, aircraft pitch and yaw, camera angle, shutter speed, frame rate, and the lens field of view. Reflective water, snow, glass, pale sand, or other bright areas can make the brightness variation easier to notice even when the sun itself is outside the frame.
Here is the practical breakdown:
| Factor | Description |
|---|---|
| Rotating Blades | Blades repeatedly interrupt direct light before it reaches the camera. |
| Sun and Flight Direction | Certain yaw, pitch, and flight directions place the propellers in the sunlight-to-lens path. |
| Low Sun Angle | Sunrise, sunset, and late-afternoon light can put direct sunlight closer to the camera’s forward path. |
| Shutter Speed and Frame Rate | They affect how sharply or smoothly the repeating interruption is recorded. |
| Camera Angle | Level, upward, or sun-facing views can make the problem easier to trigger on some aircraft. |
Adjusting Shooting Position
Changing your shooting position is usually the best first response because it removes the lighting geometry causing the artifact instead of trying to hide it afterward.
Before the main take, check the sun position and perform a short test while watching the bright parts and upper edge of the frame. You do not need to avoid sunlight entirely. You need to keep direct sunlight from passing through the spinning propeller arc into the camera.
Try these adjustments:
- Yaw the aircraft slightly left or right and check whether the flicker disappears.
- Re-plan the route so the camera is not pointed through the problematic sun angle.
- Use an angled or curved flight path instead of flying straight into low sunlight.
- Tilt the gimbal slightly downward when that still preserves the composition.
- Avoid unnecessary aggressive pitch changes during a critical shot.
- Capture a backup pass from a second angle.
Pro Tip: Record a 10-second test clip before the final pass and review the recorded file, not only the controller preview. Check bright sky, reflections, and the top of the frame for periodic bands or pulsing.
Choosing the Best Time of Day
Sun angle matters more than the clock. Low-angle sunlight around sunrise and sunset is a common trigger because direct light is more likely to approach the camera through the propeller plane. The exact risk still depends on aircraft design, camera direction, gimbal tilt, and flight attitude.
Midday light changes the geometry because the sun is higher, but it does not guarantee that prop shadow will disappear. Midday scenes can also create strong reflections and high contrast.
If you want golden-hour footage, plan several headings for the same shot rather than committing to one straight path. A small yaw or gimbal change may preserve the lighting while moving the propeller shadow out of the camera’s light path.
Note: Water, glass, snow, sand, and other bright reflective surfaces can make periodic brightness changes more visible, so test the actual composition before a long take.
Using ND Filters
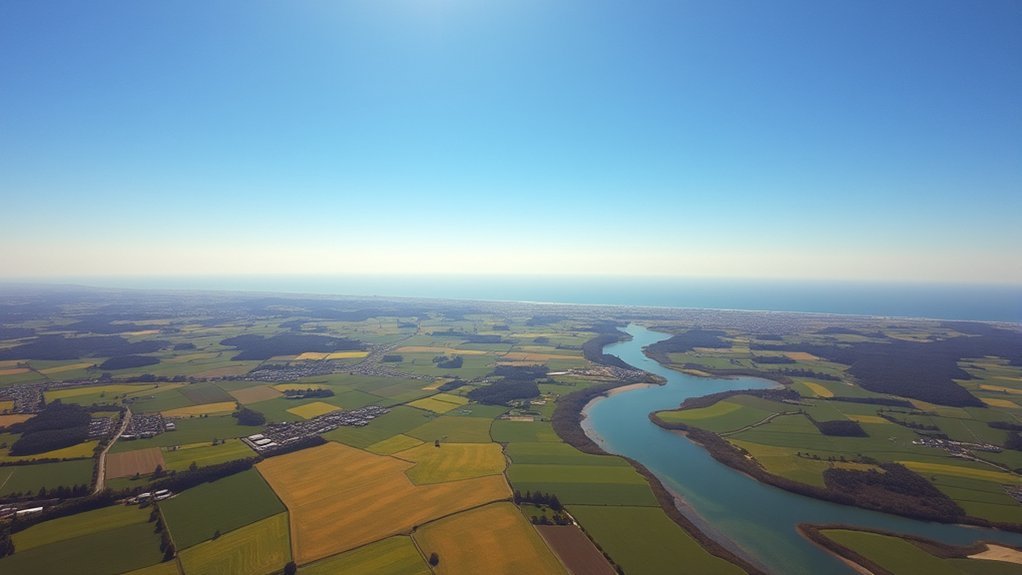
An ND filter reduces the amount of light entering the camera so you can use a chosen shutter speed in bright conditions without overexposing the image. DJI describes ND filters as a way to control shutter speed and maintain lower video shutter speeds in bright environments. For a deeper explanation, see DJI’s ND filter guide.
For natural-looking video motion, many filmmakers use the 180-degree shutter guideline as a starting point. That is roughly 1/48 or 1/50 second at 24 fps, 1/50 at 25 fps, and 1/60 at 30 fps. It is a creative guideline rather than a mandatory anti-flicker setting.
A slower video shutter can make individual prop-shadow pulses less sharply defined, but an ND filter does not remove the physical cause. If rotating the drone or changing the camera angle eliminates the flicker, use that geometric fix first.
Do not choose an ND strength only from a rule such as “ND16 for sunny days.” Set the frame rate, desired shutter speed, ISO, and aperture if adjustable, then choose the filter that produces correct exposure. The dedicated drone ND filter guide covers filter selection in more detail.
Warning: If the filter forces you to raise ISO unnecessarily or leaves important parts of the scene underexposed, it is too strong for the current conditions.
[Amazon Products Picked for You]

【3 Pack Drone Filter Set】 Compatible with DJI Mini 4K, Mini 2 SE, Mini SE, Mini 2, Mavic Mini and Fly More Combos, this circular polarizing neutral density drone filter set elevates your aerial photography and videography to a professional level. Each lens filter quickly snaps onto the camera and locks into place with a hook for secure attachment during flights

This FPV ND UV Filter Set is compatible with O4 Pro Air Unit, ensuring its adaptability and suitable for aerial video shooting.
Setting Camera Exposure
Exposure settings change how propeller-shadow flicker is recorded. A very fast shutter can render each periodic interruption more distinctly, while a slower shutter may blend part of the brightness change into motion blur.
For controlled video shots, manual exposure can prevent the camera from changing brightness while the drone turns through different lighting. Start with your desired frame rate and shutter appearance, keep ISO as low as practical, and use aperture or an ND filter to finish the exposure when your camera supports those controls.
Auto exposure does not create propeller shadow, but automatic brightness changes can add exposure pumping that makes a problem clip look even less stable. If the entire image rises and falls in brightness rather than showing directional bands, test manual exposure before assuming the propellers are responsible.
Locking white balance can also keep color from drifting during a continuous shot. For more detailed setup guidance, see the site’s drone camera settings guide.
Installing a Lens Hood

A model-compatible lens hood can sometimes help when off-axis sunlight is reaching the lens through the propeller area. It should be treated as a secondary option after changing flight direction and gimbal angle.
Do not use a hood that obstructs the camera, interferes with gimbal movement, adds excessive weight, or changes aircraft handling. A poorly fitted accessory can replace one image problem with vibration, gimbal errors, or a visible obstruction.
If you use a hood, choose one intended for the specific camera or drone and test the full gimbal range on the ground before flight.
[Amazon Products Picked for You]
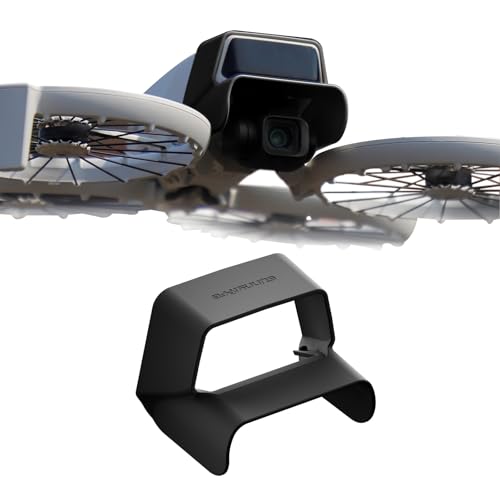
Compatibility: the lens hood is specifically designed for dji flip accessories.

【Lens Compatibility】The tulip lens hood is compatible with Canon RF 75-300mm f/4-5.6, EF 75-300mm f/4-5.6 III, EF 75-300mm f/4-5.6 III USM, EF 75-300mm f/4-5.6 II, EF 75-300mm f/4-5.6 II USM, EF 75-300mm f/4-5.6, EF 75-300mm f/4-5.6 USM, EF 90-300mm f/4.5-5.6, EF 90-300mm f/4.5-5.6 USM, EF-S 55-250mm f/4.5-5.6 IS and EF-S 55-250mm f/4.5-5.6 IS II lens. *Warm Tips: it’s NOT compatible with Canon EF 75-300mm f/4-5.6 IS USM or EF-S 55-250mm f/4-5.6 IS STM lens.

Compatibility: The lens hood shade for Canon EF-M 15-45mm f/3.5-6.3 IS STM lens and Canon RF-S 18-45mm f/4.5-6.3 IS STM Lens on Canon EOS R100, R50, R7, R10, M50, M50 Mark II, M5, M6, M6 Mark II, M200, M100, M10 camera.
Benefits of Lens Hoods
A suitable hood may reduce stray light, glare, or flare when the offending light approaches from outside the intended field of view. In the right geometry, that can also make some propeller-shadow artifacts less visible.
Potential benefits include:
- Blocking some off-axis stray light
- Reducing glare and lens flare in suitable lighting angles
- Helping preserve contrast when strong light is near the frame
- Reducing some prop-shadow situations when the hood blocks the specific offending light path
A hood cannot fix every prop-shadow angle, and it should not be used as a substitute for changing the flight path when a small heading adjustment solves the problem.
Installation Tips and Tricks
Start with compatibility. The hood should fit securely, remain outside the recorded frame, and allow the gimbal to complete its normal movement without resistance.
Before takeoff, power on the aircraft and watch the gimbal complete its startup movement. Slowly test the camera’s useful tilt range and confirm that the accessory does not touch the camera, aircraft body, or gimbal mechanism.
Use the accessory manufacturer’s mounting method rather than improvising an attachment that may loosen in flight.
| Step | Description |
|---|---|
| Compatibility Check | Use a hood designed for the specific drone or camera when available. |
| Frame Check | Confirm no part of the hood appears in the recorded image. |
| Gimbal Clearance | Test normal tilt and startup movement before takeoff. |
| Secure Attachment | Follow the accessory manufacturer’s intended mounting method. |
| Test Clip | Compare a short clip with and without the hood in the problem lighting. |
Weight Considerations and Impact
Any camera accessory adds some combination of weight, frontal area, or load to the gimbal. The effect may be small, but lightweight drones and delicate gimbals have less margin for poorly balanced accessories.
Consider these issues before installation:
- Gimbal Performance: Extra or unbalanced weight may affect smooth movement.
- Flight Time: Additional aircraft weight can increase power demand.
- Clearance: The hood must stay outside the camera’s field of view and gimbal travel.
- Flight Dynamics: Added frontal area can increase drag, especially in wind.
- Actual Benefit: Keep the hood only if a controlled comparison shows that it solves the lighting problem.
For ND filters, prefer filters designed for the exact camera system so their fit and weight do not interfere with normal gimbal operation.
Checking Propellers and Gimbal
Damaged propellers and gimbal problems do not normally create the same light-interruption mechanism as true propeller shadow, but they can create vibration, wobble, or jello that is easy to misdiagnose as a camera problem.
Inspect each propeller for chips, bends, cracks, or other damage and follow the aircraft manufacturer’s replacement guidance. Clean the lens and any installed filter because fingerprints and contamination can also increase glare in strong light.
Confirm that the gimbal moves freely and that filters, hoods, cables, or other accessories are not touching it. If the image bends or ripples regardless of sun direction, investigate vibration before spending time on exposure settings.
[Amazon Products Picked for You]
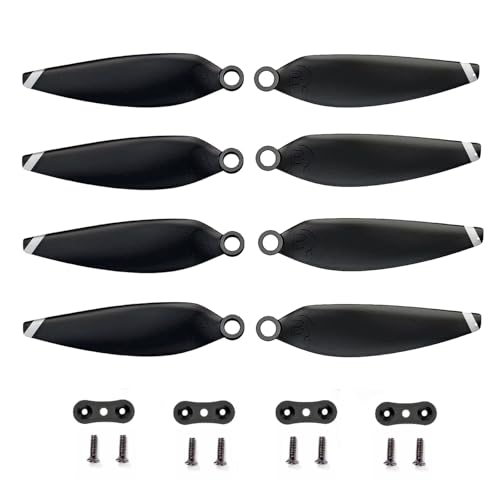
Wide Compatibility: The propeller for HS175D F11MINI F7 MINI Q5 Q7 Q8 M7 WF31 HT50 drone, ensuring excellent flight performance and stability.
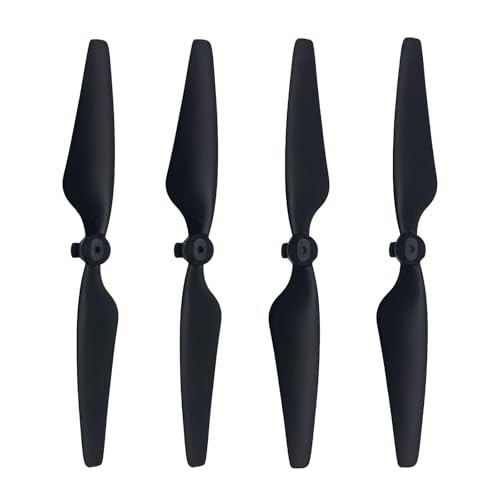
Compatibility: 4pcs propellers for HS600 HS600D V11 V11Pro TF35 PRO drone. It can be used as a spare propeller or as a replacement for an old propeller.

Package include: All 3 sets( black, red, and white ) Propeller for HS720 HS720E; 3SET/12pcs Propeller
Post-Production Techniques
Post-production is most useful when the prop-shadow flicker is mild. Severe full-frame bands are much harder to repair cleanly, so prevention during flight remains the preferred approach.
Use a temporal deflicker tool when available because it evaluates brightness changes across multiple frames. DaVinci Resolve includes a Deflicker tool in its Resolve FX restoration tools, as described by Blackmagic Design.
For localized problems, masks, keyframes, selective exposure changes, or a carefully chosen alternate take may produce a cleaner result than applying a strong global effect.
Advanced Editing Tools
Programs such as Adobe After Effects, Adobe Premiere Pro, Final Cut Pro, and DaVinci Resolve can help with different parts of the repair workflow, but no single generic effect guarantees removal of prop shadow.
Useful approaches include:
- Temporal Deflicker: Targets rapid frame-to-frame brightness changes.
- Masking: Restricts corrections to the affected part of the image.
- Keyframes: Adjust exposure or mask position only while the artifact is visible.
- Alternate Takes: Replace a damaged portion with a cleaner pass when composition permits.
- Color Correction: Reduces the visibility of mild remaining brightness differences after the main repair.
Flicker Removal Plugins
Dedicated deflicker effects and third-party plugins can analyze temporal brightness changes and smooth repeated flicker. They work best when the scene itself is not changing rapidly in the same area as the artifact.
Start with conservative settings and inspect movement, fine textures, trees, water, and other detailed areas at full resolution. Excessive temporal processing can create smearing, ghosting, or softened motion.
Do not assume every effect named “anti-flicker” targets prop-shadow flicker. For example, Adobe documents Premiere Pro’s built-in Anti-flicker Filter primarily for flicker associated with thin lines and sharp edges, so test the result rather than treating it as a dedicated prop-shadow repair.
Color Grading Techniques
Color grading can make mild residual bands less distracting, but it should not be presented as a substitute for true deflickering when brightness changes from frame to frame.
After the temporal problem is reduced, you can:
- Balance overall brightness and contrast.
- Reduce harsh highlights that make residual bands easier to notice.
- Use masks for small localized exposure corrections.
- Match repaired sections to surrounding frames.
- Adjust saturation only when the flicker repair has created a visible color mismatch.
Judge the result during normal playback and frame-by-frame. A correction that looks good on a paused frame may still pulse or smear when the footage moves.
Community Insights and Solutions
Drone-pilot discussions and video tutorials repeatedly point to the same practical sequence: change the aircraft or camera angle first, then adjust shutter control if needed, and use editing only when the artifact remains.
This is useful because it separates the physical cause from the recording appearance. Flight geometry determines whether direct sunlight passes through the propeller path. Shutter speed determines how that repeating interruption is rendered. Editing can only work with the footage already captured.
Community examples are also useful for diagnosis. If other pilots reproduce a similar band only when facing a certain direction, that supports a prop-shadow diagnosis; if the artifact remains regardless of lighting direction, investigate vibration, gimbal behavior, or camera settings instead.
Accessory advice should be treated cautiously because a solution that works on one drone may not fit another aircraft’s camera, gimbal, field of view, or payload limits.
Pre-Flight Checklist for Cleaner Footage
Before recording an important drone shot, run a short check so prop shadow and similar artifacts are caught while you can still change the flight.
- Check the sun position and plan at least two possible flight headings.
- Clean the lens and any installed ND filter.
- Inspect propellers for visible damage.
- Confirm that the gimbal moves freely with no accessory interference.
- Set frame rate, shutter speed, ISO, and ND filter based on the intended exposure and motion look.
- Lock exposure when changing brightness during the shot would be distracting.
- Lock white balance when you need consistent color through the take.
- Record a 10-second test clip and review it for directional bands, pulsing, or vibration.
- Rotate the drone and repeat the test if flicker appears.
- Capture a backup pass from a slightly different heading or gimbal angle.
This separates a lighting-geometry problem from an equipment or camera-setting problem before the main flight is complete.
Frequently Asked Questions
What causes propeller shadows in drone video?
Propeller shadows occur when direct sunlight passes through spinning propellers before reaching the camera. The rotating blades repeatedly interrupt the light, and the camera records those changes as flicker, pulses, or dark bands. Sun angle, aircraft attitude, camera direction, shutter speed, and frame rate all affect how visible the artifact becomes.
Can ND filters completely remove propeller shadows?
No. An ND filter reduces incoming light so you can use a chosen shutter speed in bright conditions. A slower shutter may make individual shadow pulses less sharply defined, but the most reliable fix is to change the drone’s heading, flight path, or camera angle so direct sunlight no longer passes through the propellers into the lens.
What shutter speed helps reduce drone prop flicker?
There is no universal anti-flicker shutter speed. For natural video motion, the 180-degree shutter guideline is a common starting point, such as about 1/50 second at 24 or 25 fps and 1/60 second at 30 fps. Slower exposure can soften the appearance of periodic prop shadow, but changing the sun-to-propeller-to-camera geometry is still the primary fix.
Why are propeller shadows often worse near sunrise or sunset?
Low-angle sunlight is more likely to approach a forward-facing drone camera through the propeller plane. That makes sunrise, sunset, and some late-afternoon headings common situations for prop-shadow flicker. A small change in yaw, gimbal tilt, altitude, or route can often move the direct light out of the problematic path.
Is propeller shadow the same as the drone jello effect?
No. Propeller shadow is a repeating light-interruption artifact that changes with sun direction. Jello is a wavy or gelatin-like distortion commonly associated with vibration and rolling-shutter capture. If rotating away from the problem light removes the bands, prop shadow is more likely; if the image keeps wobbling regardless of sun direction, inspect the propellers, gimbal, mounts, and vibration sources.
Can propeller shadows be removed in post-production?
Mild prop-shadow flicker can sometimes be reduced with temporal deflicker tools, masks, keyframes, or selective exposure correction. Severe bands covering the entire frame are harder to repair without introducing softness, ghosting, or other artifacts, so preventing the shadow during flight usually produces the cleanest result.
Conclusion
The most reliable way to reduce propeller shadows is to remove the lighting geometry that causes them. If flicker appears, yaw the drone, change the route, or alter the gimbal angle and record another short test.
If bright light prevents you from using the shutter speed you want, add a compatible ND filter and set exposure from the actual scene rather than choosing filter strength from a fixed time-of-day rule. If the artifact remains regardless of sun direction, inspect the propellers, gimbal, and accessories for vibration or interference.
Use temporal deflicker and localized editing only for footage that cannot be reshot. Prevention during flight gives you the cleanest image and preserves more detail than aggressive repair later.
