
Greasing a Toyota Tacoma driveshaft is not a one-size-fits-all job. The number of serviceable fittings, their locations, the correct lubricant, and the maintenance interval can change by model year and driveline. Before reaching for a grease gun, check your Tacoma’s maintenance guide and inspect the actual shaft for fittings.
Quick Answer
First confirm your Tacoma has serviceable grease fittings and check its model-year maintenance guide. Clean each fitting, use the exact grease Toyota specifies for that joint, attach the coupler squarely, and pump slowly only until the joint accepts fresh grease or reaches its approved purge point. Stop if pressure rises sharply or a seal swells.
Key Takeaways
- Do not assume every Tacoma has the same number or location of grease fittings.
- Toyota specifies different grease for standard spiders and slide yokes than for a double-cardan joint on applicable models.
- A 5,000-mile interval generally applies only to specified severe-use conditions in the reviewed 2019 and 2023 guides.
- Never release the parking brake, shift to Neutral, or move the truck while someone is underneath it.
- Stop if a boot expands, pressure rises suddenly, a seal distorts, or grease will not flow through a clean fitting.
At a Glance
| Time Required | About 20 to 40 minutes after the truck is safely positioned |
| Difficulty | Moderate; access and joint identification are more important than pumping the grease gun |
| Tools Needed | Grease gun, correct grease, flexible coupler, shop towels, light, gloves, wheel chocks, and rated ramps or jack stands if extra clearance is required |
| Cost | Low if you already own a grease gun; otherwise you will need the gun, coupler, and specified grease |
Confirm Your Tacoma Has Serviceable Driveshaft Zerks

Begin with your model-year maintenance guide, not an assumed fitting count. Toyota’s 2019 Tacoma maintenance guide and 2023 Tacoma maintenance guide both call for propeller-shaft lubrication on applicable 4WD trucks. However, neither guide establishes a universal number of zerks for every cab, wheelbase, shaft, or replacement assembly.
Inspect the complete driveline before loading the grease gun. Look around each universal joint, the slip-yoke area, and any double-cardan joint. A zerk is a small metal nipple with a spring-loaded ball in its tip. A smooth joint or boot without a fitting must not be punctured, drilled, or modified.
The correct fitting count is the number physically installed on your Tacoma’s serviceable shaft, not a number copied from another model year or configuration.
Does My Tacoma Have Zerk Fittings?
Your Tacoma may have serviceable fittings, non-serviceable joints, or a combination of both. The safest approach is to compare the maintenance guide with a physical inspection of the installed driveshaft.
Year and Trim Variations
Driveline service requirements can change by model year. For example, Toyota’s 2020 guide still specifies lubrication of applicable 4WD propeller shafts, so it is inaccurate to assume that all 2020 Tacomas have sealed shafts. Toyota’s 2020 Tacoma maintenance guide also separates the lubricant used on spiders and slide yokes from the lubricant used on a double-cardan joint.
Newer instructions can differ. The 2025 Tacoma maintenance guide lists propeller-shaft bolt torque checks but does not list propeller-shaft lubrication. Do not apply an earlier Tacoma procedure to a newer truck unless its own guide and installed components call for it.
Front vs. Rear Driveshaft
Do not inspect only the front shaft or assume the rear shaft has no fittings. Follow each installed shaft from one end to the other and examine the following areas:
- Universal-joint bearing crosses: The zerk may sit in the center of the cross or at the end of a bearing cap.
- Slip-yoke or slip-joint section: A fitting may lubricate the sliding splines rather than a U-joint.
- Double-cardan joint: This assembly can contain closely spaced joints and may require a different lubricant.
- Replacement shaft: An aftermarket or replacement assembly may not match the original factory layout.
If you cannot identify the joint or determine where expelled grease should appear, have a qualified technician service it.
Inspect for Zerk Fittings
- Park on firm, level ground and let the exhaust and driveline cool.
- Engage the parking brake, place the transmission in Park or in gear, and chock the wheels.
- Use a bright work light to inspect each U-joint, cardan joint, and slip section.
- Wipe dirt from any suspected fitting so you can see the nipple and spring-loaded ball.
- Record the fitting locations before beginning so none are missed or greased twice.
- Compare what you find with the maintenance guide or factory service information for your VIN.
Tools and Grease You’ll Need for the Job
Gather everything before going underneath the truck. You need a working grease gun, the correct lubricant for each joint, a clean coupler, shop towels, gloves, wheel chocks, and adequate lighting. A flexible hose or locking coupler can make recessed fittings easier to reach.
[Amazon Products Picked for You]
Lubricates at temperatures ranging from 0°F to 375°F
HEAVY DUTY RED GREASE: AtomLube Ultra Heavy Duty Red Grease (NLGI #2) is a multi-purpose high-performance lubricant designed for extended chemomechanical durability. This essential chassis bearing grease has outstanding extreme-pressure lubrication and wear protection. Includes a 2-pack of 14 oz. tubes.

Rust and oxidation inhibitors
Grease Gun Selection
A manual pistol-grip or lever-style gun gives you better pressure control than a high-output powered gun. Choose a flexible hose long enough to reach around a crossmember without sharply bending the hose. The coupler should grip the fitting securely but still release without pulling sideways on the zerk.
Before connecting the gun, confirm that grease exits the coupler when you operate the handle. If the gun has been stored empty or recently reloaded, bleed trapped air according to the grease-gun manufacturer’s instructions.
- Use slow, controlled strokes instead of rapid pumping.
- Keep the coupler and cartridge end clean.
- Do not hold the hose where grease under pressure could contact your skin.
- Replace a damaged coupler rather than forcing it onto the fitting.
Recommended Grease Type
Use the lubricant listed for the exact joint and model year. Toyota’s 2019 and 2020 maintenance guides specify lithium-base chassis grease for the propeller-shaft spiders and slide yokes. They specify molybdenum-disulfide lithium-base chassis grease for the double-cardan joint.
Note: Do not choose a cartridge only because it says “NLGI No. 2” or “multipurpose.” NLGI grade describes consistency, not every performance property. Confirm that the product meets the lubricant description required for the specific joint.
Using one grease gun for two products can leave the old lubricant in the hose and coupler. When the joints require different products, use separate labeled guns or have a technician perform the service.
Safely Position the Truck and Access the Driveshaft
Many Tacomas provide enough clearance for inspection without lifting. Use that clearance when possible because every lifting step adds risk. Remove the ignition key or keep the smart key away from the truck so another person cannot start it.
Warning: Never work under a truck supported only by a hydraulic jack. Never release the parking brake, shift to Neutral, rotate a wheel, or move the vehicle while someone is underneath it.
If you need more clearance, use properly rated ramps or jack stands at the lifting and support points specified in the owner’s manual. Chock the wheels that remain on the ground and push the truck lightly from the side before going underneath to confirm that it is stable.
If a fitting faces a crossmember and cannot be reached, crawl out from under the truck. Remove the chocks only when you are ready to reposition the vehicle. Move it a few inches on level ground, reapply the parking brake, return the transmission to Park or gear, replace the chocks, and confirm stability before going underneath again.
- Locate the shaft and trace it from one flange to the other.
- Check for dents, missing balance weights, rust scale, or shiny contact marks.
- Inspect seals and boots before adding grease.
- Do not loosen shaft bolts or remove a crossmember merely to reach a zerk.
Clean Each Zerk Fitting Before Greasing
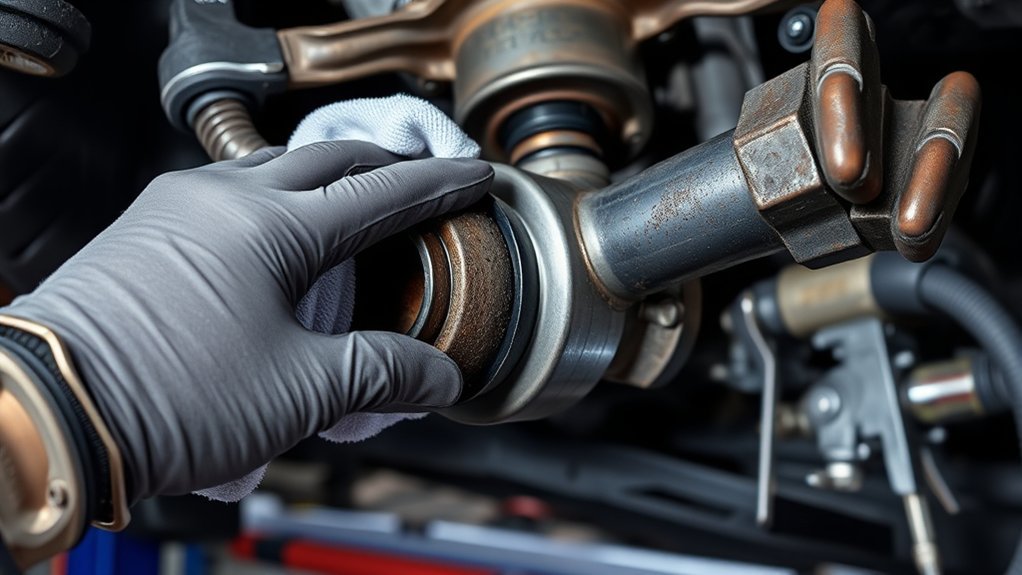
Cleaning is essential because the coupler can push dirt directly through the fitting. Use a clean towel and a nylon brush to expose the complete nipple, including the spring-loaded ball at its tip.
Wipe Away Surface Dirt
- Remove loose mud with a dry brush before wiping the fitting.
- Wrap a clean section of towel around the nipple and wipe from its base toward the tip.
- Use another clean section of towel for the coupler.
- Do not spray grit toward the joint with compressed air.
- Keep the cleaned fitting covered from falling dirt until the coupler is attached.
Cleaning also helps you distinguish a real zerk from a casting feature, plug, or bolt head.
Inspect for Corrosion
Check the fitting for heavy rust, a flattened tip, damaged threads, looseness, or a stuck center ball. Light surface staining may clean away, but deep pitting or a bent nipple can prevent the coupler from sealing.
Do not apply excessive gun pressure to overcome a damaged fitting. A blocked zerk may need replacement, and the replacement must have the correct thread, length, and angle. If removing it could allow dirt into the joint, clean the surrounding area first or have a technician replace it.
Use a Clean Grease Gun
Wipe the grease-gun coupler before every connection. Operate the gun once away from the truck to confirm that clean grease reaches the coupler. Discard any material contaminated with water, dirt, hardened residue, or an unidentified lubricant.
Seat the coupler straight onto the fitting. A tilted connection can leak around the nipple, making it look as though the joint is accepting grease when the lubricant is actually escaping outside.
How to Attach a Grease Gun to Hard-to-Reach Zerks
Guide a flexible hose to the fitting by hand and keep the hose away from sharp heat shields and exhaust edges. Push the coupler straight onto the nipple until it seats. Tug gently on the hose to confirm the coupler is locked before pumping.
Pro Tip: If the coupler will not line up squarely, reposition the truck while no one is underneath it. A right-angle or slim coupler is safer than forcing a standard coupler sideways.
Do not remove crossmembers, loosen driveshaft bolts, or disconnect a joint to create access. Those actions can change shaft alignment and require model-specific torque procedures.
After greasing, relieve pressure on a standard coupler by tilting it only as much as its manufacturer permits, then pull it straight off. If a locking coupler has a release lever, operate the release before pulling. Do not pry against the fitting.
[Amazon Products Picked for You]

Spring-loaded collar for extra-sturdy connection

【Durable & Solid】: This grease connector is made of high quality carbon steel material, which is hard and strong enough. The galvanized surface treatment can prevent corrosion to the greatest extent. Therefore, even if you use it for a long time, it will not be easily broken and worn out, very durable.

Simply use an adaptor for troublesome grease fittings
How Much Grease to Apply and How to Tell When It’s Done
No universal number of grease-gun strokes applies to every Tacoma joint. A small pistol-grip gun and a large lever gun can deliver different amounts with each stroke. The correct stopping point also changes between a purgeable U-joint and a lubricated slip section.
For a Serviceable U-Joint or Spider
- Seat the coupler squarely and support the hose so it cannot pull sideways.
- Pump slowly while watching the seals around all four bearing caps.
- If the joint is designed to purge, a small amount of fresh grease may appear at a seal.
- Stop once fresh lubricant appears or the joint reaches the service procedure’s stated condition.
- Do not continue pumping to force equal amounts from every seal.
If grease exits from only one seal, do not automatically keep pumping. A blocked passage, hardened grease, or internal wear may prevent even distribution. Repeated high pressure can damage the easiest seal without clearing the blocked path.
For a Slip-Yoke or Slip-Joint Fitting
Add grease in small increments. Stop immediately if a rubber boot expands, the shaft begins moving along its slip section, or handle resistance rises sharply. A slip section can trap grease and become hydraulically loaded if it is overfilled.
Final Greasing Check
- The coupler accepted grease without leaking heavily around the fitting.
- No seal is displaced or visibly swollen.
- No boot is stretched or ballooned.
- The fitting remains tight and undamaged.
- Excess grease has been wiped from the joint and nearby surfaces.
Do not mistake a sudden increase in resistance for proof that the joint is full. It can also indicate a blocked fitting or passage. Stop and diagnose the restriction rather than adding more force.
If Your Driveshaft Has Sealed Joints (No Zerks)
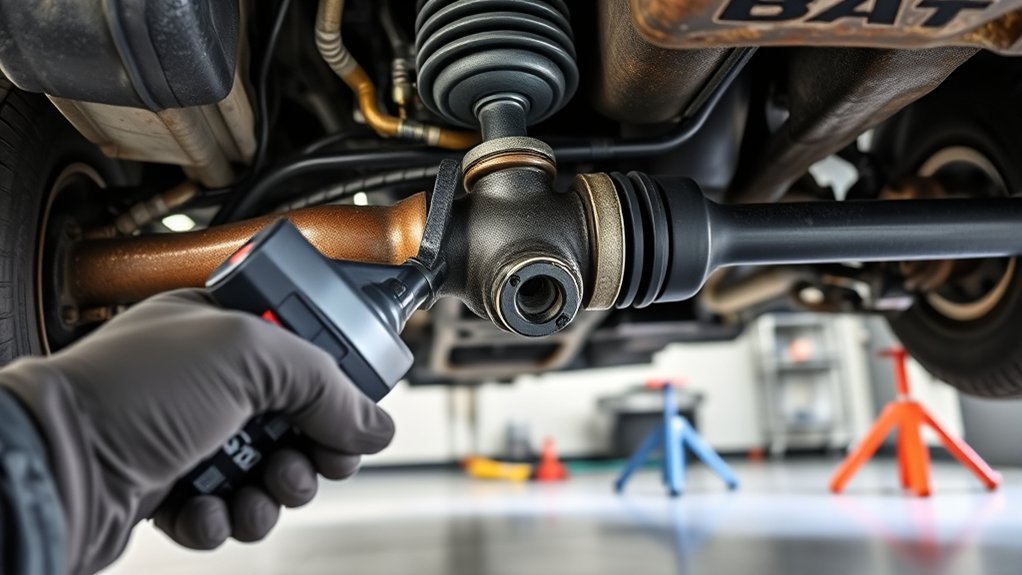
A joint without a factory or approved replacement fitting is non-greasable. Do not drill the bearing cap, pierce a seal, inject grease through a boot, or install a self-tapping zerk. Those modifications can introduce metal chips, damage the seal, weaken the component, and mask internal wear.
Non-greasable does not mean guaranteed to last for the life of the truck. Inspect the joint and shaft at the maintenance intervals listed for your model, after hard off-road use, and whenever symptoms appear.
| Action | What You Are Checking |
|---|---|
| Inspect the shaft | Dents, rust damage, missing balance weights, or contact marks |
| Inspect seals and boots | Cracks, tears, displaced lips, or lubricant leakage |
| Check for play | Movement between the bearing cross and yoke, checked with the vehicle safely secured |
| Listen while driving | Clunks during takeoff, squeaks at low speed, or rhythmic clicking |
| Monitor vibration | Speed-related vibration or shudder under acceleration |
| Replace worn parts | A worn sealed joint must be replaced rather than force-lubricated |
When to Grease: Schedule and Warning Signs
Use the maintenance guide for your exact model year and operating conditions. Do not automatically match driveshaft lubrication to every oil change.
- Normal operation on applicable 2019 and 2023 4WD models: Toyota’s reviewed guides include propeller-shaft lubrication at the 15,000-mile service point and later scheduled intervals.
- Primarily driving on dirt or dusty roads: The reviewed guides add lubrication at 5,000-mile or six-month service points.
- Towing, roof-carrier use, or heavy loading: The reviewed guides also add propeller-shaft lubrication under these special operating conditions.
- Road-salt exposure: The maintenance-guide footnotes include operation on salted roads in the applicable special-condition requirement.
- Off-road use through deep sand, mud, or water: The 2019 and 2023 guides include propeller-shaft lubrication in their off-road daily-maintenance lists.
- 2025 models: The reviewed Toyota guide lists propeller-shaft bolt torque service rather than propeller-shaft lubrication.
Because Toyota’s schedule changes by year, always confirm the guide associated with your VIN. If the shaft has been replaced, also follow the replacement manufacturer’s lubrication instructions.
Warning Signs That Need Inspection
- A clunk when shifting between Drive and Reverse
- A squeak or chirp that changes with road speed
- Vibration during acceleration or at a particular speed
- Visible looseness at a U-joint
- Rust-colored powder around a bearing cap
- A torn boot or displaced seal
- Grease thrown in a circular pattern under the truck
- A dented shaft or missing balance weight
Grease cannot repair worn bearings, a bent shaft, loose flange bolts, or damaged splines. Stop driving and arrange an inspection if vibration is severe, the shaft contacts another component, or a joint has visible play.
Troubleshooting Common Problems While Greasing
[Amazon Products Picked for You]

Package contents: you will receive 2 pieces silver coupler adapters that will satisfy your various needs, effective locking and quick release mechanisms ensure that grease enters the machine without spilling or leaking, safe and convenient to use in your daily life

Size and 1/8 Inch NPT Threads: the size of the grease gun coupler is 2.1 x 0.55 x 0.55 inch and it comes with a 1/8 Inch NPT threads adapter which make it more widely applicable

Effortless Lubrication in Tight Spaces - This compact 90 degree grease gun coupler is expertly engineered to access hard-to-reach Zerk fittings on tractors, mowers, construction equipment, and heavy machinery. It’s the perfect solution for those tight areas where traditional straight grease couplers and grease guns simply can't reach.
The Coupler Will Not Attach
Clean the nipple again and check whether the coupler jaws are stuck, worn, or adjusted too tightly. Confirm that you are looking at a zerk rather than a plug. Use a slim or angled coupler when surrounding metal prevents a straight connection.
Grease Leaks Around the Coupler
The coupler may be tilted, incompletely seated, worn, or incompatible with the fitting. Stop pumping, clean both parts, and reconnect squarely. Do not count grease leaking outside as lubricant delivered into the joint.
The Grease Gun Handle Will Not Move
Stop applying force. Confirm that the gun is loaded, bled, and working by testing it away from the vehicle. If the gun works normally, the fitting or internal passage may be blocked.
The Fitting Accepts No Grease
A stuck center ball may sometimes free after careful cleaning, but do not strike it hard or use excessive hydraulic pressure. A damaged or blocked fitting may need replacement. Persistent blockage can also indicate hardened grease or an internal joint problem that requires professional service.
Grease Appears From Only One Seal
Stop once fresh grease has reached an approved purge point. Do not keep pumping solely to make all four seals purge evenly. Inspect for hardened grease, a blocked passage, or seal damage if distribution appears abnormal.
The Boot or Seal Starts Swelling
Stop immediately and release the grease-gun coupler. Swelling means pressure is building where it should not. Wipe the area and inspect the boot or seal for displacement. Do not continue until the correct service procedure is confirmed.
The Coupler Is Stuck on the Zerk
Use the coupler’s release lever or pressure-relief feature. With a standard coupler, follow its manufacturer’s removal method and keep the pull aligned with the fitting. Do not twist hard enough to loosen or break the zerk.
Noise or Vibration Remains After Greasing
Greasing will not correct a worn U-joint, loose flange, damaged center support, bent shaft, or driveline-angle problem. Have the driveline inspected if symptoms remain or become worse.
Related Guides
Frequently Asked Questions
How often should I grease the driveshaft of my Tacoma?
Follow the maintenance guide for your model year. In the reviewed 2019 and 2023 guides, applicable 4WD propeller-shaft lubrication appears at normal 15,000-mile service points and at 5,000-mile or six-month points for specified severe-use conditions. Newer guides may use different requirements.
How do you grease a third-generation Tacoma driveshaft?
Confirm the service requirement for the exact model year, inspect all installed shafts for fittings, clean each fitting, and use the joint-specific grease. Attach the coupler squarely and pump slowly. Stop at the approved purge point or when pressure rises, then wipe away excess and inspect the seals.
How do you grease Tacoma U-joints?
Clean the zerk and coupler, connect the gun straight to the fitting, and pump slowly with the lubricant Toyota specifies. On a purgeable joint, stop after fresh grease reaches an approved seal outlet. Do not force every seal to purge or continue after pressure rises sharply.
What is the most common problem with the Toyota Tacoma?
No single problem applies to every Tacoma generation, climate, and configuration. Review the maintenance and service information for your model year, inspect the truck’s actual condition, and check the VIN through the NHTSA recall search for unresolved safety recalls.
Conclusion
Greasing Tacoma driveshaft zerks starts with confirming that the installed shaft is serviceable. Check the model-year guide, identify every fitting, and match the lubricant to the joint. Clean the fitting and coupler, connect them squarely, and pump slowly without relying on a fixed stroke count.
Stop if pressure rises sharply, a boot expands, a seal moves, or grease will not flow. Never reposition the shaft while someone is underneath the truck, and never rely on a jack alone. Have a qualified technician inspect blocked fittings, worn joints, loose components, persistent clunks, or driveline vibration.
Sources
- Toyota 2019 Tacoma Warranty & Maintenance Guide — lubrication schedule, severe-use conditions, lubricant types, and qualified-technician guidance
- Toyota 2020 Tacoma Warranty & Maintenance Guide — confirms applicable 4WD propeller-shaft lubrication and joint-specific grease
- Toyota 2023 Tacoma Warranty & Maintenance Guide — normal, severe-use, and off-road lubrication schedules
- Toyota 2025 Tacoma Warranty & Maintenance Guide — newer maintenance chart listing propeller-shaft bolt torque service
- NHTSA Recall Lookup — VIN-based unresolved safety-recall information
