
Replacing the front brake pads and rotors on a 2016–2023 Toyota Tacoma is manageable for an experienced DIYer, but it is a safety-critical job. You must support the truck correctly, keep the hydraulic line closed, retract the caliper pistons evenly, and verify a firm pedal before driving. This procedure does not apply to the redesigned 2024-and-newer Tacoma.
Last updated: September 19, 2026
Quick Answer
On a 2016–2023 Toyota Tacoma, support the truck on jack stands, remove the front fixed caliper without opening the hydraulic line, clean the hub, retract all pistons evenly, and install matched pads and rotors. Torque the caliper mounting bolts to 123 N·m (91 ft-lb) and wheel nuts to 113 N·m (83 ft-lb), then pump and test the pedal.
Key Takeaways
- This guide covers the original front fixed-caliper brake assembly on 2016–2023 Tacoma models.
- Remove only the 12 mm hose or tube support-bracket bolt. Do not disconnect the hydraulic hose fitting.
- Never support the truck with a floor jack alone, and never create airborne brake dust with compressed air or dry brushing.
- Compress the caliper pistons slowly and evenly while watching the brake-fluid reservoir for overflow.
- Follow the pad or rotor manufacturer’s bedding instructions and do not drive with a soft pedal, leak, severe pull, or abnormal heat.
At a Glance
| Time Required | About 1.5–3 hours for both front wheels, plus extra time for seized hardware or inspection |
| Difficulty | Intermediate and safety-critical |
| Tools Needed | Floor jack, jack stands, wheel chocks, 21 mm, 17 mm and 12 mm sockets, breaker bar, torque wrench, pad-pin punch, piston spreader, pliers, bungee cord, brake cleaner and PPE |
| Cost | Parts cost varies by VIN, rotor type, pad compound and whether new pins, springs, bolts or calipers are required |
Warning: Brake work directly affects vehicle control. Stop if you find a fluid leak, damaged hose, torn piston boot, seized piston, stripped mounting thread or a pedal that will not become firm. Have the truck inspected by a qualified technician before driving.
Tools, Parts, and Safety Checks for a Tacoma Front Brake Job
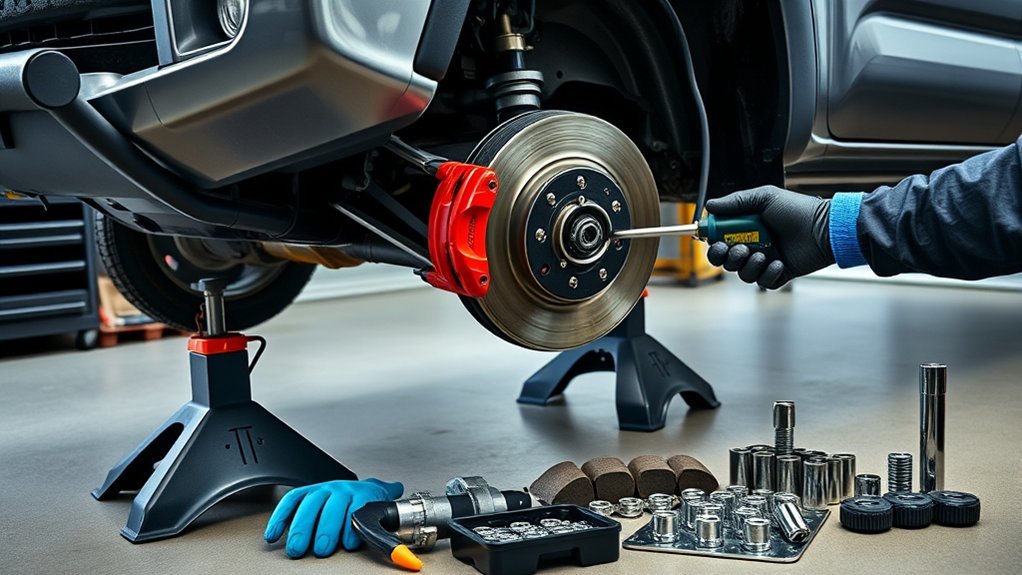
This procedure is written for the original front fixed-caliper setup used on 2016–2023 Tacoma models. Toyota lists a 113 N·m (83 ft-lb) wheel-nut specification in the 2023 Tacoma Owner’s Manual.
The redesigned 2024 Tacoma uses a different platform, brake arrangement and wheel-torque specifications. The 2024 Tacoma Owner’s Manual lists 131 N·m (97 ft-lb) for aluminum wheels and 209 N·m (154 ft-lb) for steel wheels, so do not apply this guide to a 2024-or-newer truck.
Parts to Confirm Before You Lift the Truck
- Front brake pads matched to the truck’s model year, drivetrain and original caliper
- Two matching front rotors
- Pad-retaining pins and anti-rattle springs if the existing hardware is corroded, bent or included in the kit
- Dedicated high-temperature brake lubricant approved by the pad manufacturer
- Replacement caliper mounting bolts if Toyota service information or the brake kit requires them
- Brake cleaner suitable for the rotor and caliper materials
Confirm fitment by VIN or a reliable parts catalog. Compare the new rotor diameter, thickness, offset, center bore and bolt pattern with the removed rotor before assembly.
Tools and Protective Equipment
- Floor jack and jack stands rated for the vehicle
- Wheel chocks
- 21 mm socket for the wheel nuts
- 17 mm socket and breaker bar for the caliper mounting bolts
- 12 mm socket for the brake-hose or tube support bracket
- Torque wrench capable of accurately reaching at least 91 ft-lb
- Pin punch, small hammer and pliers for the pad-retaining hardware
- Disc-brake piston spreader or suitable compression tool
- Bungee cord or caliper hook
- Drain pan or absorbent pads to protect the work surface
- Nitrile gloves and safety glasses
Note: The 123 N·m (91 ft-lb) caliper mounting-bolt value and 29 N·m (21 ft-lb) brake-tube support-bracket value apply to the original 2016–2023 front fixed-caliper setup described here. Toyota repair information for the truck’s VIN remains the controlling source, especially if the knuckle, caliper, wheels or brake system have been modified.
Jack Points and Vehicle Support
- Park on level, solid pavement and shift into Park or first gear.
- Apply the parking brake and chock the rear wheels on both sides.
- Loosen each front wheel nut about one-quarter turn before lifting the truck.
- Lift the front using the approved point shown in the Tacoma owner or repair manual.
- Place jack stands at the specified front support locations and lower the truck onto them.
- Push the body gently from the side to confirm that the truck is stable before removing a wheel.
- Leave the floor jack positioned as a secondary precaution without allowing it to carry the vehicle’s full weight.
Never place any part of your body beneath a vehicle supported only by a hydraulic jack.
Control Brake Dust Before Cleaning
Do not begin by blowing or dry-brushing the brake assembly. The EPA’s brake and clutch repair guidance advises home mechanics not to use compressed air, dry rags or brushes to clean dusty brake parts.
Use a low-dust wet-cleaning method or a brake-service vacuum with suitable HEPA filtration. Apply brake cleaner carefully according to its label, allow dust to become wet, and collect residue with disposable towels. Do not spray dust across the work area.
Quick Step Summary: Tacoma Front Pads and Rotors
- Verify the truck is a 2016–2023 Tacoma with the original front fixed caliper.
- Confirm the pads, rotors and hardware match the truck.
- Chock the rear wheels, loosen the front wheel nuts and support the truck on stands.
- Remove one front wheel and inspect the hose, caliper, rotor and fluid level.
- Remove the anti-rattle spring and pad-retaining pins.
- Retract the pistons slowly and remove the old pads.
- Remove the 12 mm hose-support bolt without opening the hydraulic connection.
- Remove the two caliper-to-knuckle bolts and hang the caliper securely.
- Remove the old rotor and clean the hub using a low-dust method.
- Install the new rotor, pads, pins and spring.
- Torque the caliper mounting bolts and wheel nuts correctly.
- Pump the pedal, check the fluid and leaks, then perform a controlled road test and the product-specific bed-in procedure.
Prep and Safety
Work on one side at a time so the opposite brake can serve as an orientation reference. Do not press the brake pedal while the caliper is removed or while the pads are out.
Open the hood and inspect the brake-fluid reservoir before retracting the pistons. If the level is already at or above the maximum mark, remove only enough fluid with a clean fluid extractor to prevent overflow. Do not reuse removed fluid.
Check the replacement instructions before opening any lubricant or cleaner. Some rotors have a protective coating that should remain, while uncoated rotors may need their friction surfaces cleaned before installation.
Removal and Cleaning
Remove the wheel and inspect the brake hose for cracks, swelling, wetness or abrasion. Check the caliper for fluid around the piston boots and bleeder screws. Do not continue if you find active leakage.
Wet visible dust with an approved cleaning method. Remove the pad-retaining spring, then drive or pull the retaining pins out carefully. Note the direction of the spring, pins, pads, shims and wear indicators before removing them.
Use the old pads and a piston spreader to retract the pistons slowly and evenly. Alternate pressure across the caliper so one piston does not move outward while another moves inward. Watch the fluid reservoir throughout this step.
Reassembly and Testing
Before installing the new parts, compare them with the removed components. Confirm that the rotor sits fully against the hub and that every pad moves into position without force.
Start every mounting bolt by hand. Torque the caliper before installing the wheel. After the wheel is installed, start the wheel nuts by hand, snug them in a crisscross sequence, lower the truck and finish with a calibrated torque wrench.
With the engine off, pump the brake pedal until it becomes firm. Then start the engine and confirm that the pedal remains controlled as power assist becomes available. Check the reservoir and inspect both sides for leaks before moving the truck.
Remove the Caliper and Rotor: Stuck Pins and Bolts
- Photograph or note the original pad, spring and pin orientation.
- Remove the anti-rattle spring while controlling it so it does not spring away.
- Use the correct-size punch to drive the pad-retaining pins out without mushrooming their ends.
- Retract the pistons gradually and remove the old pads and shims.
- Remove the 12 mm bolt securing the brake-hose or tube support bracket to the knuckle.
- Do not loosen the banjo bolt, flare fitting, bleeder screw or any other hydraulic connection.
- Remove the two 17 mm caliper-to-knuckle mounting bolts.
- Lift the caliper away and suspend it from the frame with a caliper hook or bungee cord.
- Keep the hose in its natural position without twisting, pulling or sharply bending it.
- Remove the rotor from the hub.
If a retaining pin is corroded in place, wet-clean the area first. Apply a small amount of penetrant only to the pin joint and keep it away from the rotor, pads and piston boots. Replace heavily corroded, bent or damaged pins instead of forcing them back into service.
If the rotor is seized to the hub, use its threaded extraction holes with correctly sized bolts if equipped. Tighten the bolts evenly in small increments. Otherwise, tap the rotor hat between the wheel studs with a dead-blow or small hammer. Do not strike the studs, friction surface or caliper.
Pro Tip: Leave one front brake assembled until you finish installing the hardware on the first side. You can use it as a reference if the spring, shims or wear indicator orientation becomes unclear.
Clean the Hub and Prepare the Rotor Mounting Surface

The rotor must sit flat against the hub. Rust scale or trapped debris can create lateral runout, vibration and uneven pad contact.
- Use a low-dust cleaning method to remove loose brake residue before disturbing corrosion.
- Clean the flat hub face carefully without removing unnecessary metal.
- Clean around the raised center pilot and wheel studs.
- Wipe the area with brake cleaner and a lint-free towel.
- Inspect the hub face for severe scaling, damage or raised burrs.
- Confirm that every wheel stud and thread is undamaged.
Keep the flat rotor-to-hub mounting face clean and dry. Do not coat that surface with grease or a thick layer of anti-seize.
Where corrosion is a recurring problem, you may apply a nearly transparent trace of high-temperature anti-seize to the raised center pilot only. Keep it away from the flat hub face, wheel studs, lug-nut seats, rotor friction surfaces and brake pads.
Follow the new rotor’s instructions. Clean shipping oil from an uncoated rotor with approved brake cleaner. Do not strip a factory-applied friction-surface coating unless the rotor manufacturer tells you to remove it.
Install the New Rotor and Prepare the Caliper
- Place the new rotor on the clean hub.
- Thread one wheel nut on backward by hand to hold the rotor against the hub. Do not torque it.
- Confirm that the rotor sits flat without visible rocking or trapped debris.
- Inspect every piston dust boot for tears, heat damage or fluid.
- Inspect the caliper body, bleeder screws and hose connection for leakage.
- Clean the exposed piston and boot area gently without scratching the piston or tearing a boot.
- Use an old pad and piston spreader to retract all pistons evenly.
A piston that will not retract smoothly may be corroded or seized. Do not use extreme force. A damaged or sticking caliper can produce uneven braking, rapid pad wear and overheating and should be repaired or replaced before the truck is driven.
Position the caliper over the rotor without twisting the brake hose. Start both caliper mounting bolts by hand, then tighten them evenly.
For the original 2016–2023 front fixed-caliper assembly covered by this guide, torque the caliper-to-knuckle mounting bolts to 123 N·m (91 ft-lb). Consult the official Toyota Technical Information System when the truck has modified brakes, aftermarket calipers, replacement knuckles or uncertain hardware.
Install the New Pads, Retaining Pins and Spring
Do not assume that every pad kit places its wear indicator on the same side. Compare the old pads with the new set and follow directional arrows, labels or instructions supplied with the replacement pads.
- Install any required shims exactly as shown by the pad manufacturer.
- Apply only a very thin film of dedicated brake lubricant to approved metal-to-metal contact points.
- Do not place lubricant on the pad friction material, rotor, piston boots, retaining-pin friction area or wheel hardware.
- Slide the inboard and outboard pads into their correct positions with the friction material facing the rotor.
- Align the retaining-pin holes.
- Insert the cleaned or new retaining pins in the same direction as the original hardware.
- Position the anti-rattle spring correctly beneath or around the pins as designed.
- Seat the pins fully and confirm that the spring is securely retained.
- Reinstall the 12 mm brake-hose support-bracket bolt without twisting the hose, then torque the bracket bolt to 29 N·m (21 ft-lb).
The pads should sit squarely and the retaining hardware should be fully engaged. Do not grind or force a pad into place. If the pad does not fit, stop and verify the part number, shims and piston position.
Note: Dedicated brake lubricant and anti-seize are not interchangeable. Use brake lubricant only where the pad or caliper manufacturer permits it, and never allow any lubricant to reach a friction surface.
Inspect the Old Pads and Diagnose Uneven Wear
The removed pads can reveal problems that should be corrected before the new parts are installed.
- One pad much thinner than the other: Check for a sticking piston, pad binding or damaged hardware.
- One end of a pad thinner than the other: Check pad fit, caliper alignment and rotor condition.
- Cracked or crumbling friction material: Check for overheating, contamination or a dragging caliper.
- Greasy or wet pad: Find and repair the fluid, grease or oil source before installing new pads.
- Blue or heavily heat-spotted rotor: Check for a seized piston, restricted hose or repeated overheating.
- Deep scoring or a rotor below its marked minimum thickness: Replace the rotor rather than reusing it.
Both front sides should receive matching pad and rotor service. Replacing friction parts on only one side can create unequal braking characteristics.
Do You Need New Rotors Every Time You Replace Tacoma Brake Pads?
No. New pads do not automatically require new rotors, but the rotors must be measured and inspected before reuse. Brembo advises replacement when a rotor is at or below the manufacturer’s minimum thickness, has deep scoring or radial cracks, shows dark or blue heat spots, or has deformation that affects the braking surface.
Measure rotor thickness with a micrometer at several points around the disc, staying away from the outer wear lip, and compare the lowest reading with the exact Toyota service limit or the minimum-thickness marking on the rotor. If the rotor is below the limit, cracked, badly heat-damaged or cannot meet runout and surface requirements, replace it. If you are unsure whether a rotor is serviceable, have it measured by a qualified brake shop before installing new pads.
Reinstall the Wheel and Complete the Torque Sequence
- Remove the temporary wheel nut holding the rotor.
- Clean the wheel-to-rotor contact face if necessary.
- Install the wheel and start every wheel nut by hand.
- Snug the nuts in a crisscross pattern without using the impact tool for final torque.
- Lower the truck until the tire contacts the ground and cannot rotate.
- Torque the wheel nuts in a crisscross pattern to 113 N·m (83 ft-lb).
- Lower the truck fully and remove the jack and stands.
Wheel studs and lug-nut seats should remain clean and dry unless the wheel manufacturer specifically provides a different instruction. Lubricating the threads changes the clamping force produced at a given torque setting.
Brake Pedal, Fluid and Leak Checks
- Do not move the truck immediately after lowering it.
- With the engine off, press the brake pedal slowly several times.
- Continue until the pedal becomes firm and its travel stabilizes.
- Check the brake-fluid reservoir and adjust only with the fluid specified for the truck.
- Inspect both front calipers, hose fittings and bleeder screws for moisture or leakage.
- Start the engine and confirm that the pedal drops slightly as power assist becomes active but does not sink toward the floor.
- Hold steady pedal pressure for about 20 seconds and confirm that the pedal does not continue sinking.
Bleeding is not normally required when no hydraulic connection was opened. Bleed and diagnose the system if the hose or bleeder was opened, fluid was lost, or the pedal remains soft after the pistons have seated.
For related procedures, see how to bleed Tacoma brakes and how to check Toyota Tacoma brake fluid safely.
Warning: Do not drive if the pedal remains soft, drops toward the floor, becomes firm only after repeated pumping, or if any brake fluid appears around the caliper or hose.
Final Checks, Bed-In and Road Test

Torque and Hardware Checklist
- Caliper-to-knuckle bolts torqued to 123 N·m (91 ft-lb) for the scoped 2016–2023 original front setup
- Brake-hose support bracket installed and torqued to 29 N·m (21 ft-lb)
- Hydraulic hose untwisted and clear of the tire and suspension
- Pad-retaining pins fully seated
- Anti-rattle springs correctly engaged
- Wheel nuts hand-started and torqued to 113 N·m (83 ft-lb) in a crisscross pattern
- Brake-fluid level within the marked range
- Pedal firm with no visible leaks
- Tools, wheel chocks and loose hardware removed from the work area
Bed-In and Road Test
The installed pad and rotor manufacturer’s instructions take priority because bedding procedures differ by friction compound and rotor coating.
For ordinary replacement pads without a special procedure, begin with a low-speed test in a traffic-free area. Apply the brakes gently several times and confirm that the truck stops straight without scraping, severe vibration or an abnormal pedal.
Brembo’s general bedding guidance recommends brief, gradual braking and monitoring for noise or vibration during an approximately 300 km bedding period. Avoid unnecessary hard or prolonged stops while the pad and rotor surfaces establish even contact.
Some performance or coated brake kits require a different series of controlled decelerations. Follow the instructions supplied with those parts instead of mixing procedures from another brand.
During the first road test, stop and inspect the truck if you notice:
- A pedal that feels soft or changes height
- Fluid leakage
- Strong pulling to one side
- Grinding or continuous scraping
- Heavy smoke or a burning smell that does not quickly diminish
- Severe steering-wheel vibration
- One front wheel becoming much hotter than the other
Troubleshooting After Tacoma Brake Replacement
Pedal Is Soft or Spongy
Do not continue the road test. Confirm that the pistons were seated by pumping the pedal and inspect for leaks. If the hydraulic circuit was opened, bleed it using the correct Toyota procedure. A soft pedal that remains after bleeding requires diagnosis before driving.
Pedal Is Firm but the Truck Pulls
Check for a seized piston, contaminated pad, restricted hose, incorrect pad installation or unequal rotor and pad condition between the two sides. Also confirm tire pressure before assuming the pull comes from the brakes.
Continuous Scraping or Grinding
Stop and inspect the dust shield, retaining pins, spring and pad orientation. A light intermittent contact noise may come from a bent shield, but grinding can indicate incorrect assembly or metal-to-metal contact.
Vibration During Braking
Check that the rotor and wheel mounting faces are clean, the rotor sits flush and the wheel nuts were torqued evenly. Persistent vibration may require rotor-runout and hub inspection.
One Wheel Becomes Very Hot
A hot wheel can indicate a piston that is not releasing, a restricted hose, a pad binding in the caliper or incorrect hardware installation. Do not continue driving until the cause is corrected.
Related Guides
Frequently Asked Questions
How do you replace front brake pads on a 2016–2023 Toyota Tacoma?
Support the truck on stands, remove the wheel, anti-rattle spring and retaining pins, retract all caliper pistons evenly, and remove the old pads. Install matched pads in the correct orientation, reinstall the pins and spring, pump the pedal until firm, check for leaks and complete the required bed-in procedure.
Can I replace Toyota Tacoma brake pads and rotors myself?
You can complete the job if you can support the vehicle safely, identify the correct parts, retract and inspect the pistons, use a torque wrench and diagnose an abnormal pedal. A technician should handle the work if you find leakage, seized pistons, damaged threads or uncertain hardware.
Do I need to replace Tacoma rotors every time I replace the brake pads?
No. Measure and inspect the rotors before reuse. Replace a rotor if it is at or below the manufacturer’s minimum thickness, deeply scored or cracked, severely heat-spotted, or deformed beyond service limits. Use the exact Toyota specification or the rotor’s marked minimum thickness for the truck and installed part.
Do Tacoma brakes need to be bled after replacing pads and rotors?
Not normally. The brake hose and bleeder remain closed during a routine pad and rotor replacement. Bleeding is required if the hydraulic circuit was opened, fluid escaped, air entered the system or the pedal remains spongy.
What are the front brake torque specifications for a 2016–2023 Tacoma?
For the original fixed front caliper covered here, the caliper-to-knuckle mounting bolts are tightened to 123 N·m (91 ft-lb). Toyota lists 113 N·m (83 ft-lb) for the wheel nuts. Modified brakes, aftermarket wheels and other model years may require different specifications.
Does this procedure apply to a 2024 or newer Toyota Tacoma?
No. Toyota redesigned the Tacoma for 2024, and the newer truck uses different components and wheel-torque specifications. Use the owner and repair information written for the exact 2024-or-newer model.
How much does Tacoma front brake replacement cost?
The total depends on the model year, pad compound, rotor type, labor rate and whether the truck also needs hardware, hoses or calipers. For context, RepairPal’s September 2026 estimate places Tacoma brake-pad replacement at about $274–$341 before taxes, fees and related repairs; adding two rotors raises the total. Compare written estimates that separate pads, rotors, hardware, labor and any additional repairs.
Conclusion
A safe Tacoma front brake replacement depends on correct fitment, stable vehicle support, clean mounting surfaces, evenly retracted pistons and accurate torque. Keep the hydraulic line closed, use low-dust cleaning practices and install the retaining hardware exactly as designed.
Before driving, confirm a firm pedal, correct fluid level and dry connections. Begin with a low-speed brake check and follow the installed pad or rotor manufacturer’s bedding instructions. Stop immediately if the truck develops a soft pedal, leak, strong pull, grinding, severe vibration or abnormal heat.
Sources
- Toyota 2023 Tacoma Owner’s Manual — wheel-nut torque and vehicle-specific operating guidance
- Toyota 2024 Tacoma Owner’s Manual — redesigned-model wheel specifications and model-year distinction
- Toyota Technical Information System — model-specific repair procedures and service specifications
- U.S. Environmental Protection Agency Brake and Clutch Repair Guidance — brake-dust cleaning precautions
- Brembo Brake Rotor Replacement Instructions — hose handling, caliper support and contamination prevention
- Brembo Bedding-In Guidance — initial road testing and gradual bedding recommendations
- RepairPal Toyota Tacoma Brake Pad Replacement Cost Estimate — September 2026 pad-service cost context
