A Toyota Tundra brake inspection should combine what you feel and hear while driving with a close look at the pads, rotors, calipers, hoses, lines, and brake fluid. A basic inspection can reveal uneven wear, overheating, or leaks, but it cannot certify that the entire braking system is safe. Any loss of braking effectiveness requires professional diagnosis before the truck is driven again.
Quick Answer
Inspect your Toyota Tundra’s brakes by checking warning lights, pedal feel, fluid level, pad wear, rotor condition, calipers, hoses, and visible leaks. Compare all measurements with the specifications for your exact model year. Do not drive if the pedal sinks, fluid is leaking, braking is reduced, or a red brake warning remains on.
Key Takeaways
- Grinding, a sinking pedal, fluid leakage, smoke, or reduced stopping ability requires immediate attention.
- Inspect both the inner and outer pads because one can wear much faster than the other.
- Rotor, pad, wheel-lug, and fluid specifications differ by Tundra model year and axle.
- Brake-fluid color alone cannot determine moisture content or remaining boiling-point performance.
- Never work beneath a Tundra supported only by a hydraulic or emergency jack.
At a Glance
| Time Required | 15–30 minutes for a basic check; approximately 45–90 minutes for a careful wheel-off inspection |
| Difficulty | Beginner for an external check; intermediate for lifting the truck and removing wheels |
| Tools Needed | Flashlight, gloves, wheel chocks, brake-lining gauge or ruler, floor jack, rated jack stands, lug socket, and torque wrench |
| Cost | No additional cost if you already own the tools; professional inspection charges vary by shop and location |
Warning: Brakes and vehicle lifting are safety-critical. Park on solid, level ground, chock the wheels, use the lifting points specified for your model year, and support the truck with properly rated jack stands. Never place any part of your body beneath a Tundra held only by a jack. If you are not confident about lifting, wheel installation, hydraulic components, or torque procedures, have the inspection completed professionally.
Symptoms Indicating Brake Issues on Your Toyota Tundra

Changes in braking behavior can appear before serious damage is visible. Pay attention to when the symptom occurs, whether it affects the front or rear of the truck, and whether it changes with speed, temperature, towing, or repeated braking.
- Squealing: May come from a wear indicator, glazed friction material, debris, corrosion, hardware movement, or normal characteristics of a particular pad compound. Persistent squealing deserves inspection even when the truck still stops normally.
- Grinding or scraping: Can indicate severely worn friction material or metal-to-metal contact. Stop driving if the noise is accompanied by poor braking, pulling, or a rough pedal.
- Pedal pulsation or steering-wheel vibration: May result from rotor thickness variation, runout, uneven friction deposits, heat damage, hub-mounting problems, or faults outside the brake system.
- Pulling while braking: Can be caused by unequal pad friction, a sticking caliper, contaminated friction material, a hydraulic problem, tire differences, or a suspension issue.
- Soft or sinking pedal: May point to air, a fluid leak, hose expansion, master-cylinder trouble, or another hydraulic fault. A pedal that travels unusually close to the floor is a stop-driving condition.
- Hard pedal with weak braking: May indicate a brake-assist problem or another system fault that requires diagnosis.
- Burning odor, smoke, or one unusually hot wheel: Can indicate a dragging brake, seized component, or severe overheating. Park safely and allow the brakes to cool without touching the wheel or brake hardware.
- Visible fluid beneath the truck or inside a wheel: Treat any suspected brake-fluid leak as urgent.
Toyota uses different brake, ABS, parking-brake, and electronic-system indicators across Tundra generations. Identify the exact symbol in the Toyota warning-light resource and your model-year owner’s manual. A red brake-system warning that remains illuminated while driving requires immediate attention.
[Amazon Products Picked for You]

PLEASE CONFIRM YOUR FITMENT: Using the Amazon Confirmed Fit bar at the top of the page or check the Product Description to confirm your vehicle fitment. This may be delivered in multiple boxes

[THE BOSCH ADVANTAGE] - The Bosch QuietCast line draws on over 77 years of OE braking excellence; promising the highest quality performance, industry-leading strength and durability, and exclusive innovations including Molded Shim Technology (MST)

OE REPLACEMENT: Designed and engineered to OE specifications for fit, form, and function
How Often Should Toyota Tundra Brakes Be Inspected?
There is no single inspection or replacement interval that applies to every Tundra. Brake life changes with model year, truck weight, pad material, traffic, terrain, towing, payload, corrosion, wheel and tire setup, and driving style. Follow the maintenance schedule in the Toyota Warranty and Maintenance Guide for your exact year.
A practical time to examine the brakes is whenever the wheels are removed for tire rotation or seasonal tire service. Inspect them sooner when you notice a warning symptom or after:
- Heavy towing or hauling
- Repeated downhill or mountain braking
- Driving through deep water, heavy mud, sand, or road salt
- A wheel impact or suspension repair
- An extended period of storage
- Installing different wheels, tires, brake pads, or rotors
Note: Inspection intervals are not replacement intervals. Pads and rotors should be replaced according to condition and the service limits for the exact axle and model year—not because the truck reached an arbitrary mileage.
Essential Brake Components You Need to Inspect
A complete preliminary inspection covers more than the visible face of a brake rotor. Compare the left and right sides of each axle because uneven conditions often reveal a problem that a single-wheel check would miss.
[Amazon Products Picked for You]

[THE BOSCH ADVANTAGE] - The Bosch QuietCast line draws on over 77 years of OE braking excellence; promising the highest quality performance, industry-leading strength and durability, and exclusive innovations including Molded Shim Technology (MST)
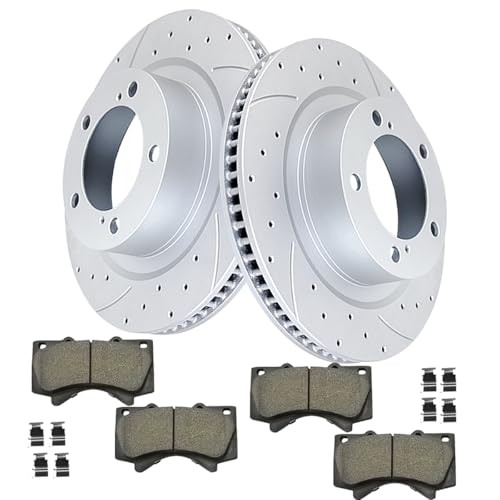
Notice: Fits Models with 13.89 inch (353mm) Front Rotor Outside Diameter ONLY!

PLEASE CONFIRM YOUR FITMENT: Using the Amazon Confirmed Fit bar at the top of the page or check the Product Description to confirm your vehicle fitment. This may be delivered in multiple boxes
Brake Pads and Friction Material
Inspect both inner and outer pads. Check the remaining friction material, but do not include the steel backing plate in the measurement. Look for uneven taper, cracking, crumbling, glazing, oil or brake-fluid contamination, and separation from the backing plate.
Do not rely on a universal online minimum. Compare the measurements with the service information for your exact Tundra through the owner documentation or Toyota’s Technical Information System.
Brake Rotors
Inspect both rotor faces for deep scoring, cracks, heavy rust, blue or purple heat marks, uneven contact patterns, and a pronounced outer lip. A shiny rotor is not automatically healthy, and visible grooves do not reveal the rotor’s remaining thickness.
Accurate evaluation may require a micrometer and dial indicator. Rotor minimum thickness, measurement locations, allowable runout, and refinishing limits differ by axle and model year.
Calipers, Slides, Boots, and Hardware
Look for torn piston boots, fluid seepage, seized or corroded slide pins, damaged pad clips, missing hardware, and pads that cannot move correctly in their brackets. Unequal inner and outer pad wear can indicate restricted movement or another caliper problem.
Brake Hoses and Metal Lines
Inspect flexible hoses for cracking, abrasion, bulges, twisting, wetness, and contact with tires or suspension parts. Examine visible metal lines and connections for corrosion, damage, or leakage. Do not squeeze, bend, or disturb a questionable hose to “test” it.
Master Cylinder, Reservoir, and Brake Assist
Check around the reservoir and master cylinder for wetness. Observe whether the pedal holds steady under normal pressure with the engine running. An abnormal pedal, assistance problem, or warning message requires diagnosis rather than repeated test drives.
Parking-Brake Components
Confirm that the parking brake applies and releases normally. The mechanism and adjustment procedure differ between Tundra generations, so do not force or manually retract an electronic parking-brake actuator without the correct service procedure.
Pro Tip: Compare pad thickness and rotor appearance across all four wheels. One thin inner pad or one wheel with much more dust than the others often provides more useful information than the average wear level.
Quick Brake Inspection Steps for Your Toyota Tundra
[Amazon Products Picked for You]

Durable and Corrosion-Resistant : Featuring a corrosion-resistant probe, this brake fluid tester is designed for long-lasting performance. The durable construction ensures that the tool remains effective over time, even with frequent use, making it a reliable addition to your maintenance toolkit

Test the car brake fluid quality quickly to check whether it’s qualified, which can remind you to change the brake fluid when necessary to avoid traffic accident

WIDE RANGE OF APPLICATIONS: The automotive brake fluid tester is a universal device for most vehicles. It can check the condition of DOT-3, DOT-4, DOT-5.1 brake fluids as well as most synthetic brake fluids. It is extremely easy for personal use and is widely used for private workshops, repair shops and car dealerships.
1. Park and Prepare the Truck
Choose a dry, solid, level surface away from traffic. Put the transmission in Park, apply the parking brake for the initial checks, switch off the engine when instructed by your manual, and chock the wheels that will remain on the ground.
Gather a flashlight, gloves, brake-lining gauge or ruler, approved floor jack, correctly rated jack stands, lug socket, and torque wrench. Use the owner’s manual for lifting points and the correct wheel-nut tightening specification.
2. Check the Warning Lights and Pedal
Start the truck and confirm that brake-related warning indicators complete their normal self-check. With the vehicle stationary, press the brake pedal several times and note its travel and firmness. The pedal should not continue sinking under steady pressure.
Do not repeatedly pump the pedal and then assume a temporary improvement has fixed the cause of abnormal travel. Hydraulic or assist problems require diagnosis.
3. Inspect the Brake-Fluid Reservoir
With the truck level, locate the brake-fluid reservoir and read the level through the translucent container when possible. Avoid opening the cap unless necessary because dirt and moisture must be kept out of the hydraulic system.
If the level is low, inspect for worn pads and leaks before adding anything. Use only the fluid specification printed on the reservoir cap or listed in the exact owner’s manual. Do not substitute or mix fluid types based solely on a generic recommendation.
4. Look Through the Wheel Openings
Use a flashlight to inspect the visible rotor surface, caliper, hose, and outer pad where the wheel design allows. Look for leakage, deep scoring, heat discoloration, damaged hoses, and a pad that appears nearly worn to its backing plate.
This is only a screening check. The wheel may hide the inner pad, inner rotor face, caliper slides, boots, and mounting hardware.
5. Lift the Truck and Remove the Wheels Safely
Loosen wheel nuts only as directed for safe wheel removal, lift at the approved point, and place a rated jack stand beneath the specified support location. Lower the truck onto the stand and verify stability before approaching the brake assembly.
Federal workplace guidance for jacks states that a raised load should be cribbed, blocked, or otherwise secured immediately. The same conservative principle is appropriate in a home garage. See OSHA Standard 1910.244 for the referenced jack-safety requirement.
6. Inspect and Compare the Components
Examine the inner and outer pads, both accessible rotor surfaces, caliper, boots, clips, hose, fittings, and surrounding area. Measure the friction material and rotor only with suitable tools and compare the results with Toyota’s model-specific specifications.
Do not inhale or blow brake dust with compressed air. Avoid applying lubricants or cleaners unless you know where the product is permitted and can prevent contamination of the friction surfaces.
7. Reinstall the Wheels and Perform a Final Check
Clean obvious debris from the wheel-to-hub mounting surfaces without damaging them. Install the wheel, tighten the nuts in the correct sequence, lower the truck, and use a calibrated torque wrench to apply the model-year specification.
Before moving, press the brake pedal until normal firmness is present. If the pedal does not become firm, do not drive. When no faults were found and braking feels normal, begin any road check at very low speed in a safe area. Listen for abnormal contact and verify that the truck stops straight without warning lights, smoke, or unusual pedal travel.
Spotting Physical Signs of Brake Wear and Damage
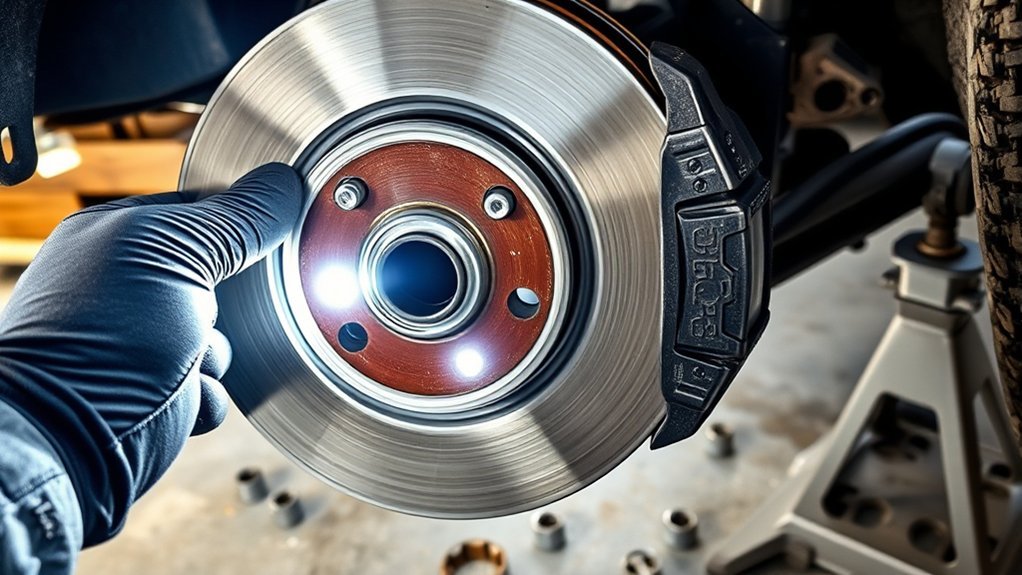
Driver symptoms tell you that something may be wrong; physical findings help narrow the cause. Look for combinations of evidence instead of diagnosing a component from one clue.
- One pad thinner than its axle partner: May indicate restricted caliper movement, piston trouble, hardware binding, or contamination.
- Inner pad much thinner than the outer pad: Often warrants a close caliper and slide inspection.
- Tapered pad wear: Can result from hardware, alignment, bracket, slide, or caliper problems.
- Deep rotor scoring: May indicate debris, worn friction material, or damaged pads.
- Blue or purple rotor areas: Suggest excessive heat and require investigation of driving conditions and possible brake drag.
- Cracks or severe surface damage: Require professional evaluation and normally removal from service.
- Wet caliper, hose, line, or backing plate: May indicate a hydraulic leak. Do not drive until the source is identified.
- Torn rubber boots: Allow water and debris to reach moving components, increasing the risk of corrosion and binding.
- Heavy dust on one wheel: Can support a finding of abnormal wear or drag, but dust alone does not prove that a caliper is seized.
- Uneven rotor contact pattern: May indicate pad, caliper, rotor, corrosion, or installation issues.
A rotor can look smooth while being below its service limit, and a thick pad can still be unsafe if it is cracked, contaminated, or separating. Measurements and condition both matter.
How to Check Toyota Tundra Brake Fluid Correctly
Brake fluid transmits pedal force through the hydraulic system and must meet the specification chosen for the vehicle. The federal brake-fluid standard establishes performance requirements for DOT fluid, including separate dry and wet boiling points. See 49 CFR 571.116.
Follow these precautions:
- Check the fluid level with the truck parked level.
- Read the reservoir markings without opening the cap when possible.
- Clean around the cap before opening it.
- Use only the specification shown on the reservoir cap or in the exact model-year manual.
- Use fluid from a sealed, clean container.
- Do not use DOT 5 silicone fluid unless Toyota specifically requires it.
- Prevent brake fluid from contacting paint, skin, eyes, or contaminated tools.
- Investigate low fluid rather than automatically topping it off.
Brake-fluid color is an observation—not a complete condition test. Fluid can look acceptable while its service history or boiling performance is unknown, and darker fluid does not prove a specific moisture percentage.
Obvious cloudiness, debris, separation, or contamination requires attention, but replacement should be based on Toyota’s guidance, verified service history, system repairs, and appropriate testing. Toyota does not publish one universal two- or three-year replacement rule for every Tundra model year.
If the reservoir is unexpectedly low, look for leakage and abnormal pad wear. Adding fluid without identifying the reason can hide a fault and may overfill the reservoir when worn pads are later replaced.
Brake Inspection After Towing or Harsh Use
Towing, hauling, long downhill grades, larger tires, repeated stops, and off-road driving can increase brake temperature and wear. After demanding use, check for:
- A new odor, smoke, or change in pedal feel
- Rotor heat marks or cracking
- Uneven pad wear
- Mud, gravel, vegetation, or debris near brake components
- Damaged or abraded hoses
- Water or contamination around connectors and hardware
- A wheel that remains much hotter than the others after adequate cooling time
Never cool hot brakes by spraying them with water. Rapid cooling can damage components. Park safely and allow them to cool naturally.
When You Should Not Drive Your Toyota Tundra
Arrange professional inspection or towing instead of driving when you find any of the following:
- The brake pedal sinks toward the floor or cannot become firm
- Braking ability is clearly reduced
- A red brake-system warning remains illuminated
- Brake fluid is leaking or the reservoir level drops unexpectedly
- Grinding is accompanied by poor stopping, severe vibration, or pulling
- Smoke comes from a wheel or brake assembly
- A brake remains applied or one wheel overheats
- A hose is bulged, cut, abraded, or wet with fluid
- A rotor is visibly cracked or a pad is separating
- Wheel nuts cannot be tightened correctly
Do not attempt a longer test drive to see whether a serious symptom disappears. A preliminary visual inspection does not rule out internal hydraulic, electronic, ABS, or brake-assist faults.
Check for Toyota Tundra Recalls
Brake-related recalls and service campaigns can be limited to particular production dates, configurations, or VINs. Search your 17-character VIN using the NHTSA recall lookup and Toyota’s owner resources. NHTSA notes that VIN results identify unrepaired recalls associated with a specific vehicle, although newly announced recalls may take time to appear.
Related Guides
Frequently Asked Questions
Can I do my own Toyota Tundra brake inspection?
You can perform a preliminary visual inspection if you can lift and support the truck safely, remove and reinstall its wheels correctly, and recognize when professional help is needed. Hydraulic repairs, brake bleeding, electronic parking-brake procedures, ABS diagnosis, rotor measurements, and uncertain findings should be handled by a qualified technician.
What is the 30-30-30 rule for brakes?
The 30-30-30 rule is not an official Toyota Tundra maintenance standard. Do not use it as a substitute for your model-year Warranty and Maintenance Guide. Inspection and fluid-service needs depend on the truck’s exact specifications, condition, operating environment, and service history.
What is a seven-step brake check?
There is no single official seven-step Toyota procedure for every Tundra. A useful preliminary check is to prepare the truck safely, examine warning lights and pedal feel, check the fluid reservoir, inspect through the wheels, lift and support the truck, examine the components, and reinstall the wheels before a cautious low-speed check.
How do you perform a basic Toyota Tundra brake inspection?
Check for warning lights, unusual noises, pulling, vibration, abnormal pedal travel, low fluid, and visible leaks. Safely remove the wheels when qualified to do so, then inspect both pads, both rotor faces, calipers, boots, hardware, hoses, and lines. Compare measurements and tightening values with Toyota’s specifications for the exact model year.
How often should Toyota Tundra brakes be inspected?
Follow the model-year maintenance guide and inspect the brakes whenever symptoms appear. Wheel rotations provide a convenient opportunity for a closer inspection. Towing, mountain driving, road salt, mud, deep water, heavy payloads, or repeated hard braking can justify more frequent checks.
Can brake-fluid color tell me when it needs replacement?
Not by itself. Dark, cloudy, separated, or debris-filled fluid deserves attention, but color does not measure moisture percentage or boiling performance. Use Toyota’s model-specific guidance, the known service history, system condition, and appropriate fluid testing.
Conclusion
Regular brake checks can help you find uneven pad wear, rotor damage, leaks, heat stress, and restricted caliper movement before they become more serious. The most important part of a Toyota Tundra brake inspection is knowing its limits: use the specifications for your exact model year, support the truck safely, and never treat a quick visual check as proof that the complete brake system is fault-free.
Do not drive when the pedal sinks, fluid leaks, braking ability falls, smoke appears, or a red brake warning remains illuminated. In those situations, have the truck towed for professional diagnosis.
Sources
- Toyota Manuals and Warranties — model-year owner’s manuals, maintenance guides, specifications, and warnings
- Toyota Warning Lights — interpretation of Toyota safety-system and dashboard indicators
- Toyota Technical Information System — model-specific repair procedures, measurements, and tightening specifications
- 49 CFR 571.116: Motor Vehicle Brake Fluids — federal DOT brake-fluid performance, labeling, and boiling-point requirements
- OSHA Standard 1910.244 — jack capacity, operation, inspection, and load-support requirements
- NHTSA Recall Lookup — VIN-based vehicle safety recall information