Replacing brake pads and rotors on a Toyota Tundra can restore quiet, consistent braking, but the correct parts and procedures depend on the truck’s model year, axle, trim, and brake package. Treat this as a safety-critical repair: inspect before replacing parts, use factory specifications, and stop if you find a hydraulic leak, damaged hose, seized caliper, or warning light.
Quick Answer
Replace Toyota Tundra brake pads when inspection shows they are at or near the minimum thickness, contaminated, cracked, or causing abnormal braking—not at one universal mileage. Replace or machine rotors only when thickness, runout, surface condition, or heat damage fails the specification for your exact model year.
Key Takeaways
- Use the VIN and exact model year to confirm pad, rotor, hardware, torque, and rear parking-brake requirements.
- Measure rotor thickness and runout instead of replacing every rotor automatically.
- Replace pads on both wheels of the same axle and inspect calipers, slide pins, boots, hoses, and brake fluid.
- Support the truck with correctly rated jack stands; never work under a vehicle held only by a jack.
- Restore a firm pedal before moving the truck, then follow the pad maker’s bed-in instructions and perform a controlled low-speed test.
At a Glance
| Time Required | Plan several hours per axle; corrosion, seized hardware, rotor measurement, and rear parking-brake service can add time. |
| Difficulty | Intermediate to advanced; this is a safety-critical repair that requires accurate measuring and torque control. |
| Tools Needed | Wheel chocks, rated floor jack and jack stands, sockets, breaker bar, torque wrench, caliper piston tool, micrometer, dial indicator when required, brake cleaner, approved brake lubricant, caliper hanger, and eye/hand protection. |
| Cost | Varies by model year, axle, brake package, parts grade, rotor condition, and local labor. Price VIN-matched parts before disassembly. |
Warning: Brake work directly affects vehicle control. Use the factory jacking points and correctly rated stands, keep friction surfaces free of grease, and do not drive until the pedal is firm. Avoid blowing brake dust with compressed air; OSHA specifies controlled wet-cleaning or HEPA methods for professional brake service.
Understanding the Importance of Brake Pads for Your Toyota Tundra

Your Tundra’s brake pads create friction against the rotors to slow the wheels. The rotors absorb and release heat, while the calipers, slide pins, hydraulic hoses, brake fluid, and electronic controls help apply braking force evenly. A heavy pickup used for towing, hauling, mountain driving, or frequent stop-and-go traffic may wear brakes faster than a lightly used truck.
There is no single Toyota Tundra brake-pad replacement mileage that fits every year and driving pattern. Inspect the system at regular service visits and whenever braking behavior changes. Use the Toyota Manuals and Warranties portal to select the exact truck, and use Toyota’s factory service information for minimum pad thickness, rotor thickness, runout, fastener torque, and model-specific procedures.
Note: A low reservoir level can reflect pad wear, but it can also indicate a leak. Do not repeatedly top off brake fluid without finding the cause, and never use fluid from an unsealed or incorrect container.
Signs It’s Time to Replace Your Brake Pads and Rotors
Brake noise alone does not prove that pads and rotors both need replacement. Inspect the complete system when you notice any of these symptoms:
- Grinding or metal-on-metal noise: Stop driving when safe and inspect immediately; the pad friction material may be gone.
- Persistent squealing: A wear indicator may be contacting the rotor, although glazing, debris, or hardware can also cause noise.
- Longer stopping distance or increased pedal effort: Possible causes include worn or contaminated pads, overheated brakes, a seized caliper, a hydraulic fault, or a brake-booster problem.
- Pulsation or steering-wheel vibration: Check rotor runout, thickness variation, hub cleanliness, wheel-bearing condition, and wheel-nut torque.
- Pulling during braking: Inspect for uneven pad wear, a sticking caliper, contaminated friction material, hose restriction, tire problems, or alignment issues.
- Deep scoring, cracks, heavy rust, blue heat spots, or thickness below specification: The rotor may require replacement.
- Brake, ABS, or parking-brake warning light: Diagnose the warning before assuming a normal pad-and-rotor job will solve it.
Replace parts based on inspection and factory limits—not a generic mileage, a single noise, or the appearance of one wheel.
How to Choose the Right Duralast Brake Pads for Your Tundra
Duralast is one aftermarket option, but a product name or old catalog number is not enough to confirm fit. Search by VIN or enter the exact year, drivetrain, trim, axle, and brake package. Confirm whether the listing includes abutment clips, shims, wear indicators, and any hardware your application requires.
Choose the friction material around how the truck is used. Ceramic pads often emphasize low dust and quiet operation, while semi-metallic or severe-duty formulations may tolerate repeated heat better. A Tundra that tows, descends grades, carries heavy loads, or operates off-road may benefit from a pad designed for higher thermal demand. Check the current product description and warranty terms at purchase because prices, part numbers, and coverage can change.
Pro Tip: Compare the new pads with the removed parts before installation. Match the shape, thickness, wear-indicator position, backing plate, shims, and hardware; stop if anything differs.
Should You Go With OEM or Aftermarket Brake Pads?

Both Toyota Genuine and reputable aftermarket brake pads can work well when they are correct for the truck and installed properly. OEM parts simplify fitment and are engineered around Toyota’s original noise, vibration, harshness, and braking targets. Aftermarket products provide more choices for dust, noise, towing, heat resistance, and budget, but quality and included hardware vary.
Cost Comparison Analysis
Universal price claims are unreliable because Tundra brake systems differ by year and axle, and online prices change. Compare complete axle-set costs rather than one pad or one rotor, and include rotors, hardware, cleaner, lubricant, possible caliper parts, taxes, shipping, and labor.
| Option | Typical Strength | Check Before Buying |
|---|---|---|
| Toyota Genuine | Straightforward factory fit and original-style behavior | VIN fitment, included hardware, dealer price |
| Premium Aftermarket | Choices for towing, low dust, noise, or heat | Test standard, friction rating, hardware, warranty |
| Budget Aftermarket | Lower initial cost | Fit accuracy, noise, dust, heat capacity, support |
Performance and Durability Factors
Judge pads by more than brand. Consider friction material, heat range, backing-plate quality, shim design, hardware, corrosion resistance, noise control, and suitability for towing. Rotor quality also matters: correct dimensions, vane design, metallurgy, coating, and machining affect fit and heat management. Toyota’s official Genuine Parts store supports VIN-based fitment, which helps avoid ordering a part for the wrong brake package.
Do not assume the most expensive pad lasts longest or that the hardest pad is best. A high-friction or severe-duty compound can change pedal feel, dust, noise, rotor wear, and cold response. Use a matched, reputable pad-and-rotor combination suited to the truck’s actual work.
How to Replace Brake Pads and Rotors: A Step-by-Step Guide
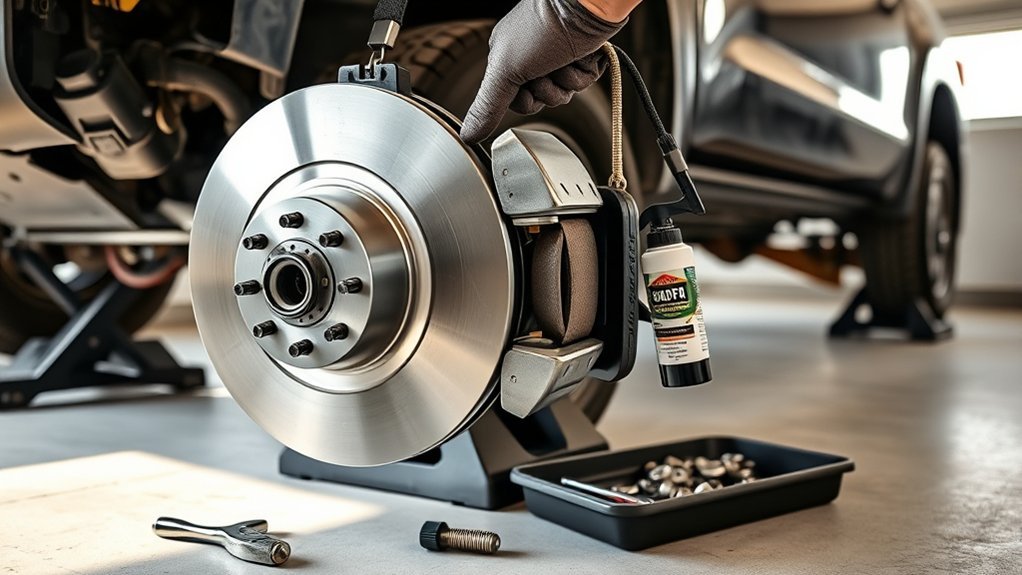
The outline below explains the workflow, but it does not replace the factory procedure. Retrieve the exact instructions and specifications from the Toyota Technical Information System, which provides Toyota repair manuals and service information for North American vehicles.
1. Confirm the Truck and Brake Configuration
Record the VIN, model year, 2WD or 4WD configuration, trim, axle being serviced, and any upgraded brake package. Confirm pad, rotor, hardware, brake-fluid, jacking, parking-brake, and torque specifications before loosening anything. Rear procedures may differ because of the parking-brake design or an electronic parking-brake system.
2. Prepare the Work Area
Park on a hard, level surface. Put the transmission in Park, chock the wheels that remain on the ground, and wear eye protection and gloves. Loosen the wheel nuts slightly before lifting. Use a jack and stands rated for the Tundra’s weight, position them only at approved points, and verify stability before removing a wheel.
3. Inspect Before Disassembly
Check the reservoir level, visible brake lines and hoses, caliper boots, bleeders, and the area around each wheel for leaks. Compare inner and outer pad wear. Severe uneven wear can indicate seized slide pins, a sticking piston, bracket corrosion, hose restriction, or hardware problems that must be corrected before new pads are fitted.
4. Remove and Support the Caliper
Remove the required caliper fasteners and support the caliper with a hanger; never let it hang from the brake hose. Keep track of pad orientation, shims, wear indicators, clips, and bolt locations. Do not press the brake pedal with the caliper removed.
5. Measure the Pads and Rotors
Measure friction material and rotor thickness with suitable tools, and check rotor runout when the factory procedure calls for it. Inspect for cracks, deep scoring, heavy pitting, heat checking, blue spots, damaged vents, or contamination. Compare every reading with the exact Toyota specification. A rotor that is smooth and within all limits may be reusable; a rotor below minimum thickness or otherwise damaged must be replaced.
6. Service the Hub, Bracket, Pins, and Parking Brake
If replacing the rotor, remove it according to the factory procedure. Clean rust and debris from the hub mounting face without removing metal or damaging studs. Inspect the caliper bracket, slide pins, boots, and pad lands. Replace torn boots or damaged hardware, and use only the lubricant and locations approved for the application. For rear brakes, follow the exact parking-brake release or service-mode instructions; never force an electronic actuator or wind-back piston without confirming the design.
7. Retract the Piston Carefully
Use the correct piston tool and retract slowly while monitoring the reservoir so it does not overflow. A piston that will not move smoothly may indicate corrosion, an internal fault, a restricted hose, or an engaged parking-brake mechanism. Do not use the new pads to force a damaged caliper back into service.
8. Install the Rotor, Pads, and Hardware
Clean a new rotor as directed by its manufacturer. Keep cleaner, grease, and fingerprints off pad and rotor friction surfaces. Install the rotor, pads, shims, clips, and wear indicators in the correct positions. Apply brake lubricant sparingly only at approved metal contact points—never on friction material, rotor faces, rubber parts not compatible with the lubricant, or wheel studs.
9. Torque Fasteners to the Exact Specification
Reinstall the bracket and caliper, replacing single-use fasteners when required. Tighten every fastener with a calibrated torque wrench to the specification for the exact Tundra. Do not copy values from another year, axle, trim, or online video. Repeat the service on the opposite wheel of the same axle.
10. Reinstall the Wheels and Restore Pedal Feel
Reinstall the wheels, lower the truck, and torque the wheel nuts in the specified sequence and stages. Before moving, press the brake pedal repeatedly until it is firm. Check the fluid level and inspect for leaks. If the pedal remains soft, sinks, or does not become firm, do not drive.
11. Bed the Brakes and Test Safely
Follow the pad or rotor manufacturer’s bed-in procedure; different friction materials require different cycles. Start with a stationary pedal check, then perform a controlled low-speed test in a traffic-free area. Confirm normal pedal feel, stopping, parking-brake operation, and no abnormal noise, pulling, warning lights, smoke, or overheating. Recheck the work if anything is wrong.
Note: Check the VIN for open safety recalls before service. The NHTSA recall lookup shows unrepaired recalls reported for a specific U.S.-market vehicle.
Top Maintenance Practices to Maximize Brake Pad Longevity
- Inspect regularly: Look at both inner and outer pads, rotor condition, hoses, boots, and slide pins during tire or scheduled service.
- Correct drag promptly: A seized pin, sticking piston, misadjusted parking brake, or restricted hose can overheat one wheel and destroy new parts.
- Drive smoothly: Leave more following distance, anticipate stops, and avoid riding the brake on long descents.
- Manage towing heat: Stay within vehicle and trailer limits, use a properly adjusted trailer-brake system when required, and select gears that reduce continuous brake use on grades.
- Keep the system clean: Remove road salt and packed debris during inspections without blowing dust into the air.
- Use matched parts: Choose pads, rotors, and hardware suitable for the truck’s brake package and duty cycle.
- Maintain correct wheel torque: Uneven or excessive wheel-nut torque can contribute to hub and rotor problems.
Common Mistakes to Avoid When Replacing Brake Pads
- Working under a jack alone: A hydraulic or emergency jack is a lifting device, not a safe support for brake work.
- Using generic torque values: Caliper, bracket, and wheel specifications vary by year and configuration.
- Hanging the caliper by its hose: This can damage the hose and create a hidden safety fault.
- Replacing only one side: Pads should be replaced as an axle set so left and right braking behavior remains consistent.
- Assuming every rotor must be replaced: Inspect and measure first; then reuse, machine, or replace only as specifications and condition allow.
- Ignoring uneven wear: New pads will wear quickly if a seized pin, piston, bracket, hose, or parking-brake problem remains.
- Contaminating friction surfaces: Grease, brake fluid, or dirty hands can reduce braking and cause noise.
- Forcing a rear piston or electronic parking brake: The wrong procedure can damage the caliper or actuator.
- Skipping the pedal check: Moving the truck before the pistons and pads are seated can result in little or no braking on the first pedal application.
- Using compressed air on brake dust: Wet-cleaning or HEPA-controlled methods reduce airborne exposure; OSHA’s brake and clutch work-practice appendix prohibits dry brushing in its wet methods.
What to Know Before Replacing Tundra Brakes
Brake-pad life varies with model year, pad material, towing, payload, terrain, traffic, corrosion, and driving style. Inspect instead of scheduling replacement from a generic 30,000- or 50,000-mile claim. Rotors also need a measurement-based decision: thickness, runout, thickness variation, surface condition, and heat damage matter more than age alone.
Cost cannot be reduced to one price per axle. A pads-only service on reusable rotors differs greatly from a job requiring two rotors, hardware, a seized caliper, parking-brake parts, fluid service, diagnostics, or shop labor. Obtain a VIN-specific parts list and written estimate that states what is included.
When to Stop and Call a Professional
Use a qualified technician when you lack the correct lifting equipment, measuring tools, service information, or torque wrench; when the truck needs electronic parking-brake service mode or scan-tool functions; or when you find a fluid leak, damaged hose, seized piston, broken bleeder, severe corrosion, ABS warning, contaminated pads, or a pedal that stays soft after assembly.
Related Guides
Frequently Asked Questions
How much does it cost to replace brake pads on a Toyota Tundra?
There is no reliable universal price. Cost depends on the model year, axle, brake package, pad grade, rotor condition, hardware, caliper condition, taxes, and local labor. Compare estimates that clearly separate pads, rotors, hardware, fluid or diagnostics, and labor.
Are genuine Toyota brake pads worth it?
Toyota Genuine pads are a strong choice when you want factory-style fit, pedal feel, noise control, and straightforward VIN matching. A reputable aftermarket pad may be better for a specific goal such as towing or low dust. Correct fit, quality, and installation matter more than the label alone.
How often should I change the brake pads on my Tundra?
Replace them when inspection shows the friction material is at or near Toyota’s minimum specification, wear is uneven, the pads are cracked or contaminated, or braking symptoms require replacement. Towing, payload, hills, traffic, and corrosion can shorten service life, so mileage alone is not enough.
Can I replace my Toyota Tundra brake pads myself?
Yes, but only when you can lift and support the truck safely, identify the exact brake system, measure rotors, service calipers correctly, and torque all fasteners to factory specifications. Brake work is not a good first repair without experienced guidance.
Do I need to replace the rotors every time I replace the pads?
No. Measure and inspect each rotor. Reuse is possible only when thickness, runout, surface condition, and all other factory limits are acceptable. Replace rotors that are below minimum thickness, cracked, badly scored, heavily corroded, heat damaged, or otherwise outside specification.
Should brake pads be replaced on both sides?
Yes. Replace pads on both wheels of the same axle. If one side is much more worn, diagnose the cause—such as a sticking caliper, seized slide pin, hose restriction, or hardware problem—before installing new pads.
Do new Tundra brakes need a bed-in procedure?
Usually, but the exact process depends on the pad and rotor manufacturer. Follow the instructions supplied with the parts. Before any bed-in stops, confirm a firm pedal, normal low-speed braking, no leaks, and no warning lights.
Conclusion
Safe Toyota Tundra brake service starts with the exact truck, a complete inspection, and factory specifications. Replace pads as an axle set, measure rotors instead of guessing, correct seized or leaking components, and torque every fastener properly. After assembly, restore a firm pedal and verify braking at low speed before returning the truck to normal driving or towing.
Sources
- Toyota Manuals and Warranties — exact-year owner and maintenance information.
- Toyota Technical Information System — factory repair manuals, service bulletins, wiring diagrams, and technical information.
- Genuine Toyota Parts and Accessories — VIN-based Toyota parts fitment.
- OSHA Appendix F for Automotive Brake and Clutch Work — controlled cleaning methods that reduce airborne asbestos exposure.
- NHTSA Recall Lookup — VIN-based unrepaired safety recall information for U.S.-market vehicles.