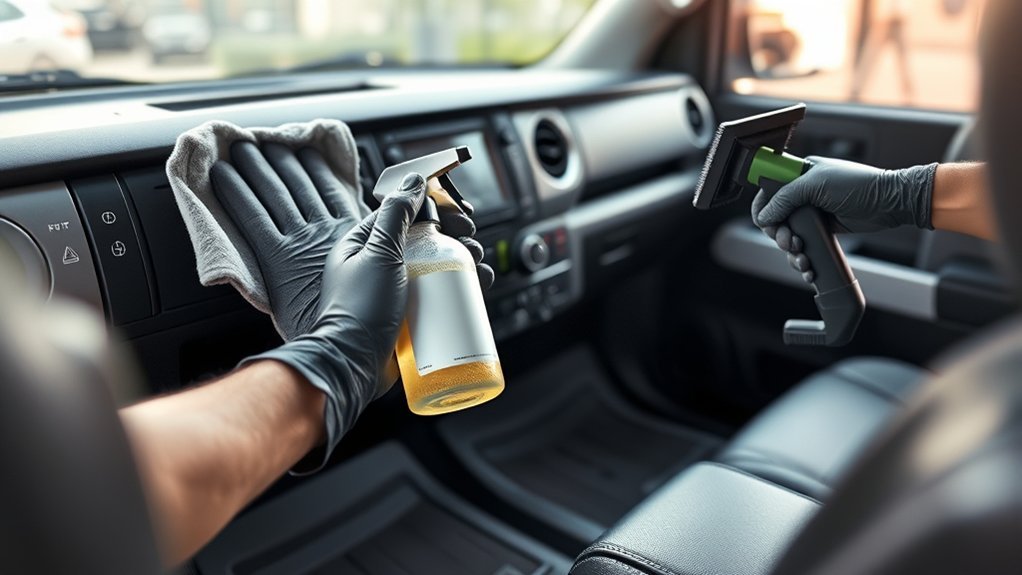
Cleaning your Toyota Tundra’s interior safely starts with a simple sequence: vacuum loose debris, identify the material you are cleaning, use the least aggressive compatible cleaner, keep moisture away from electronics and safety components, and dry everything thoroughly. Apply liquids to a cloth or applicator instead of spraying the dashboard, touchscreen, switches, seat controls, or upholstery directly.
Last updated: September 22, 2026. Toyota interior-care guidance, touchscreen precautions, rear-window cleaning guidance, floor-mat safety, moisture guidance, and related Tundra maintenance resources were rechecked for this update.
How this guide was prepared: This is a document-based DIY guide built from Toyota owner and multimedia guidance plus EPA and CDC safety references. It does not claim hands-on testing of every Tundra model year, trim, upholstery material, or cleaner, so verify the instructions for your exact truck before using a chemical product.
Quick Answer
To clean a Toyota Tundra interior without damage, vacuum loose debris first. Then use clean microfiber towels and products approved for each surface. Wipe with minimal moisture, blot fabric instead of soaking it, keep liquid away from electronics and SRS-related wiring, and let seats, carpets, and mats dry completely. Check the model-year manual before using cleaner on the touchscreen, rear defogger glass, leather, synthetic upholstery, or special trim.
Key Takeaways
- Check your model-year owner’s manual before using a cleaner on leather, synthetic upholstery, screens, clear plastic, rear defogger glass, or special trim.
- Vacuum before wet cleaning so grit does not become muddy residue or scratch delicate surfaces.
- Apply cleaner to the towel or applicator, not directly to buttons, screens, seams, speakers, USB ports, seat controls, or electrical components.
- Use the least moisture and agitation needed to remove the dirt.
- Dry seats, carpet, and mats fully, then secure the driver’s mat to its factory retention points.
At a Glance
| Time Required | Typical DIY estimate: about 45–90 minutes for routine cleaning, plus drying time |
| Difficulty | Beginner |
| Tools Needed | Vacuum attachments, microfiber towels, soft brushes, buckets, and surface-compatible cleaners |
| Cost | Low to moderate, depending on the tools and cleaners you already own |
Toyota-Specific Interior Cleaning Rules to Check First
Toyota’s exact cleaning instructions can vary by model year and equipment, so your Tundra’s manual takes priority. Across Toyota’s Tundra guidance, several recurring rules are especially important:
- Hard interior surfaces: Start by vacuuming dust and wiping with a soft cloth dampened with lukewarm water. Use only a compatible mild or neutral cleaner when water alone is not enough.
- Instrument panel: Avoid polish wax or polish cleaner. Toyota warns that reflected glare can interfere with forward visibility, and unsuitable products may damage painted interior finishes.
- Water and electronics: Do not splash or spill liquid inside the truck or wet SRS components and wiring. Keep cleaning liquid controlled around switches, seat wiring, chargers, screens, and under-floor electrical components.
- Touchscreen: Recent Toyota Tundra multimedia guidance calls for a glasses-cleaning cloth or similarly soft cloth and warns against benzine and alkaline cleaning solutions.
- Seat belts: Toyota manuals commonly specify mild soap and lukewarm water applied with a cloth or sponge while also checking the webbing for wear, fraying, or cuts.
- Rear defogger glass: Some Tundra manuals instruct owners not to use glass cleaner on the inside of the rear window. Where your manual gives that warning, use a cloth dampened with lukewarm water and wipe parallel to the heater wires.
Use Toyota’s Manuals and Warranties portal to check the instructions for your exact model year before using an unfamiliar chemical or cleaning method.
What Should You Use to Clean a Toyota Tundra Interior?

You do not need a large detailing kit, but you do need products that match the materials in your truck. Toyota offers model- and year-specific manuals through its Manuals and Warranties portal. Check that guidance before treating special upholstery, coated trim, screens, or instrument-cluster lenses.
- Several clean microfiber towels: Keep separate towels for glass, screens, hard trim, and dirty areas. Replace a towel if it falls on the ground or collects grit.
- A vacuum with soft attachments: A crevice tool reaches seat rails, console gaps, and carpet edges. A soft brush attachment is useful on vents and textured plastics.
- A soft detailing brush: Use it dry or with very little product around vents, seams, buttons, and stitching.
- A mild interior cleaner: Confirm that the label approves it for the exact plastic, vinyl, coated surface, or synthetic material you plan to clean.
- Upholstery cleaner: Choose a product intended for automotive fabric and carpet.
- Leather or synthetic-upholstery product: First identify the seating material. A product intended for natural leather may not be suitable or necessary for synthetic upholstery.
- Automotive glass cleaner: Choose a tint-safe formula if your windows have aftermarket film, but check your Tundra manual before using glass cleaner on the inside of the rear defogger window.
- Small bucket of clean water: Use it to dampen and rinse towels without soaking the interior.
- Nitrile or household gloves: Wear them when a product label recommends skin protection.
The EPA’s Safer Choice label can help you identify products reviewed for ingredient safety and performance. However, the label does not prove that a cleaner is compatible with every vehicle surface. You must still check the product directions and Toyota guidance.
Note: Test every new cleaner on a hidden area. Let the test spot dry completely, then check for discoloration, gloss changes, stiffness, residue, or dye transfer.
How Should You Prepare Your Tundra Before Cleaning?
Park in a shaded, ventilated place and allow hot interior surfaces to cool. Turn off the ignition, remove charging cables, and take personal items out of the door pockets, cupholders, console, and under-seat storage.
- Photograph the interior. Pictures help you remember the correct positions of floor mats, removable organizers, and child-seat components.
- Remove loose items and trash. Check under the seats before moving them because wiring, sensors, and other equipment may be present.
- Remove the floor mats. Note each mat’s location and how the driver’s mat connects to its retention hooks.
- Inspect for damage. Look for torn upholstery, loose trim, sticky switches, leaking windows, damp carpet, visible mold, or warning lights.
- Read the product labels. Confirm dilution, dwell time, ventilation, protective equipment, and material compatibility.
Warning: Never mix cleaning products. Keep the doors or windows open for ventilation when using chemical cleaners, and follow every safety direction on the label. Do not combine bleach, ammonia, acids, disinfectants, or unknown products.
Vacuum the Interior From Top to Bottom
Dry cleaning comes before sprays or upholstery products. Loose sand and grit can mark gloss trim, clear plastic, and coated surfaces when rubbed with a towel.
- Use a soft brush to loosen dust from vents, seams, speaker grilles, and dashboard edges.
- Vacuum the dashboard and console with a soft attachment without dragging hard plastic across the trim.
- Slide the seats only after checking that no object can catch in the rails, wiring, sensors, or other under-seat components.
- Vacuum seat seams, under-seat areas, carpet edges, and the rear cabin.
- Use the crevice tool gently around seat tracks and console gaps.
- Vacuum fabric seats and carpet in overlapping passes.
Hybrid Tundra note: On applicable i-FORCE MAX models, traction-battery cooling uses cabin air through intake vents around the rear-seat area. Do not push debris or liquid into those openings or block them with belongings. Follow the model-year manual for inspection and cleaning. See the Toyota Tundra hybrid battery cooling system guide for the separate battery-vent maintenance process.
Pro Tip: Hold the vacuum nozzle close to the detailing brush while brushing vents and seams. The vacuum captures loosened dust before it settles elsewhere.
How to Clean the Dashboard, Steering Wheel, and Console
Fold a clean microfiber towel into quarters, then lightly dampen one section with lukewarm water or a compatible interior cleaner. The towel should feel damp, not wet. Wipe a small area and follow with a dry section before moisture reaches seams or openings.
Dashboard and Trim
Work from the windshield edge toward the front of the dashboard. Use light pressure on textured plastics and soft-touch materials. For vents and narrow seams, agitate dust with a soft brush while holding a towel or vacuum nearby.
Avoid polish wax, polish cleaner, and greasy dressings on the dashboard. Also avoid slick products on the steering wheel, pedals, gear selector, or door handles. Residue can affect grip, attract dust, or create unwanted reflections.
Steering Wheel
First identify whether the wheel is leather-wrapped, synthetic, or plastic. Apply a compatible cleaner to the towel, not the wheel. Wipe the rim, spokes, rear finger grips, and frequently touched controls. Use minimal moisture around switches and seams, then dry the surface thoroughly.
Buttons, Cupholders, and Storage Areas
Use a barely damp towel around buttons and switches. Do not flood gaps or use a dripping brush. Remove cupholder inserts only when they are designed to come out, then wash and dry them before reinstalling.
| Area | Safe Starting Method | Main Risk |
|---|---|---|
| Dashboard | Damp microfiber towel followed by a dry towel | Staining, glare, gloss changes, or liquid entering seams |
| Air vents | Dry soft brush and low-suction vacuum | Broken vanes or cleaner sprayed into ducts |
| Steering wheel | Material-compatible cleaner applied to a towel | Slippery residue or damage to the finish |
| Buttons and switches | Barely damp towel or lightly loaded detailing brush | Liquid entering electrical components |
How Do You Clean a Tundra Touchscreen Safely?
Treat the touchscreen, gauge-cluster cover, camera display, and glossy trim as delicate surfaces. Turn the system off so fingerprints and streaks are easier to see.
- Remove loose dust with a clean, dry microfiber or glasses-cleaning cloth.
- If marks remain, follow the multimedia manual for your model year before introducing moisture or a cleaning product.
- Wipe gently without pressing hard on the display.
- Dry any permitted moisture immediately with a separate clean towel.
Recent Toyota Tundra multimedia guidance says to clean the screen gently with a glasses-cleaning cloth or a similar soft cloth and warns against benzine and alkaline solutions. Do not spray the screen directly. Avoid paper towels, abrasive pads, strong solvents, and any cleaner your Toyota multimedia manual does not approve.
The CDC’s general electronics guidance also recommends following the device manufacturer’s cleaning instructions rather than applying a universal disinfecting method.
How Do You Clean Leather or Synthetic Tundra Seats?
Do not assume that every smooth seat surface is natural leather. Tundra materials vary by trim and model year, and some seats combine more than one material. Check the vehicle documentation before selecting a cleaner or conditioner.
- Vacuum first. Use a soft tool around stitching, perforations, and seat seams.
- Test the product. Choose a hidden area that will not be noticeable if the finish changes.
- Apply cleaner to an applicator. Do not pour or spray it directly onto the seat.
- Work in small sections. Use light pressure and avoid forcing liquid into perforations.
- Remove residue. Wipe with a clean, slightly damp towel if the product directions require it.
- Dry the seat. Buff gently with a dry microfiber towel and allow remaining moisture to dry in a shaded, ventilated area.
Use conditioner only when the seat material and product instructions call for it. More conditioner is not better. Excess product can leave a sticky or slippery surface and collect dust. Avoid applying conditioner to fabric panels, suede-like inserts, seat belts, controls, or child-seat contact areas.
Do not use strong degreasers, household solvents, abrasive pads, or unapproved disinfectants. These products can alter the color, sheen, coating, or texture.
Clean Fabric Seats and Remove Stains
Fabric seats respond best to controlled moisture and repeated blotting. Heavy saturation can push the spill deeper into the foam, extend drying time, and leave water rings.
- Vacuum the entire seat, including seams and the area between the seatback and cushion.
- Blot fresh spills with an absorbent white towel. Do not scrub the spill outward.
- Test the upholstery cleaner in a hidden area.
- Apply a small amount to the towel or soft brush.
- Work from the outside edge of the stain toward its center.
- Blot away suspended soil with a clean towel.
- Repeat light applications instead of soaking the fabric once.
- Leave the doors open in a secure, ventilated area until the seat is fully dry.
Common Stain Response
- Water or soft drinks: Blot immediately, then use a fabric-safe cleaner if residue remains.
- Coffee or food: Lift solids without spreading them, blot the liquid, and clean from the stain’s edge inward.
- Grease: Do not flood it with water. Use a product specifically approved for oily upholstery stains.
- Mud: Let thick mud dry, vacuum the loose soil, and then treat the remaining mark.
- Road salt: Vacuum loose crystals first. Use small amounts of a carpet-compatible cleaner and blot repeatedly.
- Pet accidents or vomit: Wear gloves, remove solids, blot moisture, and use a product approved for the affected material. Professional treatment may be safer if liquid reaches the seat foam.
Clean the Carpet and Floor Mats

Interior Carpet
Vacuum slowly in more than one direction. Use the crevice tool along seat rails and trim edges without pressing against wiring or connectors. Apply carpet cleaner sparingly, agitate gently, and blot or extract the loosened soil according to the product directions.
Avoid soaking the carpet or washing the vehicle floor with water. If the padding beneath the carpet becomes wet, surface drying may not remove all moisture. A persistent damp or musty smell can indicate a leak, wet padding, or contamination below the visible carpet.
Rubber or All-Weather Mats
- Remove the mats from the truck.
- Shake off loose dirt and vacuum both sides.
- Rinse them outside with a hose.
- Clean them with a compatible product and soft brush.
- Rinse away all soap because residue can make the surface slippery.
- Allow both sides to dry completely.
Carpeted Floor Mats
Vacuum both sides, spot-treat stains, and use only enough upholstery cleaner to lift the soil. Blot or extract the moisture, then dry the mats outside the truck. Do not reinstall damp mats over the carpet.
If you are replacing worn or badly contaminated mats rather than cleaning them, confirm model year, cab layout, row coverage, and retention-point compatibility. The Toyota Tundra floor mat guide covers those fitment considerations separately.
Warning: Put each mat back in its correct position. Secure the driver’s mat to the factory retention hooks, never place one mat on top of another, and confirm that no mat can touch or interfere with the accelerator, brake pedal, or footrest.
How Do You Clean Tundra Interior Glass and Mirrors?
Use a separate low-lint microfiber towel for normal interior glass. Apply a small amount of compatible automotive glass cleaner to the towel instead of spraying near the dashboard, speakers, camera or sensor housings, or door controls.
- Lower each side window slightly and wipe the top edge.
- Clean the glass with overlapping strokes.
- Use a second dry towel to remove residue.
- Inspect from more than one angle because film can appear only in direct light.
Rear-window exception: Check your model-year owner’s manual before using glass cleaner on the inside of the rear window. Toyota manuals for applicable Tundras warn that glass cleaner can damage rear-window defogger heater wires. Where that instruction applies, use a cloth dampened with lukewarm water, wipe gently in strokes parallel to the heater wires, and avoid scratching them.
If the side windows have aftermarket tint, confirm that the cleaner is tint-safe. Avoid scraping tools unless the film or glass manufacturer approves them.
How Do You Clean the Headliner and Seat Belts?
Headliner
The headliner’s fabric may be bonded to foam or a backing material. Heavy moisture, steam, or aggressive brushing can loosen the adhesive and cause sagging.
Vacuum it gently with a soft attachment without pressing hard. For a small mark, apply a tiny amount of compatible cleaner to a towel and blot the area. Do not saturate the fabric or scrub a large circle around the stain.
Seat Belts
Toyota manuals commonly direct owners to clean seat-belt webbing with mild soap and lukewarm water using a cloth or sponge. Extend the belt, remove loose debris gently, use minimal moisture, and check the webbing for excessive wear, fraying, or cuts while you clean.
Avoid bleach, dye, strong solvents, pressure washing, and aggressive scrubbing because the webbing is a safety component. Allow a cleaned belt to dry fully before retracting it. If the belt is frayed, cut, stiff, contaminated by an unknown chemical, or does not retract and latch normally, have it inspected rather than trying to restore it with stronger cleaners.
Treat Child Safety Seats as Separate Safety Equipment
Do not clean an installed child safety seat with the same methods used for the truck’s upholstery. Harnesses, covers, padding, buckles, and fire-resistant materials have model-specific instructions.
Follow the child-seat manufacturer’s manual exactly. Do not pressure-wash, soak, bleach, steam, machine-wash, or machine-dry any part unless the manufacturer specifically permits that method. Confirm that every cover, clip, harness path, and buckle is correctly reassembled before use.
How Do You Keep a Toyota Tundra Interior Fresh and Odor-Free?
Odor control starts with finding and removing the source. Fragrance sprays and deodorizing bags may cover a smell temporarily, but they do not remove spilled liquid, spoiled food, damp padding, pet contamination, or a dirty cabin air filter.
- Empty the cabin: Check door pockets, console storage, under-seat areas, and reusable bags.
- Clean cupholders and seams: Small food particles can create persistent odors.
- Inspect for moisture: Check beneath mats, along carpet edges, and near doors and windows.
- Dry cleaned materials: Keep doors or windows open in a secure area until upholstery and carpet are fully dry.
- Check the cabin air filter: Inspect or replace it according to the correct model-year maintenance guidance if it is dirty or has absorbed odors. See the Toyota Tundra cabin air filter replacement guide for model-specific interval and symptom guidance.
- Use an odor absorber only after cleaning: An unscented absorber can be a finishing step, not the main repair.
The EPA’s general moisture-control guidance says wet or damp materials should be dried within 24–48 hours to reduce the opportunity for mold growth. In a vehicle, also correct the leak or spill source before repeatedly cleaning the same odor.
A clean smell should come from removing dirt and moisture, not from masking them with a stronger fragrance.
When to Call a Professional Detailer
Routine dust, light stains, and normal spills are reasonable DIY jobs. Professional help is a better choice when the work requires controlled extraction, disassembly, specialty treatment, or contamination handling.
Consider professional service when:
- Water has soaked into carpet padding or seat foam.
- A musty odor returns after the visible surfaces dry.
- You see mold or suspect hidden mold beneath carpet or trim.
- Milk, bodily fluids, fuel, oil, chemicals, or contaminated water entered porous materials.
- A stain remains after one or two careful treatments.
- The headliner is sagging or heavily stained.
- Leather is cracked, peeling, discolored, or sticky.
- Buttons, switches, screens, sensors, SRS-related areas, or seat controls were exposed to liquid.
- You cannot identify the upholstery or trim material.
Frequently Asked Questions
What does Toyota recommend for cleaning the dashboard?
Recommendations can vary by Tundra model year and interior material. Toyota guidance generally starts with removing dust and wiping dirty surfaces with a soft cloth dampened with lukewarm water, then using only a compatible mild or neutral cleaner when needed. Avoid polish wax or polish cleaner on the instrument panel, and keep liquid away from switches, seams, screens, wiring, and electrical components.
How do you clean Toyota Tundra seats?
Vacuum the seats first and identify whether they are fabric, leather, synthetic upholstery, or a combination. Test the correct cleaner in a hidden area, use small amounts, blot rather than soak, and let the seats dry completely. Use conditioner only when the seating material and product instructions permit it.
What should you use to clean a Toyota Tundra touchscreen?
Start with a clean glasses-cleaning cloth or similarly soft microfiber cloth and very light pressure. Recent Toyota Tundra multimedia guidance warns against benzine and alkaline cleaning solutions. Do not spray cleaner directly onto the display, and check the multimedia manual for your exact model year before using any liquid product.
Can you use glass cleaner on the Tundra rear window?
Check the owner’s manual for your exact model year. Toyota manuals for applicable Tundras warn against using glass cleaner on the inside of the rear window because it can damage the defogger heater wires. Where that warning applies, use a cloth dampened with lukewarm water and wipe gently in strokes parallel to the wires.
What do professional detailers use inside vehicles?
Detailers may use commercial vacuums, extractors, steam equipment, air tools, soft brushes, microfiber towels, and material-specific chemicals. The equipment alone does not make a method safe. Proper dilution, heat control, moisture control, agitation, extraction, and knowledge of the surface are more important.
Is steam cleaning better than shampooing a vehicle interior?
Neither method is always better. Steam uses heat and relatively little liquid, but it can affect adhesives, coatings, delicate fabrics, screens, and nearby electronics. Shampoo or extraction can remove embedded soil, but oversaturation may wet the padding. Choose the method according to the material and manufacturer guidance.
Can you use household all-purpose cleaner in a Toyota Tundra?
Only when the product label and vehicle guidance confirm compatibility with the exact surface. Do not assume one household cleaner is safe for leather, fabric, screens, clear plastic, coated trim, and vinyl. Test it in a hidden area and apply it to the towel rather than spraying the cabin directly.
How often should you clean a Toyota Tundra interior?
Remove trash and address spills as soon as possible. Vacuum and wipe high-touch areas when visibly dirty, then perform a deeper cleaning as use and conditions require. Trucks exposed to children, pets, jobsite dust, winter salt, mud, or frequent food spills may need attention more often. Some Toyota Tundra manuals also recommend cleaning leather areas at least twice a year to help maintain interior quality.
How do you remove a musty smell from a Tundra?
Check for damp carpet, wet padding, window or door leaks, a dirty cabin air filter, and spills beneath the seats or mats. Correct the moisture source, clean the contaminated material, and dry it fully. Seek professional help if the smell returns or visible mold is present.
Conclusion
You can clean your Toyota Tundra interior safely by using a simple sequence: identify the material, vacuum loose debris, check the model-year guidance, test the cleaner, use minimal moisture, and dry the surface thoroughly. Give extra care to screens, clear plastics, controls, SRS-related areas, seat belts, headliners, rear defogger glass, perforated upholstery, and hybrid battery cooling vents where equipped.
Before driving, reinstall fully dry mats in their correct positions, secure the driver’s mat, and confirm that the pedals move freely. Stop and seek professional help when you find hidden moisture, recurring odors, visible mold, chemical contamination, damaged safety components, or liquid near electronics. For an unfamiliar material or cleaner, open the Toyota manual first rather than guessing.
Sources
- Toyota Manuals and Warranties — access to model- and year-specific owner guidance.
- Toyota: How to Clean Your Car’s Interior — Toyota guidance for dashboard, steering wheel, touchscreen, seats, console, and other cabin surfaces.
- Toyota Tundra Multimedia Owner’s Manual — touchscreen operation and cleaning precautions for the applicable model year.
- U.S. Environmental Protection Agency: Safer Choice Label — safer-ingredient, product-performance, pH, and VOC review information.
- Centers for Disease Control and Prevention: Cleaning and Disinfecting Guidance — surface compatibility, electronics, ventilation, label directions, and chemical-mixing precautions.
- U.S. Environmental Protection Agency: Mold and Moisture Guide — general moisture control, complete drying, and mold-prevention guidance.