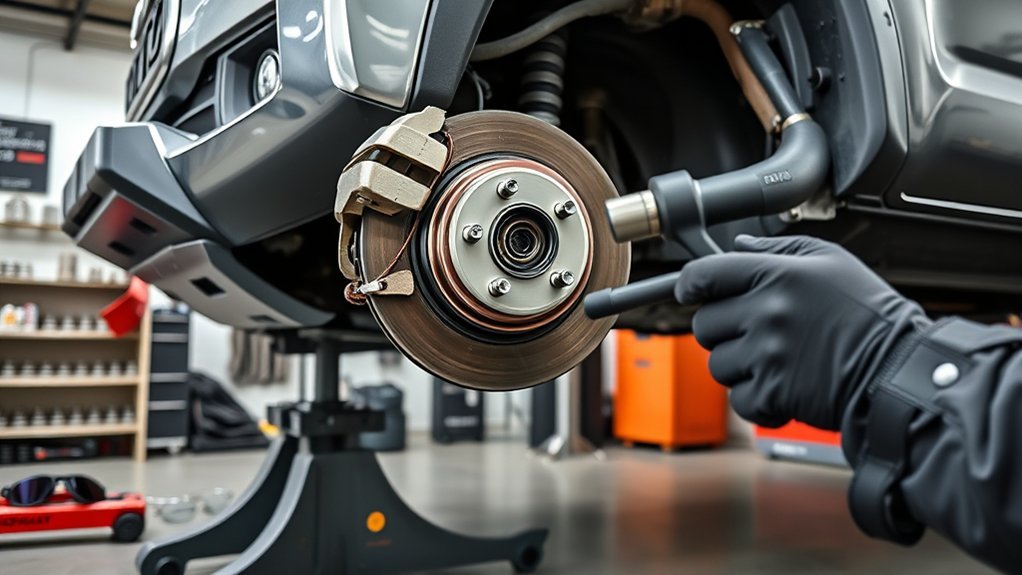
Toyota Tacoma ball joint replacement is not one universal procedure. The correct method depends on the truck’s model year, drivetrain, suspension configuration, and whether you’re replacing an upper or lower joint. Before lifting the truck, verify the replacement part by VIN and obtain the exact Toyota repair procedure and torque specifications for your vehicle.
Last updated: September 19, 2026. This guide was reviewed against Toyota service resources, Toyota parts information, and NHTSA safety-recall records. Because Tacoma ball-joint designs vary by application, this article intentionally does not publish one universal torque table.
Quick Answer
To replace a Toyota Tacoma ball joint safely, identify the exact joint design by VIN, support the truck at approved points, separate the tapered stud with the correct puller, and follow the model-specific removal method. Install the verified part with new required hardware, torque every fastener to Toyota specifications, and inspect the wheel alignment afterward.
Key Takeaways
- Confirm the model year, drivetrain, side, and upper or lower joint before ordering parts.
- Do not assume every Tacoma ball joint requires a press, C-clip, grease fitting, or the same socket sizes.
- Support the truck with rated jack stands and support the steering knuckle before separating a joint.
- Use the exact Toyota repair procedure and torque specifications for your VIN.
- Inspect the steering, ABS wiring, brake hose, wheel alignment, and fasteners before returning to normal driving.
At a Glance
| Time Required | Plan several hours. Corrosion, seized tapers, access, joint design, and whether a control arm must be removed can extend the repair. |
| Difficulty | Advanced. Ball joints are steering and suspension components, so accurate support and torque procedures are essential. |
| Tools Needed | Floor jack, rated jack stands, wheel chocks, metric sockets, breaker bar, calibrated torque wrench, pliers, penetrating oil, and the specified separator or puller. Use a press only when the verified joint design requires one. |
| Cost | Varies by model year and whether you replace a separate joint, a bolt-on assembly, or a complete control arm. Include required hardware, tool rental, labor if applicable, and an alignment inspection in your estimate. |
Warning: Never work beneath a Tacoma supported only by a hydraulic jack. Ball-joint separation can allow the steering knuckle or control arm to move suddenly. Use rated jack stands at approved support points, keep your body outside the component’s path, and stop driving the truck if the wheel has severe looseness or the steering feels unstable.
How Do You Confirm Your Tacoma’s Exact Ball Joint Setup?
Tacoma ball-joint procedures aren’t universal. Before taking anything apart, record the truck’s model year, VIN, drivetrain, trim, and suspension modifications. Also confirm whether you’re replacing the left or right upper or lower joint.
You can use the NHTSA VIN Decoder to verify basic vehicle information. Confirm the service part through the official Toyota Parts Center, which accepts full-VIN searches.
Next, obtain the exact removal procedure and torque values from Toyota’s Technical Information System. The applicable joint may fall into one of these categories:
- Bolt-on joint or joint assembly: The housing attaches with bolts, while the tapered stud connects to the control arm or steering knuckle.
- Pressed-in joint: The housing is installed with an interference fit and may use a retaining ring. It requires properly sized press adapters.
- Joint supplied with a control arm: The correct service method may be replacing the complete arm instead of pressing out the joint.
[Amazon Products Picked for You]
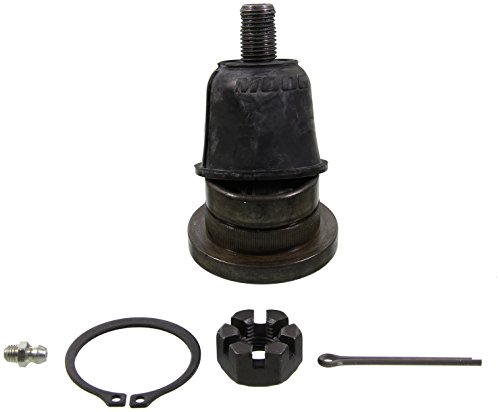
COMPATIBILITY – Fits 2005-2023 Toyota Tacoma; 2008-2008 Toyota Tacoma

[Vehicle Fitment]: Compatible with Toyota Tacoma 1995-1997 (4WD), Tacoma 1998-2004 (L4 2.7L), Tacoma 1998-2004 (4WD; V6 3.4L), Tacoma 1998-2004 (RWD; V6 3.4L; Pre Runner Submodel), 4Runner 1996-2002, Sequoia 2001-2007, Tundra 2000-2006 --- A-Premium Tacoma Ball Joint with original dimensions for easy installation
Identify the Correct Repair Path Before Disassembly
| What You Confirm | Likely Service Path | Verify Before Proceeding |
|---|---|---|
| Separate joint housing secured with mounting bolts | Bolt-on joint or joint assembly | Bolt count, hardware replacement rules, tightening sequence, taper-nut procedure, and torque values |
| Interference-fit joint with a retaining ring or specified press procedure | Pressed-in joint | Press direction, retaining-ring procedure, adapter sizes, and where pressing force may be applied |
| Toyota service information specifies a complete suspension arm | Control-arm replacement | Cam positions, bushing-bolt final tightening position, replacement hardware, and alignment requirements |
| Lift kit, aftermarket control arm, non-stock knuckle, or other suspension modification | Modified-vehicle procedure | Aftermarket component instructions plus Toyota specifications for the remaining factory interfaces |
Tacoma lower-ball-joint recall: Toyota Safety Recall/Special Service Campaign 50J, NHTSA campaign 05V-225, covered certain 2001 through mid-2004 Tacoma 4WD and PreRunner vehicles. Toyota reported that affected lower ball joints could develop excessive wear and looseness and, in extreme cases, separate from the knuckle. Do not assume every truck in those model years is included; check the VIN through the Toyota recall lookup or NHTSA recall database.
What Are the Symptoms of a Bad Tacoma Ball Joint?
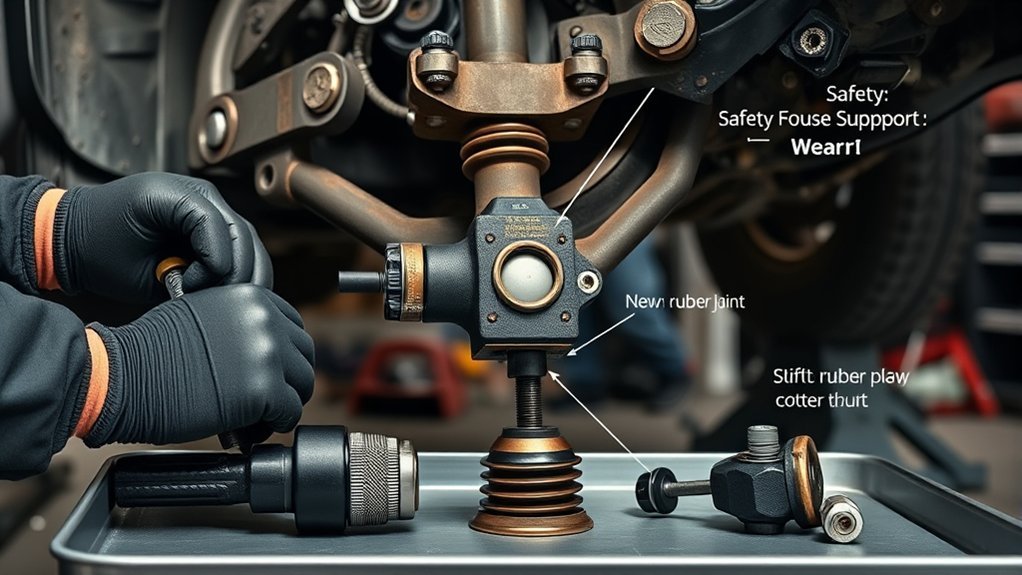
Ball joints connect suspension control arms to the steering knuckle while allowing the wheel to steer and move with the suspension. Wear inside the joint can create looseness, affect steering control, and change how the tire contacts the road.
Possible symptoms include:
- Clunking or popping from the front suspension over bumps.
- Loose, wandering, or inconsistent steering.
- Uneven tire wear, although alignment and other worn components can cause the same pattern.
- A torn dust boot, escaped grease, rust, or contamination around the joint.
- Movement at the wheel or joint that exceeds the limit in the applicable Toyota inspection procedure.
Don’t diagnose the joint from a vague “visible gap” alone. Some inspection procedures require the suspension to be loaded, while others require the joint to be unloaded. Use the support position, leverage point, measurement tool, and allowable movement specified for your exact Tacoma.
A clunk, torn boot, or unusual tire pattern is a reason to inspect the suspension, not proof that one specific ball joint has failed.
If you find major looseness, steering instability, or a partially separated joint, don’t drive the truck. Have it transported for repair.
What Tools Do You Need for Tacoma Ball Joint Replacement?
Gather the tools only after confirming the applicable procedure. Common requirements include:
- Floor jack and rated jack stands: Use the approved lifting and support points listed in the Toyota owner’s manual for your vehicle.
- Wheel chocks: Prevent the truck from rolling while a front corner is raised.
- Metric socket and wrench set: Verify the exact fastener sizes instead of assuming every Tacoma uses 19 mm and 24 mm hardware.
- Calibrated torque wrench: Use one that covers the required torque range.
- Breaker bar and penetrating oil: Useful for corroded hardware. Allow penetrating oil time to work.
- Ball-joint or tie-rod separator: Use the style specified by the repair procedure and position it without damaging components you plan to reuse.
- Ball-joint press and correct adapters: Required only for a verified pressed-in design.
- Cotter-pin pliers or needle-nose pliers: Remove locking pins without damaging nearby boots.
- Support stand or suitable jack: Supports the steering knuckle or control arm during separation.
- Safety equipment: Wear safety glasses, gloves, and hearing protection when using impact or striking tools.
Also confirm whether the repair requires new cotter pins, locknuts, mounting bolts, washers, retaining rings, or other one-time-use hardware. Do not assume the old hardware can be reused.
[Amazon Products Picked for You]

Extra Large C Frame Press: Essential ball joint tool kit staple for removing press fit parts from pick up trucks; Specialized C clamp makes truck ball joint removal simple

COMPATIBILITY – Fits 2005-2021 Toyota Tacoma

SUPERIOR TOUGHNESS: Get longer-lasting performance from patented sintered bearings.
How Do You Prepare a Tacoma for Ball Joint Removal?
- Park on a hard, level surface. Set the parking brake and place the transmission in Park or in gear for a manual transmission.
- Chock the wheels. Block the wheels that will remain on the ground.
- Loosen the wheel nuts slightly. Do this before raising the truck, without removing them.
- Lift at the approved point. Follow the owner’s manual for your model and configuration.
- Install rated jack stands. Lower the truck onto the stands and verify stability before removing the wheel.
- Remove the wheel. Store it flat where it can’t roll into your work area.
- Inspect the work area. Look for rust, damaged brake hoses, loose ABS wiring, torn boots, leaking shocks, worn bushings, and previous repairs.
- Support the suspension assembly. Prevent the knuckle, control arm, brake hose, ABS wire, or CV axle from being pulled when the joint releases.
Pro Tip: Photograph the brake-hose brackets, ABS-wire routing, washers, and fastener orientation before disassembly. The photos provide a reliable reference during reassembly.
How Do You Remove a Toyota Tacoma Ball Joint?
The following is a general workflow. Follow the exact sequence in the Toyota repair manual when it differs.
- Remove parts that block access. Depending on the joint, this may include a skid plate, splash shield, sway-bar link, brake-hose bracket, or another component identified in the repair procedure.
- Protect the brake hose and ABS wire. Release their brackets when required, but do not let the knuckle hang from either one.
- Remove the cotter pin or locking device. Discard a cotter pin when the procedure calls for replacement.
- Loosen the tapered-stud nut. Leave it threaded on by several turns until the taper releases. This helps control sudden movement.
- Position the separator or puller. Confirm it bears on solid metal and doesn’t crush a reusable boot, sensor, or shield.
- Release the taper gradually. Keep the suspension supported and your hands outside the path of movement.
- Remove the stud nut. Guide the knuckle or control arm apart without stretching the brake hose, ABS wire, or CV joint.
- Remove the joint according to its design. Follow the applicable branch below.
Remove only the components required by the verified repair procedure. Unnecessary disassembly creates additional opportunities for damaged boots, disturbed alignment settings, and incorrect reassembly.
Removing a Bolt-On Ball Joint
Support the joint and surrounding assembly before removing the mounting bolts. Note each bolt’s direction, washer position, and bracket location. Remove the joint without prying against thin shields or machined sealing surfaces.
Inspect the mounting holes and mating surfaces for cracks, elongation, heavy corrosion, or damage. A damaged control arm or steering knuckle may require replacement or professional inspection.
Removing a Pressed-In Ball Joint
Confirm the direction in which the joint must be pressed. Remove the retaining ring only if your verified design uses one. Select adapters that support the control arm or knuckle close to the joint while providing space for the joint to exit.
Keep the press screw centered. If the joint tilts, the tool bends, or the force rises sharply, stop and reposition the adapters. Do not continue forcing a crooked joint through the bore.
Replacing a Control Arm With an Integrated Joint
If the correct service part is a complete control arm, follow the control-arm removal procedure. Avoid loosening alignment cams or adjustment hardware unless required. If an inner bushing bolt is removed, follow the Toyota procedure for its final tightening position so the bushing isn’t preloaded incorrectly.
How Do You Install a New Tacoma Ball Joint Correctly?
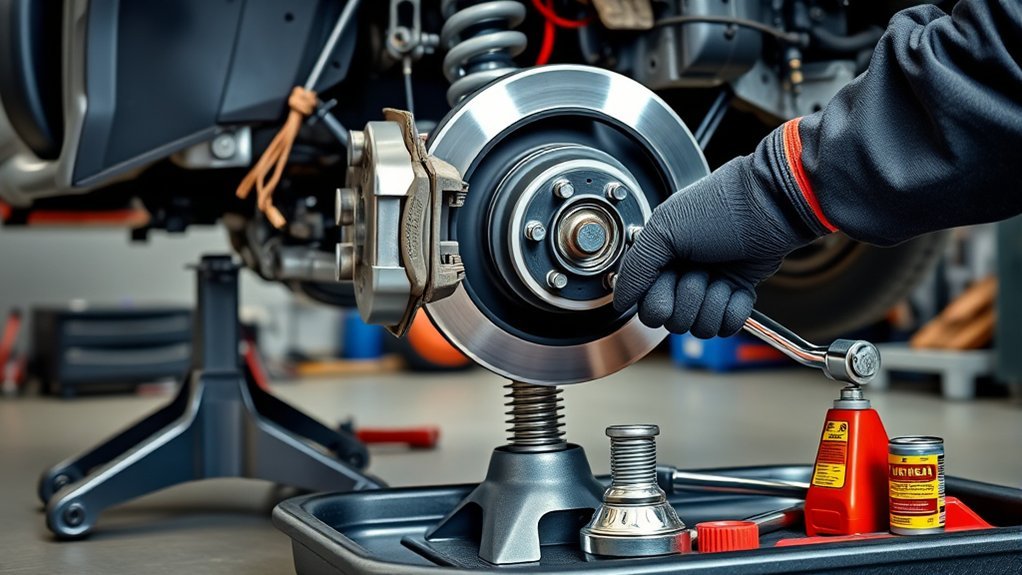
Compare the new and old components before installation. Check the housing dimensions, stud taper, mounting pattern, boot shape, hardware, fitting location, and any orientation marks. Stop if the parts don’t match the verified application.
- Clean the mating surfaces. Remove loose rust and debris without enlarging a bore or damaging a machined surface.
- Position the joint correctly. Follow any index marks, grease-fitting direction, or orientation specified by Toyota or the part manufacturer.
- Install the housing using the correct method. Start all mounting bolts by hand on a bolt-on joint. For a pressed joint, use adapters that push on the approved part of the housing rather than the stud or dust boot.
- Install the retaining ring when applicable. Confirm it is fully seated around the entire groove.
- Connect the tapered stud. Keep the boot from twisting or becoming trapped between components.
- Install the specified nut and locking hardware. Follow the exact procedure for a castle nut, prevailing-torque nut, cotter pin, or other locking device.
- Torque every fastener. Use the VIN-specific Toyota specification and the correct tightening sequence.
- Lubricate only when required. If the replacement joint has a grease fitting, follow its instructions. Do not add grease to a sealed joint with no service fitting.
- Reconnect removed brackets and links. Restore the ABS wire, brake hose, sway-bar link, and shields to their original routing.
Caution: Never guess a torque value or reuse a locking fastener simply because it appears undamaged. Incorrect clamping force can damage the taper, loosen the joint, or overload the mounting hardware.
What Safety Precautions Matter During Ball Joint Replacement?
- Wear safety glasses and gloves throughout the repair.
- Use hearing protection with impact or pneumatic tools.
- Keep your head, hands, and legs outside the path of the knuckle and control arm.
- Support heavy components before removing the final fastener.
- Do not strike threaded studs directly with a steel hammer.
- Do not use uncontrolled heat on a suspension component unless the exact Toyota procedure authorizes it.
- Stop if a press adapter bends, slips, or begins damaging the control arm or knuckle.
- Do not allow the brake hose, ABS wire, or CV axle to support the steering knuckle.
- Use a torque wrench rather than tightening safety-critical hardware by feel.
- Have a qualified technician perform the repair if you lack stable lifting equipment, the required separator, a suitable press setup, or reliable service information.
What Should You Check After Installing a Tacoma Ball Joint?
- Inspect every connection. Confirm that all mounting bolts, stud nuts, cotter pins, clips, grease fittings, and brackets are present.
- Check the dust boot. It shouldn’t be pinched, torn, twisted, or rubbing another component.
- Verify wire and hose routing. Turn the steering from side to side while the front is safely supported and confirm that nothing stretches or binds.
- Reinstall the wheel. Start the wheel nuts by hand and tighten them in a crisscross pattern.
- Lower the truck safely. Remove the stands and lower the vehicle using the approved procedure.
- Torque the wheel nuts. Use the specification in the owner’s manual for the exact wheel and vehicle.
- Check the brake pedal when applicable. If the brake caliper or hydraulic components were disturbed, confirm a firm pedal before moving the truck.
- Check the alignment. Arrange an alignment measurement if a control arm, adjustment cam, tie-rod setting, or other geometry-related component was moved. An inspection is also sensible after correcting a worn joint.
- Perform a cautious test. Begin at walking speed in a clear area. Listen for clunks and check steering response, brake operation, and warning lights before increasing speed.
Stop the test immediately if the steering feels loose, the truck pulls sharply, the wheel position looks abnormal, or an ABS or stability-control warning appears.
How Do You Troubleshoot Common Ball Joint Replacement Problems?
[Amazon Products Picked for You]

【Essential Tool for Ball Joint Service】 weyleity's ball joint press kit is an indispensable tool for your garage, designed to effortlessly remove press-fit components like ball joints, U-joints, and brake anchor pins without the need to disassemble your vehicle's control arm.
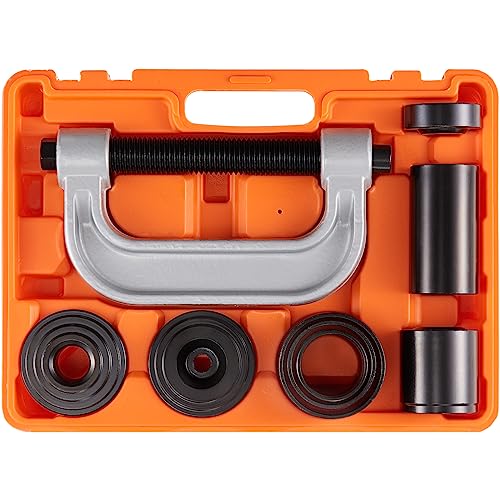
High Compatibility Tool Kit: Are you ready to get your car out of the garage? Our 10-piece ball joint tool kit is designed to fit most 2-wheel drive (2WD) and 4-wheel drive (4WD) vehicles, including 1/2 and 3/4 ton 4WD vehicles with Dana 30 or 44 front axles. It is compatible with popular car brands such as Ford, General Motors, Dodge, IHC, and Jeep.

High Compatibility Tool Kit: Are you ready to get your car out of the garage? Our 21-piece ball joint tool kit is designed to fit most 2-wheel drive (2WD) and 4-wheel drive (4WD) vehicles, including vehicles with Dana 28, 30, 35, 44 or 60 front axles. It is compatible with popular car brands such as Ford, General Motors, Dodge, IHC, and Jeep.
The Tapered Stud Spins With the Nut
The taper may not be seated firmly enough to resist turning. Follow the service procedure for applying controlled load to the joint while tightening or removing the nut. Do not grip or damage a stud surface that must fit accurately in the taper.
The Joint Will Not Release
Confirm that all locking hardware has been removed and the separator is positioned correctly. Apply penetrating oil to accessible corrosion and allow time for it to work. Avoid escalating to uncontrolled hammering or heat.
The Pressed Joint Starts Crooked
Stop immediately. Release the pressure, inspect the bore and adapters, and restart only when the joint is square. Forcing it can damage the joint housing, bore, control arm, or knuckle.
The New Joint’s Boot Is Twisted or Pinched
Correct the boot before driving. A damaged seal can allow water and grit into the joint and shorten its service life.
The Clunk Remains After Replacement
Inspect the opposite ball joint, tie-rod ends, sway-bar links, control-arm bushings, shock mounts, wheel bearing, brake hardware, and fastener torque. A front-end noise can have more than one source.
Related Guides
Frequently Asked Questions
How much does it cost to replace ball joints on a Toyota Tacoma?
The total varies by model year, joint position, part design, local labor rates, corrosion, and whether the repair uses a separate joint or complete control arm. A useful estimate should include the verified part, required hardware, possible tool rental, labor, and an alignment inspection.
Do you need an alignment after replacing Tacoma ball joints?
Have the alignment inspected, especially if control-arm bolts, alignment cams, tie-rod settings, or other geometry-related parts were moved. Adjustment is required when the measured angles are outside Toyota specifications.
Can you replace only the ball joint without replacing the control arm?
Sometimes. The answer depends on the model year, joint position, Toyota service part, and condition of the control arm. Replace the complete arm when that is the specified service method or when its bore, bushings, mounting points, or structure are damaged.
How can you tell if Tacoma ball joints are bad?
Possible signs include clunking over bumps, loose steering, a torn boot, escaped grease, irregular tire wear, or excessive movement during the correct inspection. These symptoms can also come from other suspension parts, so confirm the diagnosis with the model-specific Toyota test procedure.
Does every Tacoma ball joint require a press?
No. Some replacement designs are bolt-on assemblies, some joints are pressed into another component, and some applications are serviced with a complete control arm. Verify the exact design before renting or using a press.
Can you drive a Tacoma with a bad ball joint?
Do not drive if the joint has severe looseness, partial separation, unstable steering, or visible structural damage. A failed ball joint can allow the wheel and steering knuckle to move out of position. Arrange towing or professional transport instead.
Was there a Toyota Tacoma lower-ball-joint recall?
Yes. Toyota Safety Recall/Special Service Campaign 50J, NHTSA campaign 05V-225, covered certain 2001 through mid-2004 Tacoma 4WD and PreRunner vehicles. The affected lower ball joints could develop excessive wear and looseness and, in extreme cases, separate from the knuckle. Check the VIN through Toyota or NHTSA because not every Tacoma from those model years is necessarily included.
Should you replace both Tacoma ball joints at the same time?
Not automatically for ordinary wear. Inspect both sides using the correct Toyota procedure and replace each component according to its measured condition and service requirements. A recall or model-specific repair instruction may require a different approach, so check the VIN and applicable Toyota information first.
Conclusion
A successful Toyota Tacoma ball joint replacement begins with identifying the exact vehicle, joint position, and service design. Confirm the VIN, check for applicable recalls, obtain the correct part and Toyota procedure, and determine whether the repair uses a bolt-on joint, a pressed joint, or a complete control arm before disassembly.
Before returning to normal driving, inspect every fastener and locking device, verify hose and wire routing, tighten the wheels correctly, and complete a cautious low-speed test. Have the alignment measured when suspension geometry or adjustment hardware was disturbed, and stop driving if steering, wheel position, braking, or warning-light problems remain.
Sources
- Toyota Technical Information System — model-specific repair manuals, service bulletins, and technical information.
- Toyota Genuine Parts Center — VIN-based Toyota parts fitment and component identification.
- Toyota Manuals and Warranties — vehicle-specific owner’s manuals and lifting, wheel, and safety information.
- Toyota Safety Recall and Service Campaign Lookup — Toyota campaign checks by VIN or license plate.
- National Highway Traffic Safety Administration Recall Lookup — federal recall, investigation, complaint, and manufacturer-communication information.
- Toyota Campaign 50J / NHTSA 05V-225 Owner Notice — affected Tacoma applications, safety defect description, and recall remedy information.
- NHTSA VIN Decoder — manufacturer-reported vehicle identification information.
