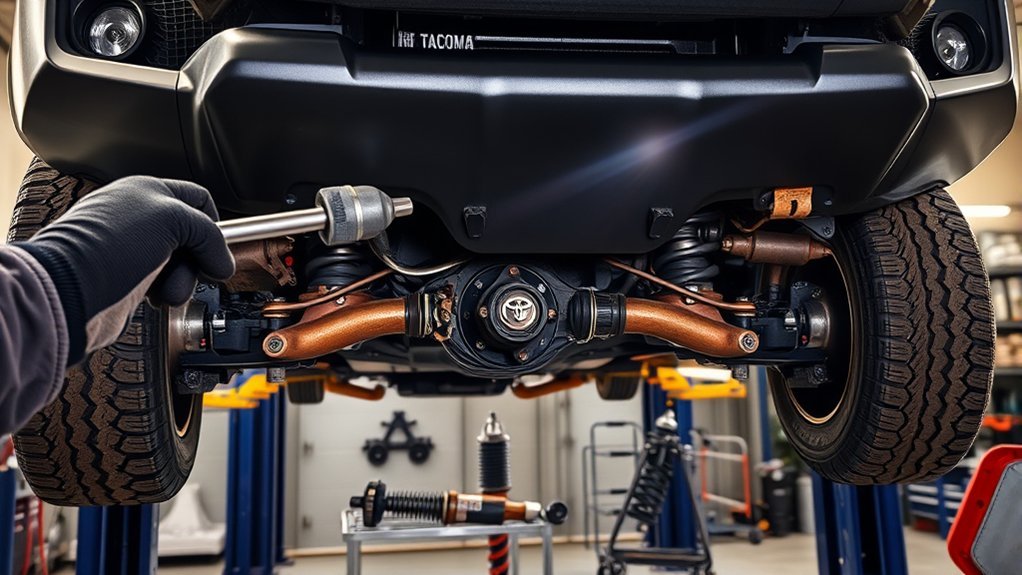
If your Toyota Tacoma clunks over bumps, common areas to inspect first are the sway bar links and bushings, control arm bushings, ball joints, shock or coilover mounts, body mounts, rear-suspension hardware, skid plates, and loose accessories. The exact noise pattern matters more than its volume. Remove loose cargo first, note whether the clunk also happens while turning, braking, accelerating, or shifting, then inspect before replacing parts.
Last updated: September 22, 2026 · [VERIFY: add the real author/byline if the CMS does not already display it]
Quick Answer
A Toyota Tacoma that clunks over bumps may have worn sway bar links, control arm bushings, ball joints, shock mounts, body mounts, leaf-spring or coil-suspension hardware, or loose underbody parts. Remove loose cargo first, note when the sound occurs, inspect visible hardware, and stop driving if steering, braking, or wheel stability changes.
Key Takeaways
- A clunk over bumps does not automatically mean a failed shock. Sway bar links, bushings, mounts, skid plates, body hardware, and rear suspension parts can make similar sounds.
- A clunk during acceleration or braking may point toward control arm movement, driveline play, or loose mounting hardware rather than a wheel bearing.
- Never crawl under a Tacoma supported only by a jack. Use the correct lifting points, wheel chocks, and properly rated jack stands.
- Do not tighten suspension fasteners to a guessed torque or spray lubricant on sealed joints. Use specifications and procedures for your exact model year.
- Check your VIN for open recalls and review Toyota service information before assuming that another owner’s repair applies to your truck.
At a Glance
| Time Required | About 30 to 60 minutes for a preliminary inspection and controlled test drive |
| Difficulty | Basic for exterior checks; intermediate or advanced when lifting the truck or inspecting steering and suspension joints |
| Tools Needed | Flashlight, gloves, wheel chocks, helper, torque wrench, and model-specific service information; use a rated floor jack and jack stands only when necessary |
| Cost | Basic checks cost little or nothing. Professional diagnosis and repairs vary widely with the failed component, model year, and modifications. |
Warning: Stop driving and arrange an inspection if the clunk comes with loose steering, pulling, brake changes, severe vibration, wheel movement, tire rubbing, a leaning body, fluid leakage near a shock, or visible damage. Never work beneath a vehicle held up only by a hydraulic or emergency jack.
Why Does a Toyota Tacoma Clunk Over Bumps?

A Tacoma can produce a similar clunk from several unrelated areas. The likely cause changes with the model year, suspension design, drivetrain, load, and any lift or aftermarket parts. Use the sound’s location and operating condition to guide your inspection.
[Amazon Products Picked for You]

Kit Includes: 2 Front Inner Tie Rods; 2 Front Lower Control Arms with Ball Joints; 2 Front Outer Tie Rods; 2 Front Steering Rack & Pinion Bellows; 2 Front Sway Bar Links; 2 Front Upper Control Arms with Ball Joints

[Vehicle Fitment]: Compatible with Toyota Tacoma 1995-1997 (RWD; Power Steering), Tacoma 1998-2000 L4 2.4L (Power Steering), Tacoma 2001-2004 L4 2.4L, Tacoma 1998-2000 V6 3.4L (Base; DLX; RWD, Power Steering), Tacoma 2001-2002 V6 3.4L (Base; DLX, S-Runner; RWD), Tacoma 2003 V6 3.4L (DLX; S-Runner; RWD), Tacoma 2004 V6 3.4L (Base; S-Runner; RWD) --- A-Premium Tacoma Suspension Kit with original dimensions for easy installation

Kit Includes: 2 Front Inner Tie Rods; 2 Front Lower Ball Joints; 2 Front Outer Tie Rods; 2 Front Steering Rack & Pinion Bellows; 2 Front Sway Bar Links; 2 Front Upper Ball Joints
Front Suspension and Steering Causes
- Sway bar links or bushings: Worn joints, damaged boots, loose nuts, or deteriorated bushings may knock when one front wheel rises or drops.
- Control arm bushings: Cracked or separated rubber can let the control arm shift during bumps, braking, or acceleration.
- Ball joints: Wear can create looseness, knocking, steering changes, or uneven tire wear. Ball-joint diagnosis is safety-critical and should follow Toyota’s procedure for the exact model.
- Tie-rod ends or steering hardware: Loose steering joints may knock and can also create wandering, uneven steering response, or abnormal tire wear.
- Shock, strut, or coilover mounts: Loose upper or lower hardware, worn mounting bushings, or internal shock damage may cause a single clunk or repeated knock.
- Coil spring contact: A shifted spring, damaged isolator, or incorrect aftermarket installation can allow unwanted contact.
Rear Suspension Causes
Rear suspension design varies among Tacoma generations and configurations. Depending on the truck, inspect leaf springs, spring bushings, shackles, isolator pads, shock mounts, axle hardware, or coil-suspension links.
2024-and-newer Tacoma note: Fourth-generation Tacomas use a multi-link coil-spring rear suspension on most configurations, while leaf springs remain on configurations including SR, SR5 XtraCab, and TRD PreRunner. Identify the rear-suspension design fitted to your truck before using a checklist written for another Tacoma configuration.
Contact marks, polished metal, torn bushings, shifted components, or fresh rust around a fastener can help identify movement. A rear clunk may also travel through the frame and sound as though it comes from beneath the cab.
Body Mount, Cargo, and Accessory Noises
Deteriorated or loose body mount hardware can allow movement between the cab and frame, but body mounts should not be treated as the default cause. Similar sounds may come from:
- A loose spare tire or spare-tire carrier
- Tools, recovery gear, a jack, or cargo moving inside the cab or bed
- A tailgate, tonneau cover, bed rack, hitch, or bed-mounted accessory
- A skid plate, splash shield, exhaust shield, or aftermarket step
- Loose battery hold-down or engine-bay hardware
- Hood latch or hood-stop movement
Remove movable cargo and check these items before disassembling the suspension. A simple body or accessory rattle can closely imitate a suspension knock.
Driveline Causes
A clunk felt through the floor during acceleration, deceleration, shifting, or taking up driveline load may come from a driveshaft joint, slip joint, differential movement, engine or transmission mount, or loose driveline hardware. These problems follow a different pattern from a clunk caused only by road bumps.
Clicking during tight turns may suggest a CV-joint problem on an applicable four-wheel-drive model. A wheel bearing more often creates a hum, growl, or roughness that changes with road speed rather than a single clunk over a bump.
Note: Temperature can change the stiffness of rubber and plastic parts, so a noise may become louder or quieter as conditions change. That pattern is useful to record, but it does not identify the failed component by itself.
Identifying Key Symptoms of Suspension Problems
Listen for the exact moment the noise occurs. A controlled description gives you and your mechanic more useful information than simply reporting a “front-end clunk.”
| Noise Pattern | Areas to Inspect | Helpful Clues |
|---|---|---|
| Single front clunk over a one-wheel bump | Sway bar link, sway bar bushing, control arm bushing, ball joint, or shock mount | Compare straight bumps with angled driveway entrances |
| Rapid rattle on rough roads | Loose shield, skid plate, sway bar link, accessory, or brake hardware | Often changes with small, repeated bumps |
| Clunk when braking or accelerating | Control arm bushing, driveline, engine mount, transmission mount, or loose hardware | May be felt through the seat, pedal, or floorboard |
| Rear clunk over bumps | Spring hardware, shock mount, suspension link, spare tire, hitch, or tailgate | Remove bed cargo before testing |
| Clicking during tight turns | CV joint, axle, tire contact, or steering component | Note whether the sound changes left versus right |
| Hum or growl that rises with speed | Wheel bearing or tire | Usually follows vehicle speed rather than individual bumps |
An angled driveway or one-wheel bump twists the anti-roll bar more than a bump that moves both front wheels together. If the clunk appears mainly when one wheel rises or drops, sway bar links, bushings, and nearby contact points move higher on the inspection list. That pattern is a clue, not a stand-alone diagnosis.
Other warning signs include uneven tire wear, a crooked steering wheel, wandering, reduced ride control, excessive bouncing, or visible changes in ride height. A clunk paired with any steering or braking change deserves prompt professional inspection.
How to Diagnose Clunking Sounds in Your Tacoma
Work from the simplest checks toward the parts that require lifting or disassembly. Avoid replacing a component based only on a sound recording or another owner’s repair.
[Amazon Products Picked for You]

Give your Tacoma the Perfect Blend of Performance, Protection, and Style from Rough Country.

Level Up Your Stance & Clearance: Eliminate factory rake and add extra height to confidently clear obstacles - giving your Tacoma a tougher, trail-ready look without overdoing it.

Give your Tacoma the Perfect Blend of Performance, Protection, and Style from Rough Country.
1. Remove Cargo and Check External Hardware
Empty loose items from the cab and bed. Secure the jack, tools, spare tire, hitch accessories, bed cover, recovery gear, and tailgate. Check whether the hood, skid plates, steps, and splash shields move by hand.
Drive the same short route again. If the sound disappears, you may have isolated a body or accessory noise without touching the suspension.
2. Evaluate Noise Patterns Carefully
Record whether the sound occurs during:
- Small repeated bumps
- A single speed bump
- An angled driveway entrance
- Left or right turns
- Braking
- Acceleration from a stop
- Shifting between drive and reverse
- Cold or warm conditions
- Driving with or without cargo
Also note the apparent location, number of clunks, steering position, speed, and whether you feel the impact through the steering wheel, seat, brake pedal, or floor.
3. Inspect Suspension Components Thoroughly
With the Tacoma parked on a level surface, engine off, transmission in park or gear, parking brake applied, and wheels chocked, use a flashlight to inspect visible parts.
Look for:
- Torn ball-joint, tie-rod, or sway-link boots
- Cracked, separated, or displaced bushings
- Leaking or damaged shocks
- Broken spring material or shifted spring seating
- Loose-looking nuts, bolts, or mounting brackets
- Bright metal, polished areas, impact marks, or rust dust that suggests movement
- Contact between tires and liners, control arms, sway bars, or aftermarket parts
- Damaged body mounts or gaps that differ from side to side
Do not assume a fastener is loose based on appearance alone. Some suspension fasteners require the vehicle to sit at normal ride height during final tightening, and torque values vary by year and component.
4. Check for Movement Safely
A helper can gently rock the body or turn the steering wheel while you observe from a safe position beside the truck. Keep hands away from pinch points, tires, springs, and steering parts.
If you lift the Tacoma, follow the lifting points and procedures in the Toyota owner’s manual. Support the vehicle with correctly rated jack stands before working near or beneath it.
Do not rely on a universal amount of wheel movement as a pass-or-fail test. Play may come from a wheel bearing, tie rod, ball joint, steering gear, or the way the suspension is loaded. Any clear knock or looseness should be traced by a qualified person using the correct procedure.
5. Check Modifications and Recent Work
If the truck has a lift kit, spacer, aftermarket upper control arm, replacement coilover, oversized tire, skid plate, or other modification, inspect the installed parts and nearby contact points.
Review the kit manufacturer’s installation instructions and required follow-up checks. Hardware that was recently disturbed deserves special attention, but it must still be tightened to the correct specification and in the correct suspension position.
6. Test Drive Under Controlled Conditions
Choose a safe, low-traffic route and keep speeds low. Compare straight bumps, gentle turns, an angled entrance, and smooth pavement. Avoid aggressive steering, hard braking, off-road obstacles, or repeated testing when the truck shows a safety-related symptom.
Document the results. A technician may use chassis microphones or other diagnostic equipment to identify the source while the vehicle is moving.
Pro Tip: Record a short video or voice note immediately after the noise occurs. Include the road condition, speed, steering position, outside temperature, load, and whether you were braking or accelerating. Consistent details make intermittent noises easier to reproduce.
Effective Solutions for Resolving Clunking Noises

The correct repair depends on the confirmed source. Tightening random bolts, replacing common parts, or spraying lubricant around the suspension may hide the noise without correcting the problem.
[Amazon Products Picked for You]

Step-by-step procedures written from a complete teardown and rebuild, giving you the confidence to tackle repairs at any skill level.
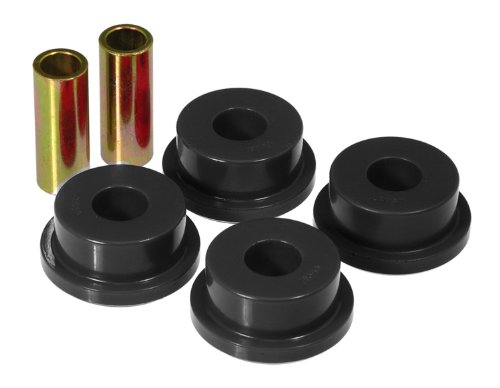
Precision fabrication assures perfect fit

COMPATIBLE WITH: 1995-2004 Toyota Tacoma 4WD, 1998-2004 Toyota Tacoma RWD; Power Steering; Pre Runner Submodel
Tighten Loose Hardware Correctly
Loose shock, coilover, sway bar, control arm, skid plate, or accessory hardware can create a clunk. Use the exact Toyota or component-manufacturer procedure, torque value, fastener condition, and tightening position.
Do not reuse a one-time-use fastener when the service procedure requires replacement. Avoid tightening a rubber-bushed joint with the suspension hanging if the procedure requires normal ride height.
Replace Worn or Damaged Components
Replace a component when inspection confirms torn rubber, excessive joint movement, internal shock damage, broken hardware, or structural damage. Related parts on the opposite side should also be inspected because they have experienced similar mileage and conditions.
Repairs involving tie rods, control arms, ball joints, ride height, or other alignment-related parts may require a wheel alignment afterward.
Use Lubricant Only Where Approved
Apply lubricant only when Toyota or the component manufacturer specifies a serviceable point and compatible product. Do not coat brake parts, tires, sealed ball joints, sealed tie-rod ends, or rubber bushings with an unapproved spray.
A temporary reduction in noise after spraying a part does not prove that the part is safe or serviceable.
Correct Body and Accessory Movement
Secure loose spare-tire hardware, bed accessories, skid plates, heat shields, steps, hitch parts, tailgate hardware, or hood components using the proper fasteners and adjustment procedure.
Body mount problems require careful inspection because changing mount position, adding washers, or altering bushings without an approved repair can affect body alignment and isolation.
Review Recalls and Service Information
Search your VIN through the Toyota recall portal and the NHTSA recall database. A year-and-model search can also display manufacturer communications and investigations.
One relevant example is NHTSA Recall 25V-656, which covers certain 2025 Tacoma and Tacoma Hybrid vehicles with affected front drive-shaft CV-joint components. Toyota reported that the affected ball cage can deform or break and restrict steering rotation; some field reports involved popping or grinding. A noise alone does not prove that the recall applies, so check the VIN rather than diagnosing the condition by sound.
A recall lookup does not diagnose every clunk, and it may not display repaired recalls, very old campaigns, or some recently announced actions. Review the truck’s service records and consult a Toyota dealer when the history is unclear.
Preventing Future Clunking Noises
You cannot prevent every bushing, joint, or shock from wearing, but routine inspection can catch movement before it becomes severe.
- Inspect after impacts and off-road use. Check for bent shields, damaged mounts, tire contact, packed debris, and loose accessories after hard trail use or a pothole impact.
- Follow up after suspension work. Complete any torque recheck or alignment required by Toyota or the aftermarket component manufacturer.
- Watch protective boots. A torn joint boot can allow contamination and accelerate wear.
- Maintain tire pressure and alignment. Correct pressure and alignment support predictable handling and can reveal uneven wear, although they do not directly repair a mechanical clunk.
- Keep records. Note when the noise began, recent repairs, modifications, impacts, towing, and changes in tire size or load.
- Use model-specific maintenance information. Review the manual for your year and configuration rather than relying on a general torque chart.
Why Regular Suspension Maintenance Matters
Suspension and steering parts control wheel position, tire contact, ride movement, and directional stability. Early inspection can separate a minor loose shield from a worn joint that affects safe handling.
| Maintenance Task | Why It Helps |
|---|---|
| Inspect boots, bushings, links, springs, and mounts | Reveals visible damage, contamination, contact, or movement |
| Check disturbed fasteners to the correct specification | Reduces the risk of movement after repair or modification |
| Inspect tires and alignment | Highlights uneven loading, rubbing, or steering changes |
| Check recalls and service history | Identifies open safety actions and previous related work |
| Address new noises promptly | Prevents continued movement from damaging nearby parts |
Maintenance does not mean spraying every joint or routinely retightening untouched factory hardware. It means following the inspection and service procedures that apply to your Tacoma’s year, drivetrain, suspension, and installed equipment.
Tacoma Owners Share Their Experiences

Owner forums can help generate a checklist of areas to inspect on similarly configured trucks. Examples discussed by owners include sway bar hardware, shock hardware, body mounts, leaf-spring contact, skid plates, hood movement, and loose aftermarket parts.
Community reports remain anecdotal. One owner’s successful repair does not prove that your truck has the same fault, even when the sound seems identical.
Temperature-related reports also vary. Rubber, grease, plastic, and metal clearances change with temperature, so a sound may increase, decrease, or remain unchanged. Record the pattern and use it as one clue rather than a final diagnosis.
The most useful owner report matches your Tacoma’s model year, suspension configuration, modifications, operating condition, and confirmed repair. A similar noise alone is not enough.
When to Seek Professional Help for Clunking Noises
Professional diagnosis makes sense when the sound persists after basic checks, cannot be reproduced safely, or involves steering, braking, wheel attachment, structural parts, or the driveline.
Signs of Serious Issues
Arrange prompt inspection when you notice any of the following:
- Loose, delayed, or inconsistent steering
- The truck pulls, wanders, or changes direction over bumps
- A wheel appears tilted or has obvious looseness
- Severe vibration develops through the steering wheel or floor
- Braking feel, pedal travel, or stability changes
- A tire rubs a suspension or body part
- A spring, control arm, mount, or bracket appears cracked or bent
- The clunk becomes rapidly louder or more frequent
- Fluid leaks from a shock or other nearby component
Do not continue a test drive simply to reproduce a noise when the truck no longer feels stable.
When DIY Isn’t Enough
A shop can load individual joints, measure movement, inspect the truck on a lift, verify torque, and use chassis microphones during a road test. These methods often locate intermittent clunks that are difficult to find in a driveway.
| Situation | Recommended Action |
|---|---|
| Persistent clunk with no visible cause | Schedule a suspension, steering, body, and driveline inspection |
| Noise started after a lift or suspension repair | Return to the installer with the kit instructions and alignment record |
| Handling or braking changed | Stop driving and arrange immediate inspection |
| Several visits have not found the cause | Seek a second opinion from a technician experienced with Tacoma suspension and modifications |
| Possible recall or campaign | Check the VIN and contact a Toyota dealer |
Frequently Asked Questions
Why does my Tacoma make a clunking noise when I go over bumps?
Common possibilities include sway bar links, control arm bushings, ball joints, shock or coilover mounts, body mounts, rear spring or suspension-link hardware, skid plates, and loose cargo or accessories. The correct diagnosis depends on whether the sound comes from the front or rear and whether it also occurs while turning, braking, or accelerating.
How do I know if my Tacoma wheel bearing is bad?
A failing wheel bearing often produces a hum, growl, roughness, or vibration that changes with vehicle speed and sometimes with steering load. A single clunk only when crossing bumps is more likely to involve suspension, steering, brake, body, or accessory hardware. Have any wheel looseness inspected promptly.
What year was the worst year for Toyota Tacoma suspension problems?
No single model year can reliably be called the worst for every owner or problem. Complaint totals, recalls, suspension designs, production volume, maintenance, and modifications differ. Check the specific truck’s VIN, service history, inspection results, and current Toyota and NHTSA records instead of relying on a broad model-year label.
How do you diagnose a suspension clunk?
Remove loose cargo, identify when and where the sound occurs, inspect visible bushings and hardware, look for contact marks, and reproduce the noise on a controlled route. Use safe lifting equipment when needed and follow model-specific procedures. A shop can use chassis microphones and loaded-joint tests when the source remains unclear.
Why does my Tacoma clunk when I brake or accelerate?
A clunk during braking or acceleration can come from a control arm bushing that allows fore-aft movement, driveline play, an engine or transmission mount, or loose mounting hardware. Note whether the noise is felt through the steering wheel, pedal, seat, or floor and whether it also occurs when shifting between Drive and Reverse.
Can I keep driving my Tacoma when it clunks over bumps?
A minor loose shield may be harmless, but the same sound can come from a steering or suspension joint. Stop driving if the truck has loose steering, pulling, severe vibration, braking changes, wheel movement, tire rubbing, or visible damage. Otherwise, avoid demanding driving and arrange an inspection soon.
Conclusion
A clunking Toyota Tacoma needs a process, not a guessed part. Begin with cargo, spare-tire, tailgate, hood, skid-plate, and accessory checks. Then compare the sound with bumps, turns, braking, acceleration, and road speed before inspecting suspension and steering components.
Identify the suspension configuration fitted to your model year, especially on 2024-and-newer trucks, and check the VIN for applicable recalls before assuming another Tacoma owner’s repair applies to yours. Use the correct manual, lifting points, torque specifications, and service procedures for your exact truck. Stop driving when the clunk comes with steering, braking, vibration, wheel, or structural symptoms.
Sources
- Toyota Manuals and Warranties — model-specific owner’s manuals, maintenance information, and warranty resources
- Toyota Technical Information System — official Toyota repair procedures, service information, and technical publications
- Toyota Safety Recall Lookup — VIN-based Toyota recall and service-campaign information
- National Highway Traffic Safety Administration Recall Database — recalls, investigations, complaints, manufacturer communications, and VIN-based recall information, including NHTSA Recall 25V-656 where applicable
- NHTSA Report a Safety Problem — official reporting portal for suspected vehicle safety defects
