Your Toyota Camry’s CV axle transfers torque from the transaxle or differential to a driven wheel while the suspension moves and, at a front steering axle, while the wheel turns. Clicking in turns, grease around a boot, clunking under load, or acceleration-related vibration can point to a problem, but tires, wheel bearings, mounts, brakes, and suspension parts can create similar symptoms.
Quick Answer
A Toyota Camry CV axle sends power to a driven wheel through inner and outer constant-velocity joints. Common warning signs include clicking during turns, grease from a torn boot, clunking as load changes, and vibration that worsens during acceleration. Replace parts only after inspection confirms the axle or joint is actually faulty.
Key Takeaways
- The outer joint handles steering angle; the inner joint usually allows plunge movement as the suspension travels.
- Clicking, clunking, grease leakage, and load-related vibration deserve inspection, but none proves axle failure by itself.
- A clean, quiet joint with a newly damaged boot may be repairable; a noisy, binding, contaminated, or loose joint usually needs joint or axle replacement.
- Replace the failed side unless inspection confirms a comparable fault on another driven axle.
- Use the maintenance guide and service information for your exact Camry year, drivetrain, and market.
Last reviewed for accuracy: July 13, 2026.
Understanding the Importance of Your Toyota Camry’s CV Axle

A CV axle, also called a drive axle, half-shaft, or sideshaft, links the transaxle or differential to a driven wheel. Front-wheel-drive Camrys use front CV axles. Some all-wheel-drive versions also have driven rear half-shafts and other driveline components, so part selection and inspection points must match the vehicle identification number.
CV Axle vs. CV Joint vs. CV Boot
- CV axle: the complete shaft assembly that carries torque to a wheel.
- CV joint: the articulated joint at each end of the shaft that allows movement while transmitting torque.
- CV boot: the flexible cover that holds grease around the joint and keeps dirt and water out.
Each sideshaft usually has two joints connected by a shaft. GKN Automotive’s sideshaft overview describes a typical arrangement with a fixed joint at the wheel end and a plunging joint at the gearbox end. The outer joint accommodates steering and suspension angle, while the inner joint changes the axle’s effective length as the suspension moves.
The joints are packed with grease and sealed by flexible boots. When a boot splits or a clamp loosens, grease can escape and dirt or water can enter. That contamination can turn a small boot defect into joint wear.
A CV axle must transfer torque smoothly while the suspension moves and, at a steering axle, while the wheel changes direction.
Symptoms Indicating Your CV Axle Might Be Failing
Pay attention to when the noise or vibration appears. The driving condition often provides a better clue than the sound alone.
| Symptom | What It May Suggest | Best Next Step |
|---|---|---|
| Repeated clicking or popping during a tight turn | Outer CV-joint wear, especially when the sound repeats under light acceleration | Inspect the outer boots and road-test the vehicle; do not identify the failed side from turn direction alone |
| Clunk or shudder when accelerating, decelerating, or shifting between drive and reverse | Inner-joint play, although mounts, suspension parts, and driveline backlash can feel similar | Request a controlled road test and under-vehicle inspection |
| Vibration that becomes stronger under acceleration | A worn inner joint, bent shaft, or axle runout | Rule out tires, wheels, bearings, and mounts before replacing the axle |
| Grease on the inside of a wheel, strut, control arm, underbody, or splash shield | A split boot or loose boot clamp | Repair promptly and inspect nearby brake parts for contamination |
| Binding, banging, a displaced shaft, or loss of propulsion | Severe joint, shaft, spline, or retaining-hardware damage | Stop driving and arrange professional inspection or towing |
Warning: Do not keep driving if the axle binds, strikes nearby parts, causes severe vibration, appears displaced, contaminates brake components with grease, or no longer delivers normal propulsion. A badly damaged joint or shaft can separate or damage surrounding components.
What Else Can Cause Similar Noise or Vibration?
CV axle symptoms overlap with several common Camry problems. Replacing an axle based only on a vibration or clunk can waste money and leave the real fault unfixed.
- Tire or wheel imbalance: usually creates a speed-related vibration that may not change much with throttle position.
- Wheel bearing wear: often causes humming or growling that changes as vehicle load shifts during a turn.
- Engine or transmission mounts: can cause a clunk or shake when shifting between drive and reverse or when torque changes.
- Ball joints, control-arm bushings, or tie rods: may produce knocks, looseness, or steering changes over bumps.
- Brake or splash-shield contact: can create scraping or rotational noise near a wheel.
- Transaxle, transfer-case, or differential concerns: may cause whine, leakage, or driveline play that feels like an axle problem.
A technician can compare the symptom during coasting, acceleration, braking, and turning, then inspect the boots, shaft condition, joint play, wheel bearings, mounts, suspension, and related driveline components.
Note: The direction of a turn does not reliably identify which CV joint is bad. Sound can travel through the body, and weight transfer changes several components at once. Confirm the side by inspection and a repeatable road-test result.
Common Causes of CV Axle Failure
A damaged boot is one of the most important causes because it removes the joint’s protection. GKN Automotive’s driveshaft-boot guidance describes the sealing system as a major factor in driveline life and emphasizes correct fit and material.
- Cracked, torn, or loose boots: allow grease loss and contamination.
- Impact damage: road debris, potholes, collision damage, or improper handling during repairs can damage a boot or bend a shaft.
- Heat and age: repeated flexing and temperature changes can harden or split boot material.
- Excessive joint angle: nonstandard ride-height changes or damaged suspension parts can force a joint outside its intended range.
- Hard launches and abrupt traction changes: add torque shock to already worn joints.
- Installation errors: an incorrect axle, damaged seal, reused one-time hardware, poor spline engagement, or improper fastener torque can shorten service life.
Normal use does not create a predictable failure mileage. A protected, correctly installed joint may last a long time, while a torn boot can shorten its life quickly.
Essential Components of Your CV Axle
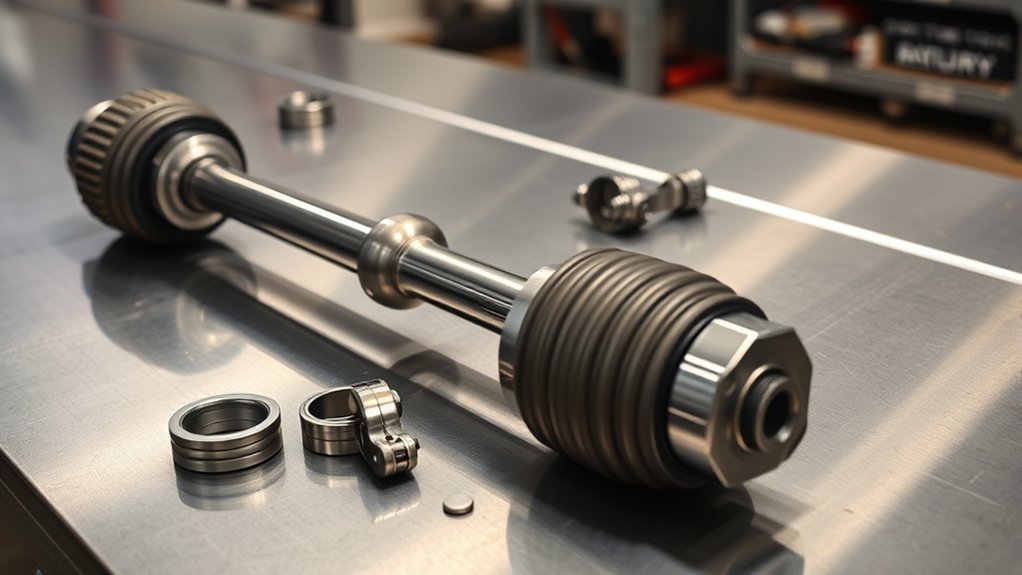
The exact joint design varies, but an axle assembly normally includes an inner joint, outer joint, connecting shaft, boots, clamps, grease, splines, retaining hardware, and a hub-side nut or bolt.
Inner CV Joint Function
The inner joint connects the axle to the transaxle or differential. In many applications, it is a plunging joint that allows the axle’s effective length to change as the suspension rises and falls. GKN Automotive’s CV-joint overview explains this plunge function and common fixed and plunging designs.
Wear in the inner joint can cause shudder or vibration under acceleration, but those symptoms still require comparison with tire, mount, bearing, and driveline faults.
Outer CV Joint Structure
The outer joint connects to the wheel hub and must transfer torque through a wide steering angle. Many passenger-car outer joints use a fixed ball design with an inner race, outer housing, cage, and ball bearings. Joint construction is not identical across every Camry generation or replacement axle.
| Component | Function | Common Concern |
|---|---|---|
| Outer housing and inner race | Provide tracks that guide the joint’s rolling elements | Pitting or track wear can create clicking |
| Ball bearings and cage | Transfer torque while allowing articulation | Wear or damage can cause play, noise, or binding |
| Boot and clamps | Keep grease in and contamination out | Cracks, tears, loose clamps, or grease leakage |
| Splines and hub fastener | Connect the axle to the hub and transaxle or differential | Damage, poor engagement, or incorrect torque can affect fit and bearing load |
How to Inspect a Camry CV Axle Safely
You can perform a basic visual check without disassembling the axle. This does not replace a professional diagnosis when noise, vibration, looseness, or grease leakage is present.
At a Glance
| Time Required | About 10–20 minutes for a basic visual check |
| Difficulty | Easy for visible boots; professional inspection is needed for joint play, runout, and internal wear |
| Tools Needed | Flashlight, gloves, wheel chocks, and a clean cloth |
| Cost | No parts cost for a visual check; professional diagnostic charges vary by shop and location |
- Park on level ground, switch the vehicle off, set the parking brake, chock a wheel, and let hot components cool.
- Use a flashlight to inspect each visible boot. Look between the folds and around both ends for cracks, splits, punctures, or loose clamps.
- Check the inner wheel, strut, control arm, underbody, splash shield, and nearby brake parts for fresh grease.
- Compare the driven-axle boots for one that looks twisted, collapsed, swollen, or recently disturbed.
- Look for a visibly bent shaft, polished contact marks, damaged splines, or a boot rubbing another component.
- During a slow, controlled test in a safe area, listen for repeatable clicking on turns or clunking as load changes. Stop if the vehicle binds, shakes severely, or steering feels unstable.
- Have the vehicle raised and inspected professionally if visibility is limited or any symptom is present.
Note: Never crawl under a vehicle supported only by a jack. On a hybrid Camry, do not touch orange high-voltage cables or components. Axle removal also involves high-torque fasteners, hub and suspension connections, possible fluid leakage, and model-specific procedures.
[Amazon Products Picked for You]

[Vehicle Fitment]: This CV Axle Shaft Fits for Toyota Camry L4 2.5L 2012 2013 2014 2015 2016 2017 ----GAS Only, Not for Hybrid Model

[Vehicle Fitment]: Compatible with Toyota Camry 2002-2009 L4 2.4L Gas (Except Hybrid Models), Highlander 2001-2007 L4 2.4L (FWD), Solara 2004-2006 L4 2.4L, Solara 2007-2008 L4 2.4L (Manual Transmission)---Supplied with Standard Neoprene Outboard Boot
Top Maintenance Tips for Extending Your CV Axle’s Lifespan

Toyota’s maintenance guidance focuses on inspection rather than a universal axle-replacement mileage. In the U.S. 2026 Camry Warranty and Maintenance Guide, drive-shaft boots appear at 15,000-mile intervals in the normal maintenance chart and at every 5,000-mile interval when the vehicle is driven primarily on dirt or dusty roads. Toyota also tells technicians to check boots and clamps for cracks, deterioration, and damage. Schedules differ by year and market, so use the guide for your exact vehicle.
- Follow the correct schedule: use the guide for your Camry’s exact model year and market.
- Inspect boots during routine service: tire rotations, brake work, and scheduled maintenance provide convenient opportunities.
- Act on grease leakage early: a clean, quiet joint may still be repairable if contamination has not damaged it.
- Keep suspension and mounts healthy: worn supporting parts can increase movement, vibration, or joint angle.
- Avoid impact and incorrect lifting: never place a jack or stand against an axle shaft or boot.
- Use the correct replacement part: axle length, spline count, retaining method, ABS-related features, and drivetrain fitment can differ.
Pro Tip: Ask the technician to show you the torn boot, grease pattern, looseness, shaft damage, or repeatable road-test symptom before approving an axle. That helps distinguish a confirmed failure from a guess based on vibration alone.
Boot Repair Versus Complete Axle Replacement
A torn boot does not automatically mean the complete axle must be replaced. Toyota’s 2026 guide says deteriorated or damaged drive-shaft parts should be replaced and the grease repacked if necessary by a qualified technician. The right repair depends on how long the boot has been open, whether contamination entered, and whether the joint already makes noise or has play.
| Condition | Likely Repair Direction |
|---|---|
| Small boot defect found early; grease is clean; joint is quiet and smooth | A model-specific boot kit, cleaning, inspection, and correct grease may be reasonable |
| Boot has been open; dirt or water is present; grease is contaminated | Joint or complete axle replacement is usually safer than boot-only service |
| Clicking, binding, measurable play, or load-related shudder is confirmed | Replace the worn joint or complete axle assembly |
| Shaft is bent, splines are damaged, or the axle is incorrect for the vehicle | Replace the complete axle and inspect related hub, seal, and suspension parts |
A split-style universal boot may look convenient, but a joint-specific boot installed with the correct grease and clamps is the preferred repair when available. GKN recommends a replacement boot developed for the specific joint.
[Amazon Products Picked for You]
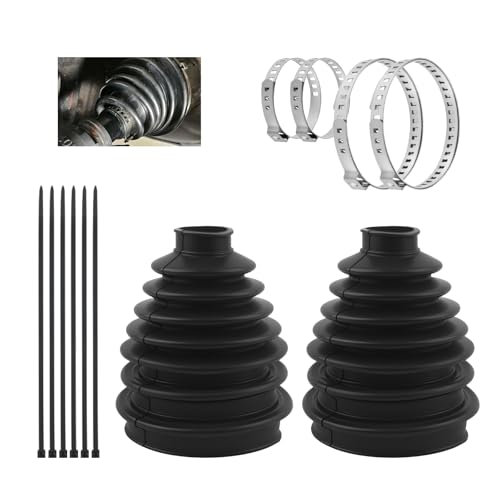
Dust and Leak Protection: This axle boot precisely covers the CV joint part, effectively blocking dust, sand, and other debris from entering the interior. It also provides a tight seal to avoid internal lubricant leakage, thereby avoiding abnormal wear that could cause gaps

Specifications: Axle boot is 4.72 inch in length and small port inside diameter is 0.78 inch, and contains three different calibers: 2.55 inch/65 mm, 3.14 inch/80 mm and 3.54 inch/90 mm. Please check the size data you need before purchase

Fits shaft size 19mm-24mm
When to Replace One or Both CV Axles
Replacing both axles is not an automatic rule. Each driven axle should be diagnosed separately. A sound axle does not become defective simply because another one failed.
[Amazon Products Picked for You]

Vehicle Compatibility: This CV Axle Shaft fits 2012-2017 for Toyota Camry 2.5L GAS ONlY------NOT for Hybrid model

[Vehicle Fitment]: Compatible with Toyota Camry 2012-2014 L4 2.5L GAS, Camry 2015 L4 2.5L GAS (For Models Built Before 01/2015), Camry 2016-2017 L4 2.5L GAS --- Only For Standard Gas Model; Not For Hybrid Models
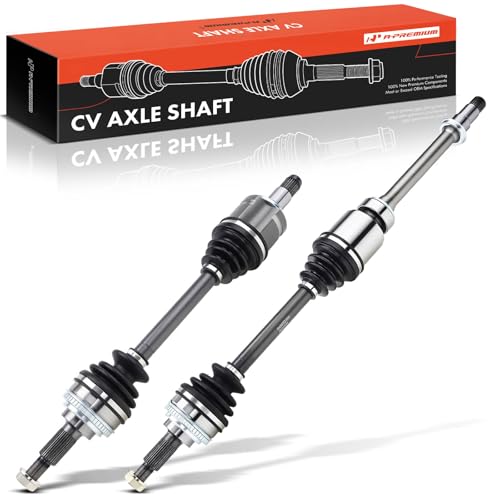
[Vehicle Fitment]: Compatible with Lexus ES300 1997-2001 V6 3.0L; Compatible with Toyota Avalon 1997 V6 3.0L (Plug-in Style Inboard Housing), Avalon 1998-2004 V6 3.0L, Camry 1997-2001 V6 3.0L (Automatic Transmission, Plug-in Style Inboard Housing), Sienna 1998-2003 V6 3.0L, Solara 1999-2001 V6 3.0L (Automatic Transmission, Plug-in Style Inboard Housing), Solara 2002-2003 V6 3.0L (Automatic Transmission) --- Not for Bolt-on Style Inboard Joint
Signs of Axle Wear That Support Replacement
- Repeatable clicking traced to one outer joint during turns
- Confirmed inner-joint shudder or clunk under load
- Binding, excessive play, or visible physical damage
- A boot failure with contaminated grease and joint wear
- A bent shaft, damaged splines, or failed retaining hardware
Is There a Recommended Replacement Interval?
No single mileage applies to every Toyota Camry CV axle. Toyota publishes inspection schedules, not a universal preventive-replacement interval. Use the Toyota manuals and warranties portal to find the maintenance guide for your model year, and replace an axle when inspection and symptoms confirm damage.
When Replacing Both Axles May Make Sense
Replacing more than one axle can be reasonable when both boots are damaged, both joints show wear, multiple shafts were harmed by the same impact, or a technician confirms comparable faults. It may also be considered during a major restoration when several original assemblies are clearly deteriorated. Age alone is not enough evidence.
After replacement, the technician should verify axle seating, seal condition, fluid level where applicable, required fastener replacement, specified nut or bolt torque, ABS-wire clearance, and a quiet road test. Alignment needs depend on which suspension or steering components were loosened and whether the vehicle pulls, the steering wheel is off-center, or tire wear is abnormal.
Questions to Ask Before Approving CV Axle Repair
- Which axle and which joint failed? Ask for the exact side and whether the concern is the inner joint, outer joint, boot, shaft, splines, or retaining hardware.
- What evidence confirms it? Look for a torn boot, contaminated grease, measurable play, visible damage, or a repeatable road-test symptom.
- What similar causes were ruled out? Tires, wheels, bearings, mounts, brakes, suspension parts, and driveline components should be considered.
- Is boot service still reasonable? A clean, quiet joint found early may not require a complete axle.
- What replacement part will be used? Confirm correct VIN fitment, new or remanufactured condition, warranty coverage, and whether seals or one-time-use hardware are included.
- What checks follow installation? Ask about fluid level, seal leakage, fastener torque, ABS-wire routing, road testing, and alignment only when needed.
Can You Drive With a Bad CV Axle?
There is no safe universal distance for driving with a suspected CV axle problem. A newly noticed boot defect may not yet have damaged the joint, but contamination and wear can progress unpredictably. Avoid hard acceleration and tight turns, and arrange inspection promptly.
Do not drive when there is severe vibration, binding, banging, unstable steering, a visibly displaced shaft, loss of normal propulsion, or grease on brake components. Arrange towing when the vehicle cannot be moved smoothly and safely.
Recall Check: For vehicle-specific safety campaigns, enter the VIN at the NHTSA recall lookup and Toyota’s owner portal. A general article cannot determine whether a particular Camry has an open recall or service campaign.
Related Guides
Frequently Asked Questions
What is the CV axle responsible for?
It transfers torque from the transaxle or differential to a driven wheel. Its inner and outer joints let it keep transferring power while the suspension moves and, at a front steering axle, while the wheel turns.
What happens when a CV axle goes bad?
You may hear clicking on turns, feel a clunk or shudder under load, notice grease from a torn boot, or experience vibration. Severe damage can cause binding, surrounding-part damage, or loss of normal propulsion.
How long do Toyota Camry CV axles last?
Toyota does not publish one universal lifespan for every Camry axle. Service life depends on boot condition, contamination, road impacts, installation quality, suspension condition, and driving load. Inspect the axle boots according to the guide for your exact model year.
How often should Camry CV axle boots be inspected?
Follow the maintenance guide for the exact year and market. As one current example, the U.S. 2026 Camry guide lists normal drive-shaft-boot inspections at 15,000-mile intervals and every 5,000 miles when the vehicle is driven primarily on dirt or dusty roads.
Does a bad CV axle affect the transmission?
The axle connects directly to the transaxle or differential, but an axle fault does not automatically mean the transmission is failing. A broken or disengaged axle can prevent normal propulsion, and poor installation can damage a seal or cause fluid leakage.
Can you replace only the CV boot?
Yes, when the damage is found early and the joint remains clean, quiet, smooth, and unworn. If dirt entered or the joint clicks, binds, or has excess play, replacing the joint or complete axle is usually the better repair.
Do both CV axles need replacement at the same time?
No. Replace the failed axle unless inspection shows a real problem on another driven axle. Replacing more than one makes sense only when multiple assemblies are damaged, worn, contaminated, or affected by the same event.
Can a bad CV axle cause highway-speed vibration?
It can, especially when an inner joint or shaft causes vibration under acceleration. However, tire balance, wheel damage, bearings, and mounts are common alternatives, so highway-speed vibration alone does not confirm an axle failure.
Conclusion
Your Toyota Camry’s CV axles are durable, sealed driveline parts, but their boots need scheduled inspection. Treat clicking, grease leakage, clunking, and acceleration-related vibration as reasons to investigate rather than proof by themselves. Repair a clean boot problem early, replace a worn joint or axle when diagnosis confirms it, and replace additional axles only when they also show a real fault.
Sources
- Toyota 2026 Camry Warranty and Maintenance Guide — drive-shaft-boot inspection intervals, damage checks, grease repacking, and qualified-technician guidance.
- Toyota Manuals and Warranties — official model-specific owner and maintenance information.
- GKN Automotive: Sideshafts — typical fixed outer joint, plunging inner joint, and shaft configuration.
- GKN Automotive: Constant Velocity Joints — joint movement, articulation, and common designs.
- GKN Automotive: Driveshaft Boots — boot sealing, fit, materials, and replacement guidance.
- National Highway Traffic Safety Administration Recall Lookup — VIN-based safety recall checking.
