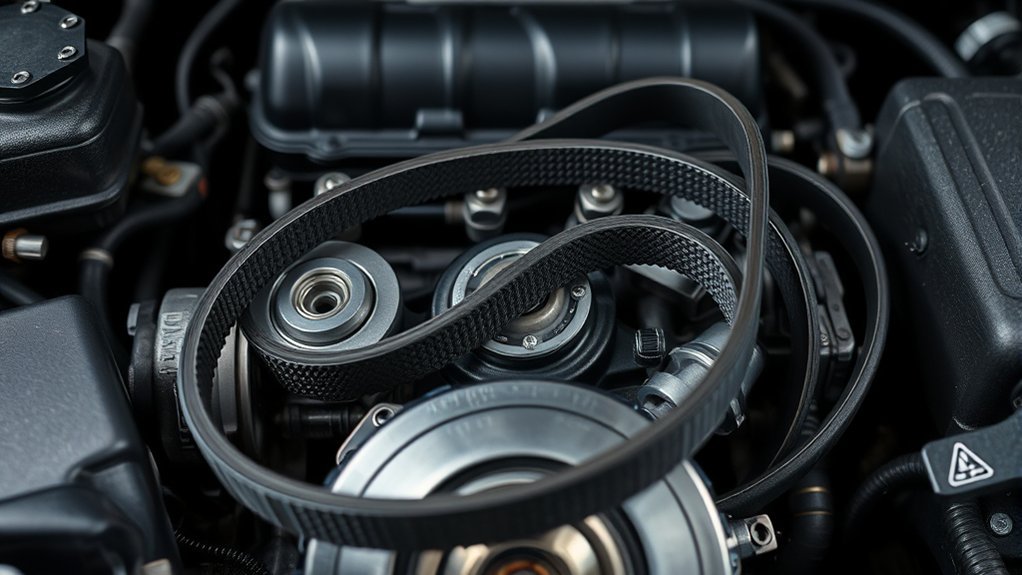
A Toyota Camry serpentine belt replacement is not a one-procedure-fits-all job. Toyota service information confirms a serviceable V-ribbed belt on 2018–2024 U.S. gasoline Camrys with the 2.5L A25A-FKS and 3.5L 2GR-FKS engines, while the 2025 and 2026 U.S. Camry lineups are hybrid-only and should not be serviced with those gasoline-engine belt procedures. Identify the model year, VIN, engine, market, and powertrain before buying a belt or moving a tensioner.
Last updated: September 22, 2026 — model-year scope and 2018–2024 gasoline-engine service details rechecked against Toyota information.
Quick Answer
First confirm that your Camry actually uses a serviceable external drive belt. For a belt-equipped Camry, use routing and service information for the exact year, engine, market, and VIN; photograph the original route; identify the tensioning method; and inspect the pulleys before removal. For 2025–2026 U.S. Camrys, use hybrid-specific Toyota service information rather than an older gasoline-engine serpentine-belt procedure.
Key Takeaways
- Camry belt routing, belt size, tensioning method, access, and driven accessories vary by model year, engine, market, and powertrain.
- Confirm fitment with the VIN, engine information, and official repair documentation before buying parts.
- Toyota service information shows automatic-tensioner V-ribbed belt systems on 2018–2024 U.S. gasoline A25A-FKS and 2GR-FKS Camrys; other configurations must be verified separately.
- Inspect the tensioner, idlers, pulley alignment, accessory bearings, and fluid leaks instead of replacing only the belt.
- Keep your hands, tools, clothing, hair, and jewelry away from the drive system whenever the engine could start.
Model-year note: Toyota confirms that the 2025 and 2026 U.S. Camry lineups are exclusively hybrid. The 2018–2024 gasoline A25A-FKS and 2GR-FKS belt procedures in Toyota repair information do not automatically apply to those newer hybrid-only cars. Confirm the VIN-specific service information before ordering or removing any belt.
Warning: On a hybrid, a quiet engine does not necessarily mean the vehicle is safely shut down. Confirm that the READY indicator is off, keep the key or remote away from the work area, and follow the shutdown instructions in the applicable Toyota manual.
Does Your Toyota Camry Have a Serpentine Belt?
Start with the powertrain, not the badge on the trunk. The Camry name covers several engines and hybrid systems, so a routing diagram or tool size from one generation can be wrong for another.
| Camry Configuration | What Toyota Service Information Shows | What You Should Do |
|---|---|---|
| 2025–2026 U.S. Camry | Toyota sells these model years in the U.S. only with the hybrid powertrain. | Do not apply the 2018–2024 gasoline belt procedure. Use VIN-specific hybrid service information before ordering a belt. |
| 2018–2024 U.S. 2.5L gasoline A25A-FKS | Toyota repair information includes a V-ribbed belt, automatic tensioner, crankshaft pulley, generator, and compressor pulley. | Use the A25A-FKS procedure for the exact production configuration. Toyota’s procedure uses a 5 mm hex wrench to secure the released tensioner during belt service. |
| 2018–2024 U.S. 3.5L gasoline 2GR-FKS | Toyota repair information includes a V-ribbed belt, automatic tensioner, water-pump pulley, idler, generator, crankshaft pulley, and compressor pulley. | Use the 2GR-FKS routing and access procedure; Toyota specifies right-front wheel/fender-apron access and a 5 mm hex wrench to secure the tensioner. |
| Hybrid or older Camry not listed above | Accessory layouts and belt systems vary by engine and generation. | Use the VIN, engine code, market, and Toyota repair information to determine whether a serviceable belt exists and how it is tensioned. |
This distinction matters because a search result for “Camry serpentine belt” can mix gasoline and hybrid procedures from different generations. If the service information and the physical pulley layout do not match, stop and verify the vehicle configuration.
What Is a Serpentine Belt and What Does It Do in a Camry?

A serpentine belt, also called an accessory drive belt or Micro-V belt, transfers power from the engine’s crankshaft pulley to one or more accessories. The components it drives depend on the Camry’s engine and powertrain.
On a compatible gasoline-engine Camry, an external belt may drive the alternator, air-conditioning compressor, water pump, or another accessory; applicable older generations may also use belt-driven hydraulic power steering. Toyota’s 2018–2024 A25A-FKS service diagram identifies the crankshaft, generator, and compressor in the belt path, while the 2GR-FKS diagram also includes the engine water pump and an idler. Hybrid layouts use different electrically driven systems, so never identify the driven components by the Camry name alone.
Modern automotive Micro-V belts commonly use durable EPDM construction. EPDM belts can wear by losing material from the rib profile without developing the dramatic deep cracks associated with some older belt compounds. A proper inspection therefore covers the ribs, edges, backing, profile depth, and surrounding drive components.
Correct routing is essential. The belt must follow the specified path and sit fully inside each grooved pulley. Its smooth backing normally contacts smooth pulleys. Incorrect routing can reduce pulley contact, interfere with tensioner operation, cause the belt to walk sideways, or, in some layouts, turn a driven component incorrectly.
The correct Camry belt and installation procedure are determined by the vehicle configuration, not by the model name alone.
Confirm Your Camry’s Belt Configuration First
Before opening a parts catalog or moving a tensioner, collect the information that identifies the vehicle accurately:
- Model year
- VIN
- Engine size or engine code
- Gasoline or hybrid powertrain
- Market in which the vehicle was sold
- Any engine or accessory-system modifications
You can usually find the VIN at the lower driver-side windshield or on the driver-door certification label. Use the VIN to confirm the vehicle configuration, then select the applicable year and model through Toyota’s manuals and warranties portal, a Toyota parts catalog, or professional repair information.
Open the hood only after the vehicle is fully shut down. Look for a visible external belt near the side of the engine. Do not confuse an accessory belt with an internal timing chain or a covered timing belt. If the physical layout does not match the repair information, stop and verify the engine and market configuration.
Identify the Belt and Tensioning System
Across Camry generations, you may encounter a conventional serpentine belt with an automatic tensioner, more than one accessory belt, a manually adjusted belt, or another application-specific design. Confirm which system is installed before applying force to any fastener.
Verified 2018–2024 gasoline example: Toyota repair information for both the A25A-FKS 2.5L and 2GR-FKS 3.5L uses an automatic V-ribbed-belt tensioner that can be secured with a 5 mm hex wrench after the tensioner holes are aligned. Access differs by engine, so follow the engine-specific procedure rather than copying a tool direction from another Camry.
- Automatic-tensioner system: Uses a spring-loaded tensioner that is rotated at a designated drive point.
- Manual-adjustment system: Uses an accessory bracket or adjuster to establish belt tension.
- Multiple-belt system: Uses separate belts for different accessories and may require a specific removal order.
- Stretch-fit system: Uses a special elastic belt and installation method rather than a conventional release tensioner.
Note: The numbered replacement procedure below applies only after you have confirmed a conventional automatic-tensioner system. Use the exact Toyota repair procedure for a manually adjusted, multiple-belt, or stretch-fit layout.
When Should You Replace a Toyota Camry Serpentine Belt?
Follow the inspection and maintenance guidance for your specific Camry rather than treating one mileage figure as a universal replacement interval. Toyota’s 2018–2024 2GR-FKS inspection procedure calls for replacement when the V-ribbed belt is cracked, has exposed cords, has chunks missing from the ribs, or has slipped out of the pulley grooves. Replace a contaminated, misfitting, or otherwise damaged belt when the applicable service information calls for it.
Common reasons for replacement include:
- Missing chunks of rib material
- Worn or rounded rib profiles
- Deep cracks that extend across or through the ribs
- Frayed or separated edges
- Glazing or a polished, hardened surface
- Exposed reinforcing cords
- Swelling, softness, or deterioration caused by oil or coolant
- A belt that repeatedly walks toward the edge of a pulley
- Incorrect length, width, rib count, or application
Newer EPDM belts may lose rib material without showing severe surface cracking. Dayco explains that EPDM wear can change a rib groove from a sharper “V” profile toward a more rounded “U” shape as material is lost. A belt-wear gauge recommended by the belt manufacturer can help check rib profile and depth; see Dayco’s serpentine-belt inspection guidance.
A squeal, chirp, grinding sound, or rattling tensioner can indicate a belt-drive problem, but noise does not prove that the belt itself is defective. Inspect the tensioner, idlers, accessory bearings, alignment, and fluid leaks before installing another belt.
A battery or charging warning may appear if a belt-driven alternator stops turning, but the same warning can have electrical causes. Treat it as a reason to stop and diagnose the vehicle, not as proof that the belt is the only failed part.
Warning: If the belt is partly detached, badly frayed, or running off a pulley, switch the vehicle off. Do not reach into the engine compartment while any pulley can rotate.
How to Find the Correct Camry Serpentine Belt Routing
Your Camry may have a routing decal in the engine compartment, but the label may be missing, damaged, or unreadable. Check several model-specific sources before removing the original belt:
- Inspect the engine compartment for an original routing label.
- Check the owner and maintenance information for the applicable year and model.
- Use Toyota repair information selected for the correct VIN and engine.
- Confirm the replacement-belt application in a reliable manufacturer catalog.
- Compare the published diagram with the belt currently installed.
Toyota’s official manuals page provides available owner and maintenance documents after vehicle selection. Detailed service procedures, component locations, and diagrams may be available through the Toyota Technical Information System.
Pro Tip: Take several clear photos of the original routing before touching the tensioner. Capture the crankshaft pulley, tensioner, idlers, and every accessory pulley from more than one angle.
If the existing belt is already missing or appears incorrectly routed, do not copy it. Use verified repair information for the installed engine. If the physical pulley layout still differs from the diagram, stop rather than improvising a route.
Tools, Parts, and Safety Preparation
The correct tensioner drive size, access direction, and removal method vary among Camry engines. A universal 14 mm or 17 mm tool list would be unreliable. Gather the equipment specified by the repair procedure for your vehicle.
Typical supplies include:
- A replacement belt confirmed for the VIN and engine
- A long-handled ratchet, breaker bar, or serpentine-belt tool
- The correct socket or wrench for the designated tensioner drive point
- A flashlight
- Safety glasses and close-fitting work gloves
- A phone or camera for routing photos
- A belt-wear gauge when recommended by the belt manufacturer
- Wheel chocks if a wheel must be removed or the vehicle must be raised
- Rated jack stands if underbody or wheel-well access is required
Park on a firm, level surface, select Park, apply the parking brake, and allow the engine to cool. Keep the key or remote away from the vehicle. Follow Toyota’s shutdown precautions for a hybrid, push-button-start, or remote-start-equipped Camry.
Some configurations may require removal of a wheel, an engine under-cover, or a splash shield. Use only the approved lift points and follow the model-specific removal procedure. Keep every removed fastener organized and reinstall all shields before driving.
Warning: Never place any part of your body beneath a vehicle supported only by a jack. Use correctly rated jack stands on a stable surface, chock the wheels, and stop if you do not have suitable lifting equipment.
Warning: A spring-loaded tensioner can move forcefully. Maintain control of the tool, keep your fingers away from pinch points, and never place your hand between the belt and a pulley.
Toyota Camry Serpentine Belt Replacement: Step by Step
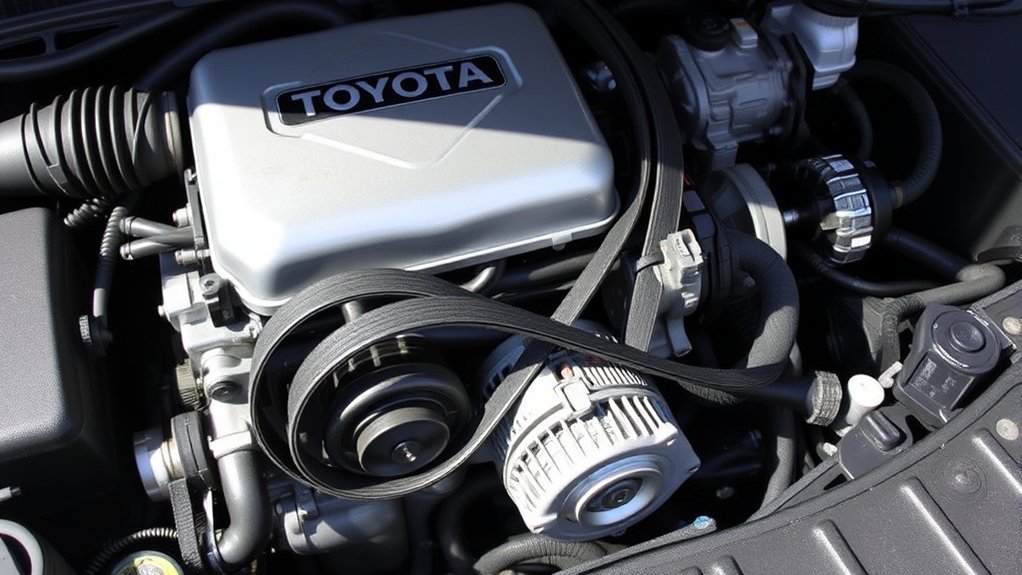
At a Glance
| Time Required | Varies by engine and access. Toyota’s 2018–2024 gasoline procedures can require underbody or right-front wheel-area access before the belt is removed. |
| DIY Suitability | Intermediate. The job requires controlled tensioner handling and may require safe vehicle lifting or wheel-area access. |
| Tools Needed | Model-specific socket or wrench, long-handled ratchet or belt tool, flashlight, safety glasses, routing reference, and safe lifting equipment when required. |
| Cost | Varies by engine, belt supplier, local labor rates, and whether a tensioner, idler, shield, or pulley also requires replacement. |
Procedure Scope: Use these steps only for a Camry confirmed to have a conventional automatic-tensioner accessory belt. Do not use them for a manual-adjustment, stretch-fit, or multiple-belt system unless the applicable repair instructions direct you to do so.
2018–2024 gasoline note: Toyota’s A25A-FKS and 2GR-FKS procedures both secure the released automatic tensioner with a 5 mm hex wrench, but the belt path and access steps differ. The A25A-FKS route identifies the crankshaft, generator, and compressor; the 2GR-FKS route additionally identifies the water-pump pulley and No. 2 idler. Follow the correct engine diagram.
- Verify the application. Match the replacement belt to the VIN, model year, engine, market, and powertrain. Compare its part application, width, rib count, and specified length with reliable catalog information.
- Confirm the routing. Locate the correct diagram and compare it with your underhood photos. Identify the grooved pulleys, smooth pulleys, tensioner, idlers, and driven accessories.
- Prepare the access area. Look for oil, coolant, damaged splash shields, loose wiring, hoses, or anything that could contaminate or contact the belt. Remove only the components specified by the repair procedure.
- Position the tensioner tool. Attach the correct socket, wrench, or belt tool to the designated tensioner drive point. Do not use a nearby pulley bolt unless Toyota’s procedure specifically identifies it for that purpose.
- Release belt tension. Rotate the automatic tensioner in the direction specified for the installed engine. If the Toyota procedure calls for locking the tensioner, align the designated holes and insert the specified holding tool before removing the belt. Move the tensioner only as far as the procedure requires.
- Remove the old belt. Slip it off an accessible pulley while keeping your fingers out of pinch points. Slowly return the tensioner to its resting position.
- Inspect the complete drive system. With the engine off, check the tensioner and accessible idler pulleys for roughness, looseness, wobble, binding, damaged grooves, or misalignment. Do not force an accessory, clutch pulley, or one-way pulley to rotate if the service information does not call for that test. Investigate fluid leaks before fitting the new belt.
- Route the new belt. Follow the verified diagram. Seat each rib inside the matching pulley grooves and place the smooth side against smooth pulleys. Leave one easy-to-reach pulley until last.
- Install the final section. Follow the engine-specific procedure to unload and release the tensioner holding tool, slip the belt over the final pulley as directed, and let the tensioner return under control. Do not let it snap back against its stop.
- Check every pulley. Use a flashlight to confirm that the belt is centered, untwisted, and fully seated. One rib hanging outside a groove can damage the belt within minutes.
An automatic tensioner normally establishes operating tension by itself. Do not increase tension by prying on an accessory, shortening the belt, modifying the tensioner, or moving an accessory bracket unless the applicable repair procedure specifically requires an adjustment.
Use the Toyota repair manual for any fastener torque specifications. Do not guess a torque value or assume that a specification from another engine applies.
Top Errors to Avoid During Serpentine Belt Installation
Avoid these common mistakes:
- Ordering by model name alone: Different Camry engines and powertrains use different parts and drive layouts.
- Assuming every system has an automatic tensioner: Identify the tensioning method before beginning.
- Copying an unverified routing: The old belt may already have been installed incorrectly.
- Using universal tool sizes: Confirm the approved drive point and tool size before applying force.
- Turning the wrong fastener: A pulley mounting bolt is not automatically an approved tensioner drive point.
- Releasing the tensioner suddenly: Let it return slowly to avoid damage or injury.
- Ignoring pulley condition: A seized bearing or misaligned tensioner can ruin a new belt.
- Installing over oil or coolant: Repair the leak and clean the pulleys as directed before fitting another belt.
- Leaving one rib off-center: Inspect every pulley from a clear angle before startup.
- Assuming squeal means “tighten the belt”: Automatic systems require diagnosis, not improvised tension adjustments.
- Working under an unsupported vehicle: A hydraulic jack alone is not safe working support.
The grooved side of a conventional belt should sit in grooved pulleys, while the smooth side should contact smooth pulleys. Follow the verified diagram if the vehicle uses an unusual or double-sided belt.
What to Do After Installing Your Serpentine Belt
Complete a close visual inspection while the vehicle is fully off. Remove every tool, light, socket, rag, and loose object from the engine compartment before performing a running check. Reinstall any wheel, shield, under-cover, or fastener according to the applicable procedure.
Inspect Belt Alignment Thoroughly
Trace the complete belt path with a flashlight. Confirm that each rib is seated in its groove, the belt is centered on every smooth pulley, and no section is twisted.
Look across the pulley faces where possible. A visibly tilted tensioner, damaged pulley flange, loose bracket, or belt positioned near an edge requires correction before startup.
Check Tensioner Functionality Next
With the engine off, inspect the tensioner for looseness, physical damage, corrosion, or a pulley that sits out of line. It should have moved smoothly during installation and returned without sticking.
Do not place a hand, tool, camera, or loose item near the tensioner during a running test. Excessive flutter, repeated bouncing, grinding, or sideways belt movement may indicate a failing tensioner, pulley, accessory, bracket, or alignment problem.
Test Engine Operation Safely
Start the vehicle only after closing out the work area and confirming that nobody is near the rotating drive. Keep your hands, hair, clothing, jewelry, and tools away from all moving components. Observe from a safe position without leaning over the belt.
Switch the vehicle off immediately if the belt walks sideways, slaps, smokes, sheds material, or produces severe noise. Never attempt to guide a moving belt by hand or with a tool.
| Check | What to Confirm |
|---|---|
| Engine Off | The belt is fully seated, correctly routed, and free from twists. |
| Initial Startup | The belt tracks centrally without smoke, severe noise, slapping, or sideways movement. |
| Accessory Check | Applicable belt-driven accessories operate normally without new warning lights. |
| Final Recheck | After shutdown, the belt remains seated and shows no fresh edge damage, dust, or displaced ribs. |
Troubleshooting Problems After Belt Replacement
Persistent Squealing
Squealing may result from contamination, insufficient tension caused by a weak tensioner, a seized accessory, incorrect belt fitment, poor pulley contact, or a belt installed on the wrong route. Do not spray belt dressing on the system. Identify and repair the underlying fault.
Rhythmic Chirping
A chirp that repeats with belt speed often points toward misalignment, damaged pulley grooves, belt-edge contact, debris embedded in a groove, or a pulley that is not running square. Switch the engine off before inspecting closely.
Belt Walks Toward a Pulley Edge
Stop the engine immediately. Check for an incorrectly seated rib, tilted tensioner, loose pulley, damaged bracket, missing spacer, or belt with the wrong width or rib count.
New Belt Fails Quickly
Repeated failure usually means the original cause was not corrected. Inspect for leaking oil or coolant, rough bearings, a seized accessory, misalignment, excessive tensioner movement, damaged pulley grooves, an incorrect replacement part, or missing shields that allow debris into the drive.
Maintaining Your Serpentine Belt for Longevity
Regular inspection helps you find belt-drive trouble before it leaves you stranded. Use the maintenance schedule for your Camry and inspect the belt whenever you notice noise, warning lights, visible damage, fluid leakage, or unusual tensioner movement. For broader service timing, see the site’s Camry service intervals vs. miles driven guide.
Perform Regular Inspections
With the vehicle fully shut down and the engine cool, inspect the visible belt surfaces, edges, and ribs. Rotate the engine only through an approved service procedure when additional belt sections must be viewed. Never perform a close-up inspection while the belt is moving.
Check the surrounding system at the same time:
- Tensioner alignment and physical condition
- Accessible idler-pulley bearings
- Pulley grooves and flanges
- Accessory mounting brackets
- Oil and coolant leaks
- Loose shields, wiring, or hoses near the belt
- Fresh rubber dust or edge debris
Recognize Signs of Wear
Watch for missing rib material, rounded rib profiles, fraying, exposed cords, glazing, swelling, hardened surfaces, edge damage, or contamination. EPDM belts may lose material without showing dramatic cracking, so a belt that looks relatively smooth can still require replacement.
Listen for new chirping, squealing, rattling, slapping, or grinding. Noise should trigger a complete drive-system inspection rather than an automatic belt-only replacement.
Protect the Belt From Fluid Contamination
Oil, coolant, power-steering fluid on applicable older systems, and unsuitable cleaning chemicals can damage belt material or cause slippage. Repair the source of contamination before fitting another belt. Replace a belt that has absorbed fluid, swollen, softened, or changed texture.
What to Do If the Belt Breaks While Driving
If a warning light appears, steering effort changes unexpectedly, the engine temperature rises, or you hear a sudden slapping sound, move to a safe location and switch the vehicle off as soon as traffic conditions allow.
Do not continue driving solely because the engine still runs. Depending on the accessory layout, a broken belt can stop a belt-driven charging system, cooling component, hydraulic steering pump, or another essential accessory.
If an overheating warning appears, shut the engine down and allow the vehicle to cool. Do not open a radiator cap, pressurized coolant cap, or hot cooling system.
Arrange an inspection or tow if you cannot confirm that continued operation is safe. Replacing the belt without finding the reason it broke can lead to another immediate failure.
When to Stop and Get Professional Help
Stop the job and obtain qualified assistance when any of the following applies:
- The vehicle configuration or correct routing cannot be confirmed.
- The system does not have the automatic tensioner assumed by this procedure.
- The tensioner is seized, cracked, tilted, or too forceful to control safely.
- A pulley, bracket, or accessory has visible wobble or looseness.
- Access requires lifting equipment you do not have or cannot use safely.
- The belt repeatedly moves sideways after correct installation.
- Oil or coolant continues to leak into the belt path.
- The vehicle is a hybrid and the required shutdown or service precautions are unclear.
- A new belt produces severe noise, smoke, heat, or immediate edge damage.
A professional diagnosis is usually less expensive than replacing a second belt after an unresolved tensioner, bearing, alignment, or accessory failure.
Frequently Asked Questions
Where is the Toyota Camry serpentine belt routing diagram?
Your Camry may have a routing label in the engine compartment. If it is missing or unreadable, use Toyota documentation or professional repair information selected for the correct model year, engine, market, and VIN. Photograph the original routing before removal when it is known to be correct.
How do you read a serpentine belt part number?
Part-number formats vary among manufacturers. Some encode rib count, belt profile, or approximate length, but decoding the number alone does not prove fitment. Match the belt through a reliable application catalog using the Camry’s VIN, engine, market, and powertrain.
What does a Camry serpentine belt power?
The driven accessories depend on the model year and engine. On a compatible gasoline-engine Camry, an external belt may drive the alternator, air-conditioning compressor, water pump, hydraulic power-steering pump on an applicable older system, or another accessory. Hybrid and newer electric-accessory layouts can be different.
Does the direction of a serpentine belt matter?
Correct routing and surface orientation matter most. The ribbed surface must sit in matching grooved pulleys, and the smooth surface normally contacts smooth pulleys. Follow any arrows or special instructions printed by the belt manufacturer. When reinstalling a serviceable used belt, keep its previous running direction when possible.
Do all Toyota Camrys have the same serpentine belt?
No. Belt size, rib count, routing, tensioning method, number of belts, access, and accessory layout can vary by model year, engine, market, and powertrain. Confirm the replacement part with the VIN before purchasing it.
Should you replace the tensioner with the belt?
Not automatically, but you should inspect it carefully. Replace or diagnose the tensioner if it binds, sits out of alignment, has a rough or loose pulley, cannot maintain belt control, shows excessive movement, or has physical damage.
Does a 2025 or 2026 Toyota Camry use the same serpentine-belt procedure as an older Camry?
No. Toyota sells the 2025 and 2026 U.S. Camry only as a hybrid, so the 2018–2024 gasoline A25A-FKS or 2GR-FKS belt procedure should not be carried over to those model years. Use the VIN-specific Toyota service information for the newer hybrid before ordering a belt or attempting accessory-drive service.
How is the serpentine belt routed on a 2018–2024 gasoline Camry?
It depends on the engine. Toyota’s A25A-FKS 2.5L service diagram identifies the crankshaft pulley, generator, and compressor pulley in the V-ribbed-belt path. The 2GR-FKS 3.5L diagram additionally identifies the engine water-pump pulley, No. 2 idler, and automatic tensioner. Use the diagram for the exact engine rather than copying a route from another Camry.
Can you drive a Camry after the serpentine belt breaks?
Continued driving may be unsafe because the failed belt can stop an essential accessory, depending on the engine layout. Move to a safe location, shut the vehicle off, and arrange an inspection or tow if you cannot confirm that the charging, cooling, and steering systems remain safe.
Conclusion
A successful Toyota Camry serpentine belt replacement starts with identifying the vehicle and its belt system. For 2018–2024 U.S. gasoline Camrys, Toyota provides separate A25A-FKS 2.5L and 2GR-FKS 3.5L V-ribbed-belt procedures; for the hybrid-only 2025–2026 U.S. Camry, use current hybrid service information instead of carrying over those gasoline procedures. Verify the VIN, engine, market, belt application, tensioning method, and routing before applying force to a tensioner or removing any component.
Inspect the complete drive system, route the belt carefully, and perform close checks only while the vehicle is fully shut down. If the routing remains unclear, the tensioner is difficult to control, safe access is unavailable, or a new belt immediately makes noise or walks sideways, stop and obtain model-specific professional help.
Sources
- Toyota Manuals and Warranties — official vehicle-selected owner, warranty, and maintenance documentation.
- Toyota Technical Information System — Toyota repair manuals, service bulletins, wiring diagrams, and technical information.
- Toyota 2026 Camry — confirms the current U.S. Camry’s all-hybrid powertrain.
- Toyota USA Newsroom: 2025 Camry — confirms the Camry’s transition to an exclusively hybrid U.S. lineup.
- Gates Automotive Micro-V Belts — information about automotive EPDM Micro-V belt construction and applications.
- Gates Tensioners — accessory-drive tensioner and component information.
- Dayco Serpentine Belt Inspection — EPDM rib-profile wear and belt-inspection guidance.
