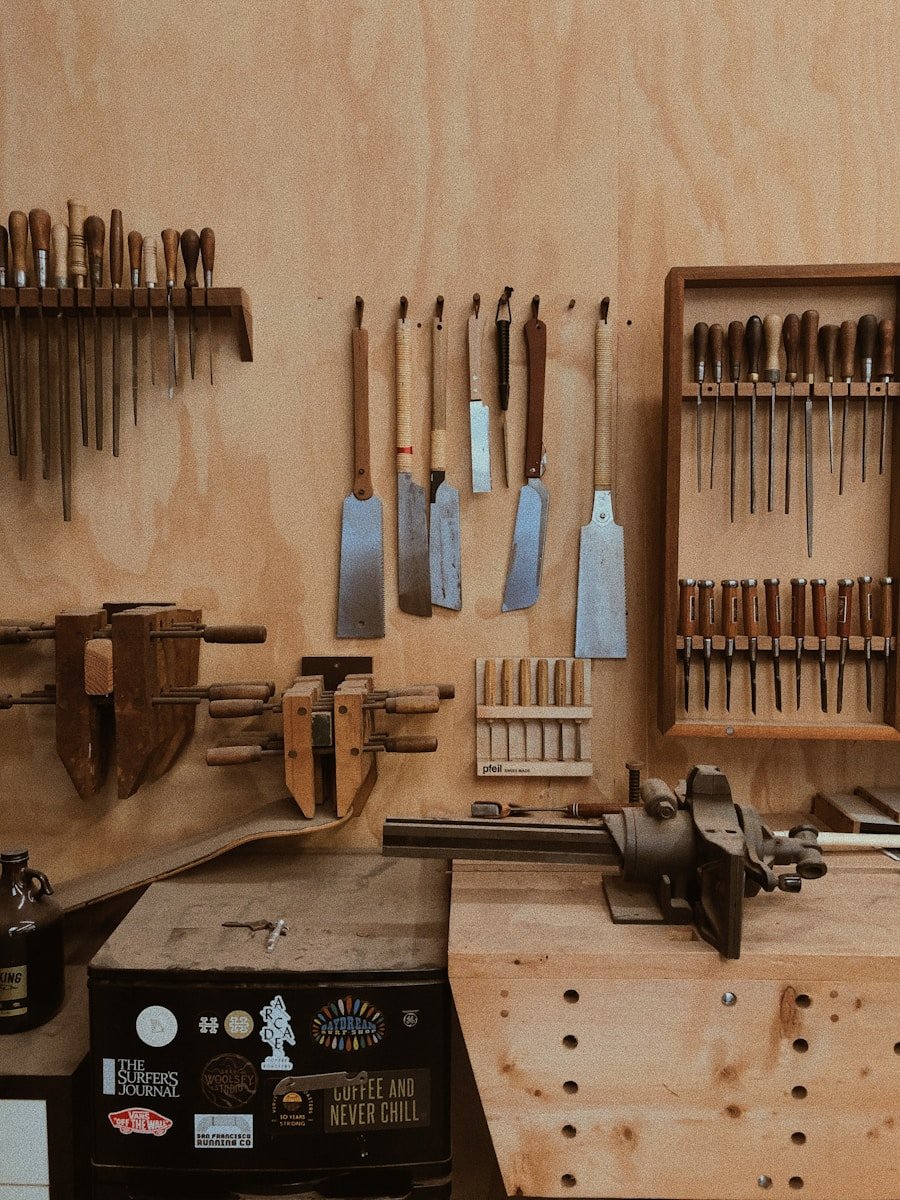
A workbench gives you a stable place to measure, cut, assemble, repair, sand, finish, or inspect a project. To use one effectively, you need more than a flat top. The bench must suit the task, stay stable under load, hold the work securely, keep tools within safe reach, and provide enough light, ventilation, and clearance for you to work comfortably.
Quick Answer
Use a workbench by first checking that it is level, stable, clear, and suitable for the planned load. Arrange frequently used tools within easy reach, secure the workpiece with the correct vise or clamps, wear task-specific protection, follow each tool’s instructions, and clean the surface after the job.
Key Takeaways
- Choose a workbench type, surface, and size that match your main projects.
- Check the bench for wobble, loose hardware, damaged surfaces, and unlocked casters before each job.
- Keep the main work area clear and place frequently used tools within a comfortable reach.
- Secure the workpiece with a vise, clamps, bench dogs, holdfasts, or suitable supports.
- Select eye, hearing, respiratory, hand, and foot protection according to the actual hazard.
- Control cords, dust, fumes, sparks, chemicals, and ignition sources before work begins.
- Clean the bench after use and inspect its structure, hardware, storage, and accessories regularly.
At a Glance
| Time Required | About 30–90 minutes for a basic inspection, cleanup, and organization. Installing storage, lighting, a vise, or electrical equipment may take longer. |
| Difficulty | Easy for cleaning and organization; moderate for mounting vises, shelves, lights, or fixed equipment. |
| Tools Needed | Tape measure, level, suitable wrenches or screwdrivers, clamps, labels, cleaning brush or approved vacuum, and any mounting hardware specified by the product manufacturer. |
| Cost | Varies. Basic cleanup and reorganization may cost nothing, while new storage, lighting, vises, dust control, or professional electrical work will add cost. |
What a Workbench Does and How to Choose the Right Type
A workbench is a sturdy table designed for manual work. Its surface, frame, work-holding features, and storage should match the materials and tools you use. A woodworking bench may have a thick wooden top, vises, dog holes, and holdfasts. A metalworking bench may use a steel or protected top that tolerates oil, impacts, abrasion, and hot debris.
An electronics bench may prioritize a seated position, task lighting, small-parts storage, controlled power, and electrostatic-discharge protection. A general repair bench may combine a durable top, mounted vise, drawers, shelves, and space for portable power tools.
| Workbench Type | Useful Features | Main Considerations |
|---|---|---|
| Woodworking | Flat wooden top, face vise, tail vise, dog holes, holdfasts, planing stop | Rigidity, flatness, clamping options, resistance to movement |
| Metalworking | Steel or protected top, mechanic’s vise, durable drawers, spark-resistant work area | Fire control, grounding where required, hot-work separation, heavy-load support |
| Electronics | Bright task lighting, small-parts bins, magnification, controlled outlets, ESD accessories | Cleanliness, ventilation, electrical safety, component protection |
| General Repair | Replaceable top layer, vise, drawers, pegboard, mobile storage | Versatility, chemical resistance, tool access, cleanup |
| Portable or Folding | Folding frame, built-in clamping, compact storage, carrying handle | Lower mass, reduced capacity, floor stability, locking mechanisms |
Do not assume every bench can carry the same load. Check the manufacturer’s rated capacity, including limits for drawers, shelves, casters, and mounted accessories. Consider both the weight placed on the top and the sideways force created by planing, sawing, filing, tightening a vise, or pulling on a stuck fastener.
[Amazon Products Picked for You]

Country Of Origin : China

【Package Contents】:1 woodworking vise, 6 fixing screws, 2 hole openers, 1 hex wrench, 1 socket wrench.

Quick-Release Mechanism for Effortless Operation –The quick-release system works in gravity and friction, allowing you to instantly engage or disengage the lead screw by simply changing the handle’s cranking direction. The front jaw slide freely in and out when disengaged
Plan Your Workbench Setup Before You Start
Choose a Safe Location
Place the bench where you can stand or sit without blocking doors, stairs, vehicles, electrical panels, fire equipment, or normal walking paths. Leave enough space to move long boards, sheet material, tools, and finished projects without striking walls or other people.
Use bright, even lighting that lets you see layout lines, cutting edges, fasteners, and surface defects. Position task lights to reduce shadows without creating glare in your eyes. Protect lamps and cords from impacts, sharp edges, hot debris, and wet areas.
Ventilation matters when you sand, grind, solder, paint, stain, glue, clean parts, or use solvents. Use source dust collection or local exhaust when the process and equipment call for it. General room ventilation alone may not capture contaminants produced directly at the workpiece.
Set a Comfortable Working Height
No single workbench height is ideal for every person or task. Fine assembly and detailed work often feel better on a higher surface because the work stays closer to your eyes. Heavy planing, filing, or forceful assembly may be easier on a somewhat lower surface because you can use your body weight without raising your shoulders.
Start with a height that lets you keep your shoulders relaxed, elbows near your sides, wrists reasonably straight, and back in a neutral position. Adjust the work with a platform, bench riser, auxiliary top, stool, or adjustable-height bench when one surface must serve several tasks.
The National Institute for Occupational Safety and Health identifies awkward postures, vibration, repeated activity, lifting, pushing, pulling, and carrying as factors that can contribute to work-related musculoskeletal problems. See the NIOSH ergonomics guidance for more information.
Check Stability, Level, and Capacity
- Empty the top. Remove loose tools and materials so you can inspect the full structure.
- Push each corner. The bench should not rock, rack, slide, or twist under moderate hand pressure.
- Check the floor. Use adjustable feet or approved shims if the floor is uneven.
- Tighten accessible hardware. Follow the manufacturer’s torque or assembly instructions when provided.
- Lock the casters. A mobile bench must not roll while you cut, clamp, hammer, or apply sideways force.
- Inspect anchors. Fixed benches and mounted machines must use suitable fasteners for the frame, wall, floor, and expected load.
- Confirm the capacity. Include the weight of the workpiece, vise, machines, stored tools, and any person leaning on the surface.
Warning: Do not use a workbench that rocks, has a cracked frame, has damaged welds, lacks required fasteners, or moves while force is applied. Stop and repair, replace, level, or properly secure it before continuing.
Organizing Your Workbench for Efficiency
An organized bench helps you work without repeatedly searching, reaching across sharp tools, or moving unstable piles. Begin by separating tools and materials according to how often and where you use them.
Create Practical Work Zones
- Primary work zone: Keep the area directly in front of you clear for the current workpiece, measuring tools, and the tool in use.
- Frequent-use zone: Place commonly used hand tools within a comfortable reach on a pegboard, shallow drawer, rack, or tool holder.
- Occasional-use zone: Store specialty tools in labeled drawers, cabinets, or bins away from the main surface.
- Dirty-work zone: Separate grinding, oily repair, painting, soldering, or chemical cleaning from clean assembly when possible.
- Charging zone: Keep compatible chargers and batteries in a dry, ventilated location that follows the manufacturer’s clearance and temperature instructions.
Hand tools such as hammers, screwdrivers, squares, pliers, and marking tools can be arranged on a pegboard or in shallow drawers. Store heavier power tools low enough that you can lift them without reaching overhead. Keep sharp edges covered or positioned so you cannot brush against them.
Use vertical space carefully. Wall-mounted shelves, pegboards, slat walls, magnetic holders, and cabinets can free the top, but every storage system must be anchored for the expected load. Do not place a heavily loaded shelf where falling objects could strike someone working below it.
Label drawers and bins according to function, tool type, fastener size, or project. Clear containers can help you identify small parts, but use containers that are suitable for their contents. Do not store solvents, finishes, fuels, or other chemicals in food or drink containers.
Decorative storage can also be functional. For lighter accessories that do not create a falling-object hazard, these decorative wall hooks may add visual interest while helping you keep suitable items off the bench. Check each hook’s mounting method and capacity before use.
Pro Tip: Outline frequently used tools on a pegboard or label their storage positions. An empty outline makes a missing tool easy to notice before you begin the next job.
Choosing the Right Tools for the Job

Select tools according to the material, operation, required accuracy, access, and finish. A tool that works well for softwood may be unsuitable for hardened steel, delicate electronics, masonry, or plastic.
[Amazon Products Picked for You]

LENGTH: 6-ft long
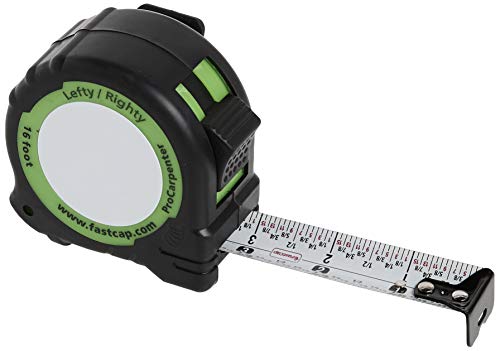
Dual Reading Capability: The Standard/Standard Reverse features standard measurements that are readable when the tape is extended from either the right or left hand

📏【9999.11 Maximum Capacity】– U.S. Measuring units, Measures in feet and inches. Measure distance wheel against a usual tape measure and it will be the same measurements. Whether private or industrial purposes, the measurement of straight line and curve line is easy.
Start With Core Measuring and Holding Tools
Many bench projects benefit from a tape measure or rule, square, marking tool, level, clamps, and a suitable vise. Add saws, chisels, files, drivers, pliers, hammers, drills, soldering equipment, or other tools only when the planned work requires them.
Use accessories that match the tool’s specifications. A blade, bit, wheel, disc, socket, or battery must be compatible with the tool, material, speed, size, and intended operation. Never force an accessory onto a tool or remove a guard to make an incompatible setup fit.
Evaluate Tools by Suitability and Condition
Price alone does not determine tool quality. Look at the tool’s materials, manufacturing, fit, ergonomics, serviceability, replacement parts, warranty, and suitability for the job. A properly maintained midrange tool may perform better than a premium tool that is damaged, dull, incorrectly adjusted, or used for the wrong material.
Inspect cutting edges, striking faces, handles, guards, switches, cords, plugs, battery housings, and accessories before use. A mushroomed chisel, loose hammer head, cracked handle, damaged cord, missing guard, or badly worn wheel should be removed from service until it is repaired or replaced correctly.
OSHA notes that hand and power tools can cause severe injuries when they are used or maintained improperly. Review the agency’s hand and power tool guidance and follow the instructions supplied with each tool.
How to Secure a Workpiece Correctly
A workbench is most useful when it lets you control the work with both hands. Do not rely on body weight or one hand to hold a part that may slip, spin, lift, or kick when a tool contacts it.
Choose the Right Holding Method
- Bench vise: Useful for boards, fittings, assemblies, and many repair tasks. Use jaw pads when the jaws could mark the work.
- Mechanic’s vise: Suitable for many metal and repair operations when mounted to a structure rated for the expected force.
- Bar or parallel clamps: Useful for assemblies, panels, edge work, and parts that extend beyond a vise.
- Quick clamps: Convenient for light positioning but not a substitute for a stronger clamp when high force or vibration is expected.
- Bench dogs and holdfasts: Useful on compatible woodworking benches for holding work against stops or down to the top.
- Jigs and fixtures: Helpful for repeat operations, small components, unusual shapes, or work that must remain at a set angle.
Clamp Without Damaging or Distorting the Work
Place clamping force over solid, supported areas. Thin panels, hollow assemblies, delicate finishes, cast components, and plastic parts can crack or deform if you overtighten them. Use cauls, soft jaws, sacrificial blocks, or shaped supports where needed.
Keep the cutting or drilling path clear of clamp bodies, metal jaws, screws, and the bench itself. Before starting a powered tool, check that the workpiece cannot rotate and that the clamp cannot vibrate loose or contact a moving accessory.
Support long or heavy material on both sides of the working area. Use roller stands, sawhorses, outfeed supports, or another rated surface instead of allowing the unsupported end to tip the work or pull it from the vise.
Safety First: Best Practices for Using the Workbench
| Best Practice | What to Check |
|---|---|
| Learn the tool before use | Read the manual, understand the controls, keep guards installed, and practice the operation on suitable scrap when appropriate. |
| Inspect equipment | Look for damage, loose parts, dull or cracked accessories, missing guards, damaged cords, leaks, unusual vibration, or overheating. |
| Select task-specific PPE | Identify eye, face, hearing, respiratory, hand, clothing, and footwear hazards before choosing protection. |
| Stop after an incident or near miss | Disconnect energy, provide appropriate first aid, report the event in a shared workplace, and correct the cause before restarting. |
| Prepare for emergencies | Know how to shut off power, keep exits clear, maintain suitable first-aid and fire-response equipment, and know when to call emergency services. |
Choose PPE for the Actual Hazard
Safety glasses or goggles may be needed for chips, dust, splashes, broken accessories, and flying debris. A face shield may add protection for some operations, but it does not automatically replace required eye protection. Hearing protection may be needed when tools or processes create hazardous noise.
Respiratory protection requires more than choosing any dust mask. Reduce contamination through substitution, enclosure, source collection, and ventilation first. When respiratory protection is necessary, use equipment suitable for the contaminant and follow applicable instructions, fit requirements, and workplace rules.
Gloves can protect against certain sharp edges, chemicals, heat, dirt, or splinters, but they are not suitable for every operation. Loose material can create an entanglement hazard near moving parts. Follow the tool manual, chemical label, and workplace procedure when deciding whether gloves are appropriate.
OSHA explains that PPE should fit properly, remain clean and reliable, and be selected according to the hazards and the equipment’s limitations. See the OSHA personal protective equipment overview.
Control Clothing, Hair, and Jewelry
Tie back long hair and secure loose sleeves, apron strings, hoodie cords, jewelry, and other items that could contact a blade, bit, wheel, spindle, fan, belt, or rotating workpiece. Wear stable footwear and maintain a balanced stance instead of leaning across the tool.
Keep Guards and Safety Devices in Place
Do not remove, bypass, wedge open, or modify a guard, interlock, shield, riving knife, brake, or other safety device to speed up a job. OSHA’s machine-guarding requirements identify point-of-operation hazards, rotating parts, ingoing nip points, flying chips, and sparks as conditions that require protection in covered workplaces.
Disconnect the tool from its power source before changing blades, bits, discs, wheels, cutters, or other accessories unless the manufacturer provides a different safe procedure. Prevent accidental startup and wait for all movement to stop before touching the accessory.
Manage Electrical Power Safely
- Inspect plugs, cords, strain reliefs, switches, chargers, and battery housings before use.
- Keep cords away from cutting paths, hot surfaces, sharp edges, wet floors, and walking areas.
- Do not use a damaged extension cord, remove a grounding pin, or make a temporary repair that the cord manufacturer does not permit.
- Use extension cords and power strips only within their ratings and intended environment.
- Do not daisy-chain power strips or treat a portable strip as permanent building wiring.
- Use ground-fault protection where required or appropriate for the location and equipment.
- Have permanent outlets, circuits, and fixed wiring installed or altered by a qualified person according to local requirements.
OSHA identifies electric shock, electrocution, fire, explosion, improper cord use, grounding problems, and missing ground-fault protection among important electrical hazards. Review its electrical safety guidance.
Control Dust, Fumes, Sparks, and Chemicals
Woodworking can expose you to sharp machinery, flying material, wood dust, and chemicals used in finishing. OSHA lists lacerations, amputations, severed fingers, blindness, skin disease, and respiratory disease among woodworking concerns. See its woodworking hazards and solutions.
Capture dust as close to the source as practical with equipment approved for the tool and material. Clean settled dust regularly using a method that does not create a larger airborne cloud. Do not use a household vacuum for hot debris, flammable liquid, or combustible metal dust unless it is specifically designed and approved for that use.
Finely divided wood and some metal dust can burn rapidly and may become explosible when suspended in air under suitable conditions. Keep dust accumulation, sparks, open flames, hot work, and ignition sources under control. OSHA provides additional information on combustible dust hazards.
Keep paints, cleaners, oils, finishes, adhesives, batteries, and similar products in their labeled original containers. Follow each product’s instructions for ventilation, storage, spill control, incompatible materials, and disposal. Do not mix leftover chemicals unless the manufacturer specifically directs you to do so.
The U.S. Environmental Protection Agency advises that some paints, cleaners, oils, batteries, and other household products require special care and local disposal arrangements. Review its household hazardous-waste guidance.
Note: This guide supports general workshop planning but does not replace a tool manual, chemical label, formal training, workplace procedure, building code, or professional electrical advice.
Maximizing Space and Storage on Your Workbench
In a small workshop, every storage choice should protect the main work surface rather than slowly covering it. Use drawers, cabinets, wall systems, mobile carts, and shelves according to tool size, weight, frequency of use, and the hazards created if an item falls.
A bench with built-in drawers or shelves can provide storage without using more floor space. Foldable extensions or removable wings can support larger projects, but they must lock securely and remain within the bench’s rated capacity.
Store Items According to Weight and Risk
- Place heavy tools and dense materials on lower shelves or drawers.
- Keep sharp tools in racks, sleeves, cases, or drawers that prevent accidental contact.
- Store small fasteners in divided, labeled containers.
- Keep precision tools away from grinding dust, moisture, impacts, and magnetic contamination when relevant.
- Separate clean electronics or assembly tools from oily, abrasive, or dusty work.
- Do not store incompatible chemicals together or place leak-prone containers above the working surface.
Leave Space for the Current Job
A storage system has failed if every open area becomes permanent storage. Before each job, remove tools, offcuts, containers, chargers, hardware, and unrelated parts from the primary work zone. Keep only the items needed for the current step.
Return each tool after use rather than waiting until the end of a large project. This habit reduces clutter, protects cutting edges and measuring tools, and makes it easier to see dropped fasteners or damaged parts.
Maintaining and Cleaning Your Workbench

Regular cleaning protects the bench, tools, workpieces, and storage system. The correct method depends on the benchtop material and the contaminants produced during the job.
Clean the Bench After Each Use
- Disconnect and store tools. Let hot equipment cool in a safe location before storage.
- Remove large debris. Pick up offcuts, fasteners, wire ends, sharp fragments, and broken accessories by a safe method.
- Collect dust safely. Use suitable extraction, a brush, or an approved vacuum for the material.
- Clean spills promptly. Follow the product label and use compatible absorbent and cleaning materials.
- Dry the surface. Do not leave moisture trapped beneath tools, mats, metal parts, or stored material.
- Return tools to their assigned locations. Remove damaged tools from service instead of placing them back into storage.
Maintain Wooden Surfaces
Remove glue before it forms hard ridges that interfere with flat work, but avoid damaging the top while scraping. Check for raised fasteners, splinters, deep cuts, loose laminations, warping, and areas that are no longer flat enough for the intended work.
Do not apply oil, wax, varnish, or another treatment automatically. The correct product depends on the existing finish and the work performed on the bench. Some treatments can transfer to unfinished wood, interfere with glue or coatings, or create problems during electronics and finishing work. Follow the bench or finish manufacturer’s instructions and test an inconspicuous area first.
Maintain Metal and Laminate Surfaces
Remove chips and abrasive debris before wiping so you do not scratch the surface. Clean oil, coolant, adhesive, or chemical residue with a product approved for the coating and contaminant. Dry bare steel promptly and apply a compatible corrosion protectant when appropriate.
Inspect laminate or replaceable coverings for lifted edges, cuts, burns, chemical damage, and trapped moisture. Replace a sacrificial hardboard, plywood, rubber, or mat surface when it no longer provides a safe, reasonably flat working area.
Use a Simple Maintenance Schedule
| Interval | Maintenance Tasks |
|---|---|
| Before each job | Check stability, surface clearance, work holding, lighting, cords, guards, PPE, ventilation, and emergency access. |
| After each job | Remove debris, clean spills, dry the surface, store tools, and isolate damaged equipment. |
| Monthly or after heavy use | Inspect fasteners, joints, welds, casters, feet, anchors, drawers, shelves, vise hardware, and mounted accessories. |
| Periodically | Check flatness, corrosion, wood movement, surface coatings, electrical accessories, storage loads, labels, and the overall layout. |
Customizing Your Workbench for Your Specific Needs
Customization can improve comfort and speed when it solves a specific problem. Begin with the tasks you perform most often, then add only the features that support those tasks without weakening the bench or creating new hazards.
[Amazon Products Picked for You]

A variety of adjustable positions: Our height adjustment ranges from 26.3" to 35", allowing you to use this work bench comfortably when sitting or standing. What's more, no matter who to use, the table can be adjusted to the most suitable height for the user.

Foldable Tabletop with Practical Sizes:Featured with a flexible foldable tabletop design, it folds down to 48"x 24" for ultra-compact storage and expands to 48"x 32" for a spacious working surface—effortlessly balancing ample operational space and space-saving storage, perfect for small garages, basements and limited work areas with variable usage needs.

Super Strong 2000 lbs Load: This sturdy workbench supports up to 2000 lbs (900 kg). Its 48 x 20-inch surface provides ample space for tools and heavy tasks like carving, cutting, drilling, and welding. It can also hold heavy items securely without tipping
Useful Customization Options
- Adjustable height: Helps one bench support detailed, seated, standing, and forceful work.
- Replaceable top: Protects the main surface during drilling, cutting, painting, gluing, or repair.
- Vise or clamping track: Improves work holding when the bench structure can support the load.
- Dog holes or holdfast holes: Add flexible woodworking work holding when laid out for compatible hardware.
- Task lighting: Improves visibility for layout, inspection, electronics, carving, and assembly.
- Backboard or pegboard: Keeps lighter, frequently used tools visible and accessible.
- Dust collection connection: Supports cleaner sanding, routing, sawing, or grinding when designed for the tool and material.
- Mobile base: Adds flexibility when the casters and locking system are rated for the bench and expected forces.
Large sheets and long stock may require removable wings, an outfeed table, roller supports, or separate sawhorses. Keep auxiliary surfaces level with the work area and position their legs or bases so they do not create trip hazards.
Built-in power may reduce trailing cords, but electrical convenience does not justify improvised wiring. Use listed equipment within its ratings and hire a qualified person for permanent circuits, outlets, or fixed wiring.
Avoid Unsafe Modifications
Do not drill through structural members, remove braces, overload drawers, attach a heavy vise to an unsupported corner, or mount a machine to a top that cannot resist its weight and operating force. Do not cover ventilation openings or place chargers and electrical devices inside unventilated compartments unless the manufacturer permits that installation.
After any modification, repeat the stability, level, capacity, clearance, and electrical checks before using the bench.
Troubleshooting Common Workbench Problems
The Bench Wobbles or Racks
Remove the load and check the floor, feet, casters, frame joints, braces, fasteners, welds, and anchors. Tighten or repair the structure according to the manufacturer’s instructions. Do not compensate for a damaged frame by loading it with more weight.
The Top Is No Longer Flat
Identify whether the problem comes from loose mounting hardware, moisture, wood movement, a damaged replaceable layer, debris beneath a mat, or structural sag. Repair the cause before flattening or replacing the surface. A bench used for rough repair may tolerate more variation than one used for joinery or precision assembly.
Tools Keep Covering the Work Area
Reduce the number of tools stored on the top. Assign shallow drawers or nearby holders to frequently used tools, place specialty tools farther away, and use a mobile cart for project-specific equipment. End each work session with a complete surface reset.
Clamps or the Vise Mark the Work
Use soft jaws, cauls, cork, leather, rubber, wood blocks, or another compatible protective layer. Spread the force over a larger area and tighten only enough to prevent movement.
Metal Parts or the Bench Are Rusting
Find and correct the moisture source. Check condensation, roof or plumbing leaks, wet cleaning methods, trapped moisture under mats, and direct contact between incompatible materials. Clean and protect the surface with products approved for the material.
The Work Area Is Too Dark
Add diffused overhead light and an adjustable task light rather than relying on one harsh source. Position the task light from the side opposite your working hand when that reduces shadows, but keep glare and moving-tool clearance in mind.
Advanced Techniques for Mastering the Workbench
Once your bench is stable, organized, and safe, you can use it for more advanced work such as joinery, precision layout, fixture building, surface preparation, finishing, electronics assembly, or repeated production tasks.
Woodworking joints such as dovetails and mortise-and-tenon joints depend on accurate layout, controlled cutting, and secure work holding. Arrange marking, cutting, fitting, and assembly tools in the order you will use them. Protect reference surfaces from glue, dents, and abrasive debris.
Jigs and fixtures can improve repeatability by locating a part or guiding a tool in the same position each time. Build them from suitable material, confirm that they cannot shift, and keep hands outside the cutting or pinch zone. A jig supplements safe tool setup; it does not replace required guards or safe operating procedures.
Finishing work benefits from a clean surface, controlled lighting, ventilation, and separation from dust-producing operations. Store wiping materials, finishes, solvents, and applicators according to their labels and local fire and waste requirements.
A well-designed workbench should make the next safe action obvious. Keep the surface stable, secure the work, choose tools that match the operation, control the hazards, and restore the bench after each project. These habits improve accuracy and comfort while reducing avoidable damage, clutter, and risk.
Frequently Asked Questions
What is a workbench?
A workbench is a sturdy table designed for manual tasks such as woodworking, metalworking, repair, assembly, electronics, crafting, and finishing. Depending on its purpose, it may include vises, dog holes, clamps, drawers, shelves, lighting, power access, or a replaceable working surface.
How do you use a workbench effectively?
Clear the main work area, check the bench for stability, arrange the required tools within easy reach, and secure the workpiece with the correct vise, clamps, dogs, or supports. Follow each tool’s instructions, control dust and cords, wear task-specific protection, and clean the bench after the job.
How high should a workbench be?
The best height depends on your body and the task. Detailed work often benefits from a higher surface, while forceful planing, filing, or assembly may feel better on a lower one. Aim for relaxed shoulders, elbows near your sides, neutral wrists, and minimal bending. Use risers, platforms, stools, or an adjustable bench when needed.
How should you secure a workpiece to a workbench?
Use a bench vise, mechanic’s vise, clamps, bench dogs, holdfasts, jig, or fixture that matches the workpiece and operation. Support long material, keep clamps outside the cutting path, protect delicate surfaces with soft jaws or cauls, and apply only enough pressure to prevent movement.
What are important safety tips for using a workbench?
Inspect the bench and tools, secure the workpiece, keep guards installed, disconnect power before accessory changes, manage cords, control dust and fumes, keep exits clear, and choose PPE for the actual hazard. Avoid loose clothing and follow the tool manual, chemical label, workplace rules, and local electrical requirements.
What are common workbench accessories?
Common accessories include face and mechanic’s vises, bench dogs, holdfasts, clamps, planing stops, soft jaws, tool racks, pegboards, drawer organizers, task lights, magnifiers, replaceable top panels, roller supports, dust collection fittings, and locking casters. Choose accessories that fit the bench and its rated capacity.
How do you maintain a workbench?
Remove debris and spills after each job, dry the surface, return tools to storage, and isolate damaged equipment. Periodically inspect the frame, joints, welds, fasteners, casters, feet, anchors, vise, drawers, shelves, top, electrical accessories, and surface finish. Use cleaning and protective products approved for the bench material.
Sources
- OSHA: Hand and Power Tools — tool hazards, maintenance, and safe-use resources
- OSHA: Personal Protective Equipment — hazard-based PPE selection, fit, use, and maintenance
- OSHA: Electrical Safety — electrical hazards, grounding, cords, and protective measures
- NIOSH: Ergonomics and Work-Related Musculoskeletal Disorders — posture, lifting, vibration, repetition, and other ergonomic risks
- OSHA: Woodworking Hazards and Solutions — machinery injuries, wood dust, finishing chemicals, and protective resources
- U.S. EPA: Household Hazardous Waste — safe storage, handling, and disposal of paints, cleaners, oils, batteries, and related products

2 thoughts on “Mastering the Workbench: Effective Tips for Use”