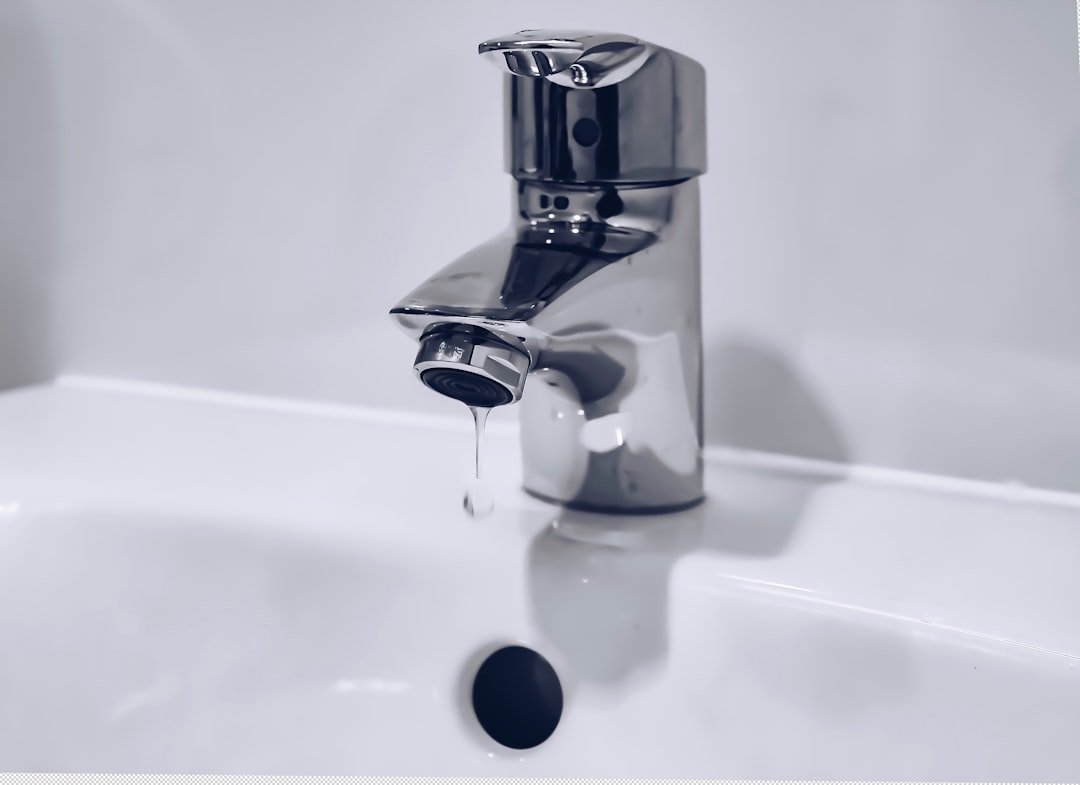
Water spots on a car’s surface are a common nuisance that can make clean paint look dull, streaky, or poorly maintained. These spots form when water droplets evaporate and leave behind dissolved minerals and contaminants. Calcium, magnesium, and other hard-water minerals are the most common culprits.
When those droplets dry on your car, they can leave a chalky residue that appears as white rings, cloudy marks, or stubborn streaks. The severity depends on the mineral content of the water, how long the spots sit, the temperature outside, and whether the car is exposed to direct sunlight.
Water spots are not only an appearance issue. If you leave mineral deposits untreated for too long, they can bond to the surface and may eventually etch into the clear coat. Once that happens, simple washing may not remove them, and polishing or professional correction may be needed.
Quick Answer
To remove water spots from your car, wash and dry the surface first, apply a paint-safe water spot remover in small sections, gently buff with a microfiber towel, then rinse, dry, and protect the paint with wax or sealant. For stubborn spots, use a clay bar or light polishing.
Key Takeaways
- Water spots on your car’s surface are caused by mineral deposits left behind when water evaporates.
- Wash and dry the car thoroughly before using any water spot remover.
- Use microfiber towels, a soft applicator pad, and a paint-safe remover to reduce the risk of scratching.
- Apply the remover in small sections and follow the manufacturer’s dwell-time instructions.
- Clay bars, polishing, and paint protection can help with stubborn spots and future prevention.
At a Glance
| Time Required | 30 to 90 minutes, depending on spot severity |
| Difficulty | Easy to moderate |
| Tools Needed | Car shampoo, clean water, water spot remover, microfiber towels, soft applicator pad, optional clay bar, optional dual-action polisher |
| Cost | Low to moderate, depending on whether you already own towels, polish, or a clay bar |
Understanding Water Spots on Your Car
Understanding the nature of water spots is crucial for effective removal and prevention. Water spots usually fall into two broad categories: surface-level mineral deposits and etched spots. Surface-level spots sit on top of the clear coat and are usually easier to remove with a dedicated cleaner. Etched spots are more serious because the minerals have started to mark or bite into the finish.
Factors such as tap water versus distilled water, local climate, sun exposure, and how often your car is exposed to rain, sprinklers, or washing can all influence the formation of water spots. Recognizing these elements can help you take proactive steps to protect your vehicle before the marks become difficult to remove.
Warning: Do not attack water spots with harsh household abrasives, dry paper towels, scouring pads, or aggressive rubbing. These can scratch the clear coat and make the finish look worse.
Gathering the Necessary Materials for Water Spot Removal
Before removing water spots from your car, gather all necessary materials so the process goes smoothly. The primary item you need is a specialized water spot remover product. These products are made to break down mineral deposits without damaging automotive paint when used correctly.
Look for a product that is labeled safe for automotive finishes. A pH-balanced option is often a safer choice for regular maintenance. If your water spots feel rough or bonded to the paint, you may also want to use a clay bar, which can lift embedded contaminants from the surface.
In addition to cleaning products, you need several tools to assist in the removal process. Microfiber towels are essential for applying products, wiping away residue, and buffing the treated surface. They are much gentler on paint than standard rags or paper towels.
A soft applicator pad can also help you spread the water spot remover evenly across the affected areas. If you have access to a dual-action polisher, it can speed up the buffing process and produce a more uniform finish.
If you have access to a dual-action polisher, it can reduce hand fatigue and help create a smoother, more even finish when used with the right pad and gentle pressure.
Lastly, make sure you have access to clean water for rinsing and enough fresh towels for drying. Using dirty towels or reusing a contaminated applicator can drag grit across the paint and create fine scratches.
[Amazon Products Picked for You]

HEAVY DUTY WATER STAIN REMOVER FOR CARS(SPI10816) – Trusted by detailers for years, this gel formula targets stubborn mineral stains and water spots on paint, glass, and metal surfaces
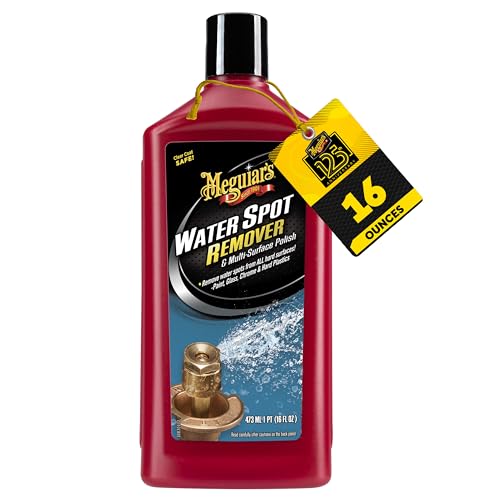
NO MORE WATER SPOTS: This car water spot remover by Meguiar’s works quickly to remove stubborn, unsightly water spots caused either through washing or weather, all without harming delicate paint finishes, glass, or hard plastics.

DISSOLVES STUBBORN WATER SPOTS: Acidic formula breaks down hard mineral deposits, sprinkler stains, and dried water marks that regular soaps leave behind, restoring a clear and spotless finish on treated surfaces.
Preparing Your Car for the Water Spot Removal Process

Preparation is key when you want to remove water spots from your car without adding scratches. Start by washing your vehicle thoroughly with a high-quality car shampoo. This removes dirt, grime, and loose contaminants that could interfere with the spot removal process.
Use a two-bucket method, with one bucket for soapy water and another for rinsing your wash mitt. This helps reduce the chance of dragging dirt back onto the paint.
Pay special attention to areas where water tends to pool, such as around windows, mirrors, badges, door handles, trim edges, and panel gaps. These areas often collect minerals and are common hotspots for water spot formation.
Once your car is clean, dry it completely using a microfiber drying towel. This step matters because remaining moisture can leave new spots while you are trying to remove the old ones.
After drying, inspect the surface closely under good lighting. Natural daylight or a strong inspection light can help you see cloudy areas, rings, streaks, and etched marks more clearly. This inspection helps you focus your effort on the most affected panels.
Note: Work on a cool surface in the shade whenever possible. Hot panels can cause cleaners to dry too quickly, which may leave streaks or reduce effectiveness.
Using a Water Spot Remover Product
| Product Name | Effectiveness | Ease of Use | Price |
|---|---|---|---|
| Water Spot Remover X | 4.5/5 | 4/5 | |
| Water Spot Remover Y | 4/5 | 4.5/5 | |
| Water Spot Remover Z | 3.5/5 | 3.5/5 |
With your car prepared and all materials gathered, it is time to apply the water spot remover product. Begin by reading the manufacturer’s instructions carefully. Different products may have specific application methods, dwell times, surface temperature limits, and removal steps.
In general, apply a small amount of remover onto an applicator pad or directly onto the affected area. Work in small sections instead of covering a large panel at once. This helps you control the product, avoid premature drying, and check your results more easily.
As you apply the product, use gentle circular motions to work it into the affected paint. Do not press hard. The goal is to let the cleaner break down the mineral deposits, not to scrub the clear coat aggressively.
Allow the product to sit for the recommended time listed by the manufacturer. This dwell time helps the active ingredients loosen the deposits. During this waiting period, avoid direct sunlight, strong wind, or hot paint because those conditions can cause the product to dry too quickly.
Pro Tip: Test the remover on a small, hidden area first. If the surface looks clear and glossy after wiping, continue with the rest of the panel.
[Amazon Products Picked for You]
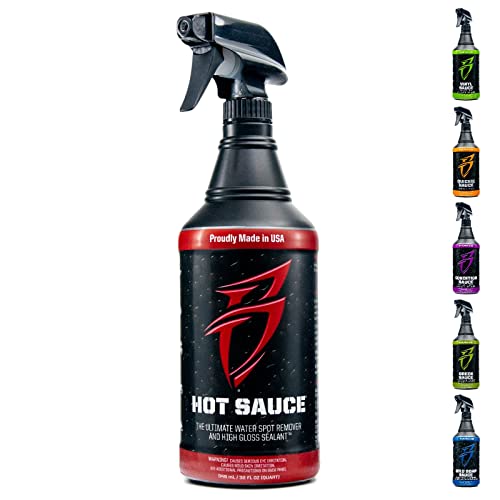
REMOVES HARD WATER SPOTS FAST – Boat Bling Hot Sauce is a premium spray-on, wipe-off hard water spot remover designed to quickly cut through water spots, mineral deposits, and light exhaust residue. Ideal for use after a day on the lake, river, or ocean, this powerful detailing spray helps restore a clean, glossy finish without heavy scrubbing or complicated application steps.

WATER SPOT REMOVER FOR AUTO GLASS: Removes baked-on water spots, hard water minerals, and bonded deposits from windshields and automotive glass that regular glass cleaner can't reach.

MADE FOR SPECIALIZED BOAT/RV FINISHES: This extremely versatile boat compound quickly and effectively clears problem surface degradation and oxidation on gel coat and fiberglass surfaces typically found on vehicles like boats and RVs
Applying the Water Spot Remover to Your Car
After allowing the water spot remover to dwell for the recommended time, continue with careful application techniques that maximize its effectiveness. Using a clean microfiber towel or applicator pad, gently buff the treated area in a circular motion.
This action helps lift away dissolved minerals and removes any remaining product residue from your car’s surface. Keep folding the towel to a clean side as it picks up residue. A dirty towel can spread minerals back across the paint.
For larger areas affected by multiple water spots, consider using a dual-action polisher equipped with a soft foam pad. This tool can reduce physical effort while providing consistent pressure across the surface.
When using a polisher, start at a low speed to avoid overheating the paint. Gradually increase the speed only if needed. Always keep the pad moving to prevent localized heat buildup or clear-coat damage.
If the water spots begin to fade but do not disappear completely, repeat the process once more before moving to a more aggressive method. Repeating a mild process is usually safer than jumping straight to heavy polishing.
Buffing and Polishing the Treated Areas

Once you have applied and worked in the water spot remover, follow up with buffing and polishing to restore your car’s shine and protect its finish. Using a clean microfiber towel, gently wipe away any remaining product residue from the treated areas.
This step is important because leftover chemicals can lead to streaking, haze, or dullness if they are not removed properly. Use light pressure and turn the towel often so you are always wiping with a clean surface.
After wiping down the surface, consider applying a high-quality polish or wax designed for automotive finishes. Polishing helps refine minor marks and light hazing that may have appeared during spot removal. Wax or sealant adds a protective layer that helps repel water and contaminants.
Apply a small amount of polish onto an applicator pad and work it into the paint using overlapping circular motions.
Allow the polish or wax to haze according to the product directions before buffing it off with a clean microfiber towel. This two-step process improves the finish and adds protection against future mineral buildup.
Rinsing and Drying Your Car
Following buffing and polishing, rinse your car thoroughly to remove any remaining residue from cleaning products and polishing compounds. Use clean water from a hose or a pressure washer set on low pressure to avoid damaging trim, badges, seals, or paintwork.
Rinse from top to bottom so residue flows downward instead of settling on already-clean areas. Make sure you rinse around mirrors, emblems, door handles, panel gaps, and window trim because product residue can hide in those tight areas.
After rinsing, dry your vehicle using a soft microfiber drying towel or chamois cloth. A blotting technique works well because it minimizes friction. Avoid dragging a dirty or saturated towel across the paint.
Pay special attention to crevices and edges where water may accumulate. These areas are often overlooked and can release water after you think the car is dry, leading to fresh water spots on the same panels you just cleaned.
Inspecting Your Car for Remaining Water Spots
Once your car is completely dry, inspect it closely for any remaining water spots or areas that may need extra attention. Use good lighting, preferably natural daylight, to highlight imperfections on your vehicle’s surface.
Walk around your car methodically and check each panel from more than one angle. Some spots appear only when light hits the paint a certain way. Hood panels, roofs, trunk lids, and side mirrors often show water spots more clearly because water sits on them longer.
If you notice stubborn spots that remain after your first treatment, do not be discouraged. Some mineral deposits need more than one application. Others may require a clay bar, light polishing, or a stronger paint-safe product.
Documenting which areas still show signs of water spots can help you focus your effort during the next treatment. This also helps you avoid overworking areas that are already clean.
Addressing Stubborn Water Spots with Additional Techniques
For stubborn water spots that resist standard removal methods, consider using additional techniques that may produce better results. One effective approach is using a clay bar treatment after applying a water spot remover.
A clay bar can lift embedded contaminants that may contribute to persistent spotting. It is especially useful when the paint feels rough after washing, even if it looks clean.
To use a clay bar effectively, first lubricate the area with a clay lubricant or detail spray designed for this purpose. Then gently glide the clay bar over the surface in straight lines rather than heavy circular motions. This helps avoid creating new scratches while allowing the clay to pick up contaminants.
After using the clay bar, rinse and dry your vehicle again before inspecting for remaining spots. If the paint now feels smooth but the marks are still visible, the spots may be etched into the clear coat. In that case, a finishing polish or professional paint correction may be needed.
Warning: If water spots remain visible after cleaning and claying, do not keep rubbing the same area aggressively. You may be dealing with etched clear coat, which needs careful polishing rather than force.
[Amazon Products Picked for You]

【Fun & Fantastic Value Given by A Great Gift】- Stemni Clay Bar Lubber Kit is the ultimate collection of car cleaning tools. And it is a gift to provide fun for car fans, enthusiasts and Father's Day You will get 10x clay bars, 10x clay lubber tablets,1x spray bottle and 2x microfiber towels and 4x disposable gloves.
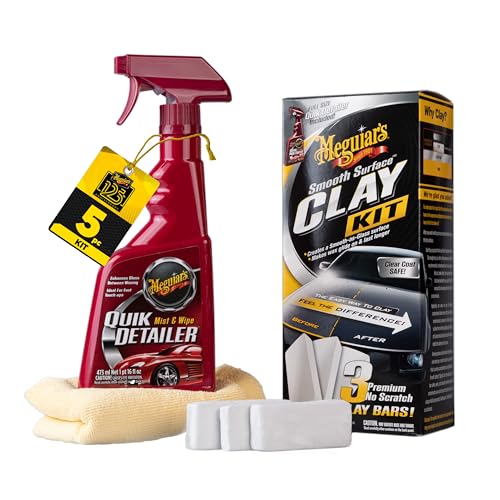
QUICK CAR CLAYING: Quickly and easily removes bonded surface contaminants like paint overspray, industrial fallout, tree sap mist, road tar and more

Removes Embedded Surface Contaminants: Safely lifts paint overspray, industrial fallout, brake dust, tree sap, acid rain and bonded debris
Preventing Future Water Spots on Your Car
Preventing future water spots requires proactive measures that protect your vehicle’s finish from mineral deposits and environmental contaminants. One useful strategy is to avoid letting tap water dry on the surface whenever possible.
If you wash your car at home, dry it immediately after rinsing. If your water is very hard, consider a water-softening filter or a final rinse with filtered or distilled water. Distilled water has fewer dissolved minerals, which can reduce spotting.
Another preventive measure is applying a high-quality sealant or wax after cleaning and polishing your car. These products create a protective barrier on your vehicle’s surface that helps repel water and contaminants while enhancing shine.
Regularly maintaining this protective layer will keep your car looking cleaner and make future washing easier. A slick, protected surface gives minerals less opportunity to bond tightly to the paint.
You should also avoid parking near sprinklers when possible. Sprinkler water often contains minerals, and repeated exposure can quickly create heavy spotting on one side of the car.
Maintaining a Clean and Spot-Free Car Surface
Maintaining a clean and spot-free car surface requires consistent care over time. Establishing a regular washing schedule, ideally every two weeks, can help prevent dirt accumulation and reduce long-term exposure to hard water spots from rain, sprinklers, and washing.
When washing your vehicle, use high-quality products made for automotive finishes. These products are designed to clean without stripping protection or damaging the paint. Avoid dish soap for routine washing because it can remove wax and leave the finish less protected.
In addition to regular washes, consider adding detailing sessions to your maintenance routine every few months. Detailing involves deeper cleaning of exterior surfaces while addressing imperfections through claying, polishing, waxing, or sealant application.
By investing time in regular maintenance, you can enjoy a clean finish with fewer water spots. You also help protect the paint’s appearance, preserve gloss, and support the vehicle’s long-term value.
If you want more car maintenance success, focus on prevention as much as removal. Dry the vehicle after every wash, keep a protective layer on the paint, and deal with new water spots as soon as you notice them.
When to Seek Professional Help
Most light water spots can be handled at home with the right products and careful technique. However, professional help may be the safer choice if the spots look deeply etched, cover the entire vehicle, or remain after washing, chemical removal, claying, and light polishing.
You should also consider a professional detailer if your car has soft paint, older paint, fresh paintwork, ceramic coating, or a delicate finish. A professional can measure the paint, choose the right polish, and avoid removing unnecessary clear coat.
If the paint looks cloudy, rough, or uneven after repeated attempts, stop and reassess. More pressure is not always the answer. The best fix may be controlled machine polishing followed by wax, sealant, or ceramic protection.
Frequently Asked Questions
What are water spots on a car?
Water spots on a car are mineral deposits left behind when water evaporates. They often contain minerals such as calcium and magnesium. These spots can look cloudy, white, or ring-shaped, and they can become harder to remove if left untreated.
How do water spots form on a car?
Water spots form when water containing minerals dries on the car’s surface. As the water evaporates, the minerals remain on the paint, glass, or trim. This commonly happens after washing, rain, sprinkler exposure, or parking in direct sunlight while the vehicle is wet.
How can I remove water spots from my car?
You can remove water spots by washing and drying the car first, then using a commercial water spot remover, vinegar solution, clay bar, or polish depending on severity. Always test any method on a small, inconspicuous area first to make sure it does not damage the paint.
Can water spots damage my car’s paint?
Yes. If left untreated, water spots can bond to the clear coat and may etch into the paint. Once etching occurs, the spots can become more difficult to remove and may require polishing or professional paint correction.
How can I prevent water spots from forming on my car?
To prevent water spots, dry the car thoroughly after washing, avoid letting water droplets dry on the surface, and use a soft microfiber towel. A water softening filter, filtered final rinse, wax, sealant, or ceramic protection can also reduce the chance of new spots forming.
Can I use vinegar to remove water spots from car paint?
A diluted vinegar solution may help with light mineral deposits, but you should use caution. Test a small area first, do not let it dry on the paint, rinse thoroughly, and follow with wax or sealant because acidic cleaners can reduce surface protection.
Why do water spots come back after washing?
Water spots can return if the car is not dried fully, if hard water is used during washing, or if minerals remain trapped in trim gaps and drip onto the paint. They can also appear again when the surface lacks wax or sealant protection.
