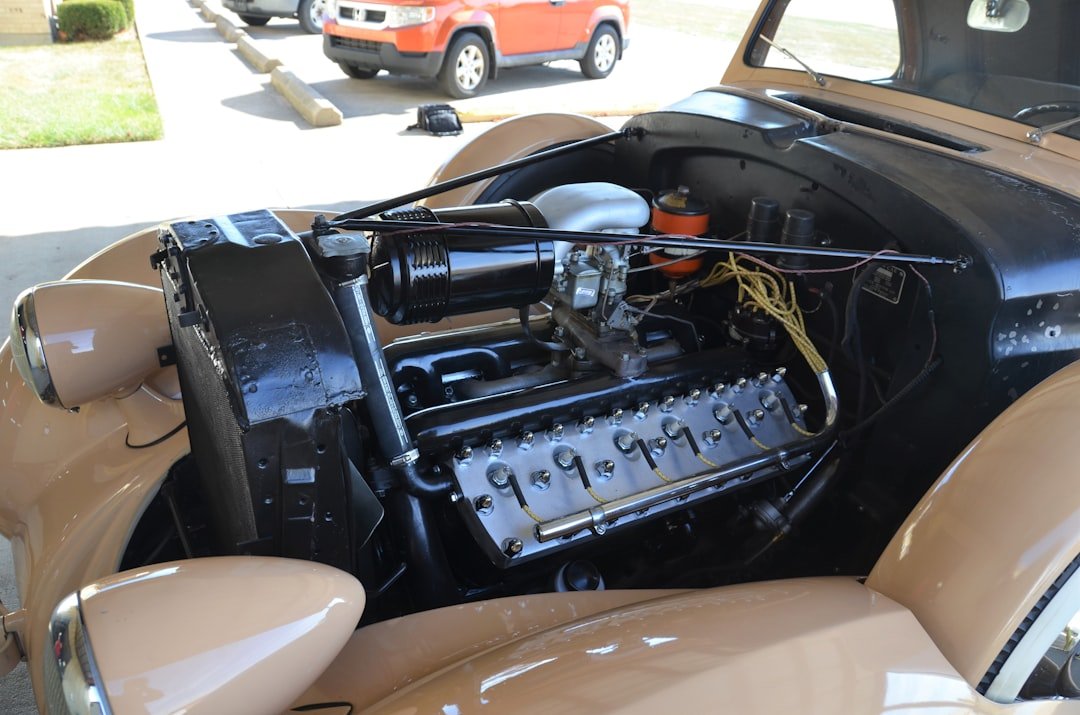
When your car heater stops blowing warm air, the problem can come from several parts of the heating and cooling system. Low coolant, a stuck thermostat, a clogged heater core, a weak blower motor, damaged heater hoses, or a faulty heater control valve can all reduce cabin heat. A careful step-by-step inspection helps you find the cause without replacing parts too early.
Quick Answer
Start by checking coolant level when the engine is cold. Then inspect the thermostat, heater core hoses, blower motor, heater control valve, and heater hoses. If coolant is low, airflow is weak, or one heater hose stays cold after warm-up, the heater system needs closer diagnosis.
Key Takeaways
- Low coolant is one of the most common reasons a car heater blows cold or lukewarm air.
- A stuck thermostat can stop the engine from reaching the right operating temperature or prevent proper coolant flow.
- A clogged or leaking heater core can reduce heat output and may cause a sweet coolant smell inside the cabin.
- A failed blower motor can stop airflow even when the heater core is hot.
- Heater hoses and the heater control valve should be checked for leaks, restrictions, cracks, and proper operation.
At a Glance
| Time Required | 20 minutes for basic checks; 1 to 3 hours or more for repairs such as flushing or replacing parts |
| Difficulty | Beginner for coolant and hose checks; intermediate for blower motor testing; advanced for heater core replacement |
| Tools Needed | Owner’s manual, flashlight, gloves, coolant, basic hand tools, multimeter, drain pan, and heater core flushing kit if needed |
| Cost | Low for coolant top-off or hose inspection; higher if the heater core, thermostat, blower motor, or control valve needs replacement |
Common symptoms of a malfunctioning heating system include lukewarm air from the vents, cold air even after the engine warms up, unusual noises when the heater is activated, foggy windows that will not clear, a sweet smell inside the cabin, or a complete lack of airflow. These symptoms can point to several problems, so it helps to understand how the system works before you start replacing parts.
In most vehicles, the heater uses hot engine coolant to warm the cabin. As the engine runs, it creates heat. The coolant absorbs that heat and flows through the heater core, which acts like a small radiator inside the dashboard. A fan then pushes air across the hot heater core and sends warm air through the vents.
If any part of this system fails, leaks, sticks, or becomes blocked, the cabin may not get enough heat. A systematic approach helps you narrow the issue to coolant level, coolant circulation, airflow, temperature control, or the heater core itself.
Warning: Never open the radiator cap or coolant reservoir cap when the engine is hot. Hot coolant and steam can spray out under pressure and cause serious burns.
Checking the Coolant Levels
One of the first steps in diagnosing a heating issue is to check the coolant level in the vehicle’s reservoir. Coolant, also known as antifreeze, helps regulate engine temperature and carries heat to the heater core. If the coolant level is low, there may not be enough fluid flowing through the heater core to warm the cabin air.
To check the coolant level, park the vehicle on level ground and let the engine cool completely. Locate the coolant reservoir, which is usually marked with a cap labeled “coolant” or “antifreeze.” Compare the coolant level with the minimum and maximum marks on the reservoir.
If the level is below the recommended mark, add the coolant type listed in your vehicle’s owner’s manual. Do not mix coolant types unless the manual says they are compatible. Using the wrong coolant can reduce corrosion protection and may cause deposits inside the cooling system.
Low coolant can also signal a leak. After topping off the reservoir, monitor the level over the next few drives. If the level drops again, inspect the radiator, hoses, water pump area, reservoir, heater hoses, and passenger-side floor for signs of leakage.
Pro Tip: If the heater suddenly starts working after you add coolant, do not stop there. Recheck the level later because a slow leak can return and cause both heating problems and engine overheating.
Inspecting the Thermostat

The thermostat plays an important role in controlling engine temperature and coolant flow. It stays closed when the engine is cold so the engine can warm up faster. Once the engine reaches operating temperature, the thermostat opens and allows coolant to circulate through the radiator and the rest of the cooling system.
If the thermostat gets stuck open, the engine may take too long to warm up. In that case, the heater may only blow cool or lukewarm air, especially in cold weather. You may also notice the temperature gauge staying lower than normal during driving.
If the thermostat gets stuck closed, the engine can overheat because coolant cannot circulate properly. This can also affect heat delivery to the heater core and may create a more serious engine problem.
To inspect the thermostat, locate it near the point where the upper radiator hose connects to the engine block. Look for corrosion, leaks, or damaged housing. A more complete test usually requires removing the thermostat and placing it in hot water to see whether it opens at its designed temperature.
If the thermostat fails to open or close properly, replacement is usually the best fix. Always use a thermostat with the correct temperature rating for your vehicle.
Checking the Heater Core
| Metric | Value |
|---|---|
| Heater Core Temperature | 150°F |
| Coolant Flow Rate | 2 gallons per minute |
| Heater Core Pressure | 15 psi |
The heater core itself can often be the source of poor heat. This component can become clogged with debris, old coolant residue, corrosion, or sealant products. A clogged heater core reduces coolant flow, which means the air passing through the vents may not warm up properly.
You can begin with a simple temperature check. After the engine warms up, carefully feel the two heater hoses connected to the heater core. Both hoses should usually feel warm or hot. If one hose is much cooler than the other, coolant may not be flowing through the heater core correctly.
Visual signs also matter. Check for damp carpet on the passenger side, oily film on the inside of the windshield, or a sweet antifreeze smell inside the vehicle. These signs can point to a leaking heater core.
If the heater core appears clogged but not leaking, flushing it may help restore flow. If it leaks, flushing will not solve the problem, and replacement may be necessary.
Note: The table values above are general reference examples, not universal specifications. Actual heater core temperature, flow, and pressure can vary by vehicle design and cooling system condition.
Testing the Blower Motor
The blower motor pushes air through the heating system and into the cabin. If this component fails, you may get no airflow from the vents even when the engine is warm and the heater core is hot.
Start by turning on the vehicle’s heating system and testing every fan speed. If the fan works on some speeds but not others, the problem may be the blower motor resistor, fan control module, wiring, or switch. If there is no response at any speed, the blower motor may have failed, but you should still check the fuse and wiring before replacing it.
To diagnose the blower motor more deeply, you may need to access the motor under the dashboard. In many vehicles, this requires removing lower trim panels or the glove box area.
Once the blower motor is accessible, a direct power test can help separate a failed motor from a control problem. If the motor runs when powered directly but not through the vehicle’s controls, the issue may be wiring, a relay, a resistor, a fuse, or the climate control switch rather than the motor itself.
If the blower motor makes grinding, squealing, clicking, or rattling noises, debris may be caught in the fan cage, or the motor bearings may be worn. Remove leaves or debris before assuming the motor needs replacement.
Inspecting the Heater Control Valve
The heater control valve regulates coolant flow into the heater core based on the temperature setting selected by the driver. Not every vehicle uses a separate heater control valve, but many do. In vehicles that have one, a stuck or failed valve can block hot coolant from entering the heater core.
To inspect this component, locate it along the heater hoses leading to or from the heater core. Look for cracks, corrosion, broken vacuum lines, damaged electrical connectors, coolant residue, or signs that the valve is stuck.
Next, adjust the temperature from cold to hot while watching the valve. Depending on the design, the valve may use a cable, vacuum signal, or electronic actuator. If it does not move or respond when the cabin temperature setting changes, the valve or its control system may need repair.
If the valve remains closed, the heater may blow cold even when coolant level, thermostat operation, and blower airflow are normal. Replacing the valve can restore proper coolant flow if the valve itself has failed.
Checking the Heater Hoses
Heater hoses carry hot coolant between the engine and the heater core. Over time, they can become brittle, swollen, cracked, soft, or restricted because of heat, age, pressure changes, and coolant contamination.
Start with a visual inspection. Look for cracks, bulges, wet areas, white or colored coolant residue, loose clamps, and collapsed hose sections. Pay close attention to the hose ends because leaks often begin near clamps and fittings.
You can also feel for temperature differences once the engine has warmed up. A major temperature drop along one hose may suggest a restriction, air pocket, or coolant flow problem. Both heater hoses should usually become warm when the heater is operating and coolant is flowing correctly.
If a hose is damaged, replace it promptly. A weak heater hose can fail suddenly, causing coolant loss, poor heat, and possible engine overheating.
Flushing the Heater Core
If you suspect a blockage inside the heater core and do not see signs of a leak, flushing may help restore heat. Flushing forces water through the heater core to loosen debris and old coolant buildup that may be restricting coolant flow.
This process usually requires disconnecting both the inlet and outlet hoses from the heater core. Place a drain pan under the area to catch old coolant and water. Avoid letting coolant drain onto the ground because it is harmful to pets, people, and the environment.
Using a garden hose or a specialized flushing kit, direct water into one side of the heater core and let it exit the other side. Then flush in the opposite direction. Continue until the water runs clearer and flow improves.
After flushing, reconnect the hoses securely, refill the system with the correct coolant mixture, and bleed air from the cooling system if your vehicle requires it. Air trapped in the system can still cause poor heater performance after the flush.
Warning: Coolant is toxic. Store it safely, clean spills immediately, and dispose of used coolant according to local rules.
[Amazon Products Picked for You]
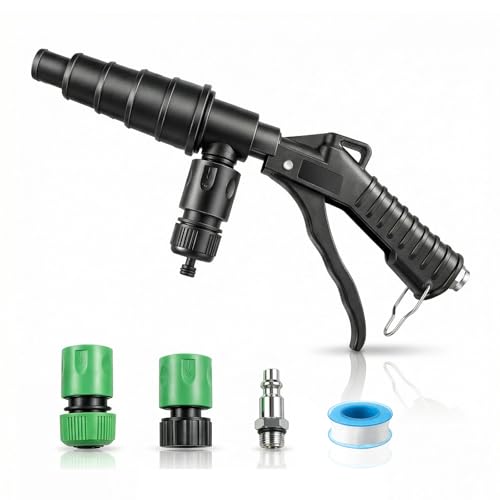
【Heater Core Flush Kit】This heater core flush kit includes 1 coolant flush gun, 3 hose adapters, 1 air line fitting, and a roll of PTFE sealant tape, enabling quick and efficient cleaning of coolant, radiator, or heater core systems.

✅【Complete & Ready-to-Use Kit with 2 Transparent Hoses】 Get started immediately! Unlike other kits, ours includes everything you need: 1 Flushing Gun, 1 Garden Hose Connector, 1 Roll of PTFE Tape, and 1 Multi-Size Nozzles,2 standard 3/4" transparent garden hoses,2 clamps,The clear hose design allows you to monitor the fluid and flushing progress visually. Simply connect to any garden hose faucet—no extra trips to the store or additional parts to buy. A true, convenient, all-in-one flush kit.

Adjustable pressure industrial spray gun with air adapter and a stepped tip design for easy heater core flushing
Replacing the Heater Core
If flushing does not restore heat or if the heater core leaks, replacement may be necessary. This repair can be labor-intensive because the heater core is often located deep inside the dashboard.
Before starting, confirm that the heater core is actually the problem. A leaking heater core may cause damp carpet, a sweet smell, coolant loss, foggy windows, or visible coolant near the HVAC case. A clogged heater core may cause one heater hose to stay cooler than the other.
The replacement process usually begins by draining coolant from the system and disconnecting the heater hoses. Depending on the vehicle, you may need to remove dashboard panels, the glove box, the center console, or parts of the HVAC housing to reach the heater core.
Once you remove the old heater core, install the new unit carefully and reconnect all hoses, clamps, panels, and electrical connectors. Refill the cooling system with the correct coolant, bleed air from the system, and check for leaks before driving.
If the dashboard must be removed or the vehicle uses complex climate control components, professional repair may be safer and more reliable.
[Amazon Products Picked for You]
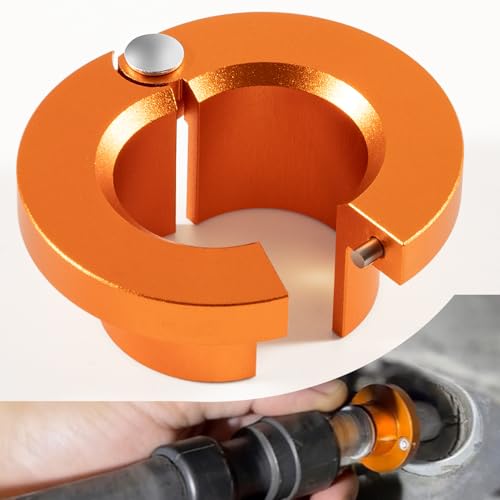
【Great Compatibility】: Specifically designed to separate quick connect fittings on 3/4" heater lines for GM Vehicles.

Genuine Motor craft Heater Core

DURABLE DESIGN - Fully brazed aluminum design (as specified by vehicle requirements), enhances efficiency and durability
Replacing the Blower Motor
If testing shows that a bad blower motor is causing weak or missing airflow, replacement may be required. Begin by disconnecting the battery, especially if you will work near electrical connectors under the dashboard.
The blower motor is commonly mounted under the passenger side of the dashboard, behind the glove box, or near the HVAC housing. Remove any trim panels that block access. Then disconnect the electrical connector and remove the mounting screws or bolts holding the motor in place.
Compare the new blower motor with the old one before installation. Make sure the connector, mounting shape, and fan cage match. Install the new motor, reconnect the electrical plug, secure the panels, and test all fan speeds.
If the new blower motor still does not work, check the blower motor fuse, relay, resistor, fan control module, ground connection, and climate control switch.
[Amazon Products Picked for You]
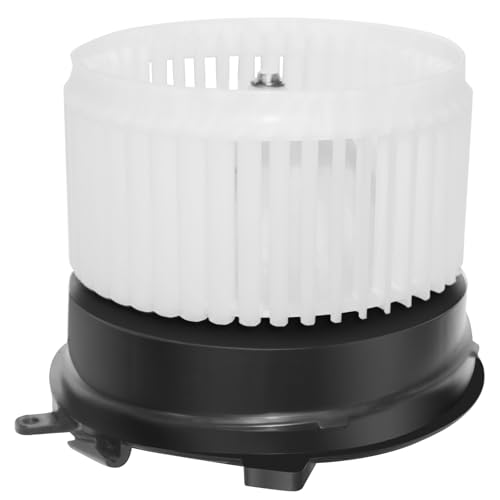
[Compatibility]: AC Blower Motor For Nissan For Rogue l4 2.5L 2008-2013,For Nissan For Rogue Select l4 2.5L 2014-2015,For Nissan For Sentra l4 2.0L 2007-2012,For Nissan For Sentra l4 2.5L 2007-2012

[Replaces Part Numbers] - 87103-42020, 700039, NA01-61-B10, MB657229
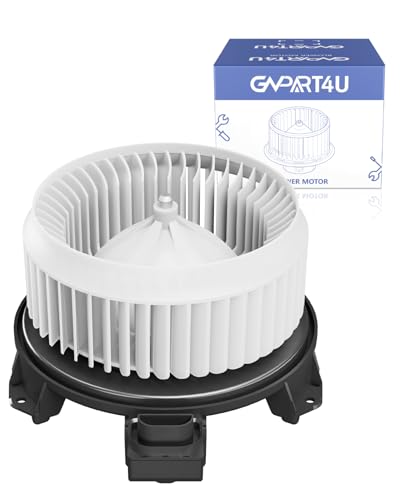
Attention: This blower motor is a front blower motor. If you need a rear blower motor, then this product is not suitable for you
Reassembling and Testing the Heater System
After completing any repair, reassemble everything carefully before testing the heater system. Make sure all hoses are fully seated, clamps are tight, connectors are attached, panels are secure, and no tools remain in the engine bay or cabin.
Refill the coolant to the correct level and bleed air from the cooling system if required. Some vehicles have a bleed screw, while others require a specific warm-up procedure. Air pockets can prevent coolant from reaching the heater core and may cause the heater to blow cold even after repairs.
Start the engine and let it reach normal operating temperature. Turn the heater to the hottest setting and test each fan speed. Check whether the air warms up, whether the airflow is strong, and whether the temperature changes correctly when you adjust the climate controls.
Inspect for leaks around the reservoir, radiator, heater hoses, thermostat housing, heater control valve, and passenger floor area. Watch the temperature gauge during the test drive. If the engine overheats, the heater remains cold, or coolant level drops again, stop driving and recheck the system.
Other Possible Causes of No Heat
If the coolant level, thermostat, heater core, blower motor, heater control valve, and hoses all seem fine, the problem may come from the HVAC control system. Modern vehicles often use blend doors, mode doors, actuators, sensors, and electronic control modules to direct air and control temperature.
A broken blend door can leave the system stuck on cold air even when the heater core is hot. A failed blend door actuator may click behind the dashboard or fail to respond when you change the temperature setting. Climate control panel faults can also prevent the system from sending the correct signal.
Cabin air filters can also affect heater performance. A severely clogged cabin filter may reduce airflow from the vents and make the heater feel weak. Replacing a dirty cabin filter is usually simple and can improve both heat output and defrost performance.
Common Symptoms and Likely Causes
| Symptom | Likely Cause |
| Cold air from vents after engine warms up | Low coolant, clogged heater core, stuck heater control valve, or blend door issue |
| No airflow from vents | Blower motor, fuse, relay, resistor, wiring, or fan control problem |
| Heat only works while driving | Low coolant, weak circulation, air in the cooling system, or heater core restriction |
| Sweet smell or foggy windshield | Possible heater core leak |
| Temperature gauge stays low | Thermostat may be stuck open |
If you’re looking to maximize space in your small bedroom, check out this helpful article on organizing a small bedroom. Creating a cozy and efficient living space can make a big difference in your daily life. And if you’re into gardening, you might also enjoy reading about the top glass bottle planters of 2025 for some creative and eco-friendly gardening ideas. Additionally, if you love entertaining outdoors, you may want to consider investing in one of the top outdoor beverage carts for effortless entertaining. These carts can make hosting gatherings a breeze and add a touch of style to your outdoor space.
Related Guides
Frequently Asked Questions
What are common reasons for a car heater not working?
Common reasons include low coolant, a malfunctioning thermostat, a clogged heater core, a faulty blower motor, a bad blower motor resistor, damaged heater hoses, a stuck heater control valve, a clogged cabin air filter, or a blend door problem inside the HVAC system.
How can I troubleshoot a car heater that is not working?
Start with the safest and simplest checks. Check coolant level when the engine is cold, inspect the heater hoses, test airflow at each fan speed, watch the temperature gauge, compare heater core hose temperatures, and inspect the heater control valve if your vehicle has one.
What are some DIY methods to fix a car heater?
DIY fixes may include topping off coolant with the correct type, replacing a dirty cabin air filter, replacing a bad thermostat, flushing a clogged heater core, replacing damaged heater hoses, replacing a failed blower motor, or replacing a faulty heater control valve.
Why does my car heater blow cold air when the coolant is full?
If coolant is full but the heater still blows cold, the issue may be a stuck thermostat, clogged heater core, trapped air in the cooling system, stuck heater control valve, blend door failure, or a climate control problem.
When should I seek professional help for fixing a car heater?
Seek professional help if you cannot identify the issue, the vehicle is overheating, coolant keeps disappearing, the heater core is leaking, dashboard removal is required, electrical testing is beyond your comfort level, or the repair requires specialized tools.
