
Last updated: September 22, 2026
To balance car wheels correctly, a technician or experienced DIYer removes each tire-and-wheel assembly, centers it on a wheel balancing machine, enters or measures the wheel dimensions, spins the assembly, and installs the amount and type of weight the machine calls for. A verification spin confirms the correction before the wheel is reinstalled and the lug nuts are torqued to the vehicle manufacturer’s specification. If a standard balance does not eliminate vibration, the tire or wheel may have runout, damage, or force variation that requires further diagnosis.
Quick Answer
To balance car wheels, remove the wheel, center it correctly on a wheel balancing machine, enter or measure the wheel dimensions, spin the assembly, then add the specified clip-on or adhesive weights at the indicated positions. Run a verification spin, reinstall the wheel, torque the lug nuts to the vehicle specification, and test drive the car. Persistent vibration after a correct balance needs further tire, wheel, suspension, or road-force diagnosis.
Wheel imbalance is often easiest to notice at moderate to highway speeds because rotational forces increase as wheel speed rises. Typical symptoms include a steering-wheel shimmy, vibration through the seat or floor, or a repeating shake that appears within a certain speed range. NHTSA notes that balancing helps wheels rotate properly and can prevent vehicle shake or vibration.
Not every vibration is a balance problem. A bent wheel, tire runout, tire force variation, incorrect tire pressure, worn suspension parts, wheel-bearing problems, or brake-related vibration can produce similar symptoms. Use balancing as one diagnostic step rather than assuming it is the only possible cause.
Key Takeaways
- Balancing car wheels helps reduce vibration, uneven tire wear, and steering shake.
- Common signs of unbalanced wheels include vibration through the steering wheel, seat, or floor, especially at highway speeds.
- A wheel balancing machine, wheel weights, lug wrench, jack, jack stands, and torque wrench are the main tools needed.
- Always park on a level surface, engage the parking brake, and support the vehicle with jack stands before removing wheels.
- Clip-on weights usually fit steel wheels, while adhesive weights are often used on alloy wheels.
- After reinstalling the wheels, tighten lug nuts in a star pattern and torque them to the vehicle manufacturer’s specification.
- A verification spin is part of a complete balance; a test drive then confirms whether the original vibration is gone.
- If vibration remains after a correct balance, inspect for wheel or tire runout, tire force variation, damage, suspension wear, wheel-bearing issues, or brake-related vibration.
- Regular tire-pressure checks, tire rotations, and wheel-alignment checks help protect tire life and ride quality.
Signs of Unbalanced Wheels
The clearest symptom of wheel imbalance is vibration that changes with road speed. A front-wheel imbalance is often felt through the steering wheel, while a rear-wheel or rear-axle vibration may be more noticeable through the seat or floor. The exact feel varies by vehicle, so vibration location is a clue rather than a diagnosis.
Irregular or cupped tread wear can accompany imbalance, but it is not specific to balance. Alignment errors, worn shocks or suspension parts, incorrect tire pressure, bent wheels, and tire defects can create similar wear patterns. Inspect the complete tire-and-wheel system before adding weights.
If your vehicle pulls to one side while driving straight, wheel balance may not be the only cause. Tire pressure, alignment, brake drag, road crown, and suspension wear can also affect tracking.
Tools Needed for Balancing Car Wheels

To balance car wheels accurately, you need the right tools and equipment. The most important tool is a wheel balancing machine. This machine measures weight distribution around the tire and wheel assembly and shows where weight must be added to correct the imbalance.
Balancing equipment can use static or dynamic correction modes. Static balancing corrects imbalance in one plane, which primarily addresses an up-and-down “hop” force. Dynamic balancing uses two correction planes across the wheel width so it can address both static imbalance and side-to-side couple imbalance. Modern computerized shop balancers commonly provide dynamic and alloy-wheel weight-placement modes.
In addition to a balancing machine, you will need wheel weights, which are used to correct any imbalances detected during the balancing process. These weights come in different styles, including clip-on weights for many steel wheels and adhesive weights for many alloy wheels.
You will also need a tire iron or lug wrench to remove and reinstall the wheels. A torque wrench is strongly recommended because lug nuts must be tightened to the correct specification. Other useful tools include a tire pressure gauge, tread depth gauge, wheel cleaner, brush, valve stem tool, jack, and jack stands.
Warning: Never rely on a jack alone while working around or under a vehicle. Always use properly rated jack stands on a solid, level surface.
Preparing the Car for Wheel Balancing
At a Glance
| Time Required | Varies by vehicle, equipment, and whether diagnosis is needed; a shop appointment may take longer than the machine spin itself |
| Difficulty | Advanced DIY / professional procedure because it requires safe lifting, correct wheel centering, and a balancing machine |
| Tools Needed | Wheel balancing machine, wheel weights, lug wrench, jack, jack stands, torque wrench, tire pressure gauge, tread depth gauge, wheel cleaner, and brush |
| Cost | Varies by shop, vehicle, wheel size, and whether standard or road-force diagnosis is needed |
| Task | Time Required | Tools Needed |
|---|---|---|
| Removing the Wheels | Varies by vehicle and wheel count | Lug wrench, jack, jack stands |
| Inspecting the Tires | A few minutes per wheel | Tire pressure gauge, tread depth gauge |
| Cleaning the Wheels | Depends on dirt and old adhesive | Wheel cleaner, brush |
| Checking for Wheel Damage | A few minutes per wheel | Flashlight, inspection mirror |
Before beginning the wheel balancing process, prepare the car properly so you can work safely and get accurate results. Park the vehicle on a flat, level surface. Engage the parking brake to keep the vehicle from moving while you work.
Turn off the engine and remove the keys from the ignition. If you are working on a vehicle with an electronic parking brake, confirm it is engaged before lifting the vehicle. Check your owner’s manual for the correct jacking points because lifting from the wrong place can damage the body, frame, or suspension parts.
Next, inspect the tires for visible damage or irregularities that could affect balancing. Look for bulges, cuts, punctures, exposed cords, bent rims, missing weights, or stones lodged in the tread. If a tire has serious damage, replace or repair it before balancing.
Check tire pressure before diagnosis and set it to the vehicle manufacturer’s recommended cold pressure shown on the tire placard or in the owner’s manual. This helps rule out underinflation or overinflation as a source of poor ride or irregular wear before you evaluate balance.
Note: Wheel balancing and wheel alignment are different services. Balancing corrects weight distribution in the tire and wheel assembly. Alignment adjusts suspension angles so the tires contact the road correctly. For a broader service comparison, see tire rotation vs. wheel alignment.
Removing the Wheels from the Car
Once the car is prepared, you can remove the wheels. Start by loosening the lug nuts with a tire iron or lug wrench while the vehicle is still on the ground. Loosening them before lifting the vehicle helps prevent the wheel from spinning.
Loosen the nuts in a crisscross or star pattern. This spreads force more evenly and helps avoid unnecessary stress on the wheel and hub. Do not remove the lug nuts fully yet. Break them loose only enough so you can remove them after the vehicle is lifted.
Use a jack to lift the vehicle at the correct jacking point. After lifting, place jack stands under the recommended support points. Lower the vehicle gently onto the stands and confirm it is stable before removing the wheel.
Remove the lug nuts completely and pull the wheel straight off the hub. Handle each wheel carefully so you do not hit the brake rotor, caliper, studs, or wheel face. Set the lug nuts somewhere clean so dirt does not get on the threads.
Mounting the Wheels on the Balancing Machine
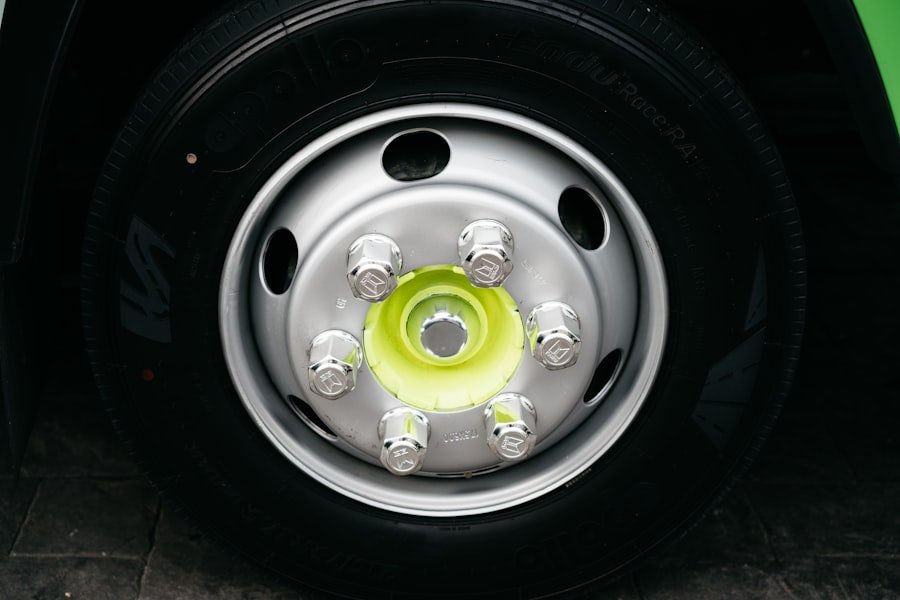
With the wheels removed from the car, mount them on the balancing machine. Begin by cleaning each wheel thoroughly. Remove mud, brake dust, stones, and old adhesive from the rim area. Dirt or leftover adhesive can affect the reading and prevent new weights from sticking correctly.
Pay special attention to the rim area where weights will be added later; any buildup can affect how well weights adhere. Clean the inner barrel of the wheel and the outer lip if the machine calls for weight placement in those areas.
Place the wheel onto the balancing machine spindle according to the machine’s instructions. Use the correct cone, adapter, or mounting plate for the wheel style. The wheel must sit centered on the spindle, because poor mounting can create a false imbalance reading.
Secure the wheel and lock it in place. Most modern balancing machines have a digital display that asks for wheel diameter, width, and offset. Enter these measurements carefully. Incorrect measurements can place weights in the wrong spot and leave the wheel unbalanced.
Pro Tip: Follow the balancer manufacturer’s procedure for existing weights. When old adhesive weights are removed, clean away the residue before applying new tape weights so the new weights can bond to a clean, dry surface.
Adding Wheel Weights
After the wheel is mounted, the balancing machine spins it to identify heavy and light spots. The display will show where weight is needed and how much weight to add. Follow the machine’s position indicators carefully.
There are two primary types of wheel weights: clip-on weights and adhesive weights. Clip-on weights usually attach to the rim flange and are common on many steel wheels. Adhesive weights stick to the inner barrel or flat rim surface and are often used on alloy wheels where appearance and rim design matter.
Choose the correct weight type for the wheel material and rim design. Using the wrong weight can damage the wheel finish, fall off during driving, or fail to correct the imbalance. Clean the adhesive area before applying stick-on weights so they bond securely.
Add the required weight at the exact location the machine recommends. If you use adhesive weights, press them firmly onto the wheel. If you use clip-on weights, seat them properly on the rim flange with the correct tool. Avoid hammering in a way that can damage the wheel edge.
Checking the Balance
Once you have added the wheel weights, spin the wheel again on the balancing machine. This second spin confirms whether the added weight corrected the imbalance. A properly balanced wheel should show little or no correction needed.
If the machine still shows an imbalance, reassess the weight placement. The weight may be too light, too heavy, or slightly off position. You may need to remove the weight and repeat the process. Do not stack too many weights in one area unless the wheel design and machine instructions allow it.
This step is important because the first correction is not always perfect. A careful recheck helps prevent vibration after the wheels go back on the vehicle. It also helps catch mounting errors, bent wheels, tire defects, or wrong machine inputs before the job is finished.
Static vs. Dynamic vs. Road-Force Balancing
Static balancing corrects imbalance in one plane. Dynamic balancing uses two correction planes and is the standard approach for correcting both up-and-down imbalance and side-to-side couple imbalance on many passenger-vehicle wheels. The balancer’s selected mode also determines where clip-on or adhesive weights can be placed.
Road-force balancing adds a diagnostic load roller that presses against the tire while the assembly rotates. This can reveal conditions a normal spin balance may not identify, including loaded runout and tire force variation. It is most useful when a wheel shows a good balance reading but the vehicle still has a repeatable speed-related vibration.
Diagnostic clue: If a properly centered wheel repeatedly balances to near zero but the vibration remains, adding more weight is not the next step. Check for tire or wheel runout, force variation, damage, hub-mounting problems, suspension wear, wheel bearings, and brake-related vibration.
Reinstalling the Wheels on the Car
After confirming that each wheel is properly balanced, reinstall the wheels on the vehicle. Lift each wheel onto its hub and align the bolt holes with the wheel studs. Start each lug nut by hand to avoid cross-threading.
Hand-tighten the lug nuts first. Then snug them in a crisscross or star pattern while the vehicle is still raised. This helps the wheel sit evenly against the hub. Do not fully torque the lug nuts while the wheel is hanging in the air unless the manufacturer’s procedure allows it.
Lower the vehicle until the tire lightly touches the ground and does not spin. Use a torque wrench to tighten each lug nut to the vehicle manufacturer’s specification. Follow the star pattern again so pressure spreads evenly across the wheel.
After all lug nuts are torqued, lower the vehicle completely. Check each lug nut once more with the torque wrench. If your vehicle uses wheel covers or center caps, reinstall them after confirming the lug nuts are secure.
Warning: Over-tightening or under-tightening lug nuts can create safety problems. Always use the correct torque specification for your vehicle, not a guess.
Test Driving the Car
With the wheels reinstalled and secured, take the car for a test drive. Start at low speed in a safe area and listen for unusual noises. Pay attention to the steering wheel, seat, and floor for vibration.
Gradually increase speed if the car feels normal. Many wheel-balance problems show up at moderate to highway speeds, so test the vehicle across the speed range where you previously noticed vibration. Keep both hands on the wheel and avoid distractions while you evaluate the ride.
During the test drive, notice whether the car tracks straight, whether the steering wheel stays steady, and whether the vibration is gone. If the vehicle still shakes, the issue may come from another source, such as a bent rim, tire separation, wheel alignment problem, worn suspension part, damaged wheel bearing, or brake rotor issue.
If vibration remains after a careful balance, do not assume the issue is solved. Recheck wheel centering on the balancer, inspect the tires and rims, and have the vehicle diagnosed if the cause is not obvious. For a symptom-based diagnosis beyond wheel balance, see why a car shakes while driving.
What Persistent Symptoms Usually Point To
| Symptom | What to Check Next |
|---|---|
| Speed-related vibration remains after a correct spin balance | Tire or wheel runout, tire force variation, centering on the hub or balancer, damaged wheel, or tire defect |
| Vehicle pulls left or right on a straight road | Tire pressure, alignment, tire pull, brake drag, or suspension condition |
| Vibration changes when the brakes are applied | Brake-related pulsation or rotor/hub issues rather than balance alone |
| Cupped or patchy tread wear | Balance, alignment, inflation, shocks/struts, suspension wear, and tire condition |
Regular Maintenance for Balanced Wheels
Have new tires balanced when they are installed. NHTSA also recommends regular tire maintenance that includes checking pressure, tread condition, rotation, balance, and alignment as appropriate. Recheck balance when a new speed-related vibration appears, a wheel weight is missing, a tire has been repaired or remounted, or a wheel has taken a hard impact.
Seasonal tire changes are a practical time to inspect wheel condition and confirm balance, especially when a tire-and-wheel set has been stored for months. Temporary flat spotting can also cause vibration after storage, so do not assume every initial shake is a permanent balance problem.
Check tire pressure at least monthly when the tires are cold, using the vehicle placard pressure rather than the maximum pressure molded on the tire sidewall. Rotate tires according to the vehicle manufacturer’s schedule and inspect tread depth across the full width of each tire. Uneven wear can point to balance, alignment, suspension, or inflation issues.
Wheel alignment also helps protect balanced tires. If the vehicle pulls, the steering wheel sits off-center, or the tread wears unevenly, alignment should be checked. A balanced wheel can still wear badly if the suspension angles are incorrect.
Bottom Line
Balancing car wheels is a measurement-and-correction process, not a visual guess. Center the tire-and-wheel assembly correctly on a suitable balancer, use the machine’s specified correction mode and weight locations, verify the result with a second spin, then reinstall the wheel using the vehicle’s torque specification. If vibration remains after a correct balance, stop adding weights and diagnose runout, force variation, wheel damage, tires, brakes, bearings, and suspension instead.
Frequently Asked Questions
What is wheel balancing?
Wheel balancing is the process of equalizing the weight of the combined tire and wheel assembly so it spins smoothly at road speed. A balancing machine finds heavy spots, and small wheel weights are added to the rim to correct them.
Why is wheel balancing important?
Properly balanced wheels help reduce vibration and create a smoother ride. Balancing can also help prevent premature tire wear and extra stress on suspension components.
How do you know if your car wheels need balancing?
Signs that your car wheels may need balancing include steering-wheel vibration, seat vibration, uneven tire wear, and shaking that appears at certain speeds. If these symptoms continue after balancing, inspect alignment, suspension, brakes, tires, and wheels.
Can I balance my car wheels at home?
You can balance car wheels at home if you have a suitable wheel balancer, the correct mounting adapters, wheel weights, safe lifting equipment, and the training to use them. For most drivers, a tire shop is more practical because correct centering, dynamic measurement, and diagnosis of persistent vibration require specialized equipment.
How often should car wheels be balanced?
Balance new tires when they are installed. Recheck balance when a speed-related vibration appears, a weight is lost, a tire is repaired or remounted, or the wheel takes a hard impact. Follow the vehicle or tire manufacturer’s maintenance guidance rather than relying on one universal mileage interval.
Is wheel balancing the same as wheel alignment?
No. Wheel balancing corrects weight distribution in the tire and wheel assembly. Wheel alignment adjusts suspension angles so the tires point and contact the road correctly. A car may need one service or both, depending on the symptoms.
What happens if I drive with unbalanced wheels?
Driving with unbalanced wheels can cause vibration, uneven tire wear, reduced ride comfort, and added stress on suspension parts. If the vibration is severe, stop driving and inspect the tires, wheels, and lug nuts before continuing.
Why does my car still vibrate after the wheels were balanced?
A correct spin balance cannot fix every source of vibration. Persistent shaking can come from tire or wheel runout, tire force variation, a bent rim, tire damage, incorrect centering, worn suspension or wheel bearings, or brake-related vibration. A road-force test can help diagnose some tire-and-wheel problems that a standard balance does not reveal.
Does wheel balancing fix a car that pulls to one side?
Usually not by itself. Pulling is more commonly associated with tire pressure differences, wheel alignment, tire pull, brake drag, road crown, or suspension problems. Balance mainly corrects rotating mass imbalance that causes vibration.
Sources
- National Highway Traffic Safety Administration — TireWise — tire pressure, tread, rotation, balancing, alignment, and new-tire balancing guidance
- Michelin — Wheel Alignment & Balancing Explained — symptoms of imbalance and the difference between balancing and alignment
- Continental Tires — Balancing Tires — static, dynamic, and road-force balancing methods
- Hunter Engineering — Road Force Wheel Balancer — diagnostic load-roller testing, centering, runout, and force-variation diagnosis

1 thought on “Balancing Car Wheels: A Step-by-Step Guide”