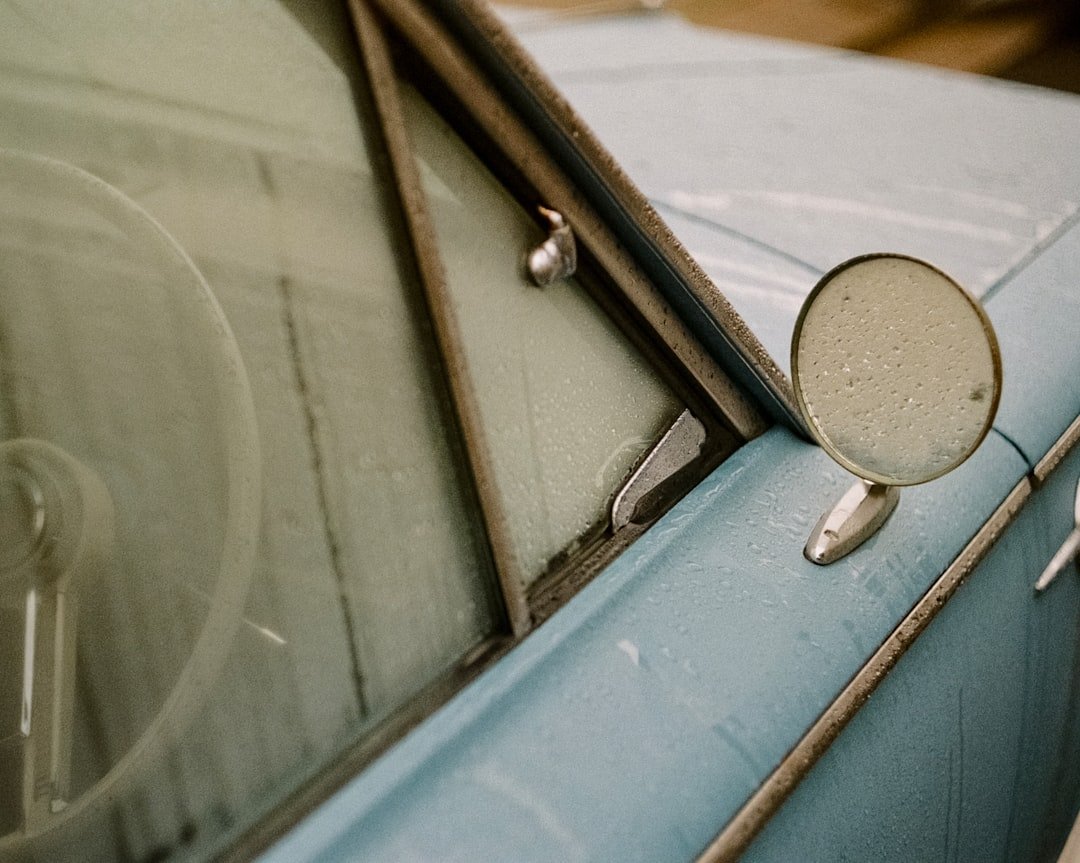
Detailing your car at home helps protect the paint, refresh the cabin, remove hidden dirt, and keep your vehicle looking cleaner for longer. A basic car wash removes surface grime, but a full detail goes further by cleaning, decontaminating, polishing, protecting, vacuuming, deodorizing, and treating the wheels, glass, tires, trim, and interior materials.
You do not need a professional shop to get strong results. With the right supplies, safe techniques, and a step-by-step process, you can detail most cars, SUVs, trucks, and motorcycles in your driveway or garage. The key is to work carefully, use products made for automotive surfaces, and avoid shortcuts that can scratch paint or damage interior finishes.
Quick Answer
To detail a car at home, wash and dry the exterior, decontaminate the paint with a clay bar if needed, polish minor defects, apply wax or sealant, clean the wheels and tires, vacuum the cabin, wipe interior surfaces, clean the glass, treat stains and odors, and protect leather, vinyl, plastic, and trim.
Key Takeaways
- Car detailing protects your vehicle’s paint, interior materials, wheels, tires, glass, and resale value.
- Use automotive products instead of harsh household cleaners because the wrong cleaner can strip wax, haze plastics, or damage upholstery.
- Start with the exterior rinse and wash, then move to decontamination, polishing, waxing, wheels, tires, interior cleaning, glass, stains, odors, and final maintenance.
- Microfiber towels, a wash mitt, car shampoo, vacuum, interior cleaner, glass cleaner, tire cleaner, clay bar, and wax cover most home detailing jobs.
- Regular light cleaning between full details makes each future detail easier and helps prevent long-term damage from grime, UV exposure, spills, and contaminants.
At a Glance
| Time Required | 2 to 6 hours, depending on vehicle size, condition, and whether you polish or clay the paint. |
| Difficulty | Beginner to moderate. Basic washing and interior cleaning are easy; machine polishing needs more care. |
| Tools Needed | Microfiber towels, wash mitt, buckets, car shampoo, vacuum, brushes, interior cleaner, glass cleaner, clay bar, polish, wax, tire cleaner, and tire dressing. |
| Cost | Low to moderate if you already own basic supplies. Costs rise if you add a dual-action polisher, specialty brushes, or premium protectants. |
Why Car Detailing Matters
Car detailing is not merely a luxury; it is an essential part of vehicle maintenance that can improve the longevity, cleanliness, comfort, and appearance of your car. Unlike a standard car wash, which mainly focuses on removing dirt and grime from the exterior, detailing includes a more thorough cleaning and restoration process for both the interior and exterior.
This careful process helps preserve the vehicle’s finish and can support resale value over time. A well-detailed car not only looks better but also feels better to drive, creating a cleaner and more enjoyable experience for both the driver and passengers.
Regular detailing can also help prevent long-term damage from environmental contaminants. Bird droppings, tree sap, road salt, bug residue, brake dust, and industrial fallout can stain or damage surfaces if they sit too long. Cleaning and protecting the paint, wheels, trim, and glass helps reduce that risk.
A clean interior also supports a healthier driving environment by reducing dust, crumbs, allergens, and bacteria that can build up in carpets, upholstery, vents, cup holders, and seams. In that sense, car detailing helps maintain both the aesthetic and functional parts of your vehicle.
Essential Tools and Supplies
To complete a successful car detailing project, you need the right tools and supplies before you start. A comprehensive detailing kit typically includes microfiber towels, wash mitts, brushes of various sizes, buckets, a vacuum cleaner, glass cleaner, car wash soap, wheel cleaner, tire cleaner, interior cleaner, wax, and protectant.
Microfiber towels are especially important because they are gentle on surfaces and effective at trapping dirt without scratching paint, glass, or interior materials. Use separate towels for paint, wheels, glass, and interior surfaces so you do not transfer brake dust, grit, or chemical residue from one area to another.
Brushes with soft bristles can be used to clean intricate areas like air vents, seams, emblems, lug nut areas, and textured trim, ensuring that no dust or debris is left behind. Small detailing brushes are helpful for cup holders, stitching, dashboards, door pockets, and around buttons.
Specialized products can make the detailing process safer and more effective. A clay bar removes embedded contaminants from paint, while a dual-action polisher can help restore gloss when used properly. A pH-balanced car shampoo cleans without stripping protection as aggressively as harsh detergents.
Interior cleaning solutions should match the surface you are treating. A mild all-purpose cleaner may work for some plastics and vinyl, but leather, fabric, screens, glossy trim, and touch controls often need gentler products. Investing in quality tools makes the process more efficient and usually gives better results.
Note: Keep wheel towels, tire brushes, and paint towels separate. Brake dust and grit from wheels can scratch paint if you reuse the same towel on body panels.
Preparing the Exterior for Detailing

Before diving into the actual detailing process, prepare the exterior properly. Start with a thorough rinse to remove loose dirt and debris. Using a pressure washer or a hose with a spray nozzle can help dislodge larger particles that may scratch the paint during washing.
Start from the top of the vehicle and work downward. Gravity helps move dirt from higher surfaces before it settles on lower panels. Rinse the roof, windows, hood, trunk, upper doors, lower doors, bumpers, wheels, and wheel wells in that order.
Once the initial rinse is complete, wash the car with a dedicated car shampoo. Household detergents can be too harsh for automotive finishes and may strip wax or dull trim. Car shampoos are formulated to clean effectively while being safer for paint, clear coat, plastic, rubber, and existing protection.
Use a microfiber or lambswool wash mitt to reduce the chance of scratches. If possible, use the two-bucket method: one bucket for soapy water and one bucket for rinsing the mitt. Rinse the mitt often so dirt does not stay trapped against the paint.
After washing, dry the vehicle thoroughly with clean microfiber drying towels or a vehicle-safe drying towel. This helps prevent water spots, especially if you have hard water or if the vehicle is sitting in direct sunlight.
Warning: Do not wash or polish hot paint in direct sun. Heat can make soap, cleaners, polish, and wax dry too quickly, which can cause streaks, residue, or surface marks.
Washing, Claying, and Decontaminating the Paint
After the basic wash, check whether the paint feels rough. Place your hand inside a clean plastic sandwich bag and gently glide it over the paint. If the surface feels gritty, the paint may have bonded contaminants that washing alone cannot remove.
A clay bar or synthetic clay mitt can remove these embedded contaminants. Spray a clay lubricant on a small section, glide the clay gently across the surface, and wipe the area dry with a clean microfiber towel. Do not press hard. Let the clay do the work.
If you drop a traditional clay bar on the ground, discard it. Dirt and grit can stick to the clay and scratch the paint. Synthetic clay tools may be cleaned according to the product instructions, but you should still inspect them carefully before reuse.
Claying is not always necessary. If your paint already feels smooth after washing, you can skip this step and move to polishing or protection. Overusing clay can add light marring, especially on softer paint, so use it only when the surface needs decontamination.
Cleaning and Protecting the Interior
| Product | Usage | Effectiveness | Price |
|---|---|---|---|
| Vacuum Cleaner | To remove dust and debris from carpets and upholstery | High | |
| All-Purpose Cleaner | To clean surfaces like dashboard, door panels, and seats | Medium | |
| Leather Conditioner | To protect and moisturize leather seats | High |
The interior of a vehicle often requires just as much attention as the exterior, if not more. Start by removing all personal items, trash, floor mats, loose chargers, child items, coins, receipts, and anything stored in the door pockets or center console.
Once the cabin is clear, vacuum carefully. Pay close attention to seat seams, under seats, floor mat grooves, trunk corners, cup holders, and the space between the seat and center console. A vacuum with crevice tools and brush attachments can help you reach tight areas.
After vacuuming, clean dashboards, door panels, steering wheels, cup holders, center consoles, and interior trim with appropriate products. For plastic and vinyl surfaces, an all-purpose cleaner or dedicated interior cleaner can effectively remove grime without causing damage when diluted and used according to the label.
For fabric upholstery, use a fabric cleaner or steam cleaner to lift stains and refresh the material. Avoid soaking seats, carpets, and headliners. Too much moisture can cause mildew, odors, adhesive failure, or water stains.
Once surfaces are clean and dry, apply a protectant to vinyl, plastic, rubber, and leather where appropriate. A good protectant can help reduce fading, make future cleaning easier, and leave the cabin looking finished without feeling greasy.
Tips for Cleaning Windows and Mirrors
Cleaning windows and mirrors is often overlooked during detailing, yet it plays a major role in visibility and safety. Use a dedicated automotive glass cleaner that is safe for your windows and tint. Many detailers prefer ammonia-free glass cleaners because they are safer for many tinted films.
Microfiber glass towels work well because they reduce lint and help remove residue. Use one towel to spread the cleaner and another dry towel to buff the glass. This two-towel method helps remove streaks instead of moving them around.
When cleaning windows, work in sections from the top down. This prevents drips from running onto areas you already cleaned. For exterior windows, a squeegee can help leave a clearer finish if you use it properly.
On the interior side, clean both the glass surface and the surrounding edges where dust can accumulate. Lower the windows slightly so you can clean the top edge of each side window. Clean the windshield last because it usually collects the most film from interior plastics, vents, and fingerprints.
Pro Tip: Clean glass in the shade and use straight vertical strokes on the outside and horizontal strokes on the inside. If you see streaks later, you can quickly tell which side needs another pass.
Removing Stains and Odors

Stains and odors can make an otherwise clean vehicle feel neglected. Treat them based on the source and surface. Food spills, coffee, soda, mud, pet accidents, smoke, and mildew each require a slightly different approach.
For fabric upholstery or carpets, identify the stain before choosing a cleaner. Use a fabric-safe stain remover, work gently with a soft brush, and blot instead of scrubbing aggressively. Heavy scrubbing can damage fibers or spread the stain.
For persistent odors, such as those caused by smoke, mildew, food spills, or pet accidents, deeper cleaning may be necessary because surface sprays often mask smells instead of removing the source.
Steam cleaning can help penetrate fibers and loosen odor-causing residue while also refreshing fabric surfaces. However, avoid oversaturating carpets, seats, and headliners. After any wet cleaning, leave the doors open in a safe, shaded area or use airflow to help the interior dry fully.
Odor absorbers such as activated charcoal or baking soda can help neutralize lingering smells over time. They work best after you clean the source of the odor. Regularly addressing stains and odors improves comfort and helps protect the interior from long-term damage.
Polishing and Waxing the Exterior
Polishing and waxing are two different steps. Polishing corrects or improves the paint surface by reducing minor scratches, swirl marks, oxidation, water spots, and dullness. Waxing or sealing adds protection after the paint is clean and polished.
A dual-action polisher with the right pad and polish can make paint correction easier and more consistent than hand polishing. However, beginners should start with a mild polish and test a small area first. Aggressive compounds can remove more clear coat than needed if used incorrectly.
Choose a polish based on the condition of the paint. Heavily oxidized or scratched paint may need a compound, while lightly swirled paint may only need a finishing polish. Always follow the product instructions and wipe away residue with clean microfiber towels.
Once polishing is complete, apply wax, paint sealant, or ceramic-style spray protection. Wax adds shine and short-term protection, while synthetic sealants often last longer. These protectants help repel water, reduce contamination buildup, and make future washing easier.
The combination of polishing followed by wax or sealant can improve gloss while safeguarding the paint from UV rays, rain, grime, bug splatter, and road film. If your paint is already in good condition, you may skip polishing and simply apply protection after washing and drying.
Detailing the Wheels and Tires
Wheels and tires collect brake dust, dirt, road grime, tar, and mud. Because wheels are often the dirtiest part of the vehicle, clean them before or separately from the paint. This helps keep brake dust and grit away from clean body panels.
Use products specifically designed for wheel cleaning. Some wheels have delicate finishes, so avoid harsh cleaners unless the label says they are safe for your wheel type. A dedicated wheel brush can help clean spokes, barrels, lug nut recesses, and tight corners.
After cleaning the wheels, scrub the tires with a tire cleaner and brush until the brown residue is removed. Rinse well and let the tires dry before applying dressing. Tire dressing gives the tire a richer finish and can help reduce cracking caused by sun exposure when used correctly.
Apply tire dressing evenly and wipe away excess product. Too much dressing can sling onto paint when you drive. Let the dressing dry before moving the vehicle if the product instructions recommend it.
Regularly detailing wheels and tires improves the vehicle’s appearance and helps you inspect tire condition, tread wear, cracks, sidewall damage, and embedded objects more easily.
Taking Care of Leather Seats
Leather seats need gentle, consistent care to maintain their appearance and durability. Start by vacuuming the seats to remove loose dirt from seams, stitching, and creases. Dirt can act like sandpaper when you wipe or sit on the leather.
Use a dedicated leather cleaner and a soft cloth or soft brush to lift grime without stripping the surface. Avoid harsh household cleaners, strong solvents, and excessive water. Many modern automotive seats use coated leather, so gentle cleaning is usually better than heavy conditioning.
Leather conditioners contain oils or conditioning agents that help maintain the feel and appearance of leather while adding some protection against dryness, UV exposure, and spills. Apply conditioner evenly with a soft cloth, allow it to absorb as directed, and wipe off any excess.
Do not leave leather greasy. A clean, matte finish usually looks better and attracts less dust than a shiny, slippery surface. Regular leather maintenance improves comfort and can help reduce cracking, fading, and wear over time.
DIY Car Detailing for Different Types of Vehicles
Car detailing techniques vary depending on the vehicle. Sedans, SUVs, trucks, vans, convertibles, and motorcycles all have different shapes, materials, storage spaces, and hard-to-reach areas.
Larger vehicles like SUVs and trucks may require extra time for roof panels, roof racks, running boards, wheel wells, cargo areas, tailgates, and lower body panels that collect heavy grime.
Sedans are usually easier to wash and dry because the roofline is lower, but you still need to clean door jambs, trunk edges, floor mats, and rear glass carefully. SUVs and minivans often need more interior work because they carry passengers, pets, groceries, sports gear, and luggage more often.
Trucks may need extra attention around bed liners, tailgates, wheel wells, tow hooks, mud flaps, and step bars. Use separate brushes and towels for muddy areas so you do not scratch the paint.
Motorcycles require careful attention to chrome, painted panels, seats, wheels, controls, and exposed mechanical parts. Avoid blasting sensitive components with high-pressure water. Use motorcycle-safe cleaners where needed and dry the bike carefully to reduce water spots and corrosion risk.
Regardless of vehicle type, the best detailing job starts with the same idea: match the cleaner, tool, pressure, and process to the surface you are treating.
Maintaining the Cleanliness of Your Car
Once your vehicle has been detailed thoroughly, maintaining its cleanliness helps preserve that fresh look for longer. A simple schedule can prevent dirt from building up into a larger problem.
Vacuum the interior weekly or every other week, depending on use. Wipe spills quickly, shake out floor mats, remove trash often, and keep a microfiber towel in the vehicle for light dusting. These small habits make full details easier.
Wash the exterior regularly, especially after road salt, bird droppings, tree sap, bug splatter, or muddy driving. These contaminants can stain, etch, or cling to paint if left too long.
Monthly or seasonal waxing can help protect the exterior, depending on the product you use and your weather conditions. Parking in shaded areas or using sunshades can also reduce UV damage to both interior materials and exterior paintwork.
Using floor mats, seat covers, cargo liners, and organizers can protect against spills or stains while making cleanup easier in everyday situations. By adopting these habits after a detailing session, you can enjoy a cleaner vehicle while reducing future maintenance effort.
Common DIY Detailing Mistakes to Avoid
Many home detailing problems come from using the wrong product or rushing the process. Washing with dish soap, using dirty towels, scrubbing paint with stiff brushes, applying wax to dirty paint, or cleaning in direct sunlight can all create extra work.
Another common mistake is using one towel for every surface. Wheels, tires, paint, glass, and interior materials should each have dedicated towels. This keeps grit, grease, and chemical residue from spreading.
Avoid spraying cleaners directly onto screens, buttons, vents, and instrument panels. Spray the towel first, then wipe gently. This helps prevent liquid from entering electronics or leaving residue in tight spaces.
Do not overuse glossy dressings inside the vehicle. Shiny dashboards can create glare on the windshield, and slippery steering wheels, pedals, or floor mats can become a safety issue. Keep driving controls clean, dry, and residue-free.
More Helpful Guides
If you’re looking to master the art of detailing your car at home, you may also be interested in learning how to marinate chicken for maximum flavor. Check out this article for tips and tricks on how to elevate your cooking game. And while you’re at it, make sure your home is safe with one of the top-rated carbon monoxide detectors with display. And for a perfectly fluffy side dish to accompany your delicious chicken, consider mastering the rice cooker with this guide.
Related Guides
Frequently Asked Questions
What supplies do I need to detail a car at home?
To detail a car at home, you need car wash soap, microfiber towels, a wash mitt, buckets, a vacuum cleaner, interior cleaner, glass cleaner, tire cleaner, wheel cleaner, tire dressing, a clay bar, polish, wax, and soft detailing brushes. You can start with the basics and add specialty tools as needed.
What is the process for detailing a car at home?
The process usually includes rinsing, washing, drying, claying the paint if needed, polishing minor defects, applying wax or sealant, cleaning wheels and tires, vacuuming the cabin, wiping interior surfaces, cleaning glass, treating stains and odors, and protecting leather, vinyl, plastic, and trim.
Can I use household cleaning products to detail my car at home?
Some household products may work for limited tasks, but it is safer to use products designed for automotive surfaces. The wrong cleaner can strip wax, dull paint, stain fabric, dry leather, haze plastic, or damage interior trim. Always test cleaners in a hidden area first.
How often should I detail my car at home?
Most vehicles benefit from a full detail every 3 to 4 months, but the right schedule depends on how often you drive, where you park, your climate, and how dirty the vehicle gets. Light weekly cleaning helps extend the results of each full detail.
Are there any safety precautions to consider when detailing a car at home?
Yes. Wear gloves and eye protection when using cleaning chemicals, work in a well-ventilated area, follow product labels, avoid mixing chemicals, keep cleaners away from children and pets, and do not use slippery dressings on pedals, steering wheels, or floor mats.
Should I wax my car after every wash?
You do not need to wax after every wash. Wax or sealant should be reapplied when water no longer beads well, the paint feels less slick, or the product’s expected protection period has passed. Regular washing helps preserve the protection between applications.
Is machine polishing safe for beginners?
A dual-action polisher can be beginner-friendly when used with a mild polish, soft pad, and light pressure. Beginners should avoid aggressive compounds, rotary polishers, and repeated polishing on thin or damaged paint unless they have proper experience.
Sources
- Consumer Reports — pressure washer safety guidance for exterior cleaning.
- National Highway Traffic Safety Administration — tire safety and inspection context for wheel and tire care.
- U.S. Environmental Protection Agency — indoor air quality context related to dust, allergens, and cleaner use.

1 thought on “DIY Car Detailing: Tips for a Clean Ride at Home”