
To physically access or remove the Toyota RAV4 A-OFF Stop & Start cancel switch, you need to work from behind the center-console control area rather than pry the button face from the front. This guide applies to 2019–2025 gasoline RAV4 models that are actually equipped with the physical A-OFF switch. It does not cover the ENGINE START STOP ignition button, RAV4 Hybrid models, or the sixth-generation 2026 RAV4.
Last updated: September 19, 2026
Quick Answer
For a 2019–2025 U.S.-spec gasoline RAV4 equipped with the physical A-OFF Stop & Start cancel switch, access the switch from behind the center-console controls. A common installation path is to release the shifter trim, storage-tray area, and adjacent climate-control panel until you can reach the switch connector. Disconnect the plug by its locking tab and service the switch from the rear of the panel. Do not pry the button face out from the front, and use VIN-specific Toyota repair information before forcing any retaining claw or tab.
Key Takeaways
- The A-OFF Stop & Start cancel switch and the ENGINE START STOP ignition button are different components.
- This guide is aimed at 2019–2025 gasoline RAV4 models that have the physical A-OFF switch; Toyota’s conventional Stop & Start system is not the same as normal hybrid engine cycling.
- Toyota repair information also refers to the switch as the eco run cancel switch assembly.
- Using A OFF is temporary on the covered Stop & Start system; Toyota states that the system is automatically re-enabled after the engine is switched off and started again.
- Removing or unplugging the switch is not Toyota’s factory method for permanently disabling Stop & Start.
- Console layout, clips, electrical connectors, and post-battery-disconnection procedures can differ by model year, trim, production date, and market.
At a Glance
| Applies To | 2019–2025 gasoline RAV4 models equipped with the physical A-OFF Stop & Start cancel switch |
| Time Required | Varies by experience, trim layout, and whether you are inspecting the connector or replacing the switch |
| Difficulty | Moderate interior-trim and electrical-connector work |
| Tools Needed | Plastic trim tools, flashlight, low-tack masking tape, small parts tray, soft cloth, and a 10 mm wrench or socket if required for battery or trim work |
| Main Risk | Breaking console clips, damaging a connector, or following the wrong procedure for your exact RAV4 configuration |
Which RAV4 Start-Stop Button Are You Removing?

Toyota uses similar wording for two controls that perform completely different jobs:
- ENGINE START STOP or POWER button: This control switches the vehicle’s ignition, engine, or hybrid system on and off. It is not the switch being removed in this guide.
- Stop & Start cancel switch: On equipped gasoline RAV4 models, this is the control marked with an encircled “A” and “OFF.” Toyota repair information also calls the component the eco run cancel switch assembly.
The removal procedure here concerns only the A-OFF Stop & Start cancel switch. Do not use these instructions to remove the ENGINE START STOP ignition button or the POWER button on an electrified RAV4.
According to Toyota’s 2024 RAV4 Quick Reference Guide, the Stop & Start Engine system may automatically stop a gasoline engine while the vehicle is stationary. Pressing the Stop & Start cancel switch disables that function when the system is fitted.
Note: Toyota states that this separate Stop & Start Engine system is not applicable to the RAV4 Hybrid. A hybrid’s gasoline engine can still stop and restart during normal hybrid-system operation, but that is not the same conventional Stop & Start function controlled by the A-OFF switch described here.
Which RAV4 Models Does This Procedure Cover?
The center-console A-OFF switch is associated with equipped fifth-generation gasoline RAV4 models. Do not assume every trim, market, production date, or powertrain uses the same switch panel.
| Vehicle | What to Check |
|---|---|
| 2019–2025 gasoline RAV4 | Confirm that your vehicle actually has the physical A-OFF Stop & Start cancel switch. Then check the VIN-specific owner’s or repair information before disassembly. |
| 2019–2025 RAV4 Hybrid or Plug-in Hybrid | Do not apply a gasoline-model Stop & Start switch or eliminator procedure simply because the gasoline engine can stop while driving. |
| 2026 RAV4 | Use sixth-generation service information. Toyota’s U.S. 2026 lineup uses Hybrid Electric Vehicle or Plug-in Hybrid Electric Vehicle powertrains rather than a gasoline-only configuration. |
| Vehicle without an A-OFF switch | This removal procedure does not apply. |
When ordering a replacement, use the VIN and compare the original part number, connector, pin arrangement, switch illumination, mounting design, and vehicle equipment. Two Toyota switches can look similar from the front while serving different electrical functions.
What If the RAV4 Stop & Start System Feels Rough or Does Not Work?
A healthy Stop & Start system can produce a noticeable sound or vibration when the gasoline engine restarts. Toyota owner information also notes that brake-pedal response can change and some vibration can occur during Stop & Start operation.
Severe shaking, repeated hesitation, slow cranking, unsuccessful restarts, a continuously flashing cancel indicator, or a persistent Stop & Start malfunction message should be diagnosed instead of hidden by unplugging the switch.
What Should You Check When Restarts Feel Abnormal?
A light restart vibration is different from a hard shake, stall, or slow crank. Use the symptom itself to decide whether the switch is relevant.
| Symptom | First Check | Next Step |
|---|---|---|
| Normal restart sound or light vibration | Check for warning messages and confirm that starting remains prompt and consistent | Use the factory A-OFF switch when you prefer Stop & Start inactive for the drive |
| Hard shake, stall, or repeated hesitation | Check whether the engine also runs roughly outside Stop & Start operation | Have the engine, mounts, starting system, stored faults, and battery condition inspected |
| Slow or unsuccessful restart | Check the 12-volt battery condition and dashboard messages | Arrange battery, charging-system, and starting-system testing before continuing to troubleshoot the switch |
| A-OFF indicator does not respond | Check the switch connector and confirm that the correct switch is installed | Use Toyota-compatible diagnostic testing to verify the switch input and related circuit before replacing more parts |
| Cancel indicator flashes continuously or a malfunction message remains | Record the message and diagnostic codes | Have the Stop & Start system diagnosed rather than repeatedly clearing the warning |
Why Does Stop & Start Turn Back On After Restarting the RAV4?
On the covered RAV4 Stop & Start system, pressing A OFF is a temporary cancellation rather than a permanent configuration change. Toyota’s owner information states that after the system is disabled with the cancel switch, it is automatically re-enabled once the engine switch is turned off and the engine is started again.
That behavior does not indicate a defective switch. Before replacing anything, confirm that the A-OFF indicator responds when the button is pressed and that the vehicle behaves as described in the owner information for your exact model.
Should You Remove the RAV4 A-OFF Switch?
Physical removal makes sense when you need to replace a damaged switch, inspect its connector, repair surrounding trim, clean the panel, diagnose the switch circuit, or reach the connector for a compatible reversible inline module.
If your only goal is to prevent the engine from shutting off at traffic lights, you do not need to remove the switch. Pressing A OFF is Toyota’s normal driver-control method for canceling Stop & Start during the current drive.
Unplugging the switch should not be treated as a permanent-disable method. Toyota repair information describes the eco run cancel switch as a momentary input to the Stop & Start system. Disconnecting the circuit can remove the driver’s factory control and may create an electrical fault rather than providing a clean permanent cancellation.
Warning: Do not pry the A-OFF button face out from the front. Reach the switch from behind the console control area. Forcing the visible button can scratch the console, crack the switch housing, or damage its mounting points.
Before ordering a replacement, compare the original switch, connector, pin arrangement, mounting design, illumination, model year, trim, powertrain, and VIN. Toyota’s Manuals and Warranties portal can help you locate model-specific owner information, while a Toyota parts department can identify the correct service part from the VIN.
How Do You Remove the Toyota RAV4 A-OFF Start-Stop Switch?
The following sequence covers the common fifth-generation gasoline-RAV4 access path. Exact panel seams, clips, fasteners, connector counts, and switch-retention details can vary. Stop if a panel does not release with light, controlled pressure.
- Confirm the correct component. Locate the center-console switch marked with the encircled A and OFF. Do not confuse it with the ENGINE START STOP ignition button.
- Park and power down. Park on a level surface, select Park, apply the parking brake, switch the vehicle off, and keep the electronic key away from the cabin.
- Prepare for any battery disconnection. Check the owner’s or repair information for your exact vehicle before disconnecting the negative 12-volt terminal. Some systems can require initialization or relearning after power is restored.
- Protect the trim. Apply low-tack masking tape beside vulnerable seams and place a soft cloth over glossy surfaces.
- Release the shifter-area trim. Use a plastic trim tool and lift one clip at a time. On common 2019–2025 aftermarket-module installations, the access path includes the shifter trim, storage-tray area, and adjacent climate-control panel.
- Lift panels only as far as the wiring allows. Do not pull a panel away if a short connector is still attached. Release connector locks before moving the panel farther.
- Disconnect the A-OFF switch connector. Press the connector’s locking tab and pull on the connector housing rather than the wires. Photograph nearby plugs first if several connectors look alike.
- Remove the switch body only from the rear side. Inspect the switch’s mounting points and use the release direction specified for your VIN-specific Toyota repair procedure. Do not force the visible button face through the panel from the front.
- Inspect the component. Look for bent or backed-out terminals, damaged connector locks, corrosion, overheated plastic, broken switch mounting points, pinched wires, or a cracked switch housing.
- Install the correct switch. Seat the replacement in the same orientation as the original, make sure its retention points are fully engaged, and reconnect the plug until the connector lock is secure.
- Reassemble the console. Route wires away from clip locations, align each trim clip with its opening, and press the panels back into place with controlled hand pressure.
- Restore power and test. If the battery was disconnected, reconnect it according to the applicable procedure. Start the vehicle, test A OFF, and verify every control or connector disturbed during the job.
Pro Tip: Photograph each connector before unplugging it and place clips or fasteners in a divided parts tray. This reduces the chance of a missed connector, misplaced clip, or console rattle during reassembly.
After battery reconnection: Stop & Start may not become available immediately. Toyota service information notes that battery disconnection/reconnection can require driving until Stop & Start operating conditions are satisfied again. Depending on equipment, other systems may also require initialization or calibration. Follow the owner or service procedure for your exact VIN before assuming the new switch is faulty.
What If the Switch Does Not Work After Reinstallation?
Switch the vehicle off and recheck the connector first. A plug can appear seated even when its locking tab has not fully engaged. Inspect for a bent pin, backed-out terminal, damaged connector lock, or a wire trapped behind the panel.
If the connection is secure, do not replace additional components blindly. Toyota repair procedures allow the Stop & Start cancel-switch input to be checked with compatible diagnostic equipment. A technician can use that information to separate a failed switch from a harness, ground, or control-system problem.
What If Warning Lights Appear?
Verify that every connector disturbed during the job has been reattached and that any battery connection is secure. Record persistent dashboard messages and diagnostic codes before taking the console apart again.
Do not repeatedly erase warning codes without identifying the cause. A continuing Stop & Start warning or flashing cancel indicator should be diagnosed using the correct wiring information and diagnostic procedure.
What If the Console Rattles After Reassembly?
A new rattle usually points to a trim clip that missed its opening, a broken clip, a trapped wire, or a fastener that was not reinstalled. Lift the affected panel again and inspect the alignment rather than pressing harder on one corner.
What Tools Do You Need to Remove the RAV4 A-OFF Switch?
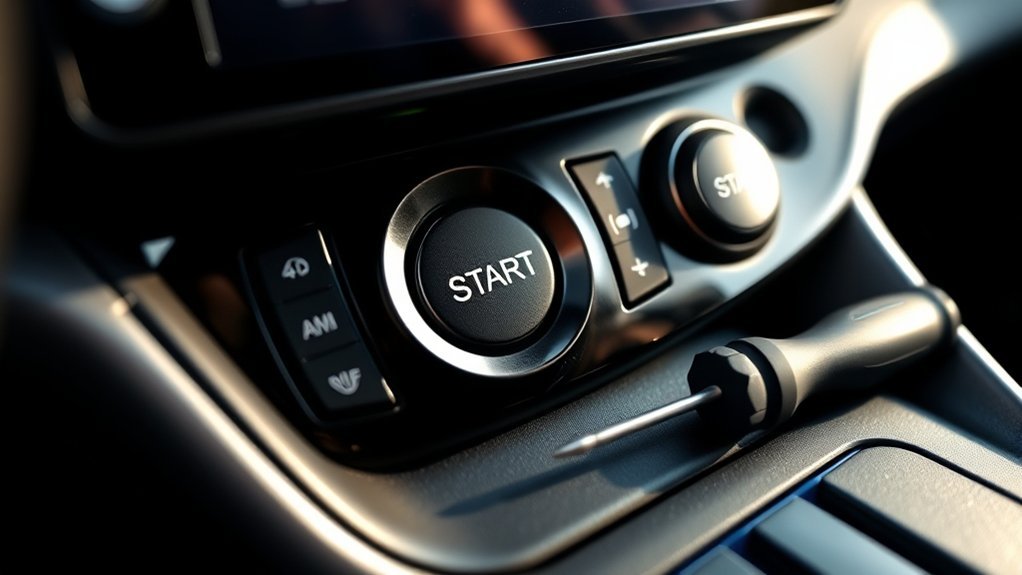
Using trim-safe tools reduces the chance of scratching the console or concentrating too much force on one clip. Gather what you need before opening the console.
Essential Tools
- Plastic trim-removal tools: Thin, rounded tools help release trim without using bare metal against visible surfaces.
- Flashlight: Use it to identify connector locks, wiring routes, and hidden panel attachment points.
- Low-tack masking tape: Protects painted, piano-black, or other easily marked trim beside panel seams.
- Small parts tray: Keeps any clips and fasteners organized.
- Soft cloth: Protects adjacent trim and gives you a safe surface for a released panel.
- 10 mm wrench or socket: Have one available if your model-specific procedure requires battery-terminal or trim-fastener work.
A flathead screwdriver should not be the primary trim tool. If one is needed for a small latch, protect its tip and keep it away from visible trim and electrical terminals.
What Safety Precautions Should You Follow?
Turn the vehicle fully off before unplugging console components and keep the electronic key away from the cabin while you work.
If your model-specific procedure requires disconnecting the 12-volt battery, follow Toyota’s specified power-down and reconnection instructions. Do not assume that every model year has the same wait time or initialization requirements.
Do not touch orange high-voltage cables, traction-battery service plugs, or other high-voltage hybrid components. This guide does not require high-voltage system work.
Battery disconnection can affect learned settings or system availability. Toyota service information lists post-disconnection procedures for Stop & Start and other vehicle systems, and Toyota’s RAV4 quick-reference information notes that an equipped power back door can require reinitialization after the battery is disconnected.
Stop and seek professional help if you find melted plastic, water intrusion, damaged wiring, an unfamiliar safety-system connector, or a panel that requires excessive force.
Do You Need to Remove the Switch to Disable Stop & Start?

No. Physical switch removal is unnecessary if you simply want the gasoline engine to keep running at a stop. Consider the factory control first, then evaluate any modification separately.
Use the Factory Cancel Switch
Press A OFF after starting the vehicle. Toyota’s 2019 RAV4 quick-reference guide states that pressing the Stop & Start cancel switch disables the system and illuminates the cancel indicator. Pressing it again re-enables the system.
The cancellation is not intended as a permanent stored preference on the covered system. Toyota owner information states that Stop & Start is automatically re-enabled after the engine switch is turned off and the engine is started again.
Replace a Faulty Switch
If the switch sticks, is physically damaged, has failed illumination, or does not register after its connector and circuit have been checked, replace it with the correct VIN-matched component rather than bypassing the circuit.
Consider a Reversible Inline Module
Aftermarket modules are sold for some 2019–2025 gasoline RAV4 configurations. A common design plugs inline behind the factory Stop & Start switch and automatically applies or remembers a cancellation state after startup.
Compatibility matters more than appearance. Confirm the model year, market, powertrain, physical A-OFF switch, connector, and the module manufacturer’s current fitment instructions before installation. Prefer a reversible plug-in connection over cutting or splicing factory wiring when both options are available.
In the United States, an aftermarket part does not automatically void the entire vehicle warranty. The Federal Trade Commission’s auto-warranty guidance says warranty coverage may still be denied for damage shown to have been caused by a defective aftermarket part or improper installation.
Have the System Diagnosed
If your reason for disabling Stop & Start is slow cranking, stalling, repeated warning messages, severe restart vibration, or inconsistent electrical behavior, diagnose that symptom instead of masking it with a bypass device.
A battery, starting-system, engine-running, connector, wiring, or stored-fault problem can exist independently of the driver’s preference about Stop & Start.
Related Guides
Frequently Asked Questions
Will removing the A-OFF switch trigger dashboard warning lights?
It can. Disconnecting the switch removes the factory cancel input and may leave an open circuit or stored diagnostic information depending on the vehicle state. When removal is only for inspection or replacement, reconnect the switch and every other disturbed connector before normal operation.
Can I replace the switch if it is damaged during removal?
Yes. Match the replacement by VIN, model year, powertrain, connector, mounting design, and original part information rather than appearance alone.
Does removing the A-OFF switch affect the ignition button?
The A-OFF Stop & Start cancel switch is a different component from the ENGINE START STOP ignition button. Removing the correct A-OFF switch does not physically remove the ignition button, although damaged wiring or incorrectly reconnected console plugs can create other electrical problems.
Why does RAV4 Stop & Start turn back on after I restart the vehicle?
Toyota designed the factory A-OFF switch as a temporary cancellation on the covered Stop & Start system. Toyota owner information states that the system is automatically re-enabled after the engine switch is turned off and the engine is started again. That reset does not by itself mean the switch is defective.
Does this A-OFF removal procedure apply to a 2026 RAV4?
No. The 2026 RAV4 begins the sixth generation in the United States and uses Hybrid Electric Vehicle or Plug-in Hybrid Electric Vehicle powertrains. Do not carry over this fifth-generation gasoline A-OFF console procedure to a 2026 model.
Is professional help recommended for this removal process?
Professional help is sensible when you have not removed automotive trim before, a panel requires excessive force, warning lights are already present, wiring is damaged, or your vehicle does not match the fifth-generation gasoline-RAV4 layout described here.
What are the risks of modifying the Stop & Start system?
Possible risks include broken trim clips, damaged connectors, short circuits, diagnostic codes, lost settings, electrical problems from an incompatible module, and repair costs for installation-related damage. An aftermarket modification can also affect warranty coverage for a related failure if the modification caused the damage.
Can I permanently disable Stop & Start by unplugging the switch?
Do not treat unplugging the switch as a permanent-disable method. The A-OFF control is a momentary input to the Stop & Start system, so disconnecting it can remove the driver’s factory control without providing a proper persistent cancellation. Use the factory switch, a correctly matched reversible module, or professional service instead.
Conclusion
On an equipped 2019–2025 gasoline Toyota RAV4, the A-OFF Stop & Start cancel switch is accessed from behind the center-console control area. Confirm the exact switch first, protect the trim, follow the correct model-specific power-down procedure, release only the panels needed for access, disconnect the switch connector by its lock, and service the switch from the rear rather than prying its face from the front.
Do not use this procedure on the ENGINE START STOP ignition button, assume every gasoline RAV4 has the same equipment, or apply fifth-generation instructions to a 2026 RAV4. If the vehicle has slow cranking, stalling, severe restart vibration, persistent warnings, or a flashing cancel indicator, diagnose the underlying problem instead of using switch removal as a workaround.
Sources
- Toyota 2024 RAV4 Quick Reference Guide — Stop & Start operation, gasoline-model applicability, Hybrid exclusion, and battery-disconnection information
- Toyota 2019 RAV4 Quick Reference Guide — fifth-generation Stop & Start system operation and A-OFF cancel-switch location
- Toyota Manuals and Warranties — model-specific owner manuals and vehicle information
- Toyota-derived RAV4 Stop & Start Cancel Switch Circuit Information — eco run cancel switch assembly terminology, circuit behavior, and diagnostic testing
- 4D Tech 2019–2025 RAV4 Start/Stop Eliminator Installation Information — common shifter-trim, storage-tray, and climate-control access path for reaching the rear switch connector
- Toyota USA Newsroom: 2026 RAV4 — sixth-generation Hybrid and Plug-in Hybrid U.S. lineup
- Federal Trade Commission: Auto Warranties and Service Contracts — aftermarket-part and warranty guidance
