
A Toyota RAV4 may have a trailer hitch, but the answer depends on its model year, trim, market, and installed accessories. Some RAV4s leave the factory without a receiver, while others may have a Toyota accessory or aftermarket hitch installed later. The 2026 RAV4 Woodland is a notable exception because Toyota lists a two-inch rear receiver and wiring harness as standard equipment.
Quick Answer
Not every Toyota RAV4 comes with a trailer hitch. The 2026 Woodland includes a two-inch receiver and wiring harness, while many other RAV4 trims and earlier model years require a Toyota accessory or aftermarket installation. Always verify the exact vehicle and its towing limits before buying or using a hitch.
Key Takeaways
- Hitch equipment and towing capacity vary by RAV4 model year, trim, powertrain, and drivetrain.
- Toyota lists a standard two-inch receiver and wiring harness on the 2026 RAV4 Woodland.
- A higher-rated aftermarket receiver does not increase the vehicle’s permitted towing capacity.
- The safe limit is the lowest rating among the vehicle, receiver, ball mount, hitch ball, coupler, and other towing components.
- Tongue weight, passengers, cargo, and hitch accessories all consume the RAV4’s available payload.
At a Glance
| Time Required | About 20–40 minutes to inspect the vehicle and compare options; installation time varies greatly by hitch and wiring design. |
| Difficulty | Easy for inspection and selection; moderate to advanced for installations involving fascia cutting, wiring, sensors, or trim removal. |
| Tools Needed | Flashlight and tape measure for selection; installation may require sockets, a calibrated torque wrench, trim tools, ramps or approved lifting equipment, and wiring tools. |
| Cost | Varies by model year, receiver design, wiring kit, fascia parts, shipping, taxes, and professional labor. Obtain an itemized current quote. |
Does a Toyota RAV4 Come With a Trailer Hitch?
There is no single answer covering every RAV4. Inspect the area beneath the rear bumper for a square receiver opening, a hitch label, safety-chain loops, and a trailer-wiring connector. Also check the original window sticker, dealer repair orders, accessory invoices, or build documentation.
For the redesigned 2026 model, Toyota specifically lists a two-inch rear tow-hitch receiver and wiring harness as standard equipment on the Woodland. Other trims should not be assumed to include the same equipment simply because they have a published towing rating.
Note: A vehicle can have a towing rating without having a receiver installed. Conversely, a receiver may be installed on a RAV4 that is intended only for a bicycle rack or cargo carrier. Verify both the equipment and the vehicle’s permitted use.
Why You May Need a Trailer Hitch for Your Toyota RAV4
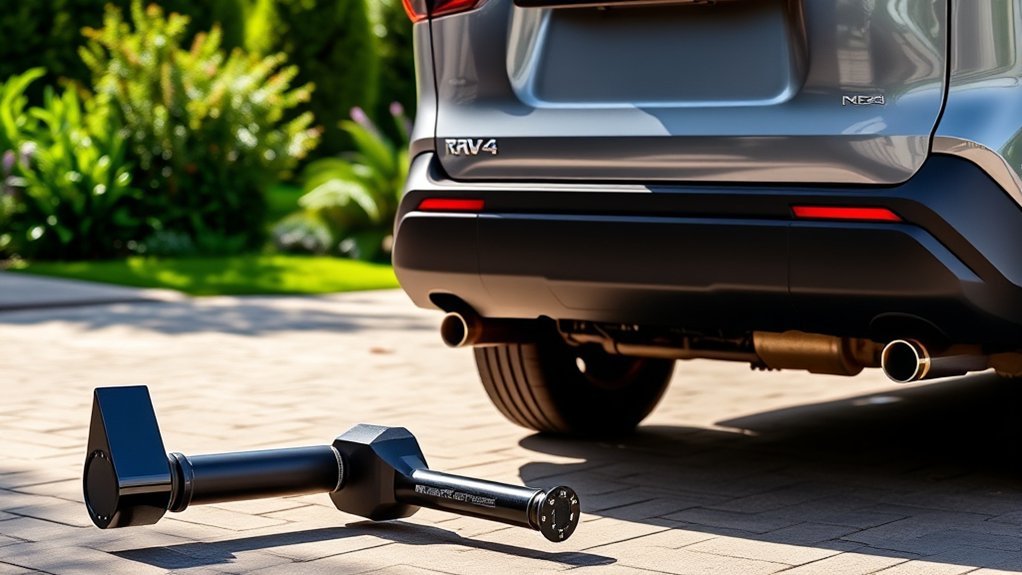
A receiver hitch can make a RAV4 more useful, but the correct setup depends on what you plan to carry. Common uses include:
- Towing a small utility, camping, or recreational trailer within the vehicle’s limits
- Carrying a receiver-mounted bicycle rack
- Using a hitch-mounted cargo carrier
- Attaching another compatible receiver accessory approved by its manufacturer
A hitch is not automatically necessary for every RAV4 owner. Roof-mounted equipment may work better for some loads, while a small trailer may require wiring, safety chains, a ball mount, a properly sized hitch ball, and additional braking equipment.
Towing and accessory carrying are different
A bicycle rack or cargo carrier places a downward load on the receiver without a trailer axle supporting part of the weight. The accessory, bicycles, cargo, adapter, and carrier all count toward the applicable tongue-load limit and the vehicle’s payload.
Long adapters and swing-away extensions can increase leverage on the receiver. Follow the accessory and hitch manufacturers’ instructions rather than assuming the full trailer tongue-weight rating applies to every rack configuration.
How to Find Your RAV4’s Actual Towing Capacity
Do not identify towing capacity from the receiver opening, hitch class, engine size, or trim badge alone. Use the owner’s manual and specifications for the exact model year, powertrain, drivetrain, and grade.
Toyota’s current specifications demonstrate why this matters. For the 2026 RAV4, Toyota lists a 1,750-pound towing capacity for the LE AWD and a 3,500-pound capacity for several other AWD grades, including the XLE Premium, Woodland, and SE AWD. These figures cannot be applied automatically to an earlier RAV4 or a differently equipped current model.
The receiver’s rating is only one limit. Your safe maximum is the lowest applicable rating anywhere in the complete vehicle-and-trailer system.
Use the lowest-rated-component rule
Compare all relevant limits before towing:
- The RAV4’s maximum trailer-weight rating
- The vehicle’s payload, gross vehicle weight, and axle ratings
- The receiver-hitch rating
- The ball-mount rating
- The hitch-ball rating and size
- The trailer coupler and safety-chain ratings
- The trailer’s loaded weight and axle rating
- Any limit stated for a wiring system, brake controller, adapter, or accessory
Warning: Installing a receiver labeled for more weight does not increase the RAV4’s factory towing capacity, payload, axle ratings, or gross combined limit. Never exceed the lowest applicable rating.
Account for payload and tongue weight
Tongue weight presses downward on the RAV4 and therefore consumes payload. A practical payload check is:
Remaining payload = door-jamb payload allowance − occupants − cargo − added accessories − trailer tongue weight.
Do not forget the receiver, ball mount, cargo in the rear compartment, roof cargo, child seats, and other equipment. Also confirm that the rear axle will remain within its rating. Follow the owner’s manual and trailer manufacturer’s instructions for tongue-weight distribution rather than applying a generic percentage to every trailer.
Comparing OEM and Aftermarket Trailer Hitches
Both genuine Toyota and reputable aftermarket receivers can be appropriate when they are designed for the exact vehicle and installed correctly. The better choice depends on fitment, intended use, installation method, appearance, clearance, wiring, warranty, and total cost.
| Factor | Toyota Genuine or OEM-Style | Aftermarket |
|---|---|---|
| Fitment | Designed around specified Toyota applications; confirm the exact part and vehicle. | Often offered in several designs; verify year, trim, powertrain, and exclusions. |
| Appearance | May position the receiver through or close to the bumper for an integrated look. | Some designs remain visible below the bumper; others use a more concealed cross tube. |
| Installation | May require fascia trimming, trim removal, wiring work, or additional Toyota parts. | Many bolt to existing mounting points, but the exact procedure varies by product. |
| Clearance | An integrated position may preserve more departure clearance on some applications. | A receiver hanging below the bumper may become the lowest rear component. |
| Wiring | Vehicle-specific components may integrate neatly but can require more trim access. | Vehicle-specific plug-in kits are common, although power routing may still be required. |
| Warranty | Toyota publishes accessory-warranty terms that depend on when the accessory is purchased. | Coverage varies by hitch manufacturer, wiring manufacturer, retailer, and installer. |
| Cost | May include receiver, fascia pieces, wiring, dealer labor, and calibration or inspection. | Part prices may be lower, but include wiring, shipping, tools, labor, and accessories in the comparison. |
Ground Clearance: Why It Matters for Towing

A receiver or ball mount positioned too low can scrape on steep driveways, dips, trails, or parking-lot entrances. However, one universal clearance figure cannot describe every RAV4 and hitch combination.
Evaluate the installed system by measuring:
- The distance from level ground to the lowest point of the receiver or safety-chain loops
- The receiver-opening height needed for the trailer to sit level
- The lowest point of the ball mount when installed
- Clearance with passengers, cargo, and expected tongue weight loaded
- How far the hitch extends behind the rear axle and bumper
The vehicle’s published ground clearance is not necessarily the same as the hitch’s lowest clearance. For example, Toyota publishes different vehicle ground-clearance figures across the 2026 lineup, but an added receiver or ball mount can sit lower than the vehicle body.
Pro Tip: Compare hitch geometry using installed side-view photos and manufacturer drawings for your exact RAV4. Measure again after loading the vehicle and trailer because rear suspension compression changes clearance.
How Installation Complexity Differs
Installation difficulty depends more on the specific hitch design than on whether the product is labeled OEM or aftermarket. Read the complete instructions before ordering so you know whether the job involves fascia cutting, exhaust lowering, underbody-panel trimming, trim removal, sensor work, or powered wiring.
Typical installation steps
- Confirm the hitch part number and all vehicle-fitment notes.
- Park on a firm, level surface and support the vehicle only as instructed.
- Remove or loosen any underbody panels, exhaust supports, or trim identified by the instructions.
- Clean the mounting points and inspect the supplied hardware.
- Raise the receiver into position without trapping wiring or damaging the exhaust.
- Install fasteners in the specified sequence.
- Tighten every fastener to the manufacturer’s published torque with a calibrated torque wrench.
- Install and route the correct wiring kit if trailer lights are required.
- Reinstall trim and confirm clearance around the exhaust, liftgate sensors, and body.
- Test trailer lights and inspect the installation before use.
Tools commonly required
A receiver installation may require metric sockets, extensions, a ratchet, a calibrated torque wrench, trim-removal tools, exhaust-hanger tools, a file or cutting tool for approved trim modifications, and safe lifting equipment. Wiring work may require access to the battery or interior trim in addition to circuit testing.
Do not substitute an impact wrench for final torque verification. If the instructions require body cutting, sensor relocation, unfamiliar electrical work, or lifting the vehicle beyond your equipment and experience, use a qualified installer.
Is the OEM Hitch Worth the Extra Cost?

A Toyota hitch may be worth the added expense when you value factory-style integration, documented Toyota fitment, coordinated fascia pieces, or dealer-supported installation. An aftermarket receiver may be the better value when it has confirmed fitment, the geometry suits your needs, and you prefer a simpler installation or a particular receiver design.
Ground-clearance advantages
Some integrated receivers position the opening higher in or near the bumper. This can reduce the amount of hardware hanging below the vehicle, but the advantage must be confirmed for the exact model and hitch. Do not rely on generalized clearance figures from another RAV4 year or trim.
Installation-complexity comparison
A factory-style installation can look cleaner while requiring more trim work. A below-bumper design may be easier to bolt on but more visible. Compare the instructions, not just marketing photographs, and include wiring in the installation estimate.
Long-term reliability factors
Reliability depends on engineering, correct fitment, fastener torque, corrosion protection, load control, and inspection. After installation:
- Inspect for loose hardware, cracked coatings, rust, or contact with the exhaust.
- Keep the receiver opening clean and protect exposed metal as appropriate.
- Check wiring for abrasion, water intrusion, and secure routing.
- Reinspect after the initial use if the installation instructions require it.
- Stop using the hitch after an impact, overload, or visible deformation until it has been evaluated.
Towing Capacity: Vehicle Rating Versus Hitch Rating
The receiver label describes the receiver assembly, not the entire vehicle. A RAV4 with a receiver rated above the vehicle’s towing limit remains restricted to the vehicle limit. The same principle applies when the ball mount, ball, trailer, or another component has a lower rating.
| Rating | What It Controls | Where to Verify It |
|---|---|---|
| Vehicle towing capacity | The maximum trailer weight allowed for that vehicle configuration under stated conditions. | Exact model-year owner’s manual and Toyota specifications |
| Payload | The combined allowable weight of occupants, cargo, accessories, and tongue load. | Driver-door-jamb certification or tire-and-loading label |
| Receiver rating | The receiver assembly’s maximum trailer and tongue loads. | Receiver label and installation instructions |
| Ball mount and ball | The limits of the removable connection between receiver and trailer coupler. | Stamped or labeled rating on each component |
| Trailer ratings | The permitted loaded trailer and axle weights. | Trailer certification label and manual |
Aesthetic Impact: How a Hitch Changes the RAV4’s Look
A receiver mounted through the bumper can appear more integrated, while a below-bumper cross tube may be more visible. Appearance varies by hitch design, not simply by OEM or aftermarket status.
Before choosing, review photographs of the exact hitch installed on the same RAV4 generation and trim. Look for:
- How much of the cross tube is visible
- Whether the bumper must be cut
- The position of the safety-chain loops
- Where the wiring connector is mounted
- Whether the receiver interferes visually or physically with the exhaust
- Whether the hands-free liftgate sensor remains functional
What Owners Should Compare Before Choosing a Hitch
Owner reviews can reveal installation challenges, but individual reports should not replace specifications or instructions. A useful review identifies the exact RAV4 year, trim, hitch part number, installation method, measured clearance, and intended load.
Useful decision criteria
- Confirmed fitment for the complete vehicle configuration
- Receiver size required by the planned rack, carrier, or ball mount
- Documented weight ratings
- Loaded ground clearance and departure-angle effect
- Fascia cutting or underbody-panel modifications
- Parking-sensor or liftgate-sensor compatibility
- Wiring requirements
- Corrosion-resistant finish
- Availability of replacement hardware and instructions
- Manufacturer, installer, and accessory warranty terms
Installation experiences
An installation described as “bolt-on” may still require lowering the exhaust, enlarging access holes, trimming a panel, or working beneath the vehicle. Read the full instructions and inspect the RAV4 before deciding whether the project fits your abilities.
A professional installation is especially sensible when the receiver passes through the bumper, powered wiring is required, safety-system components are nearby, or the vehicle has existing collision or corrosion damage.
Wiring Needs for a RAV4 Trailer Hitch
A receiver alone does not operate trailer lights. The wiring system must match the trailer and the functions required.
| Connector | Typical Functions | Important Limitation |
|---|---|---|
| Four-way flat | Tail, brake, and turn-signal lighting plus ground | Does not by itself provide the full circuits commonly used for electric trailer brakes or auxiliary charging. |
| Seven-way connector | Can support additional circuits such as trailer brakes, reverse lights, or auxiliary power when correctly equipped | A connector alone does not guarantee that every circuit, controller, fuse, or power wire is installed. |
Use a vehicle-specific powered converter when required. Route power and signal wires according to the manufacturer’s instructions, protect them from heat and abrasion, and keep connectors secured above locations where they could drag or collect water.
Trailer-brake requirements vary with the trailer, vehicle instructions, and applicable law. Confirm whether a compatible brake controller, breakaway system, or additional wiring is required before towing.
Additional Equipment You May Need
A complete towing setup may include:
- A ball mount with the correct rise or drop
- A hitch ball matching the trailer coupler’s marked size
- A rated hitch pin or locking pin
- Crossed safety chains attached to approved points
- A compatible trailer-wiring connector
- A trailer-brake controller when required
- A breakaway system when required
- Extended mirrors if the trailer blocks the required rearward view
- Wheel chocks, a trailer jack, and correctly rated tires
Weigh the trailer in its actual travel condition when practical. Include water, batteries, propane, tools, food, sporting equipment, and other cargo rather than relying only on an empty or advertised dry weight.
How to Choose the Right Hitch for Your RAV4
- Identify the vehicle. Record the model year, trim, drivetrain, powertrain, and any special equipment.
- Define the use. Decide whether the hitch is for towing, bicycles, cargo, or several purposes.
- Verify the vehicle limits. Check the owner’s manual, door labels, and official Toyota specifications.
- Select confirmed fitment. Use the exact vehicle application rather than relying on a photograph or general RAV4 description.
- Compare geometry. Review receiver height, cross-tube visibility, departure clearance, and required bumper modifications.
- Plan the wiring. Determine whether you need lighting only or additional trailer-brake and power circuits.
- Compare total cost. Include the receiver, wiring, fascia pieces, ball mount, ball, controller, shipping, taxes, tools, and labor.
- Review the warranty. Confirm what is covered by Toyota, the hitch manufacturer, the wiring manufacturer, and the installer.
- Install to specification. Follow every fitment, hardware, and torque instruction.
- Inspect before each trip. Check the coupler, pin, chains, wiring, lights, tires, load security, and clearance.
Note: Toyota’s official manuals and parts resources are the best starting points for exact vehicle information. A retailer’s hitch rating or fitment description should not replace the RAV4 owner’s manual.
Related Guides
Frequently Asked Questions
Does every Toyota RAV4 come with a trailer hitch?
No. Equipment varies by model year and trim. Toyota lists a standard two-inch receiver and wiring harness on the 2026 RAV4 Woodland, while many other RAV4s require a genuine Toyota accessory or aftermarket hitch.
How much weight can a RAV4 tow with a hitch?
The limit depends on the exact RAV4. Toyota lists 1,750 pounds for the 2026 LE AWD and 3,500 pounds for several other 2026 AWD grades. Earlier years and other configurations can have different limits, so check the exact owner’s manual.
Does a Class III hitch increase the RAV4’s towing capacity?
No. A receiver with a higher hardware rating does not increase the vehicle’s towing capacity, payload, axle ratings, or gross combined limit. The complete setup is restricted by its lowest-rated component.
Can I install an aftermarket RAV4 hitch myself?
Many vehicle-specific receivers can be installed by an experienced DIYer with the correct tools and torque specifications. Use a professional when the job requires fascia cutting, powered wiring, sensor work, difficult lifting, or procedures beyond your experience.
What is the warranty on a Toyota accessory hitch?
Toyota states that accessories purchased with a new vehicle generally receive 36-month/36,000-mile coverage from the in-service date. Accessories purchased later generally receive 12 months regardless of mileage or the remaining applicable new-vehicle warranty, whichever provides greater coverage. Confirm the terms on your invoice and warranty documents.
Do I need wiring if the hitch is only for a bicycle rack?
Usually not, unless the rack blocks required vehicle lights or includes lights that must be connected. Confirm local requirements and the rack instructions. Trailer towing normally requires a functioning lighting connection.
Which aftermarket hitch brands fit a Toyota RAV4?
Manufacturers such as CURT and Draw-Tite offer receivers for various RAV4 applications, but availability and exclusions change by model year and configuration. Select by the complete vehicle description and exact part instructions rather than brand name alone.
Conclusion
A Toyota RAV4 can use a trailer hitch, but hitch equipment and towing limits are not identical across the lineup. The 2026 Woodland includes a factory two-inch receiver and wiring harness, while many other RAV4s need an accessory installation. Choose a receiver for the exact vehicle, verify every component rating, include tongue weight in the payload calculation, and never treat a higher-rated hitch as an upgrade to the RAV4’s towing capacity.
Sources
- Toyota USA: The Next Adventure Begins—2026 RAV4 — current U.S. trim equipment, receiver information, towing capacities, and ground-clearance specifications.
- Toyota Owners: RAV4 Manuals and Warranties — official owner-document access and Toyota accessory-warranty terms.
- Toyota Global: All-New RAV4 World Premiere — sixth-generation RAV4 announcement and current-generation context.
- Toyota Genuine Parts and Accessories — official starting point for model-specific Toyota accessory fitment.
