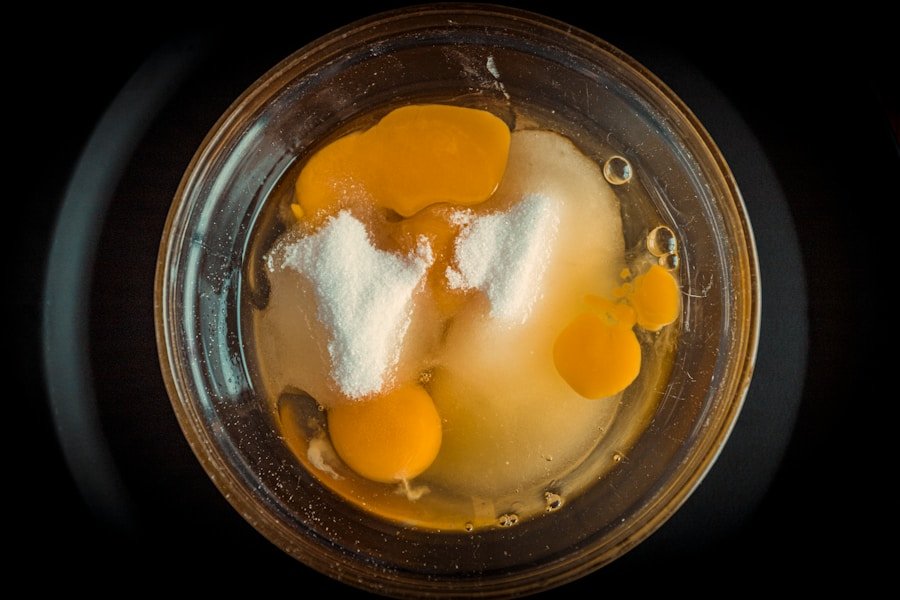
Separating egg whites from yolks is a simple kitchen skill that can change how your recipes turn out. Clean egg whites whip higher for meringues, soufflés, macarons, and angel food cake, while yolks add richness to custards, sauces, pasta dough, and desserts.
You can separate eggs with the shell, your hand, a spoon, a plastic bottle, or an egg separator tool. The best method depends on your comfort level, how many eggs you need, and whether the whites must stay completely yolk-free for whipping.
Quick Answer
The easiest way to separate an egg is to crack it into a small bowl, then lift the yolk out with clean hands, a slotted spoon, or an egg separator. For whipped egg whites, avoid even a small amount of yolk because fat can stop the whites from forming stiff peaks.
Key Takeaways
- Egg separation means dividing the white from the yolk so each part can do its job in a recipe.
- The shell transfer method is classic, but it takes practice and can introduce shell fragments.
- The water bottle method is fun and useful, but the bottle must be clean before it touches raw egg.
- An egg separator tool is the cleanest choice when you separate eggs often.
- The hand method gives you strong control, but you should wash your hands before and after handling raw eggs.
At a Glance
| Time Required | About 30 seconds to 2 minutes per egg, depending on the method and your experience |
| Difficulty | Easy, with a little practice needed for shell transfer |
| Tools Needed | Small bowls, clean hands, spoon, plastic bottle, or egg separator tool |
| Cost | Free with basic kitchen tools, or low-cost if you buy a separator |
Why Egg Separation Matters
Egg whites and yolks behave differently because they contain different amounts of water, protein, and fat. Egg whites are mostly water and protein, so they can trap air when whipped. That trapped air helps create light textures in meringues, sponge cakes, soufflés, and certain frostings.
Yolks work in a different way. They add fat, color, flavor, and emulsifying power. That makes them useful in mayonnaise, hollandaise, custards, puddings, lemon curd, pastry cream, carbonara, and enriched doughs.
When a recipe asks for separated eggs, it usually needs the whites and yolks to perform different jobs. If the yolk breaks into whites meant for whipping, the fat can weaken the foam and make the recipe fail.
Warning: Raw eggs can carry harmful bacteria. Wash your hands, use clean bowls and tools, avoid cracked or dirty eggs, and keep separated eggs chilled until you use them.
Before You Start: Set Up for Success
Good setup makes egg separation easier and cleaner. Start with three small bowls: one for the egg you are cracking, one for clean whites, and one for yolks. This keeps one broken yolk from ruining a whole batch of egg whites.
Crack each egg into the first bowl before moving the white or yolk to the main bowls. If the egg looks or smells unusual, discard it. If a shell piece falls in, remove it with a clean spoon or a larger shell piece.
Use cold eggs when you need the yolk to stay firm during separation. After separating, let the whites come closer to room temperature if your recipe needs better volume for whipping.
Pro Tip: Separate eggs one at a time in a small bowl. Then transfer each clean white to your mixing bowl. This protects the full batch if one yolk breaks.
The Traditional Method
The traditional method of egg separation is perhaps the most widely recognized technique, often passed down through generations. This method involves cracking the egg and using the shell halves to transfer the yolk back and forth while allowing the egg white to fall into a bowl below.
To use this method, crack the egg on a flat surface instead of the edge of a bowl. A flat crack helps reduce tiny shell fragments. Carefully open the shell into two halves while keeping the yolk in one half.
Hold the shell halves over a small bowl. Gently pass the yolk from one shell half to the other while the white slips down into the bowl. Continue until most of the white has fallen away, then place the yolk in a separate bowl.
This method is simple and requires no special tools. However, it does demand a steady hand. If the shell edge punctures the yolk, the yolk can leak into the whites and make them less useful for whipping.
Best For
- Quick everyday cooking
- People who are comfortable cracking eggs
- Recipes where a tiny trace of white with the yolk will not matter
Watch Out For
- Sharp shell edges that can break the yolk
- Shell fragments falling into the bowl
- Yolk contamination when you need clean whites for meringue
The Water Bottle Method

An innovative approach to egg separation is the water bottle method, which uses a common household item: a clean plastic water bottle. This technique is especially useful if you struggle with shell transfer or want a fun method for separating yolks from whites.
To begin, crack the egg into a shallow bowl. Keep the yolk whole and visible. Take an empty, clean plastic bottle and squeeze it gently to push out some air.
Place the mouth of the bottle directly over the yolk. Release your grip slowly. The suction will pull the yolk into the bottle while the white stays in the bowl. Then move the bottle over another bowl and squeeze again to release the yolk.
This method can be fun when cooking with children, but an adult should handle the raw egg cleanup. The bottle must be clean and food-safe because it touches the yolk directly.
Best For
- Beginners who want an easy visual method
- Separating one or two eggs at a time
- Cooking demonstrations or family kitchen activities
Watch Out For
- Dirty bottle openings that can contaminate the egg
- Thin yolks that break under suction
- Bottles that have held drinks with strong flavors or residue
Note: The water bottle method works best when the yolk is whole and firm. If the yolk has already broken, use a spoon to remove the pieces instead.
The Egg Separator Tool
| Metrics | Value |
|---|---|
| Material | Stainless steel |
| Length | 7 inches |
| Weight | 3.5 ounces |
| Usage | Manual |
| Efficiency | Separates egg yolks and whites with minimal mess |
For those who prefer a more specialized approach, an egg separator tool can be an invaluable addition to any kitchen arsenal. These tools come in various designs, but they all serve the same basic purpose: they let the egg white drain away while holding the yolk in place.
Most egg separator tools are made from plastic, silicone, ceramic, or stainless steel. A common design has a small cup with slots or openings. You crack the egg into the cup, and the white falls through into a bowl below.
To use an egg separator, rest it over a small bowl if the design allows. Crack one egg into the separator. Wait a few seconds while the white drains through. Then tip the yolk into another bowl.
This method is especially helpful if you separate eggs often. It reduces mess, limits contact with raw egg, and helps prevent shell fragments from reaching the whites. Many tools are also easy to rinse and wash.
Best For
- Frequent baking
- Batch cooking
- People who want a cleaner method
- Anyone uncomfortable handling raw eggs directly
Watch Out For
- Separators with slots too narrow for thicker whites
- Cheap tools that wobble over the bowl
- Hard-to-clean designs with tight corners
The Hand Method
The hand method of egg separation is another effective technique that relies on touch rather than gadgets. This method involves cracking an egg into your clean hand and allowing the egg white to slip through your fingers while retaining the yolk in your palm.
Start by washing your hands well with soap and water. Crack the egg into one hand over a small bowl. Keep your fingers slightly open so the white can fall through. Hold the yolk gently, then place it in a separate bowl.
This method gives you excellent control because you can feel the yolk before it breaks. It can also be faster than the shell method once you get used to it. Many cooks like it because it avoids sharp shell edges.
However, some people dislike the texture of raw egg. If that bothers you, use a spoon or separator tool instead. You should also wash your hands again after handling raw eggs.
Best For
- Clean separation when you do not want to use the shell
- Recipes where yolk-free whites matter
- Cooks who do not mind touching raw egg
Watch Out For
- Unwashed hands before or after handling raw egg
- Fingers held too tightly together, which traps the white
- Long nails that can puncture the yolk
The Eggshell Transfer Method

The eggshell transfer method is another classic technique that uses the eggshell itself as the separating tool. It is very similar to the traditional method, but here the focus is on using the shell halves carefully and deliberately.
To begin, crack the egg on a flat surface and carefully open it into two halves. Keep the yolk in one half while the white begins to drip into the bowl below.
With one half of the shell in each hand, tilt one half so that it cradles the yolk. Gently transfer the yolk back and forth between the two shell halves. Let the remaining egg white drip into your bowl before moving the yolk to another bowl.
This method can work well for cooks with a steady hand. It also requires no extra equipment. Still, it carries more risk than a spoon or separator because sharp shell edges can break the yolk.
Best For
- Experienced cooks
- Quick separation without extra tools
- Recipes where you only need to separate a few eggs
Watch Out For
- Shell fragments in the egg white
- Uneven cracks that create sharp edges
- Broken yolks when the shell scrapes the membrane
The Spoon Method
The spoon method offers another simple way to separate eggs without a specialty tool. It uses a regular spoon to lift the yolk out after you crack the egg into a shallow bowl.
Start by cracking the egg into a small dish. Let the yolk settle in the center. Slide a clean spoon under the yolk and lift it slowly. Let extra white drip back into the bowl, then place the yolk in another bowl.
This method is useful if you do not want to touch raw egg with your hands. It also gives you more control than the water bottle method when the yolk is delicate.
A slotted spoon works even better because the white can fall through the openings. If you only have a regular spoon, tilt it gently so the white slides off without breaking the yolk.
Best For
- Beginners
- People who do not want to handle raw egg directly
- Delicate yolks that may break with the bottle method
Watch Out For
- Using a spoon with a rough edge
- Lifting too quickly
- Leaving too much white attached to the yolk when the recipe needs exact amounts
Which Egg Separation Method Is Best?
The best method depends on what you are making. For whipped egg whites, use the hand method, spoon method, or egg separator tool because they reduce the chance of sharp shell edges breaking the yolk. For everyday cooking, the shell method is fast and convenient.
| Method | Best Use | Main Advantage | Main Risk |
|---|---|---|---|
| Traditional shell method | Quick daily cooking | No tools needed | Shell can break the yolk |
| Water bottle method | Fun beginner practice | Easy to see and repeat | Bottle must be very clean |
| Egg separator tool | Frequent baking | Clean and consistent | Requires an extra tool |
| Hand method | Clean whites for whipping | Great control | Messy for some cooks |
| Spoon method | Simple tool-free alternative | No hand contact needed | Can leave white attached |
Common Mistakes to Avoid
Small mistakes can make egg separation harder than it needs to be. The biggest problem is cracking the egg directly over your main mixing bowl. If the yolk breaks, it can contaminate all the whites you already separated.
Another common mistake is using a greasy bowl. Fat from butter, oil, or yolk residue can interfere with whipped egg whites. Use a clean glass, metal, or ceramic bowl when you need maximum volume.
You should also avoid rushing. Separate each egg slowly until you build confidence. Once you learn how the yolk membrane feels and moves, the process becomes much faster.
- Do not crack eggs on the bowl edge if you want fewer shell fragments.
- Do not separate eggs over your main batch bowl.
- Do not use a greasy bowl for whites that need to whip.
- Do not keep separated eggs at room temperature for long periods.
- Do not use cracked, dirty, or bad-smelling eggs.
What to Do If Yolk Gets in the Whites
If a tiny speck of yolk lands in the whites, remove it right away with a clean spoon or a piece of clean eggshell. This may save the whites if the amount is very small.
If the yolk breaks and spreads through the whites, set that egg aside for scrambled eggs, omelets, pancakes, or another recipe that does not need whipped whites. For meringues, macarons, and soufflés, it is safer to start with a fresh egg white.
Clean separation matters most when egg whites need to foam. Even a little fat from yolk can weaken the structure you need for stiff peaks.
How to Store Separated Eggs
If you are not using separated eggs right away, place yolks and whites in separate airtight containers. Refrigerate them promptly. Label the containers with the date so you do not forget when you separated them.
Egg whites usually store well for a short period in the refrigerator. Yolks can dry out, so cover them tightly. Some cooks add a small amount of cold water over yolks before refrigerating, then drain it before use.
For the best texture and safety, use separated eggs as soon as possible. If you are unsure how long they have been stored, discard them rather than risk using spoiled eggs.
Conclusion and Final Tips
Mastering various methods of egg separation can improve your confidence in the kitchen and help your recipes turn out better. Each technique has its own benefits, so choose the one that fits your recipe and comfort level.
If you want speed and simplicity, use the shell method. If you want cleaner separation, try the hand method, spoon method, or egg separator tool. If you want a fun kitchen trick, the water bottle method works well with firm yolks.
For best results, crack eggs one at a time, keep your tools clean, and separate eggs into a small bowl before adding them to a larger batch. If a yolk breaks into whites meant for whipping, save that egg for another recipe and start again.
If you’re looking to expand your culinary skills beyond separating egg whites from yolks, you may want to consider investing in a tortilla press for homemade tortillas. Check out this article on the 5 Best Tortilla Presses for Homemade Tortillas to take your cooking to the next level.
Frequently Asked Questions
What is the best method for separating egg whites from yolks?
The best all-around method is to crack the egg into a small bowl and lift the yolk out with clean hands, a slotted spoon, or an egg separator. These methods give you good control and help keep the whites free from yolk.
Are there any tools that can help with separating egg whites from yolks?
Yes. Egg separators, slotted spoons, yolk extractors, and some egg-cracking gadgets can help separate whites from yolks. A basic egg separator is usually the easiest tool because it holds the yolk while the white drains into a bowl.
Can I use the eggshell to separate the egg whites from yolks?
Yes, you can use the eggshell by transferring the yolk back and forth between the two shell halves. It works, but it can be tricky. Sharp shell edges may break the yolk, and small shell fragments can fall into the whites.
What should I do if some yolk gets mixed in with the egg whites?
If it is only a tiny spot, remove it with a clean spoon or a piece of clean eggshell. If the yolk spreads through the whites, save that egg for another recipe and start over, especially if you need the whites to whip into stiff peaks.
Can I separate egg whites from yolks in advance?
Yes, you can separate egg whites and yolks in advance. Store them in separate airtight containers in the refrigerator and use them as soon as possible for the best quality. Label the containers with the date so you can track freshness.
Is it better to separate eggs cold or at room temperature?
Cold eggs are usually easier to separate because the yolks feel firmer and break less easily. If your recipe needs whipped whites, separate the eggs while cold, then let the whites sit briefly so they are not ice-cold before whipping.
Why won’t my egg whites whip after separation?
Egg whites may not whip well if yolk, grease, oil, or soap residue gets into the bowl. Use a clean bowl and beaters, and start with whites that have no visible yolk. Glass, metal, or ceramic bowls are good choices for whipping.
Sources
- U.S. Food and Drug Administration: What You Need to Know About Egg Safety — safe handling guidance for eggs.
- USDA Food Safety and Inspection Service: Shell Eggs from Farm to Table — egg storage and food safety background.
- FoodSafety.gov: Cold Food Storage Charts — refrigeration guidance for perishable foods.
