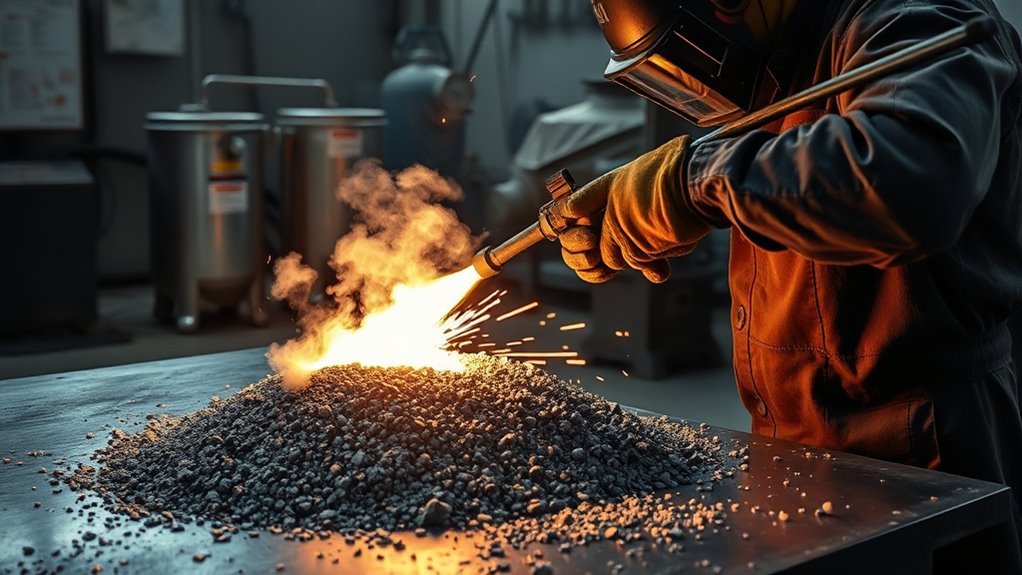
Excessive dross during plasma cutting usually means the cut has moved outside the machine’s best process window. Cutting speed is often the first variable to check, but torch height, amperage, gas flow and quality, material condition, and worn consumables can also leave re-solidified metal on the cut edge. The appearance and location of the dross help identify which setting to correct first.
Quick Answer
Plasma-cutting dross forms when molten metal is not fully expelled from the kerf. Heavy, bubbly bottom dross usually points to cutting too slowly; a thin, hard bottom bead usually points to cutting too fast; and top spatter often points to excessive speed, excessive torch height, or a worn nozzle.
Key Takeaways
- Identify the dross type before changing settings; low-speed and high-speed dross need opposite speed corrections.
- Start with the manufacturer’s cut chart for the exact material, thickness, amperage, consumables, gas, and torch configuration.
- Change one variable at a time and make small test cuts so you can see which adjustment improves the edge.
- Worn consumables, incorrect torch height, restricted or contaminated gas, and hot or dirty material can narrow the dross-free window.
- There is no universal air-pressure setting for every plasma cutter; use the pressure and flow specification in the machine manual.
At a Glance
| Time Required | About 10–30 minutes for inspection and test cuts |
| Difficulty | Moderate |
| Tools Needed | Machine cut chart/manual, scrap of the same material, PPE, and basic consumable-inspection tools |
| Cost | Usually no added cost unless worn consumables, filters, or gas-delivery parts need replacement |
What Is Dross in Plasma Cutting?
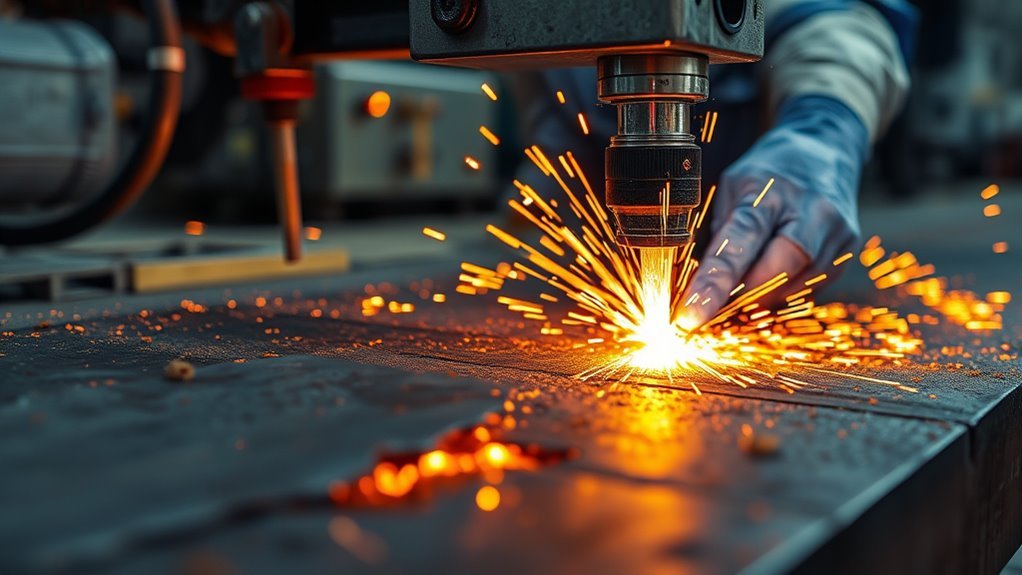
Dross in plasma cutting is re-solidified molten metal that was not fully ejected from the kerf and then adhered to the cut edge or nearby surface. Hypertherm describes three common forms: heavy low-speed dross on the bottom edge, a small hard high-speed bead near the bottom of the cut, and light top spatter on the upper surface.
These forms are useful diagnostic clues. Low-speed dross is generally thick and bubbly, high-speed dross is thin and tenacious, and top spatter is usually lighter and easier to remove. Their appearance reflects the interaction among cut speed, amperage, torch-to-work distance, gas delivery, consumable condition, and the material itself.
Excessive dross adds grinding, chipping, sanding, or other secondary work. It can also signal that the process is outside the recommended range for the material and consumables.
The fastest way to reduce dross is to identify its type, return to the manufacturer’s cut-chart baseline, and change one variable at a time.
The practical goal is clean separation of molten metal from the kerf with minimal material adhering to the finished edge. For a general troubleshooting reference, see Hypertherm’s dross troubleshooting guide.
Why Do Plasma Cuts Get Dross?
Plasma cuts develop dross when the arc and gas jet do not remove molten metal cleanly before it re-solidifies. The main process variables are cutting speed, amperage, torch height or standoff distance, gas flow, and consumable condition. Material thickness, chemistry, surface condition, flatness, and temperature can also change the result.
When cutting speed is excessive, the arc can lag behind the torch and leave a hard bead at the bottom. When speed is too low, the arc spends too long in one area, the kerf can widen, and heavy globular dross can collect underneath. Worn or damaged consumables may destabilize the arc and make either condition harder to correct.
Thicker material does not automatically mean dross is unavoidable; it means the system must be operated within the process range specified for that thickness. Likewise, rust, scale, coatings, heat buildup, or warped plate may reduce the width of the clean-cut window.
Effective cut-quality troubleshooting therefore starts with the correct cut chart, a sound torch and consumables, stable gas delivery, and controlled test cuts.
Note: A little dross can still appear at sharp corners because the machine slows while changing direction. Do not diagnose the entire process from a corner alone; inspect straight sections of the cut first.
What Causes Low-Speed Dross?
Low-speed dross is primarily caused by cutting too slowly for the selected process. The longer heat input allows the plasma column to widen, and the high-velocity center of the jet becomes less effective at ejecting molten metal from the bottom of the kerf.
The result is usually a heavy, bubbly or globular deposit along the lower edge. Excessive amperage or a torch that is too close to the work can create a similar over-energy condition for a given speed and thickness.
Slow Travel Speed
When travel speed falls below the recommended process window, molten metal has more time to collect and re-solidify under the cut. The kerf may also become wider than expected.
Start by comparing the actual travel speed with the machine’s cut chart for the exact material, thickness, consumable set, and amperage. If the cut is clearly slow, increase speed in small increments and make short test cuts. Hypertherm troubleshooting examples use 5 ipm increments on some systems, but the machine manual remains the controlling reference.
Do not compensate blindly by changing multiple settings at once. If speed is correct, inspect torch height, amperage, and consumables before assuming the material is the cause.
Overheated Cut Edge
An overheated cut edge can accompany low-speed dross because the torch deposits too much energy in a given area. Excessive amperage for the chosen nozzle or a torch-to-work distance that is too low may produce a similar effect.
The correction depends on the system. Common responses are to increase cutting speed, raise the torch slightly, or reduce amperage within the manufacturer’s allowed range. Make only one change at a time and compare the new cut with the previous sample.
On CNC systems with torch-height control, arc-voltage changes alter torch-to-work distance. Use the machine’s specified voltage increments rather than assuming one universal value for every system.
Routine inspection of the torch, motion system, and settings helps prevent the same low-speed condition from returning.
What Causes High-Speed Dross?
High-speed dross is most often associated with cutting faster than the selected process can support. The plasma arc trails behind the torch and leaves a thin, hard bead or rollover of metal attached near the bottom of the cut.
High torch standoff or insufficient amperage for a given speed and thickness can create a similar lack-of-energy condition. Worn nozzles or cartridges may make the arc less stable and further narrow the clean-cut range.
Fast Cutting Speed
If cutting speed exceeds the ideal range, the plasma arc cannot remain properly aligned through the thickness of the work. The arc lag increases, the bottom of the kerf may not clear completely, and hard dross forms close to the cut edge.
| Factor | Typical High-Speed-Dross Condition | First Check |
|---|---|---|
| Cut speed | Too fast | Reduce in small steps |
| Amperage | Too low for the process | Return to cut-chart value |
| Standoff | Too high | Correct torch height |
| Nozzle or cartridge | Worn or damaged | Inspect and replace as required |
| Gas delivery | Restricted or unstable | Check pressure, flow, leaks, and filtration |
Precise settings reduce secondary cleanup. If the bead is thin, linear, and difficult to remove, reduce speed first, then verify height and amperage against the cut chart.
Arc Lag Effects
Arc lag occurs when the bottom of the plasma arc trails behind the moving torch. Some trailing angle is normal, but excessive lag indicates that the process is no longer cleanly removing material through the full thickness.
The visible signs can include sharply swept lag lines, a narrow hard bead, excessive sparks trailing behind the cut, or incomplete penetration at more extreme speeds.
Correct the condition by returning to the specified speed and torch height, then checking amperage and consumable condition. If the machine cannot hold commanded speed accurately, motion-system tuning may also need attention.
Keeping the arc within its stable process window reduces both dross and the need for secondary machining.
Energy Loss Factors
High-speed dross can also appear when the torch delivers too little effective energy to the kerf. Possible causes include low amperage, excessive torch height, worn consumables, or a gas-delivery problem that weakens or destabilizes the plasma jet.
Low or unstable inlet pressure, undersized hoses, leaks, restrictions, moisture, oil, or particulate contamination can all affect some plasma systems. The correct pressure is machine-specific. For example, current Hypertherm guidance lists different inlet-pressure ranges for different Powermax models, which is why a blanket “90–100 PSI” rule is not reliable.
Check the actual pressure while gas is flowing, not only while the machine is idle. On systems that regulate gas automatically, follow the diagnostic procedure in the service manual rather than overriding the setting without evidence.
Why Does Top Spatter Dross Form?
Top spatter is re-solidified metal deposited on the upper surface near the kerf. According to Hypertherm, common causes are a worn nozzle, excessive cutting speed, or excessive standoff distance. The swirling plasma jet can throw molten material forward and upward instead of driving it completely through the cut.
| Factor | Effect | Correction |
|---|---|---|
| Worn nozzle | Distorted jet profile | Inspect and replace as required |
| High speed | Arc cannot clear the kerf cleanly | Reduce speed in small steps |
| High standoff | Reduced energy at the workpiece | Lower to the cut-chart height |
Top spatter is usually easier to remove than high-speed bottom dross. If it returns after speed and height are corrected, inspect the nozzle or cartridge and verify the gas path.
How Do You Find the Dross-Free Window?
The dross-free window is the range of settings that produces little or no adherent dross for a particular material, thickness, gas process, consumable set, and machine. The safest way to find it is to begin with the manufacturer’s cut chart and make controlled test cuts.
- Use scrap from the same material and thickness as the real part.
- Install the correct consumables and confirm the torch is square to the plate.
- Set amperage, gas, torch height, and speed to the cut-chart values.
- Make a straight test cut and inspect both the top and bottom edges.
- If dross is present, identify whether it is low-speed, high-speed, or top spatter.
- Change one variable in a small increment, then repeat the cut and compare.
Material response matters. Hypertherm notes that on carbon steel, air and nitrogen plasma processes tend to have a narrower dross-free window than oxygen plasma, and cold-rolled steel can cut cleaner than hot-rolled steel. Those observations are process- and material-specific, not universal rules for every metal.
Temperature also matters: as a workpiece heats through repeated cuts, dross can increase even when the programmed settings have not changed.
Pro Tip: Keep the best and worst test coupons side by side and write the speed, amperage, and height on each one. That makes the process window visible and prevents you from circling back to a setting that already failed.
How Do You Fix Dross With Settings?
Once the dross type is identified, correct the settings in a disciplined order rather than changing everything at once. The machine’s cut chart should be the baseline.
- Verify the process: confirm material type, thickness, consumables, amperage, gas, and cut mode match the cut chart.
- Inspect consumables: look for an enlarged, gouged, elliptical, burned, or otherwise damaged nozzle/orifice or cartridge.
- Check speed: increase speed for heavy low-speed dross; decrease speed for thin, hard high-speed dross or top spatter.
- Check torch height: a torch that is too low can contribute to low-speed-type defects, while a torch that is too high can contribute to high-speed dross and top spatter.
- Check amperage: excessive current can add too much energy; insufficient current can leave the arc unable to clear the kerf. Stay within the consumable and machine rating.
- Check gas delivery: verify the specified inlet pressure and flow while cutting, then inspect for leaks, restrictions, moisture, oil, or dirty filters.
- Retest: make another straight cut, compare the edge, and continue with one small change at a time.
Hypertherm’s plasma cut-quality guidance emphasizes using the correct cut-chart process, consumables, torch-to-work distance, speed, and gas delivery rather than relying on one generic setting.
[Amazon Products Picked for You]

Package Include: 10 Shield Cups, 50 Nozzles, 20 Swirl Baffle, and 30 Electrodes.

[Achieve Precise Cuts] PT31 Plasma Cutting Consumables – Your Essential Tool for Efficient Cutting! Whether you're working with sheet metal, steel, or any other material, superior cutting performance ensure clean, accurate, and smooth cuts.

High-Quality Material:Made of high quality material to ensure a longer lifespan and superior performance.
How Do Gas Quality and Consumables Affect Dross?
Plasma cutting depends on a stable gas stream and a correctly shaped arc. Worn consumables can distort the arc, while contaminated or restricted gas can reduce cut quality and shorten consumable life.
For compressed-air systems, keep the supply clean, dry, and free of oil to the level required by the manufacturer. Check filters and water separators, and confirm hose diameter and regulator capacity are adequate for the required flow.
Do not assume every machine should be set to the same pressure. For example, Hypertherm’s Powermax45 SYNC service guidance calls for 110–120 PSI inlet pressure while gas is flowing, whereas Powermax30 XP documentation specifies an 80–100 PSI regulator range. Use the exact manual for your model. See the Powermax45 SYNC gas-pressure troubleshooting guidance for an example of model-specific requirements.
[Amazon Products Picked for You]

Fit for: SG-55 AG-60 plasma cutter torch head.

Package Include: 2 Shield Cups, 10 Nozzles .040", 2 Wire Spacer Guides, and 10 Electrodes.

Package Include: 5 Shield Cups, 30 Nozzles, 10 Swirl Baffle, and 15 Electrodes.
Do Material Type, Surface Condition, and Temperature Matter?
Yes. Material chemistry, thickness, scale, coatings, rust, flatness, and temperature can all shift the dross-free window. A setting that works on clean cold-rolled steel may not produce the same edge on heavily scaled hot-rolled plate.
Heat buildup is especially easy to overlook during repetitive cutting. A later part cut from already-warm material may show more dross than the first part even though the CNC program is unchanged.
If cut quality changes across a sheet, check for warping, local scale or coating differences, and heat accumulation before changing the entire program.
How Do You Diagnose Dross by Appearance?
| Appearance | Likely Direction | What to Check First |
|---|---|---|
| Heavy, bubbly deposit on the bottom | Low-speed dross | Increase speed; then verify torch height and amperage |
| Thin, hard bead close to the bottom edge | High-speed dross | Reduce speed; then verify torch height and amperage |
| Light re-solidified metal on the top surface | Top spatter | Inspect nozzle, reduce speed, verify standoff |
| Dross appears only after several nearby cuts | Heat buildup may be contributing | Compare cold and hot material and review cut sequence |
| Dross is inconsistent around the part | Consumable, height, motion, or material issue | Inspect nozzle/cartridge, torch squareness, plate flatness, and machine motion |
This visual diagnosis is a starting point, not a substitute for the cut chart. Two faults can exist at the same time, so confirm each change with a test cut.
How Do You Remove Existing Dross Safely?
Once the part is cool and safe to handle, loose low-speed dross may come off with light chipping or a scraper, while hard high-speed dross often requires more aggressive mechanical cleanup such as grinding or sanding. The required method depends on the material, part tolerance, and finish requirement.
Remove only the adhered dross; avoid grinding deeply into the base metal or changing a critical edge dimension. If every part requires heavy cleanup, correct the cutting process rather than treating post-processing as the normal solution.
[Amazon Products Picked for You]

2-In-1 Scraper Remover Tool: The time-saving razor scraper tool with both plastic and metal blades can meet your various needs. The plastic blade is sharp but safe and without scratching the surface. The metal blade can remove multiple stubborn stains
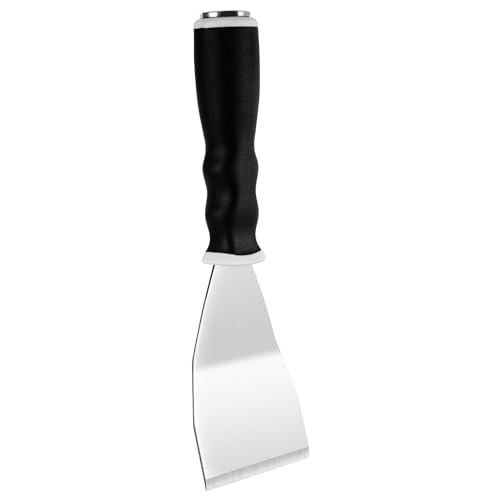
Stainless Steel Materials: The 3" heavy duty bent pole scraper is manufactured from the highest quality materials and undergo stringent quality control measures

Removes Weld Spatter / Dross
Safety Before Troubleshooting Plasma-Cutting Dross
Warning: Plasma arc cutting exposes operators to hot metal, ultraviolet and infrared radiation, fumes and gases, electrical hazards, noise, and fire hazards. Wear suitable eye/face, hand, body, foot, and hearing protection; provide ventilation as required; keep combustibles controlled; and de-energize the machine before servicing the torch or consumables.
OSHA identifies plasma arc cutting as hot work requiring protection from noise, fumes and gases, UV/IR radiation, electrical current, and hot metal. OSHA’s eye-protection tables also specify minimum filter shades for plasma arc cutting based on current and operating conditions. Review the applicable workplace rules and the cutter manufacturer’s safety manual before testing or servicing equipment. See OSHA’s hot-work PPE guidance and eye and face protection standard.
Frequently Asked Questions
What Causes Excessive Dross?
Excessive dross usually means the plasma process is outside its clean-cut window. Common causes include cutting too fast or too slowly, incorrect torch height, incorrect amperage, worn consumables, unstable or contaminated gas delivery, and material-condition problems such as scale, coatings, warping, or heat buildup.
What Can I Do to Reduce Excessive Dross When Cutting With Plasma?
Return to the cut-chart settings for the exact material and thickness, inspect the nozzle or cartridge, confirm torch height and gas delivery, and make a straight test cut. Heavy bubbly bottom dross usually calls for more speed; a thin hard bottom bead usually calls for less speed. Change one variable at a time.
How to Get Rid of Dross?
First fix the cutting process so new dross is minimized. For existing dross, let the part cool, then use a scraper or light chipping for loose deposits and grinding or sanding for stubborn high-speed dross when the part tolerance allows it. Avoid removing base metal or changing the finished edge dimension.
How Do You Remove Dross From Silver?
Silver-melting dross or surface oxides are a different metallurgical issue from plasma-cutting dross. In silver casting, some technical guidance uses borax, boric acid, or related fluxes and skims surface oxides from the melt. Follow the specific alloy and casting procedure; do not apply plasma-cutting adjustments to molten-silver refining. Ultrasonic cleaning may remove later surface residues, but it is not a method for skimming molten dross.
Can Too Much Amperage Cause Dross?
Yes. For a given thickness and speed, excessive amperage can put too much energy into the cut and contribute to low-speed-type dross. Too little amperage can contribute to high-speed dross. Use the amperage range and consumable rating in the manufacturer’s cut chart.
Does Higher Air Pressure Always Reduce Dross?
No. Plasma cutters are designed around specific pressure and flow ranges, and some modern systems regulate pressure automatically. Pressure that is too low, unstable, or restricted can hurt cut quality, but arbitrarily increasing pressure beyond the manufacturer’s specification is not a valid fix.
Conclusion
Dross is a process signal, not just a cleanup problem. Heavy bottom buildup generally points toward a low-speed or over-energy condition, while a thin hard bead points toward excessive speed or insufficient effective energy. Top spatter often directs attention to speed, torch height, or nozzle condition. Start from the cut chart, inspect consumables and gas delivery, change one variable at a time, and verify every correction with a test cut. That approach produces cleaner edges, less rework, and a repeatable plasma-cutting process.
Sources
- Hypertherm — Troubleshooting too much dross — dross types, causes, and correction direction.
- Hypertherm — Basic tips to improve plasma cut quality — cut charts, consumables, torch height, speed, and gas-delivery checks.
- Hypertherm — Powermax45 SYNC gas-pressure troubleshooting — example of model-specific inlet-pressure requirements.
- OSHA — Hot-work PPE guidance — plasma arc cutting hazards and PPE categories.
- OSHA — Eye and face protection — protective filter-shade guidance for plasma arc cutting.
- Rio Grande — Sterling silver casting instructions — silver fluxing and skimming context for the silver-dross FAQ.
