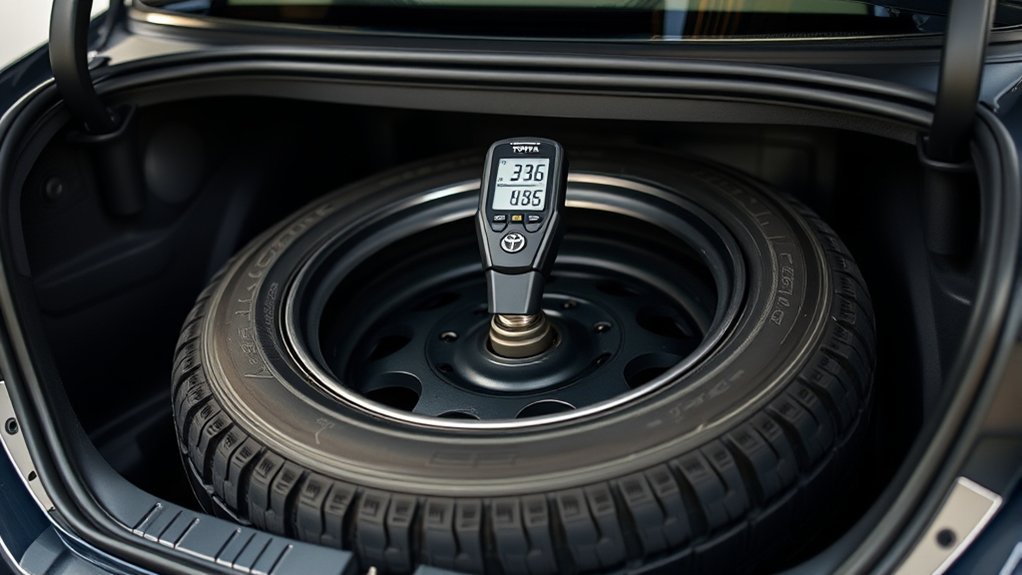
To check Toyota Camry spare tire pressure, measure the spare while cold—before driving or after the vehicle has been parked for at least three hours—and compare the gauge reading with the exact spare specification in your model-year Toyota manual. Many Camry compact temporary spares are specified at 60 PSI (420 kPa), but that value is not universal; a full-size spare or a different vehicle configuration can use another pressure. Access the spare under the trunk floor, adjust the pressure, inspect the valve and tire, then secure it again.
Last updated: September 19, 2026 · Fact-checked against Toyota and NHTSA guidance.
Quick Answer
Lift the Camry’s trunk floor, locate the spare, and check it cold—before driving or after at least three hours parked. Use the exact spare-tire pressure in the model-year Toyota manual. Many compact Camry spares list 60 PSI (420 kPa), but verify your own spare before inflating. Add or release air, test the valve for leakage, inspect the tire and wheel, and secure the spare again.
Key Takeaways
- Use the exact cold-pressure specification for your Camry’s model year and spare assembly.
- Many compact temporary Camry spares specify 60 PSI or 420 kPa, but that is an example—not a universal Camry value.
- Check the spare at least monthly, before long trips, and after major seasonal temperature changes.
- Do not assume the spare is monitored by the tire-pressure warning system.
- Do not use a spare that has a bulge, exposed cords, severe cracking, bead damage, or repeated pressure loss.
At a Glance
| Time Required | About 5 to 10 minutes |
| Difficulty | Easy |
| Tools Needed | Accurate tire-pressure gauge with sufficient range, air compressor or portable inflator if adjustment is needed, flashlight, and mild soapy water for a valve-leak check |
| Cost | No service cost if you already own the tools; gauge, inflator, and professional inspection costs vary |
Why Checking Spare Tire Pressure Is Essential for Your Safety

A spare tire can gradually lose air while sitting unused. Normal air permeation, seasonal temperature changes, a loose valve core, a damaged valve stem, a bead leak, wheel corrosion, or a small puncture can leave it underinflated when you need it.
The National Highway Traffic Safety Administration advises checking every tire, including the spare, at least once a month while cold. For a consistent cold reading, check before driving or after the vehicle has been parked for at least three hours.
Correct inflation helps the spare support the vehicle and perform as Toyota intended after installation. An underinflated tire can run hotter, handle poorly, and suffer internal damage. A severely overinflated tire may also provide less impact absorption and can be damaged more easily by potholes or sharp road hazards.
Warning: Do not choose a generic PSI range. Set the spare to the single cold-pressure value specified for your exact Camry and spare assembly. A compact temporary spare and a full-size spare can require very different pressures.
Confirm Your Camry Has a Spare and Identify Its Type
Open the trunk and lift the luggage-floor panel. On many Camrys, the spare is stored in a recessed well beneath the trunk floor and held by a center fastener. Toyota’s 2025 Camry Quick Reference Guide shows this common layout, but equipment and access details can vary by model year, drivetrain, trim, and market.
Your vehicle may have one of the following:
- Compact temporary spare: A narrow tire normally marked “TEMPORARY USE ONLY.” Many Camry compact spares specify 60 PSI or 420 kPa, but you must verify your own specification.
- Full-size spare: A tire and wheel closer to the road-wheel size. It may use a lower pressure than a compact spare. Follow the specification assigned to that exact assembly.
- Tire repair kit: Some vehicle configurations or markets provide sealant and a compressor instead of a spare wheel.
Equipment can change even between adjacent model years and markets. For example, Toyota Canada’s 2026 Camry product information lists a tire repair kit, so do not assume a newer Camry has the same emergency-tire equipment as an earlier one. Check the trunk and the exact model-year manual before planning around a spare.
Use Toyota’s official Manuals and Warranties portal to select the correct Camry model year and review its spare-tire equipment, pressure specification, removal procedure, and temporary-use restrictions.
What PSI Should a Toyota Camry Spare Tire Be?
Many Toyota Camry compact temporary spares are specified at 60 PSI (420 kPa) cold, including examples across multiple Camry generations. Treat 60 PSI as a common compact-spare specification, not a universal Camry rule. A full-size spare, a different market, or a different spare assembly may use another value.
| Spare setup | Pressure rule |
|---|---|
| Compact temporary spare | Use the exact Toyota cold-pressure specification. 60 PSI (420 kPa) is common on Camry compact spares. |
| Full-size spare | Use the pressure Toyota assigns to that tire-and-wheel assembly; do not automatically use 60 PSI. |
| Repair kit instead of a spare | Follow the kit and model-year manual; there is no stored spare tire to pressure-check. |
This page covers the stored spare tire. For the four installed road tires, use the separate Toyota Camry tire-pressure guide so the road-tire and spare-tire specifications are not mixed.
Use the following order when confirming the pressure:
- Model-year Toyota owner’s manual: Find the tire-inflation or vehicle-specifications section and identify the separate spare-tire value.
- Vehicle tire-information label: Use it when it expressly lists the spare or directs you to the applicable specification.
- Temporary-spare instructions: A compact spare may carry an inflation instruction on its sidewall or attached label. Confirm that it states the required inflation pressure rather than only a maximum rating.
Do not copy the front- or rear-road-tire pressure unless Toyota identifies the spare as a matching full-size assembly. Do not use a random specification from another Camry generation, trim, wheel package, or market.
Note: PSI and kPa are two units for the same pressure. A compact spare marked 60 PSI may also show approximately 420 kPa. Use the value and units stated by Toyota for your vehicle.
Tools You Need to Check and Inflate Your Spare Tire Pressure
You need an accurate pressure gauge and, if adjustment is required, a suitable air compressor or portable inflator. A flashlight helps you inspect the valve, sidewalls, tread, wheel, and Tire Identification Number inside the trunk.
Essential Tools Overview
- Tire-pressure gauge: Use a digital, dial, or stick gauge with a range above the spare’s target pressure. A gauge rated to 100 PSI is more suitable than one that ends at the exact target of a 60 PSI spare.
- Air compressor or inflator: A portable 12-volt or cordless unit can add air at home or during a trip. Follow the inflator manufacturer’s duty-cycle and power instructions.
- Owner’s manual: Use the manual for the exact model year rather than a generic online pressure chart.
- Flashlight: Use it to inspect the sidewall, valve, wheel, date code, and storage hardware.
- Mild soapy water: A small amount can reveal air bubbles around a leaking valve after inflation.
The factory jack and lug wrench belong in the emergency kit, but they are not normally needed just to check a spare stored beneath the trunk floor. Use the jack only for a wheel change and follow the Toyota lifting procedure for your exact vehicle.
Proper Inflation Equipment
Use an inflator with a hose connector that seals securely on the valve stem and can reach the required pressure. Some compact spares need considerably more pressure than the four road tires.
An inflator with automatic shutoff is convenient, but its built-in gauge may not exactly match a separate hand gauge. After inflation, disconnect the hose, allow the reading to settle briefly, and verify the final pressure with the same trusted gauge used for the initial measurement.
Do not use the maximum-pressure figure molded into a regular road tire as the vehicle’s recommended operating pressure. NHTSA explains that the sidewall figure is the maximum pressure the tire can hold, not necessarily the pressure specified for the vehicle.
Tire Pressure Gauge Use
Remove the valve cap and press the gauge squarely and firmly onto the valve stem. A brief hiss while the gauge seats is normal. Continued hissing means the connection is not sealed and can make the reading inaccurate.
Read the measurement, remove the gauge, and repeat the test. If the readings differ noticeably, reseat the gauge and check again. Compare the final reading with the spare specification, not automatically with the pressure used in the four road tires.
Pro Tip: Check the spare before a long trip and keep the gauge where you can reach it without unloading the entire trunk. Record the correct spare pressure on a maintenance card stored with the gauge.
Step-by-Step Guide: How to Check Spare Tire Pressure
- Park safely: Stop on a firm, level surface, set the parking brake, switch off the vehicle, and open the trunk.
- Check while cold: Measure before driving or after the vehicle has been parked for at least three hours. Do not bleed air from a warm tire merely to reach a cold-pressure specification.
- Access the spare: Lift the trunk-floor panel and remove the tool tray or cover where fitted.
- Reach the valve stem: If the valve is not accessible, loosen the center fastener and lift or reposition the spare. You do not need to jack up the car.
- Confirm the target pressure: Check the tire-inflation specifications in the correct Toyota owner’s manual. Use the compact-spare label only when it clearly states the required inflation value.
- Measure twice: Remove the valve cap, press the gauge firmly onto the valve, and take two consistent readings.
- Adjust the pressure: Add air in short intervals when low. If high, release a small amount and measure again.
- Check the valve: Apply a small amount of mild soapy water around the valve core and stem. Continuing bubble growth indicates leakage that needs repair.
- Inspect the assembly: Look for cuts, cracks, bulges, exposed cords, tread separation, bead damage, corrosion, deformation, or a damaged valve.
- Secure the spare: Dry the valve area, replace the valve cap, return the spare to its correct position, tighten the retaining fastener, reinstall the tools, and replace the trunk-floor panel.
You do not need to mount the spare on the vehicle merely to measure its pressure. Removing it from the well may still be necessary when the valve, inner sidewall, or complete DOT date code is hidden.
How to Inflate Your Spare Tire to the Recommended PSI
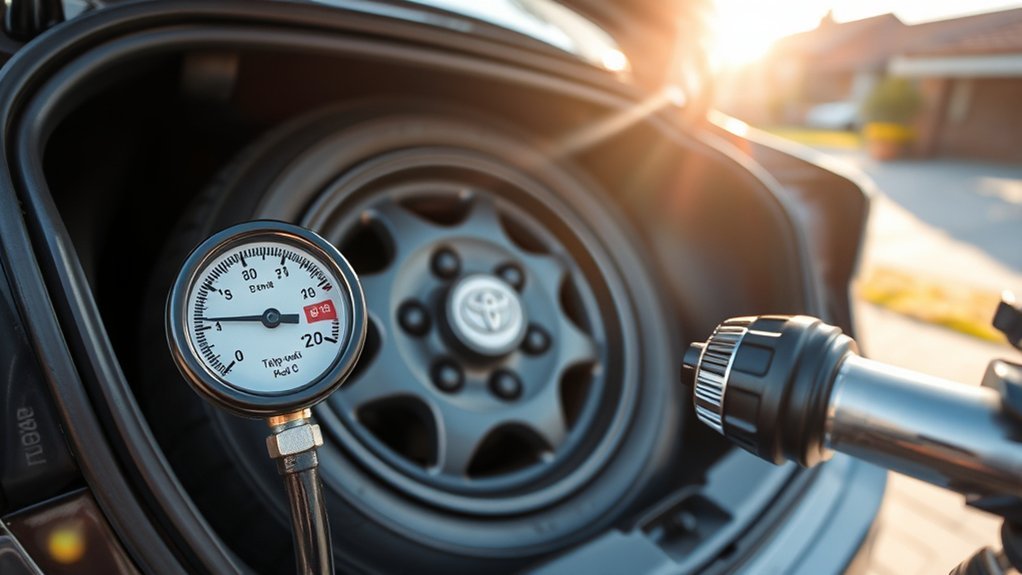
Connect the inflator hose securely to the valve stem and add air in short intervals. Stop periodically and check the pressure so you do not overshoot the specified value.
The correct Camry spare-tire pressure is one cold specification for that exact spare—not a range copied from another vehicle.
If the pressure becomes too high during a cold check, disconnect the inflator and use the gauge’s release feature to let out a small amount of air. Recheck after each brief release.
After reaching the target, disconnect the hose and measure again. Check the valve for bubbles, wipe it dry, and install the cap. The cap keeps dirt and moisture away from the valve components, but it does not repair a leaking valve core or damaged stem.
Note: Pressure changes with ambient temperature. Compare readings taken under similar temperature conditions when checking for a slow leak, and recheck after major seasonal temperature changes.
What to Do If the Spare Is Completely Flat
Do not depend on a spare that is at or near zero PSI without inspecting it. A tire that has sat collapsed may have hidden sidewall, bead, or internal damage even when the outside looks acceptable.
Stop inflating and obtain professional service when:
- The tire is visibly distorted or has separated from the wheel bead.
- The sidewall has a fold, deep crack, bulge, cut, or exposed cord.
- The inflator cannot raise the pressure normally.
- The tire loses pressure immediately after the hose is removed.
- You hear leakage from the valve, bead, tread, or wheel.
- The wheel is bent, cracked, or heavily corroded.
Do not use sealant, an external plug, or repeated inflation as a substitute for determining why the spare became completely flat.
Identifying and Fixing Common Spare Tire Problems
- Low but stable pressure: Inflate to the specified cold pressure and recheck under similar temperatures after several days.
- Repeated pressure loss: A puncture, leaking valve core, damaged valve stem, bead leak, wheel corrosion, or internal damage requires inspection.
- Cracks or weathering: Sidewall or tread cracking can indicate age or environmental deterioration even when the tire has never been installed.
- Bulges, separation, or exposed cords: Do not use the tire. These signs indicate possible structural damage.
- Damaged valve cap or stem: Replace a missing cap. Have a bent, cracked, loose, or leaking stem repaired.
- Corroded or damaged wheel: Rust or corrosion near the bead can cause leakage. A bent or cracked wheel must be evaluated before use.
- Loose storage hardware: Tighten the center fastener so the spare and tools do not move or rattle inside the trunk.
How to Check for a Slow Leak
Inflate the spare to its specified cold pressure and record the reading, outside temperature, and date. Check it again several days later at a similar temperature with the same gauge.
A small difference caused by a major weather change does not automatically prove that the tire is leaking. A repeated downward trend under similar conditions, however, needs investigation. Do not rely on repeatedly adding air to a tire that will not hold its specification.
How to Check the Valve for Leakage
After inflation, place a small amount of mild soapy water over the valve core opening and around the base of the valve stem. A few bubbles caused by application are normal. Bubbles that continue to grow indicate escaping air.
Dry the area after the test. A leaking valve core may be serviceable, but a cracked or damaged stem, wheel leak, or uncertain condition should be handled by a qualified tire technician.
Preventative Measures for Spare Tire Maintenance
Add the spare to your normal tire-maintenance routine. Because it remains hidden under the trunk floor, it can lose pressure or age without any visible change during everyday driving.
Regular Pressure Checks
- Check the spare at least once a month while cold.
- Check it before long trips and before travel through remote areas.
- Recheck it after a major seasonal temperature change.
- Use the same trusted gauge when comparing pressure over time.
- Check the valve for leakage after adding air.
- Do not wait for a dashboard warning before inspecting the spare.
Emergency Preparedness Kit
Keep a suitable pressure gauge, portable inflator, flashlight, reflective warning device, gloves, and the factory jack and lug wrench in the vehicle. Confirm that the wrench fits the wheel fasteners and that any wheel-lock key is present.
Inspect the inflator’s hose, power cord, battery charge, and pressure range periodically. A portable inflator that cannot reach the compact spare’s specified pressure is not an adequate emergency tool.
A full-size spare should use the pressure Toyota specifies for that tire-and-wheel assembly. Do not automatically inflate it to the higher pressure commonly used by compact temporary spares.
Inspect Spare-Tire Age and Condition
Find the DOT Tire Identification Number on the sidewall. On modern tires, the final four digits identify the week and year of manufacture. For example, a code ending in 2421 means the tire was manufactured during the 24th week of 2021.
The complete code may appear on only one side of the tire. You may need to lift the spare out of the well to inspect the inward-facing side.
NHTSA TireWise notes that some vehicle and tire manufacturers recommend replacement when a tire reaches six to ten years of age, regardless of remaining tread. This is not one universal legal deadline, so follow Toyota’s guidance and the tire manufacturer’s recommendation for your spare.
Have an older spare evaluated if you see cracking, deformation, discoloration, bead damage, vibration after installation, or repeated pressure loss. Age alone is not the only consideration; storage conditions and physical condition also matter.
Temporary Spare Driving Limits
A compact spare is intended only to help you reach a place where the damaged road tire can be repaired or replaced. Its smaller dimensions can affect steering, braking, ground clearance, traction-control operation, and handling. If you also need the wheel-change procedure, follow the model-year manual and this Toyota Camry flat-tire change guide.
Follow the maximum speed and distance restrictions printed on the spare and listed in the Toyota owner’s manual. Many Toyota compact-spare instructions specify no more than 50 mph or 80 km/h, but your vehicle’s own label and manual are controlling.
Drive smoothly, allow extra following distance, avoid sudden acceleration or braking, and take extra care over potholes, curbs, steep driveways, snow, ice, and uneven pavement. Do not install tire chains on a compact spare unless the exact Toyota procedure expressly permits it.
Warning: Never use a compact spare as a permanent replacement. Avoid high speeds, aggressive cornering, heavy loads, and extended driving, and arrange repair of the normal tire as soon as possible.
How TPMS Works With the Spare Tire
Do not assume the spare is monitored by the Camry’s tire-pressure warning system. Federal TPMS compliance testing covers up to four installed road tires and excludes the spare from the normal test tire set. Toyota also states in many Camry manuals that the compact spare does not have a tire-pressure warning valve and transmitter. For warning-light and initialization details, see the separate Toyota Camry TPMS guide.
Depending on the Camry’s year and equipment, the display may show individual road-tire pressures or only a general warning. In either case, check the spare manually.
- Steady warning light: Check all four road tires with a gauge and follow the model-year manual’s pressure-setting or initialization instructions.
- Light remains on after installing a compact spare: This may be normal because the flat road wheel or its sensor is no longer operating in its normal position and the compact spare may not have a transmitter.
- Light flashes for about 60 to 90 seconds and then stays on: Federal TPMS rules use this flashing pattern for a malfunction indication. Check tire pressures manually and follow the model-year Toyota manual for diagnosis.
TPMS is a warning system, not a replacement for regular manual pressure checks. It may not warn you about the stored spare, and it does not confirm that the spare is free from age-related or structural damage.
When to Get Professional Help for Your Tires
Contact a qualified tire technician when:
- The spare repeatedly loses pressure after being inflated correctly.
- The tire was completely flat or stored in a visibly collapsed condition.
- You find a puncture, bulge, exposed cord, deep crack, bead damage, or tread separation.
- The wheel is bent, cracked, heavily corroded, or damaged around the bead.
- The valve stem is cracked, bent, loose, or leaking.
- The tire is old and you are unsure whether it remains serviceable.
- You cannot confirm the correct pressure or temporary-use restrictions.
- The TPMS warning flashes for about 60 to 90 seconds and then remains illuminated.
- A steady TPMS warning remains after all road tires are adjusted and the exact manual’s initialization or driving procedure has been completed.
Do not attempt a sidewall repair, drive on a visibly damaged spare, or treat repeated inflation as a permanent solution.
Frequently Asked Questions
How do you check Toyota Camry spare tire pressure?
Lift the trunk floor, access the spare, remove the valve cap, and press a suitable pressure gauge firmly onto the valve stem. Compare two consistent readings with the cold-pressure specification in the model-year Toyota owner’s manual. Adjust the air, check the valve for leakage, replace the cap, and secure the spare.
What is the correct PSI for a Toyota Camry spare tire?
Use the pressure specified for your exact spare and Camry model year. Many compact Camry spares specify 60 PSI or 420 kPa, but that value is not universal. A full-size spare can require a different pressure.
Can you use the maximum PSI printed on the tire sidewall?
Not automatically. A road tire’s sidewall pressure is generally a maximum rating, not the vehicle manufacturer’s recommended operating pressure. Use Toyota’s model-year tire-inflation specification. Follow a compact-spare sidewall instruction only when it clearly states the required temporary-spare inflation pressure.
Do you have to remove the spare from the trunk to check it?
Not when the valve stem is accessible. If the valve, inner sidewall, or full DOT date code is hidden, loosen the retaining fastener and lift or reposition the spare. You do not need to jack up the vehicle merely to check the stored tire.
What should you do if the Camry spare is completely flat?
Inspect it before relying on it. Do not use the spare if it is distorted, separated from the bead, cracked, bulged, unable to accept air, or unable to hold its specified pressure. A tire that sat collapsed may have hidden damage and should be evaluated by a tire professional.
How do you know which tire is low on a Toyota Camry?
Some Camry displays identify an individual road-tire position, while older or differently equipped systems provide only a general warning. Check all four road tires with a gauge and inspect the spare separately because it may not be monitored.
Is there a tire-pressure sensor in the spare tire?
Do not assume there is. Many Camry compact spares do not have a tire-pressure warning valve and transmitter, and federal TPMS compliance testing normally excludes the spare. Check the model-year manual and measure the stored spare manually.
Should you check spare tire pressure when the tire is cold?
Yes. Check before driving or after the vehicle has been parked for at least three hours. Do not release air from a warm tire simply because its pressure is temporarily above the cold specification.
How often should you inspect a Camry spare tire?
Check its pressure and condition at least monthly, before long trips, and after major seasonal temperature changes. Inspect the tire’s age, tread, sidewalls, valve, wheel, and storage hardware at the same time.
How fast can you drive on a Toyota Camry compact spare?
Follow the speed limit printed on the spare and stated in your model-year Toyota manual. Many Toyota compact-spare instructions limit speed to 50 mph (80 km/h). Treat the spare as temporary, drive smoothly, and arrange repair or replacement of the normal tire as soon as possible.
Conclusion
Checking your Toyota Camry spare takes only a few minutes and can prevent a roadside surprise. Measure it while cold, use the exact Toyota specification for that model year and spare assembly, and inspect the valve, tire, wheel, age, and storage hardware. Recheck it monthly, never rely on TPMS to monitor it, and do not use a spare that will not hold pressure or shows structural damage.
Sources
- Toyota Manuals and Warranties — model-year owner’s manuals, equipment, pressure specifications, warnings, and temporary-spare instructions
- 2025 Toyota Camry Quick Reference Guide — current example of the spare-tire and tool location beneath the trunk floor
- Toyota: How to Check Tire Pressure — cold-pressure timing, gauge use, inflation, and spare-tire checks
- NHTSA TireWise — tire age, DOT Tire Identification Numbers, damage inspection, inflation, and replacement guidance
- NHTSA Summer Driving and Road Trip Tips — cold-pressure checks, spare maintenance, and the difference between recommended pressure and sidewall maximum pressure
- 49 CFR 571.138, Tire Pressure Monitoring Systems — TPMS requirements, owner information, warning behavior, and spare-tire testing provisions

1 thought on “How to Check Spare Tire Pressure on a Toyota Camry”