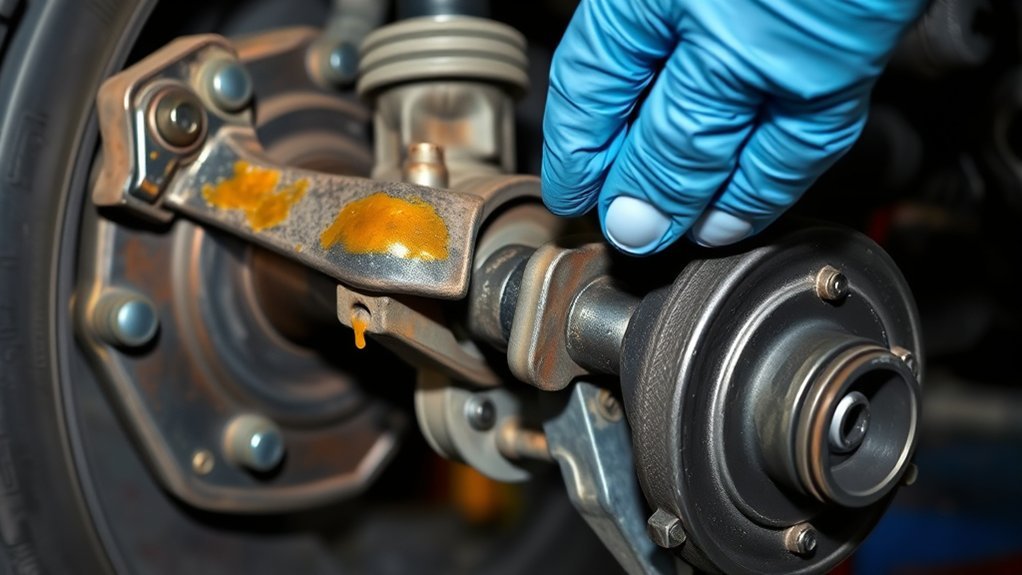
Toyota Camry CV axles do not have a fixed replacement mileage. Toyota’s maintenance guidance focuses on inspecting the drive-shaft boots and replacing damaged parts as needed, so boot condition, grease leakage, joint noise, vibration, play, and physical damage matter more than the odometer alone.
Last updated: September 19, 2026. This update verified current Toyota Camry maintenance guidance and tightened the lifespan, inspection, and replacement criteria.
Quick Answer
There is no universal Toyota replacement interval for Camry CV axles. Replace an axle when inspection confirms joint or shaft damage, not simply at a mileage milestone. For the U.S. 2026 Camry, Toyota lists drive-shaft-boot inspections at 15,000-mile intervals under the normal maintenance chart and at every 5,000 miles when the car is driven primarily on dirt or dusty roads.
Key Takeaways
- Toyota schedules CV/drive-shaft boot inspections rather than one routine axle-replacement mileage.
- On the U.S. 2026 Camry, the normal maintenance chart lists drive-shaft-boot inspection at 15,000-mile intervals; dirt or dusty-road use calls for more frequent checks.
- Clicking on turns often points toward an outer joint, while vibration under acceleration can point toward an inner joint.
- A boot-only repair makes sense only when the joint is still clean, quiet, tight, and undamaged.
- Use your VIN and model-specific Toyota service information when ordering parts or following repair procedures.
How Long Should You Expect Your Toyota Camry CV Axles to Last?

There is no reliable odometer reading that tells you exactly when a Camry CV axle will fail. Toyota’s manual and warranty portal provides model-specific maintenance information, while the maintenance schedule treats drive-shaft boots as inspection items rather than giving the axle assembly one universal preventive-replacement mileage.
That means a sealed, quiet axle may remain serviceable for many years, while a torn boot can shorten joint life much earlier by allowing grease to escape and water or grit to enter. Road impacts, altered operating angles, incorrect fitment, and poor installation can also cause premature wear.
For a current reference point, the U.S. 2026 Camry Warranty and Maintenance Guide lists drive-shaft-boot inspection at 15,000-mile intervals in the normal maintenance chart and at every 5,000 miles when the vehicle is driven primarily on dirt or dusty roads. Use the guide for your exact model year and market because schedules can differ.
The condition of the boot and joint matters more than the number on the odometer.
| Axle condition | Likely outlook |
|---|---|
| Boots are flexible, dry, secure, and free of cracks | The axle may continue working for many years. Keep inspecting it during routine service. |
| Small boot crack with no dirt, noise, looseness, or major grease loss | Prompt boot replacement and joint inspection may save the original axle. |
| Grease is slung around the wheel well or suspension | The boot has probably been leaking. The joint must be checked for contamination and wear. |
| Clicking, vibration, roughness, corrosion, or excessive play is present | A complete axle replacement is usually more appropriate than installing only a new boot. |
Your Camry’s exact axle design and repair procedure depend on its year, engine, transmission, and drivetrain. All front-wheel-drive Camrys use front drive axles. All-wheel-drive versions also have additional rear driveline components that require separate diagnosis.
What Are the Signs of a Worn Camry CV Axle or Boot?
Each CV joint is protected by a flexible boot that holds grease inside and keeps water, dust, and road grit out. Once a boot splits or a clamp loosens, the joint can lose lubrication and collect abrasive contamination.
Watch for these signs:
- Cracks or stress lines: Small surface cracks can develop into a full split as the boot flexes.
- A torn or separated boot: A visible opening allows grease to escape and contaminants to enter.
- Grease sling: Dark grease on the inner wheel, control arm, strut, splash shield, or nearby bodywork often indicates a rotating boot leak.
- Loose or missing clamps: A sound boot can still leak when a clamp moves or fails.
- Clicking or popping during turns: This is a common clue of outer CV joint wear, especially when the noise becomes louder under power.
- Shudder or vibration during acceleration: An inner CV joint can cause vibration when torque is applied, although tires, wheels, mounts, and suspension parts can cause similar symptoms.
- Clunking when changing load: A worn joint may clunk when shifting between Drive and Reverse or when moving between acceleration and deceleration. Engine mounts and transmission movement should also be checked.
Warning: Stop driving and arrange an inspection if the car has severe vibration, repeated heavy clunking, visible axle damage, a wheel-area grinding sound, or a loss of power to a drive wheel. A badly damaged joint can separate and leave the vehicle unable to move safely.
TrakMotive identifies clunking or popping during turns, vibration under acceleration, grease sling, and damaged boot clips as common warning signs. These symptoms are useful clues, but a technician should confirm the cause before replacing parts.
What Affects How Long Your CV Axles Last?
Several conditions can shorten or extend the service life of a Camry CV axle:
- Boot condition: A sealed boot protects the joint’s grease and internal surfaces.
- Road impacts: Potholes, curbs, collision damage, and debris can bend an axle or damage a boot and joint.
- Water and grit: Contaminants entering through a torn boot can quickly damage polished joint surfaces.
- Suspension condition: Worn mounts, control-arm bushings, ball joints, or wheel bearings can change loads or produce symptoms that resemble axle trouble.
- Ride-height changes: Modified suspension angles can make a CV joint operate closer to the limit of its intended travel.
- Installation quality: Wrong parts, damaged seals, incorrect axle-nut torque, and improper tool use can cause noise or premature failure.
- Part quality and fitment: Original Toyota, new aftermarket, and remanufactured axles can differ in materials, tolerances, balancing, boot construction, and warranty coverage.
- Driving environment: Rough roads, road salt, extreme temperatures, and frequent contamination can be harder on boots and driveline parts.
Note: Normal cornering does not automatically damage a healthy axle. CV joints are designed to work while the wheels turn and the suspension moves. Problems are more likely when the joint is contaminated, worn, incorrectly installed, damaged, or forced to operate at an abnormal angle.
How Often Should You Inspect Camry CV Axle Boots?

Follow the maintenance guide for your exact Camry year and market. As a current U.S. example, Toyota’s 2026 Camry guide lists drive-shaft-boot inspection at 15,000-mile intervals in the normal chart. If the car is driven primarily on dirt or dusty roads, the guide lists boot inspection at every 5,000-mile interval.
A quick boot inspection can reveal a problem before a quiet, reusable joint becomes a noisy axle that needs complete replacement. You can perform a basic visual check at home without disassembling the vehicle, and you should arrange an earlier inspection whenever you notice grease leakage, clicking, clunking, or acceleration-related vibration.
At a Glance
| Time Required | 10 to 20 minutes for a basic visual inspection |
| Difficulty | Beginner for visible checks; advanced for axle removal or boot replacement |
| Tools Needed | Flashlight, gloves, clean cloth, and wheel chocks; approved ramps or jack stands only if lifting is required |
| Cost | Usually no cost for a home visual check; professional diagnosis and repair costs vary |
How to Inspect Your Camry’s CV Boots
- Park safely. Use a level surface, shift into Park, apply the parking brake, turn off the engine, and allow hot components to cool.
- Turn the front wheels. With the vehicle stationary and the engine off, turning the steering wheel can improve your view of the outer boots behind the front wheels.
- Use a flashlight. Check the accordion-shaped boot folds for cuts, splits, shiny wet areas, missing clamps, and heavy grease buildup.
- Look beyond the boot. Inspect the inner wheel, suspension, splash shield, and nearby bodywork for grease that may have been thrown outward.
- Check both ends of each axle. Each axle normally has an inner and outer boot.
- Record what you find. Photograph damage and note when any clicking, vibration, or clunking occurs.
- Arrange a professional inspection. A technician can check joint play, axle runout, wheel bearings, mounts, suspension parts, and other possible causes.
Warning: Never crawl beneath a vehicle supported only by a hydraulic or emergency jack. Use correctly rated ramps or jack stands on a solid, level surface and follow the lifting points in your Camry owner’s manual.
Pro Tip: Ask for the CV boots to be checked whenever the car is already raised for an oil change, tire rotation, brake inspection, or suspension service. Early boot damage is easier to address before dirt reaches the joint.
Should You Replace the CV Boot or the Complete Axle?
In axle service, “rebooting” means removing the damaged CV boot, inspecting and cleaning the joint, adding the correct grease, and installing a new boot and clamps. It does not repair a joint that is already worn, pitted, loose, rusty, or noisy.
Boot-Only Service vs. Complete Axle: Decision Table
A boot kit normally costs less than a complete axle, but parts price is only one part of the bill. Boot replacement may require axle removal, disassembly, detailed cleaning, inspection, repacking, and special clamp tools. In some shops, this labor makes a complete axle assembly the more economical repair.
| Inspection finding | Boot-only service may make sense | Complete axle replacement is usually safer |
|---|---|---|
| Noise | No clicking, clunking, grinding, or acceleration vibration | Confirmed joint noise or vibration |
| Contamination | Damage was caught quickly and the grease remains clean | Water, grit, rust, or dirty grease is found inside |
| Joint condition | Joint moves smoothly with no roughness or excess play | Joint is rough, loose, pitted, binding, or damaged |
| Axle condition | Original shaft is straight and splines and threads are sound | Shaft, threads, splines, damper, or tone ring is damaged |
| Total estimate | Boot service protects a high-quality original axle at a reasonable labor cost | Boot-service labor approaches the price of a suitable complete axle |
Boot Replacement Benefits
Replacing a damaged boot early can preserve an original axle that still fits correctly and operates smoothly. This option also avoids discarding a healthy joint simply because its protective cover has aged.
Boot-only service is most attractive when:
- The split was discovered before significant grease escaped.
- The inside of the joint remains clean and dry.
- No clicking, vibration, roughness, or excess play is present.
- The shaft, threads, splines, clamps, and joint surfaces remain in good condition.
- The technician can obtain a correct boot kit and perform the work at a reasonable total cost.
Rebooting Process Overview
A proper boot replacement normally involves more than sliding a cover over the old boot. Depending on the axle design, the technician may need to:
- Remove the axle using the model-specific procedure.
- Protect the wheel bearing, ABS components, and transaxle seal from damage.
- Disassemble enough of the joint to remove the damaged boot.
- Remove old grease and inspect the joint for rust, scoring, pitting, or looseness.
- Pack the joint with the specified type and amount of grease.
- Install the correct boot and new clamps without twisting or pinching the boot.
- Reinstall the axle and torque all fasteners to Toyota specifications.
- Check for seal leakage, abnormal noise, warning lights, or vibration after the repair.
Note: Exact axle-nut torque, fastener-reuse rules, seal procedures, and installation steps vary by Camry generation. Use Toyota’s Technical Information System or an equivalent model-specific professional repair manual.
Choosing the Right Mechanic for Your CV Axle Needs
Choose a shop that diagnoses the problem before selling an axle. Clicking, vibration, and clunking can also come from wheel bearings, tires, bent wheels, engine mounts, brakes, suspension parts, or transmission movement.
| What to check | What to ask |
|---|---|
| Diagnosis | What test confirmed that the axle or joint is causing the symptom? |
| Boot condition | Is the boot merely cracked, or is the joint already contaminated, noisy, or loose? |
| Part selection | Is the replacement Toyota, new aftermarket, or remanufactured? What is the brand and part number? |
| Fitment | Was the part matched with the VIN, engine, transmission, drivetrain, and production date? |
| Installation | Will the shop use model-specific torque specifications and inspect the axle seal and wheel bearing? |
| Estimate | Does the written estimate separate parts, labor, fluids, seals, hardware, and taxes? |
| Warranty | How long are the part and labor covered, and what exclusions apply? |
You should also enter your VIN in the NHTSA recall lookup. A recall search by model alone does not confirm whether your specific Camry has an unrepaired safety recall or campaign.
Related Guides
Frequently Asked Questions
How long do Toyota Camry CV axles last?
There is no fixed Toyota replacement mileage. Toyota schedules boot inspections and calls for damaged parts to be addressed as needed. A sealed, quiet axle may remain in service for many years, while boot damage, contamination, impacts, altered suspension angles, installation quality, and joint wear can shorten its life.
What is the life expectancy of a CV axle?
CV axles are normally replaced according to condition rather than age alone. A sealed joint may last for many years. A torn boot can shorten that life quickly because it allows grease loss and contamination.
How often should Toyota Camry CV axle boots be inspected?
Follow the maintenance guide for your exact year and market. In the U.S. 2026 Camry guide, Toyota lists drive-shaft-boot inspection at 15,000-mile intervals in the normal maintenance chart and at every 5,000 miles when the vehicle is driven primarily on dirt or dusty roads.
What are the signs of a failing CV axle?
Common clues include grease around a torn boot, clicking or popping during turns, vibration under acceleration, clunking when load changes, and visible axle or clamp damage. These symptoms can have other causes, so diagnosis should be confirmed before parts are replaced.
Can you drive with a torn CV boot?
Driving allows more grease to escape and more dirt or water to enter. A small, newly discovered leak should be inspected promptly. Avoid continued driving if the axle is clicking, vibrating heavily, clunking, or visibly damaged.
Should both Camry CV axles be replaced at the same time?
Not automatically. Unlike tires or brake pads, CV axles can normally be replaced one side at a time. Inspect both sides and replace the second axle only if it is leaking, noisy, loose, damaged, or otherwise near failure.
Does CV axle replacement require a wheel alignment?
Axle replacement alone does not always change wheel alignment. An alignment may be appropriate if adjustable suspension points were moved, worn parts were replaced, impact damage is present, or the car pulls or wears its tires unevenly afterward.
Is an OEM axle better than an aftermarket axle?
A Toyota axle offers known original fit and specifications, but it may cost more. Aftermarket quality varies. Compare whether the axle is new or remanufactured, the manufacturer’s reputation, boot and joint construction, fitment accuracy, warranty terms, and the shop’s experience with that brand.
Conclusion
Your Toyota Camry’s CV axles do not expire at one set mileage. Follow the boot-inspection schedule for your exact model year, act on grease leakage early, and do not ignore new clicking, clunking, or acceleration-related vibration. The 2026 U.S. Camry guide provides a useful current example: 15,000-mile boot inspections under normal maintenance, with more frequent checks for primarily dirt or dusty-road use.
A small boot problem may be repairable when caught early. Once a joint becomes noisy, contaminated, rough, or loose, replacing the complete axle is usually the more dependable choice. Have severe symptoms inspected promptly so a driveline problem does not leave you stranded or cause additional damage.
Sources
- 2026 Toyota Camry Warranty and Maintenance Guide — current U.S. drive-shaft-boot inspection schedule and maintenance guidance
- Toyota Manuals and Warranties — model-specific owner, warranty, and maintenance information
- Toyota Technical Information System — factory repair procedures, service bulletins, specifications, and technical information
- TrakMotive: Understanding Clunking and Clicking Complaints — CV axle symptoms, boot damage, fitment, and installation practices
- National Highway Traffic Safety Administration Recall Lookup — VIN-based vehicle recall and safety-campaign information
