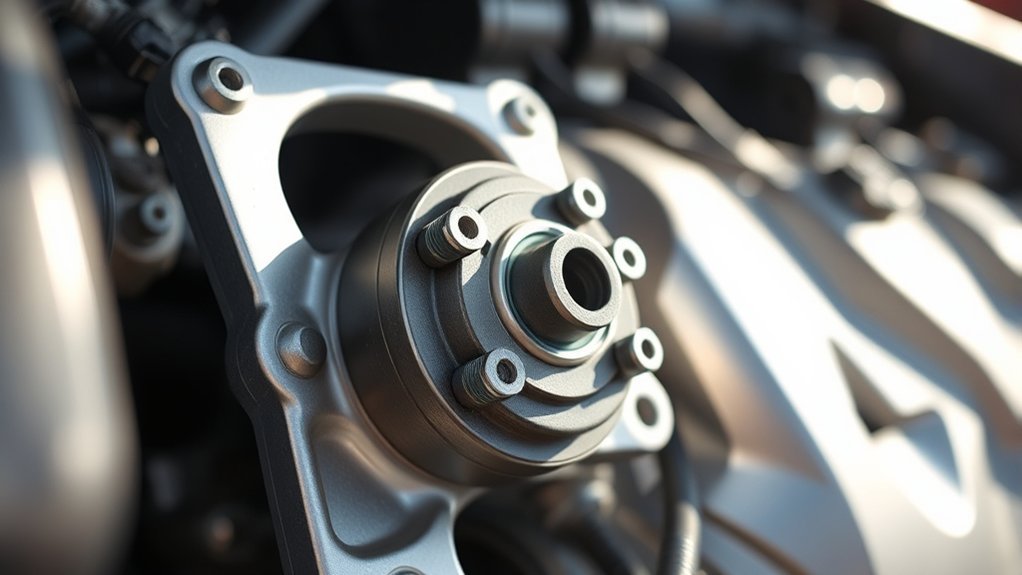
Motor mounts secure your Toyota Camry’s engine and transmission while limiting the vibration that reaches the cabin. When a mount wears out, you may notice shaking at idle, clunks during acceleration, or unusual powertrain movement. Because these symptoms can also come from engine, axle, tire, exhaust, or suspension faults, careful diagnosis should always come before replacement.
Last updated: September 11, 2026 — diagnosis guidance, 2026 Camry hybrid information, and U.S. replacement-cost benchmarks were rechecked.
This guide focuses on diagnosis, replacement decisions, repair safety, and post-repair checks. For mileage-focused guidance, see our Toyota Camry motor-mount lifespan and failure-signs guide.
Quick Answer
Toyota Camry motor mounts hold the powertrain in position while isolating vibration. Replace a mount when inspection confirms separation, collapse, hydraulic-fluid leakage, abnormal movement, or load-related clunks. Because mount design, location, support points, fastener rules, and torque values vary by year and powertrain, use VIN-matched parts and model-specific Toyota service information.
Key Takeaways
- Vibration alone does not confirm a failed motor mount. Misfires, tires, wheels, axles, exhaust contact, and suspension faults can cause similar symptoms.
- Mount quantity, position, construction, support procedure, and torque specifications vary by Camry model year, engine, transmission, market, and hybrid configuration.
- Inspect every mount, but replace only the mounts that diagnosis, condition, repair access, and part quality justify replacing.
- Engine support, vehicle lifting, running-engine tests, and hybrid high-voltage systems create serious hazards. Use approved equipment and factory repair information.
At a Glance
| Time Required | Often several hours, depending on mount location, corrosion, engine type, support method, and the components removed for access |
| Difficulty | Advanced DIY repair because the powertrain must remain safely supported, correctly positioned, and free of harmful preload |
| Tools Needed | Wheel chocks, floor jack, rated jack stands or lift, approved engine-support equipment, metric sockets, extensions, wrenches, torque wrench, trim tools, work light, gloves, and safety glasses |
| Cost | U.S. benchmark: RepairPal lists an average Toyota Camry engine-mount replacement at $628–$709; its 2026 Camry estimate is $793–$878. Checked September 11, 2026; actual quotes vary by mount, year, location, parts, and related work. |
What Are Toyota Camry Motor Mounts and What Do They Do?
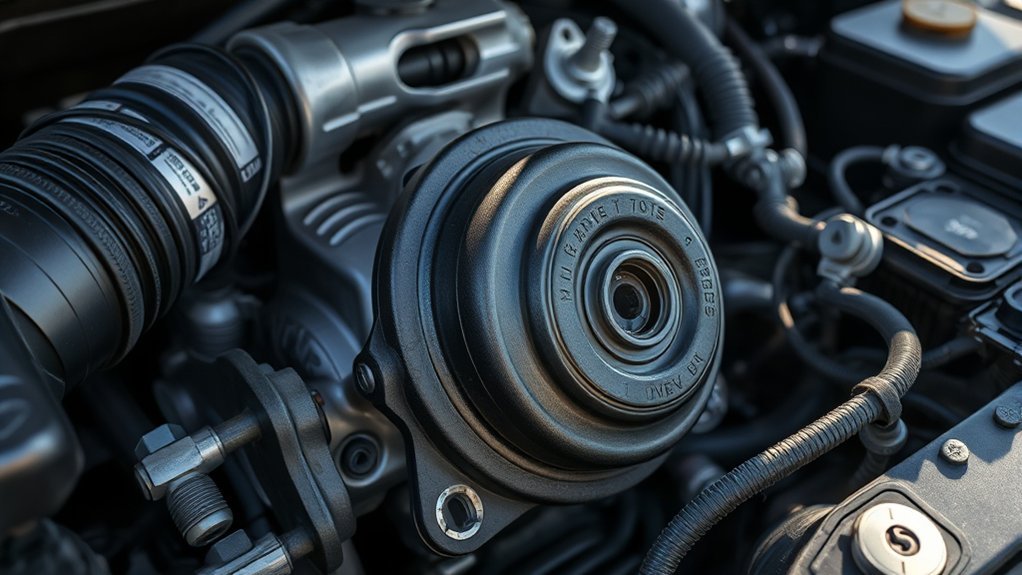
Motor mounts connect your Camry’s engine and transmission assembly to the body or supporting subframe. Most combine metal brackets with a rubber isolator. Some applications use hydraulic, or fluid-filled, mounts for additional vibration control.
The mounts perform two jobs at once. They hold the engine and transmission in their intended positions, yet they also allow a controlled amount of movement. This isolation reduces the vibration and torque reaction transferred into the passenger compartment.
Mount quantity and position vary by model year, engine, transmission, production location, market, and hybrid configuration. Depending on the Camry, the system may include an upper engine-side mount, a transmission-side mount, front or rear torque mounts, and stabilizing links.
Toyota service information documents active-control engine-mount hardware on some Camry configurations. If an installed mount has a connector, vacuum hose, sensor, or control line, do not disconnect or substitute it based on appearance alone. Confirm its function through the exact Toyota repair procedure and VIN-based parts information.
How Many Motor Mounts Does a Toyota Camry Have?
There is no single mount count that applies to every Toyota Camry. Depending on model year and powertrain, the mounting system can include engine-side and transmission-side mounts, front or rear torque-control mounts, stabilizing links, and, on some configurations, active-control hardware. Parts catalogs may also list brackets and insulators separately, so a catalog result is not always the same thing as a mount count. Use the VIN, engine, transmission, drivetrain, and market to identify the exact mounting layout before ordering parts.
Note: A mount listed for one Camry engine may not fit another Camry from the same year. Confirm the VIN, engine, transmission, production details, hybrid status, and mount position before ordering.
Why Motor Mounts Matter for Vehicle Performance
Properly functioning mounts keep the powertrain aligned while limiting noise, vibration, and harshness. Their condition can affect cabin comfort, shift feel, exhaust clearance, hose movement, axle angles, and stress on nearby brackets.
Vibration Reduction Benefits
The engine produces vibration whenever it runs. Motor mounts isolate much of that vibration before it reaches the steering wheel, dashboard, floor, and seats.
| Mount Function | Practical Benefit |
|---|---|
| Isolates normal engine vibration | Reduces shaking felt inside the cabin |
| Controls powertrain movement | Limits clunks and excessive rocking under load |
| Maintains installed position | Helps preserve hose, wiring, exhaust, and axle clearance |
| Dampens structure-borne noise | Supports a quieter and smoother ride |
General vehicle noise-and-vibration research treats powertrain mounts as an important vibration-transfer path between an engine and the passenger compartment. This research supports the general function of mounts but does not identify the correct part or diagnosis for a specific Camry.
Engine Stability Assurance
Engine torque causes the powertrain to twist slightly when you accelerate, decelerate, shift, or move between Drive and Reverse. Healthy mounts control this movement without holding the assembly completely rigid.
Excessive movement can change the way nearby components sit or move. It may strain wiring, stretch hoses, alter axle alignment, or allow an exhaust section to touch the body or subframe.
Protection Against Damage
A damaged mount can transfer more vibration into the body while allowing the engine or transmission to move farther than intended. Continued movement may add stress to:
- Exhaust flex sections, hangers, and heat shields
- Coolant, vacuum, fuel-vapor, and air-intake hoses
- Electrical connectors, ground straps, and wiring harnesses
- CV axles and related joints
- Mount brackets and subframe attachment points
The exact risk depends on which mount has failed and how much movement is present. Early diagnosis can prevent a comfort complaint from developing into a broader repair.
What Causes Toyota Camry Motor Mounts to Fail?
Motor mounts do not have one universal failure mileage. Their condition depends on their design, location, operating environment, and repair history.
- Age and heat: Repeated heating and cooling can harden rubber, weaken bonding, and reduce the mount’s ability to isolate vibration.
- Oil or fluid contamination: Engine oil, transmission fluid, powertrain fluid, or cleaning chemicals can soften and degrade some rubber materials.
- Hydraulic-mount leakage: A fluid-filled mount can lose its internal damping fluid after its chamber or seal fails.
- Excessive powertrain movement: A misfire, collision, damaged bracket, or another failed mount can place abnormal loads on the remaining mounts.
- Road impacts or collision damage: A curb strike, pothole impact, or crash can bend a bracket, shift the subframe, or tear an isolator.
- Incorrect installation: Wrong fastener order, cross-threaded hardware, improper torque, or tightening the mount while the powertrain is misaligned can create unwanted preload.
- Poor part fit or stiffness: A mount with incorrect dimensions or rubber stiffness may transmit more vibration even when it does not visibly fail.
Note: Oil on a mount does not automatically mean that a hydraulic mount is leaking. Clean the area and identify whether the fluid begins inside the mount or runs down from an engine, transmission, or hose leak above it.
What Are the Signs of a Bad Toyota Camry Motor Mount?
A failed mount usually causes more than one symptom. Look for a pattern rather than relying on vibration alone.
- Stronger vibration at idle: Shaking may be most noticeable through the seat, steering wheel, dashboard, or floor while the car is stopped.
- Clunking during load changes: A dull knock may occur when shifting between Reverse and Drive, accelerating, releasing the accelerator, or driving over a bump.
- Excessive powertrain movement: The engine or transmission may rock farther than expected when torque is applied.
- Torn or separated rubber: Splits, detached rubber, collapse, or metal-to-metal contact indicate physical failure.
- Fluid leakage from a hydraulic mount: Fluid that originates inside the mount can indicate internal failure.
- Changed exhaust clearance: A sagging or shifted powertrain can allow the exhaust to rattle against another component.
- New vibration after another repair: A mount may be loose, misaligned, preloaded, contaminated, or damaged during nearby service.
Note: Small surface cracks do not always prove that a mount has failed. Separation, collapse, leakage, abnormal movement, loss of clearance, or contact between parts provides stronger evidence.
How Do You Diagnose a Bad Toyota Camry Motor Mount?
Motor-mount diagnosis should combine symptom history, engine-running quality, a warning-light and code check, visual inspection, surrounding-clearance inspection, and controlled movement testing. Replacing parts based only on cabin vibration can waste money and leave the real fault unresolved.
Fast triage: If the vibration changes mainly with engine load, gear selection, or A/C load while the car is stopped, check engine operation and the mounts first. If it follows road speed, start with tires, wheels, hubs, axles, and suspension. If harsh vibration began immediately after mount replacement, recheck part fitment, alignment, surrounding contact, and preload before assuming the new mount needs to “break in.”
Record When the Vibration Occurs
Note whether the vibration appears:
- Only at idle
- Only in Drive or Reverse
- During acceleration or deceleration
- At a specific road speed
- While turning
- When the air conditioner operates
- After an engine, transmission, exhaust, subframe, or collision repair
Road-speed vibration points more strongly toward tires, wheels, axles, or suspension components. A mount-related vibration often changes with engine speed, gear selection, engine load, or air-conditioning load. If the shake appears mainly at highway speed, compare the pattern with our Toyota Camry highway-speed vibration guide; if it changes most during acceleration, also inspect the CV axles and joints.
Compare Common Vibration Patterns
| Pattern | More Likely Direction | Useful Check |
|---|---|---|
| Rough idle with a flashing or steady check-engine light | Misfire, air, fuel, ignition, or mechanical engine fault | Scan codes and correct engine-running faults before judging the mounts |
| Clunk when selecting Drive or Reverse | Mount movement, driveline lash, axle play, or loose bracket | Inspect mounts, brackets, axle joints, and movement under a controlled test |
| Vibration at one road-speed range regardless of engine load | Tire, wheel, hub, axle, or suspension issue | Inspect tires and wheels and compare vibration while coasting safely |
| Rattle changes over bumps or when the exhaust is cold | Exhaust hanger, heat shield, splash shield, or body contact | Inspect contact marks and clearances with the engine off and cool |
| Harsh vibration began immediately after mount replacement | Wrong part, excessive stiffness, preload, contact, or installation error | Recheck part number, alignment, fastener sequence, and surrounding clearance |
Rule Out Other Common Causes
Several problems can imitate a failed motor mount:
- An engine misfire or rough-idle condition
- A damaged exhaust hanger or exhaust pipe touching the body
- A bent, worn, or binding CV axle
- Unbalanced tires or damaged wheels
- Worn suspension or subframe bushings
- A loose splash shield, heat shield, engine cover, or underbody panel
- Improperly installed replacement mounts
Check for warning lights and diagnostic trouble codes before blaming the mounts. A mount cannot correct vibration caused by an engine that is running poorly. If engine speed is unstable or a check-engine light is present, work through the likely causes in our Toyota Camry rough-idle guide before condemning a mount.
Perform a Safe Visual Inspection
With the engine off, the parking brake applied, and the wheels chocked, inspect accessible mounts with a bright light. Look for separated rubber, collapsed height, fluid that originates inside a hydraulic mount, loose hardware, damaged brackets, shiny contact marks, or components pulled tight by powertrain movement.
Compare the suspected mount with other mounts when they are visible. A technician may also measure movement or perform a controlled load test while observing the powertrain from a safe location.
Warning: Never place your hands, tools, clothing, hair, or body near a running engine while another person shifts gears or applies throttle. A controlled load test requires a trained helper, secure vehicle positioning, firm brake application, and strict clearance from belts, fans, pulleys, wheels, and other moving parts.
Consequences of Neglecting Worn Motor Mounts
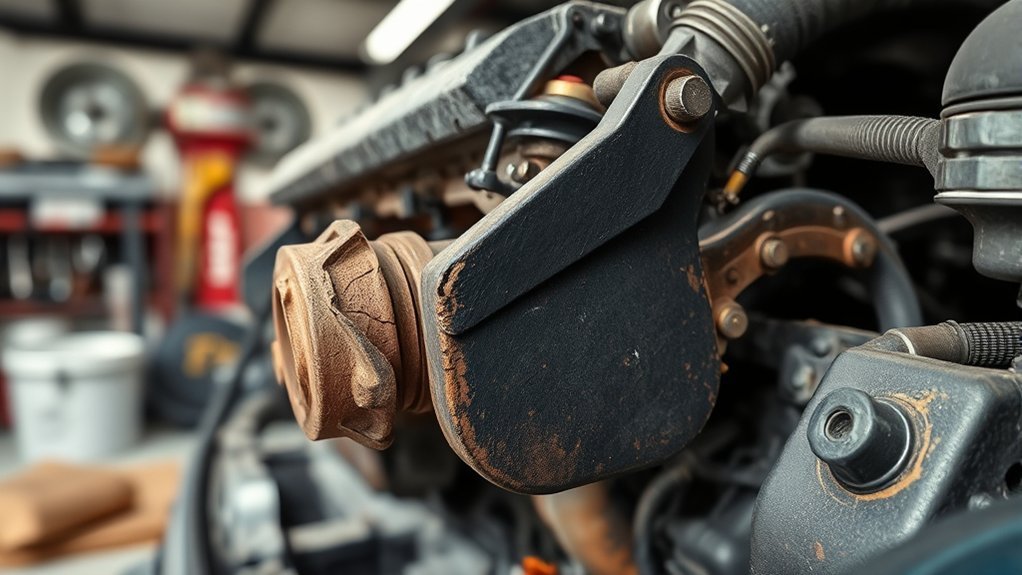
The effects of a worn mount depend on the mount’s location, construction, and severity of failure. Mild deterioration may cause only added vibration, while a collapsed or separated mount can permit much greater movement.
Increased Vibrations and Noise
Failed rubber or internal hydraulic components transmit more engine vibration into the body. You may feel shaking at idle or hear a knock as the powertrain changes direction under load.
Metal contact, a shifted exhaust pipe, or a loose bracket can make the noise much sharper. Identifying the contact point helps distinguish a mount problem from internal engine or transmission noise.
Engine Movement and Component Stress
Excessive movement can pull on hoses, connectors, intake ducting, wiring, and ground straps. It can also change exhaust alignment or place unusual angles on axles and joints.
One weak mount may increase the load carried by the remaining mounts. That does not prove every mount must be replaced, but it makes a complete inspection necessary.
Repair Costs and Drivability Concerns
Ignoring severe clunks or visible powertrain movement can allow related damage to spread. A hose, wire, exhaust section, bracket, fastener, or axle may eventually require attention in addition to the mount.
The engine and transmission are normally restrained by multiple mounts, brackets, and attachment points. However, a severely failed mount or damaged bracket can still allow unsafe movement and secondary damage. Violent impacts, stretched connections, leaks, smoke, burning odors, or changes in steering or shifting justify immediate professional inspection.
Treat motor-mount symptoms as a diagnosis problem, not a parts-replacement shortcut. Confirm the source of the vibration before ordering components.
Can You Drive With a Bad Motor Mount?
A Camry with mild vibration and no abnormal movement, contact, warning lights, or fluid damage may remain drivable long enough to schedule an inspection. Driving becomes less appropriate when the powertrain moves sharply, the car produces repeated clunks, a hose or wire is stretched, the exhaust contacts the body, or steering and shifting behavior changes.
Stop driving and arrange professional help when you notice:
- Heavy banging during acceleration or gear changes
- Visible contact between the powertrain and another component
- A damaged coolant, fuel, air, or electrical connection
- Fluid leaking from a component disturbed by engine movement
- Smoke, a burning smell, or a new warning light
- Movement severe enough to affect control or drivability
When the severity is uncertain, a tow is safer than risking additional damage.
Should You Replace Motor Mounts Individually or as a Set?
No single rule fits every Camry. A technician should inspect every mount because one failed mount can increase stress on the others. The inspection does not automatically mean every mount needs replacement.
Replacing one mount may make sense when:
- Only one mount has confirmed separation, leakage, collapse, or abnormal movement.
- The remaining mounts are secure and show no related failure.
- The failed mount was damaged by a specific event, contamination, or installation problem.
- Other mounts are easy to inspect and can be replaced later without duplicating major labor.
Replacing several mounts during the same repair may make sense when:
- Multiple mounts are cracked, collapsed, leaking, separated, or moving abnormally.
- The mounts have similar age and deterioration.
- Accessing one mount requires removing parts that also expose another worn mount.
- A previous low-quality replacement has created uneven stiffness, fit, or height.
- The diagnosis confirms movement at more than one mounting point.
Replacing every mount without inspection can add unnecessary cost. Replacing one mount while ignoring clearly damaged companions can lead to repeated labor and continued vibration.
Essential Tools for Replacing Motor Mounts
The required tools vary by Camry generation and mount location. A typical repair may require:
- Safety glasses and mechanic’s gloves
- Wheel chocks
- A suitable floor jack
- Rated jack stands or an approved vehicle lift
- An engine support bar, fixture, or manufacturer-approved support method
- Metric sockets, ratchets, extensions, and combination wrenches
- A calibrated torque wrench covering the required specification range
- Trim and clip-removal tools
- A work light and inspection mirror
- Penetrating oil for corroded fasteners
- A paint marker or camera for recording bracket positions and hardware routing
Some repairs also require removing an air-cleaner assembly, battery tray, undercovers, braces, wiring retainers, or other components. Check the service procedure before beginning so you do not discover a missing tool after the powertrain is supported.
Before Replacing a Camry Motor Mount
Warning: Never work beneath a vehicle supported only by a hydraulic jack. Never remove a mount until the engine or transmission is supported by the approved method for your exact Camry.
Complete these checks before loosening hardware:
- Identify the exact vehicle. Record the model year, VIN, engine, transmission, market, and hybrid or non-hybrid configuration.
- Obtain the correct repair procedure. Use Toyota Technical Information System or equivalent factory information for removal order, support points, fastener-replacement rules, and torque values.
- Park on a stable surface. Use a level, solid floor, apply the parking brake, and chock the wheels.
- Plan powertrain support. Use an engine support bar, fixture, or approved lifting point. Never support the powertrain through the oil pan unless the exact factory procedure expressly specifies the location, contact method, and load-distribution equipment.
- Review electrical precautions. Follow Toyota’s instructions before disconnecting the 12-volt battery, moving wiring, or working near hybrid components.
- Inspect nearby parts. Check hoses, wiring, axles, exhaust sections, brackets, and existing fluid leaks so prior damage is not mistaken for repair damage.
- Photograph the assembly. Record bracket orientation, clips, wire routing, ground straps, shields, and fastener locations.
- Check fastener rules. Confirm whether any nuts, bolts, or washers are designated for replacement rather than reuse.
Hybrid Camry Safety
A Camry Hybrid contains a high-voltage traction system that requires specialized precautions. In the United States, Toyota describes the 2026 Camry as using an all-hybrid powertrain, while older Camrys and vehicles in other markets may be hybrid or non-hybrid.
A quiet hybrid vehicle is not necessarily shut down. The gasoline engine may stop and restart while the vehicle remains in READY mode. Verify that the vehicle is fully powered off, follow the model-specific shutdown procedure, keep the key or smart key away from the vehicle as directed, and never assume silence means the powertrain cannot start.
Disconnecting the normal 12-volt battery does not by itself make every high-voltage component safe to handle. Do not touch, disconnect, support, probe, or move high-voltage components without the correct Toyota procedure, required waiting period, testing equipment, personal protective equipment, and training.
NHTSA advises that EV and HEV high-voltage systems should be serviced by qualified technicians with specialized training and equipment. Use a hybrid-qualified technician when a mount procedure involves restricted work areas, the hybrid transaxle, traction-system components, or unfamiliar electrical precautions.
How to Replace Motor Mounts in Your Toyota Camry
The following steps provide a general safety-focused overview. They do not replace the repair manual for your exact Camry.
-
Confirm the failed mount.
Verify the diagnosis before disassembly. Compare the new mount with the installed part, including bracket shape, bolt spacing, studs, sleeves, electrical connections when present, and locating tabs.
-
Secure the vehicle.
Park on a level surface, apply the parking brake, chock the wheels, and raise the vehicle only when the procedure requires access from below. Support it with properly rated stands at approved points.
-
Prepare the work area.
Remove only the covers, intake components, battery tray, braces, undercovers, shields, or retainers specified in the repair instructions. Keep fasteners organized by location.
-
Support the powertrain.
Position the approved engine or transmission support equipment before loosening mount fasteners. Apply only enough support to hold the assembly in position. Do not lift or shift the powertrain unnecessarily.
-
Release attached components.
Remove ground straps, wire retainers, hoses, brackets, shields, or connectors attached to the mount assembly as specified. Avoid stretching, twisting, or pinching nearby wiring and hoses.
-
Loosen the mount hardware.
Follow the factory sequence. Some procedures require loosening body-side fasteners before engine-side fasteners or adjusting support height slightly to remove tension.
-
Remove the old mount.
Move the powertrain only as far as the service procedure permits. Never place your fingers between the engine, transmission, mount, body, or subframe.
-
Compare and inspect.
Check the removed mount for separation, collapse, leakage, abnormal height, or contact marks. Inspect the bracket, threads, mounting surface, fasteners, and nearby components before installing the replacement.
-
Position the new mount without forcing it.
Align locating tabs, sleeves, studs, and brackets. Start fasteners by hand to prevent cross-threading. Do not use the bolts to pull a badly misaligned powertrain into place.
-
Settle the powertrain into its natural position.
Adjust the support carefully so the mount sits without twisting or excessive preload. Preload means the mount is being forced away from its normal resting position before the fasteners are tightened. This can cause vibration even when the part is correct.
-
Tighten fasteners to the exact specification.
Use the sequence and torque values listed for the specific model year, engine, mount, bracket, and fastener. Replace any one-time-use hardware identified by Toyota. Do not apply a generic torque value from another Camry.
-
Reconnect removed parts.
Restore ground straps, clips, wiring, hoses, shields, braces, intake components, covers, and underbody panels. Confirm that no tool or loose hardware remains in the engine compartment.
-
Remove support equipment gradually.
Watch the mount and surrounding clearances as the powertrain’s weight returns to the mounting system.
-
Perform final checks.
Inspect fluid lines, exhaust clearance, wiring, intake connections, brackets, and fasteners. Follow the repair manual for battery reconnection, hybrid procedures, or system initialization.
Pro Tip: Start every mount fastener by hand before tightening any one fastener fully. This reduces the chance of cross-threading, bracket distortion, alignment error, and unwanted mount preload.
Checks After Motor Mount Replacement
Start the vehicle only after all tools and support equipment are clear. Listen and feel for changes while the engine idles or, on a hybrid, while the vehicle is operated according to the model-specific inspection procedure.
Check the following:
- The engine idles without a new harsh vibration.
- No mount bracket touches the body or subframe.
- Hoses, wiring, ground straps, and intake ducts have normal slack and clearance.
- The exhaust does not rattle against a heat shield or structural part.
- No warning lights remain illuminated.
- No fluid leaks appeared or worsened during the repair.
- Shifting between Park, Reverse, Neutral, and Drive does not produce an abnormal impact.
- A cautious road test does not reveal clunks during acceleration or deceleration.
Reinspect the work area after the road test. A loose shield, wire retainer, ground strap, intake clamp, or bracket can create symptoms that resemble another failed mount.
Why a New Motor Mount May Still Vibrate
A new mount does not always eliminate vibration. Possible causes include:
- The original vibration came from a misfire, axle, tire, exhaust, wheel, or suspension fault.
- Another mount is damaged.
- The new mount is incorrect for the vehicle or mount position.
- The mount was tightened while the powertrain was misaligned.
- A bracket, exhaust section, hose, shield, or underbody panel now touches another component.
- The replacement mount uses rubber with substantially different stiffness from the original design.
- Hardware is loose, cross-threaded, damaged, reused against instructions, or tightened in the wrong sequence.
Do not assume that strong new vibration is a normal break-in condition. Rubber may settle slightly during use, but a correctly selected and installed mount should not require prolonged harsh vibration before it works properly. Recheck part fitment, alignment, surrounding clearance, hardware, and the original diagnosis.
Where to Find Quality Replacement Motor Mounts for Your Camry
You can purchase Camry mounts through a Toyota dealership, Toyota’s official online parts network, established auto-parts retailers, or reputable aftermarket suppliers.
Use Toyota’s official parts catalog or another reliable VIN-based catalog to confirm compatibility. A product title that only says “fits Toyota Camry” may overlook engine, transmission, production-date, market, mount-position, or hybrid differences.
Compare these details before buying:
- Exact part number and supersession information
- Vehicle year, engine, transmission, market, and hybrid status
- Mount position
- Included brackets, studs, sleeves, connectors, or hardware
- Rubber or hydraulic construction
- Manufacturer reputation and warranty terms
- Return policy for incorrectly cataloged parts
OEM Toyota mounts generally provide factory-matched fit and isolation characteristics. A well-made aftermarket mount can also work, but a very inexpensive mount may use different rubber stiffness, dimensions, or bracket geometry.
Pro Tip: Compare the replacement with the old mount before installation. Check bolt spacing, bracket angles, installed height, locating pins, sleeves, connectors, and casting marks while the part can still be returned.
Before paying for a major repair, you can also check your VIN through the NHTSA recall lookup. A recall search does not diagnose a motor mount and may not show completed, very old, newly announced, or international campaigns, but it can identify certain unrepaired U.S. safety recalls.
How Much Does Toyota Camry Motor-Mount Replacement Cost?
As checked September 11, 2026, RepairPal lists the average Toyota Camry engine-mount replacement at $628–$709, with estimated labor of $174–$255 and parts around $454. Its 2026 Camry estimate is $793–$878. These are U.S. benchmarks, not quotes: taxes, fees, location, the exact mount, part choice, and related repairs can change the total.
A meaningful estimate should identify more than a single total. Ask the shop to show which mount failed and explain how the diagnosis was confirmed.
| Estimate Item | Why It Matters |
|---|---|
| Exact mount position and part number | Different mounts can have very different parts prices and access requirements |
| OEM or aftermarket brand | Part fit, stiffness, warranty, and price can vary |
| Labor operations | Battery trays, intake parts, braces, undercovers, or other components may require removal |
| Fasteners and brackets | Damaged or one-time-use hardware may add cost but should not be omitted when required |
| Related damage | Exhaust contact, stretched wiring, leaking hoses, or axle problems may require separate repair |
| Diagnostic time | Confirming the cause can prevent paying for a mount that does not solve the vibration |
Be cautious with an estimate that lists only “engine mounts” without identifying the failed location, part brand, diagnosis, labor operations, and related findings.
Frequently Asked Questions
Why are motor mounts important?
Motor mounts hold the engine and transmission in their intended positions while isolating vibration. They also control powertrain movement during acceleration, deceleration, and gear changes, helping protect hoses, wiring, exhaust parts, axles, and brackets.
How long do Toyota Camry motor mounts last?
Camry motor mounts do not have one universal replacement interval. Their lifespan depends on heat, fluid contamination, mount design, road conditions, driving habits, collision history, installation quality, and powertrain movement. Replace a mount when inspection and diagnosis confirm failure rather than at an arbitrary mileage.
What problems can a bad motor mount cause?
A bad mount can cause vibration, clunks, excessive powertrain movement, exhaust contact, and added stress on hoses, wiring, ground straps, brackets, and axles. The exact effects depend on which mount failed and how far the engine or transmission can move.
Are motor mounts the most common Toyota Camry problem?
No single problem is most common across every Camry generation and powertrain. Motor-mount wear is one possible cause of vibration, but misfires, tires, wheels, axles, exhaust contact, loose shields, and suspension components can produce similar symptoms.
Should all Camry motor mounts be replaced together?
Not automatically. Inspect every mount because a failed mount may increase stress on the others. Replace multiple mounts when testing confirms multiple failures, their condition is similarly poor, or shared access makes replacement practical.
Can I replace a Camry motor mount myself?
An experienced DIYer with proper lifting equipment, approved powertrain-support equipment, a torque wrench, and model-specific repair information may be able to replace an accessible mount. The repair is not suitable for beginners because incorrect support, alignment, or hybrid-system handling can cause injury or vehicle damage.
How much does Camry motor-mount replacement cost?
As checked September 11, 2026, RepairPal lists an average Toyota Camry engine-mount replacement at $628–$709, while its 2026 Camry estimate is $793–$878. Actual cost varies by mount position, model year, powertrain, part quality, labor rate, location, fastener requirements, and related repairs.
Does fluid on a mount always mean the mount is leaking?
No. A hydraulic mount can leak internally contained fluid, but engine oil, transmission fluid, or another leak may run onto the mount from above. Clean the area, identify the fluid source, and reinspect before condemning the mount.
Do new motor mounts need a break-in period?
There is no universal Camry mount break-in procedure. Minor settling may occur, but strong or new vibration should not be dismissed as normal. Recheck part fitment, mount position, powertrain alignment, surrounding contact, and fastener torque.
How do I know if my Toyota Camry motor mount is bad?
A bad mount is more likely when a repeatable symptom—such as vibration in Drive, a clunk during load changes, or abnormal engine movement—matches physical evidence such as separation, collapse, hydraulic-fluid leakage, lost clearance, or metal contact. Vibration alone is not enough; rule out misfires, tires, wheels, axles, exhaust contact, and suspension faults.
How many motor mounts does a Toyota Camry have?
The exact number varies by model year and powertrain. A Camry can use engine-side and transmission-side mounts, torque-control mounts, stabilizing links, or active-control hardware. Verify the mounting layout by VIN, engine, transmission, drivetrain, market, and mount position instead of relying on a universal count.
Can you drive a Toyota Camry with a bad motor mount?
Mild vibration without abnormal movement or contact may allow a short drive to arrange inspection. Do not keep driving when the powertrain bangs or shifts sharply, a hose or wire is stretched, the exhaust contacts the body, fluid is leaking, a warning light appears, or steering or shifting changes. When severity is uncertain, towing is the safer choice.
Conclusion
Toyota Camry motor mounts support the powertrain, control movement, and reduce vibration transferred into the cabin. Strong vibration, clunks, hydraulic-mount leakage, torn rubber, lost clearance, or excessive movement justify inspection, but none of these symptoms should replace a complete diagnosis.
Confirm the exact failed mount, rule out engine and road-speed vibration sources, match parts by VIN, and follow the correct Toyota repair procedure. When the job requires unfamiliar lifting, hybrid-system work, difficult powertrain support, or diagnosis around a running engine, professional repair is the safer choice.
Sources
- Toyota Technical Information System — factory repair manuals, service bulletins, wiring information, diagnostics, model-specific support procedures, and torque specifications
- Toyota Genuine Parts and Accessories — full-VIN and vehicle-based Toyota parts lookup
- Toyota 2026 Camry — current U.S. Camry powertrain information
- National Highway Traffic Safety Administration Recall Lookup — VIN-based unrepaired U.S. safety-recall information and lookup limitations
- NHTSA Electric and Hybrid Vehicle Safety — high-voltage servicing, training, and equipment precautions
- Vibration Transfer Path Analysis and Path Ranking for NVH Optimization of a Vehicle Interior — general research on vehicle vibration-transfer paths and engine-mount optimization
- RepairPal Toyota Camry Engine Mount Replacement Cost — current U.S. average and model-year-specific replacement-cost estimates checked September 11, 2026
