When you shoot at long distances on a lawful, controlled range, you must account for bullet drop and holdover. Gravity pulls the bullet down from the moment it leaves the barrel. Air drag slows it, which also increases drop. To stay on target, you either dial elevation or hold above the target using your reticle. Always follow local laws, range rules, and the basic firearm safety rules before handling any firearm.
Quick Answer
Bullet drop is how far a bullet falls below your line of sight as it travels. Holdover is aiming above the target by that amount, or dialing the same correction on your scope, so the bullet lands where you want. Drop changes with distance, speed, drag, zero, sight height, and weather.
Bullet drop is how far a bullet falls below your line of sight as it travels. Holdover is aiming above the target by that amount, or dialing the same correction on your scope, so the bullet lands where you want. Drop changes with distance, speed, drag, zero distance, sight height, and the weather.
Key Takeaways
- More time in the air means more drop because gravity acts on the bullet throughout flight.
- Velocity, ballistic coefficient (BC), zero distance, sight height, and air density all affect bullet drop.
- Converting drop into MOA or MIL helps you hold or dial a repeatable correction.
- Wind mostly affects horizontal drift, while temperature, altitude, and pressure can change the drop curve.
- Ballistic calculators are only a starting point. Confirm any data only in a safe, lawful range setting.
At a Glance
| Time Required | 15 to 30 minutes to prepare a basic drop reference; longer to confirm data safely at the range |
| Difficulty | Moderate; the math is simple, but safe confirmation requires discipline and a controlled range |
| Tools Needed | Ballistic calculator, known zero distance, accurate distance measurement, optic with MOA or MIL marks, and a safe backstop |
| Cost | Free if using online calculators and existing range gear; paid apps, chronographs, and range fees vary |
Warning: Use this information only for lawful sporting, target, or training purposes in a safe range environment. Keep the firearm pointed in a safe direction, know your target and what is beyond it, and follow all range officer instructions.
Understanding bullet drop: the basics
When you fire a bullet, gravity starts affecting its path right away. That is why the bullet falls below the straight line it started on. The amount of drop depends on how fast the bullet is going, how much drag it has, and how far it must travel. With drag, the path is a smooth curve, not a perfect parabola. Knowing this drop helps you understand why a point of aim and point of impact can change at different ranges.
Bullet drop is usually discussed relative to your line of sight. Your barrel is normally angled slightly upward compared with the sight line, so the bullet may cross your line of sight near the zero distance and then fall below it farther away. That is why the same rifle, load, and optic can need different corrections at 100, 200, 300 yards, and beyond.
The physics behind bullet drop
Drop is mostly about time of flight. Gravity pulls the bullet down the whole time it is moving to the target. A faster bullet usually gets there sooner and drops less. A higher-BC bullet also tends to hold speed better, which can reduce drop and wind drift at longer ranges.
| Factor | Impact on bullet drop |
|---|---|
| Initial velocity | Higher velocity usually means less drop at a given distance |
| Firing angle | Uphill and downhill shots change the effective horizontal distance for drop |
| Distance to target | More distance usually means more time of flight and more drop |
| Ballistic coefficient | A higher BC usually keeps velocity better and can reduce drop at longer range |
| Sight height and zero | These set the baseline relationship between the bore, sight line, and point of impact |
These variables work together. A fast, high-BC bullet may still drop more than expected if the distance is misread, the muzzle velocity is only a box estimate, or the zero is not confirmed.
What is holdover and how to use it
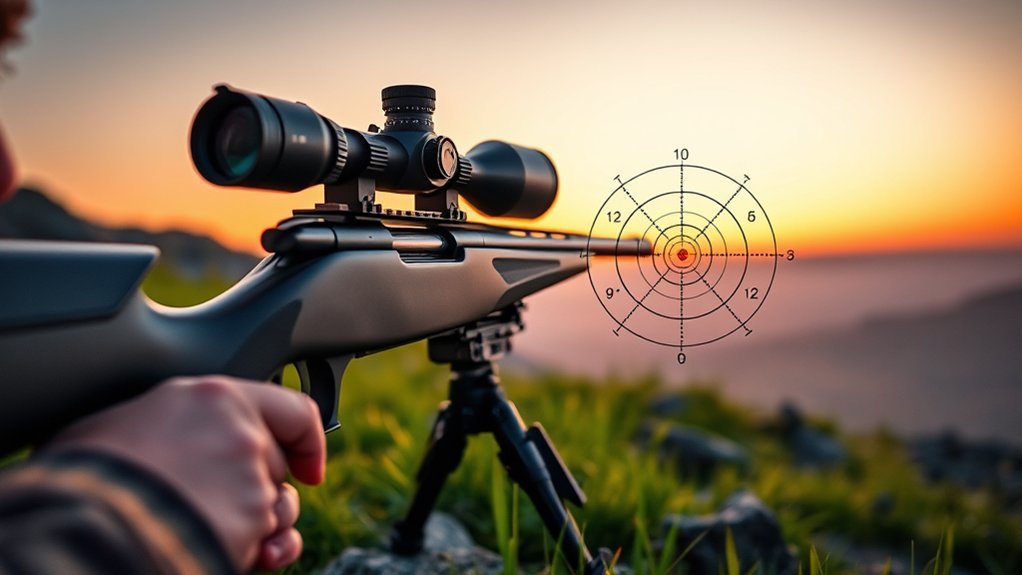
Holdover means aiming above the target to make up for drop. Instead of moving your sights, you pick a higher aiming point, often a reticle mark. This works best when you know your bullet’s drop at that distance and your reticle is marked in MOA or MIL.
Dialing elevation does the same job in a different way. With dialing, you turn the scope turret so the main aiming point represents the corrected point of impact. With holdover, you keep the turret where it is and use a lower reticle mark as your aiming reference. Both methods depend on the same drop data.
Note: MOA and MIL are angular units, not fixed inch measurements. Their inch value grows as distance grows, which is why the distance must be included in every conversion.
Calculating bullet drop and holdover
Start with the basics: your muzzle velocity, your bullet’s BC, your zero distance, and your sight height. A ballistic calculator or a maker’s table can then estimate drop at many ranges. After that, you translate the drop into MOA or MIL for your reticle, or into turret clicks if you dial elevation.
Convert drop to scope units (MOA or MIL)
Many charts list drop in inches. Scopes and reticles use angle, so you need a quick conversion:
- MOA (true): MOA ≈ drop (in) ÷ (1.047 × distance (yd) ÷ 100)
- MIL: MIL ≈ drop (in) ÷ (3.6 × distance (yd) ÷ 100)
Example: if drop is 10 inches at 300 yards, that is about 3.2 MOA (10 ÷ (1.047 × 3)) or about 0.9 MIL (10 ÷ (3.6 × 3)). You can hold that amount, or dial it if your scope uses clicks, often 0.25 MOA or 0.1 MIL per click.
For a starting chart, try the Hornady 4DOF ballistic calculator or the JBM trajectory calculator. Treat any output as an estimate until you confirm it with real shots on a safe range.
Pro Tip: Keep one card or note for each rifle and load. Mixing data from different ammunition, barrel lengths, optics, or zero distances can make a good chart useless.
Build a simple drop reference
A useful drop reference does not need to be complicated. Keep it clear enough that you can read it quickly and safely.
- Confirm your zero: Make sure the point of aim and point of impact match at your chosen zero distance.
- Record your setup: Note the rifle, ammunition, bullet weight, BC source, sight height, and zero distance.
- Estimate the curve: Use a trusted calculator or published table to estimate drop at useful distances.
- Convert the drop: Change inches of drop into MOA or MIL so it matches your optic.
- Confirm safely: Check your data only at a lawful range with a safe backstop and clear range procedures.
- Update your notes: Replace estimates with confirmed values when your actual results differ.
Adjusting for environmental factors
Real weather can move your impact, even if your drop chart is solid. Wind and air density are the big drivers.
Mastering bullet drop is just the start; wind and air density can change where the bullet lands.
- Wind: crosswinds push the bullet sideways. You may need a wind hold or a windage dial.
- Temperature: warm air is less dense than cold air, so drag is often lower.
- Altitude: higher altitude means thinner air and less drag.
- Humidity: has a small effect, but it can still change air density a bit.
- Barometric pressure: lower pressure generally means thinner air, which can slightly reduce drag.
These changes are usually small at short range but can matter more as distance increases. That is why serious drop notes often include the weather and location where the data was confirmed.
Practical tips for long-range shooting
At long range, simple habits help more than guesswork. Measure well, keep notes, and verify your data in a safe, controlled environment.
Understand the inputs that matter most
- Bullet and BC: lower drag often means less drop and drift.
- True muzzle velocity: a chronograph reading beats a box estimate.
- Zero and sight height: these set the baseline for your drop curve.
- Weather: note temperature, altitude, and pressure when you confirm your data.
- Consistent ammunition: switching loads can change velocity, BC, recoil, and point of impact.
Utilize rangefinders effectively
A rangefinder gives you precise distance for your chart. Hold it steady and range the same target more than once. If your unit supports angle compensation, use it for uphill or downhill shots. Even a small distance error can lead to a larger elevation error as range increases.
Adjust for wind conditions
- Watch indicators: mirage, grass, and flags show wind changes.
- Use a baseline: your chart or app can give a first wind value.
- Hold consistently: use your reticle’s wind marks the same way each shot.
- Practice: wind is rarely constant, so confirmed notes are better than memory.
Common mistakes that cause bad holdovers
- Using the wrong unit: Do not mix MOA data with a MIL reticle, or MIL data with MOA turrets.
- Trusting unconfirmed velocity: Published velocity can differ from your actual firearm and barrel length.
- Forgetting sight height: A wrong sight-height input changes the calculated curve.
- Ignoring zero shift: Loose mounts, different ammunition, or a hard impact can change your zero.
- Skipping safety checks: Never attempt live-fire confirmation without a safe backstop and clear range permission.
Glossary
- Bullet drop
- How far the bullet falls below the line of sight as it travels.
- Holdover
- Aiming above the target, often with a reticle mark, to make up for drop.
- Ballistic coefficient (BC)
- A number that describes how well a bullet cuts through the air; higher BC usually means less drag.
- MOA / MIL
- Angular units used in optics; they scale with distance and help you apply repeatable holds or clicks.
- Zero
- The range where your point of aim and point of impact match.
- Line of sight
- The straight visual line from your eye through the optic or sights to the target.
- Time of flight
- The amount of time the bullet spends traveling to the target. More time in flight usually means more drop.
Related Guides
Frequently Asked Questions
Is bullet drop only caused by gravity?
Gravity causes the downward acceleration, but drag changes how long the bullet is in the air. More time in flight means gravity has more time to act, which increases drop. Shooters also talk about drop relative to the line of sight and the chosen zero.
What’s the difference between holdover and dialing elevation?
Holdover uses a reticle mark above the target. Dialing elevation adjusts the scope turret so the reticle can stay on the target. Both use the same drop data; your choice depends on speed, distance changes, your optic, and what is safest under range rules.
How do you convert inches of drop to MOA?
MOA ≈ drop (in) ÷ (1.047 × distance (yd) ÷ 100). Many shooters round 1 MOA to 1 inch at 100 yards for fast math, but using 1.047 is more accurate as distance grows.
How do you convert inches of drop to MILs?
MIL ≈ drop (in) ÷ (3.6 × distance (yd) ÷ 100). A quick check: 1 MIL is about 3.6 inches at 100 yards and about 10.8 inches at 300 yards.
Do temperature and altitude change bullet drop?
Yes. They change air density, which changes drag and time of flight. Higher altitude and warmer air usually mean less drag and a slightly flatter path than the same setup in cold, dense air.
Do I still need to confirm a ballistic calculator’s results?
Yes. Calculators depend on correct inputs, especially muzzle velocity, zero distance, sight height, BC, and weather. Confirming on a safe range and writing down your verified holds or clicks is the most reliable way to build a usable drop chart.
Is holdover better than dialing?
Neither is always better. Holdover can be faster when distances change quickly, while dialing can feel cleaner when you have time and a stable setup. The best method is the one that matches your optic, verified data, range rules, and safe handling habits.
Conclusion
Bullet drop is normal physics. Your job is to plan for it safely and legally. Build a drop chart for your setup, convert drop into MOA or MIL, and then confirm those numbers in real conditions at a controlled range. Once your data is proven, holdover or dialing becomes clearer, safer, and more repeatable.
Sources
- Hornady 4DOF Ballistic Calculator — supports ballistic calculator use and trajectory estimates.
- JBM Trajectory Calculator — supports drop, trajectory, and scope-unit calculation concepts.
- NSSF Firearm Safety Rules — supports the firearm safety guidance in this article.