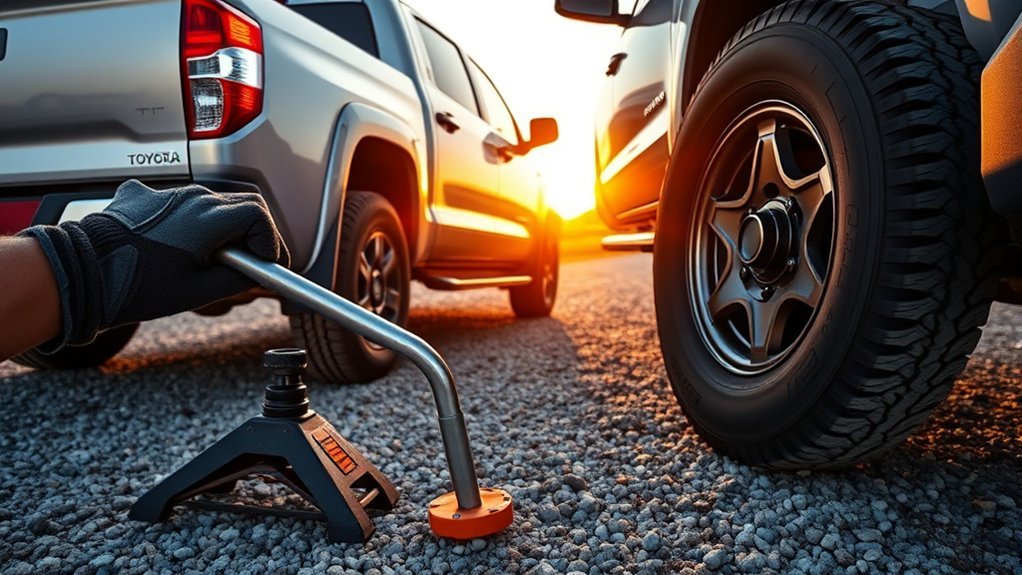
To change a flat tire on a Toyota Tundra, park on firm, level ground away from traffic, secure the truck, loosen the wheel nuts before lifting, raise it only at the jacking point specified for your model year, install the spare, then tighten the nuts in a crossing pattern to the exact specification for your truck and wheel. Tool locations, jack points, spare-release procedures, tire pressures, and wheel specifications can vary, so keep your exact Toyota owner’s manual available during the job.
Last Updated: September 22, 2026
Quick Answer
To change a flat tire on a Toyota Tundra, secure the truck on firm, level ground, place the wheel chock or chocks as shown in your model-year manual, loosen the lug nuts slightly, raise the truck at the specified jacking point, install the spare, lower the truck, and tighten the nuts in a crossing pattern. Finish with a torque wrench set to the specification for your exact model year and wheel.
Key Takeaways
- Don’t change the tire beside fast traffic or on soft, sloped, icy, or uneven ground.
- Use only the jacking points, wheel-chock positions, and procedures listed in your exact Toyota Tundra owner’s manual.
- Loosen the wheel nuts before lifting, but don’t remove them until the tire is off the ground.
- Never crawl under, reach under, or intentionally rock a truck supported by an emergency jack.
- Use the model-specific wheel-nut torque specification rather than a generic torque range.
- Have the damaged tire inspected and repaired or replaced as soon as possible.
At a Glance
| Time Required | Varies with roadside conditions, wheel-nut condition, and access to the spare and tools |
| Difficulty | Moderate |
| Tools Needed | Toyota jack and handle, lug wrench, serviceable spare, wheel chock or chocks, pressure gauge, flashlight, gloves, wheel-lock key if fitted, and torque wrench |
| Cost | No immediate cost if the factory tools and spare are serviceable; tire repair or replacement costs extra |
How to Safely Change a Flat Tire

Your first decision is whether the location is safe enough for a tire change. Pull into a parking lot, rest area, or another firm, level area away from moving traffic whenever possible. Avoid curves, hills, intersections, narrow shoulders, and locations where approaching drivers may not see you.
Warning: Don’t attempt a roadside tire change when traffic passes close to the truck, the ground is soft or sloped, visibility is poor, or you don’t have the correct tools. Stay in a protected location and call roadside assistance. Never place any part of your body beneath a truck supported only by its emergency jack.
If a tire suddenly blows out while you’re driving, hold the steering wheel firmly and concentrate on maintaining control. Avoid abrupt braking, gradually release the accelerator, correct the steering as necessary, and allow the truck to stabilize. Once it is stable, continue slowing and pull off the road where it is safe to stop.
- Park on firm, level ground away from moving traffic.
- Turn on the hazard lights and switch off the engine.
- Shift the transmission into Park and engage the parking brake.
- Move passengers to a protected location away from traffic only when they can exit the truck safely.
- Place the wheel chock or chocks in the position specified in your exact model-year owner’s manual. Toyota’s procedure uses the diagonally opposite wheel, with the chock position depending on whether the flat tire is at the front or rear.
- Remove the spare tire and gather the jack, jack handle, lug wrench, wheel-lock key, and other needed tools.
- Remove any wheel cover that blocks access to the lug nuts.
- Loosen each lug nut slightly while the flat tire remains on the ground.
- Position the jack at the lift point specified in your model-year owner’s manual.
- Raise the truck only high enough for the inflated spare to fit.
- Remove the nuts and flat tire, then install and hand-tighten the spare.
- Lower the truck completely and tighten the lug nuts in a crossing pattern.
- Use a torque wrench to apply the exact specification listed for your truck and wheel.
- Check the spare, collect every tool, remove the chock or chocks, and arrange permanent tire service.
What Tools Do You Need to Change a Toyota Tundra Tire?
The factory tire-changing equipment can vary among Tundra generations, cab styles, and packages. Check the Toyota Manuals and Warranties portal for the instructions that match your model year.
- Vehicle jack: Use the jack specified for your truck and follow Toyota’s operating instructions.
- Jack handle and extensions: These parts may also operate the under-bed spare-tire hoist.
- Lug wrench: Use it to loosen the nuts and seat them during installation.
- Torque wrench: Use it for the final model-specific tightening step.
- Wheel chock or chocks: Position them as shown in the exact model-year tire-changing instructions.
- Serviceable spare tire: Inspect its tread, sidewall, valve, wheel, and pressure before relying on it.
- Tire-pressure gauge: Don’t rely only on appearance or the TPMS warning.
- Wheel-lock key: Keep it with the tire-changing tools if locking nuts are installed.
- Flashlight, gloves, and reflective vest: These can improve visibility and protect your hands.
Don’t try to make an unsafe shoulder usable by placing loose wood, bricks, stones, or other makeshift materials beneath the jack. Move the truck to a stable surface or call for assistance.
Pro Tip: Inspect the spare, jack, wheel-lock key, and tire-changing tools before long trips. NHTSA recommends checking every tire, including the spare, at least once a month when the tires are cold.
[Amazon Products Picked for You]

Efficient Tire Disassembly and Installation: The VEVOR 3-piece tire mount demount tool kit (including a dismounting tool, bead holder, and mounting bar) provides a complete and convenient toolset for quick and easy tire renovation and replacement. Get back on the road swiftly and enjoy your driving trip with a new tire.

🚗【Package Include】You will get 1 valve core installation push rod tool, 1 plastic tapered positioning tube,1 T-hook tool, 4PCS TR413, 4PCS TR414,2PCS TR418 valve cores, 1PC 4 way valve tool, 1 dual heads valve removal tool,10PCS valve cores,10 PCS valve stem caps, 1 gloves and 1 detailed instruction manual.Suitable for cars, light trucks, small trailers, unicycles, lawn mowers, ATVs and motorcycles, etc.
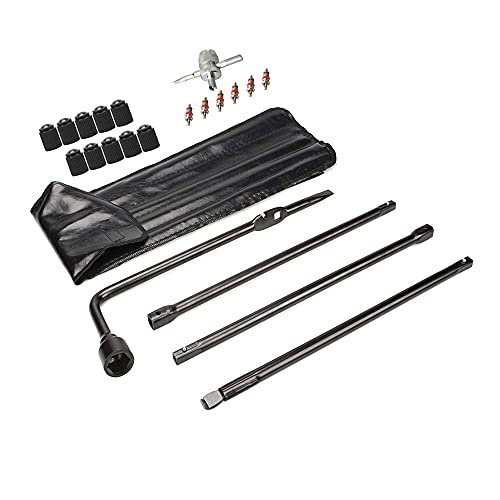
Premium OEM Upgraded Quality Spare Tire Tool: Stable strong rustproof automotive grade steel,tubing instead of soil designed made it more light,not only stong but also convenient.
How to Get Your Spare Tire Ready
On many Toyota Tundras, the spare is stored beneath the rear of the truck and lowered with a cable or hoist system. The tool assembly and access point can vary by model year, so follow the diagram in your owner’s manual rather than forcing the mechanism.
For a focused walkthrough of the hoist and retaining bracket, see how to lower the spare tire on a Toyota Tundra.
- Assemble the spare-tire lowering tool exactly as the manual shows.
- Insert it into the rear access point until it engages the hoist.
- Turn the tool in the direction specified in the manual and lower the spare completely to the ground.
- Create enough cable slack to release the retaining plate or bracket as instructed.
- Slide the spare from beneath the truck without placing your head or torso under the vehicle.
- Inspect the tread, sidewalls, valve stem, and wheel for visible damage.
- Check the pressure against the applicable owner’s-manual or vehicle-label specification.
Note: The pressure molded into a tire sidewall isn’t automatically the correct operating pressure for your truck. Use the vehicle manufacturer’s recommended cold pressure shown on the applicable Tire and Loading Information label or in the owner’s manual.
Don’t install a spare with severe cracking, exposed cords, a damaged wheel, a leaking valve, or inadequate pressure. Use roadside assistance when the spare isn’t serviceable.
[Amazon Products Picked for You]
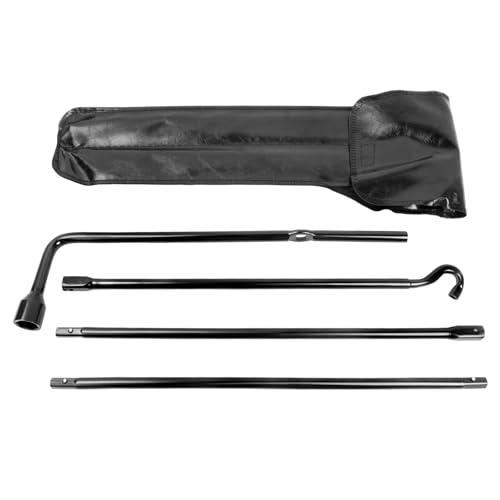
Durable strong rustproof automotive grade steel, tubing instead of soil designed
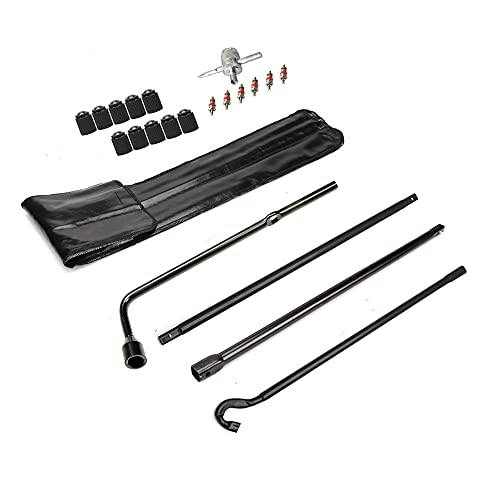
Premium OEM Upgraded Quality Spare Tire Tool: Stable strong rustproof automotive grade steel,tubing instead of soil designed made it more light,not only stong but also convenient.

【Applicable Models】:Compatible with 2007-2021 Tundra, 2008-2021 Sequoia
Loosen the Lug Nuts Before Lifting

Break the lug nuts loose while the flat tire still touches the ground. Ground contact prevents the wheel from turning while you apply force. Loosen each nut only enough to break it free. Don’t remove any nut yet.
Importance of Loosening First
- Better control: The wheel can’t spin freely while it carries the truck’s weight.
- Less jack movement: You avoid applying strong sideways force after the truck has been lifted.
- Easier removal: Each nut will be ready to unscrew after the tire clears the ground.
- Safer sequence: The strongest loosening force is applied while the truck is still resting on all four tires.
Use firm, controlled pressure. If a nut won’t move, confirm that the wrench is seated fully and that any wheel lock has the correct key.
Proper Tool Usage
Fit the lug wrench fully over the nut so it doesn’t slip or round the corners. Keep your hands and face clear of the wrench’s travel path and use steady force rather than bouncing or jumping on it.
If the factory wrench slips, the nut begins to round, or controlled force will not loosen it, stop. A damaged, seized, cross-threaded, or badly rounded nut needs professional attention.
What to Do If a Lug Nut Won’t Loosen
Stop when the supplied wrench slips, the nut begins to round, the wheel-lock key doesn’t fit securely, or the truck moves while you’re applying force. Repeated attempts can damage the nut, stud, wheel lock, or wrench.
- Confirm that the parking brake is engaged and the vehicle is chocked as directed in the manual.
- Make sure the wrench is seated completely on the nut.
- Check that you’re using the correct wheel-lock key.
- Use firm, controlled pressure without bouncing or jumping.
- Call roadside assistance if the nut remains seized.
[Amazon Products Picked for You]

Must Have Tool for Bolt Nut Repair: Used to remove stripped, damaged, frozen, rusted, rounded bolts, nuts and screws. Each impact grade extractor socket has been professionally designed to almost exceed OEM standards for solving bolt problems and making it an essential tool for removing bolts nuts. Note: It is only suitable for standard nut removal and is not intended for deep applications

Upgraded New Sizes: Compared to regular deep bolt extractor kits, our kit includes commonly used sizes (14mm, 16mm, 17mm, 19mm) plus larger options (21mm, 22mm, 24mm, 27mm) to meet a wider range of work needs

【Premium & Drable】The GRLCOOD bolt extractor kit is made of high-hardness alloy steel. Each surface has undergone sandblasting treatment to make it harder, effectively extending the product's lifespan. It features robust durability, better wear resistance, and can withstand high-intensity use to meet your needs
Secure the Vehicle With the Jack

Locate the jacking point shown in the owner’s manual for the flat tire’s position. Don’t guess based on a nearby frame rail, suspension part, axle component, skid plate, or body seam. Using the wrong point can damage the truck or allow the jack to slip.
Raise the truck only after the parking brake is engaged, the vehicle is chocked as directed, the jack is positioned correctly, and its base sits fully on firm, level ground.
- Center the jack saddle beneath the designated lift point.
- Check that the jack base sits flat and can’t sink or tilt.
- Raise the truck slowly while watching the jack and lift point.
- Stop immediately if the jack leans, shifts, twists, or sinks.
- Lift only until the flat tire clears the ground and the inflated spare can fit.
- Never start the engine, enter the cab, rock the truck, or crawl underneath it while it’s raised.
Avoid touching the wheel or brake surfaces immediately after driving. These components can remain hot enough to cause burns.
Remove the Flat Tire Safely
Once the tire clears the ground, unscrew the loosened lug nuts by hand. Place every nut in a clean container or secure location where it can’t roll into traffic, dirt, snow, or a storm drain.
Grip the flat tire securely and pull it straight toward you from the hub. A Tundra wheel and tire can be heavy, so keep your back in a stable position, bend your knees, and avoid trapping your fingers beneath the wheel.
Place the flat tire on its side away from traffic. Don’t place it under the truck if doing so requires reaching beneath the raised vehicle.
Look at the wheel-mounting surface for loose dirt, severe rust flakes, or obvious damage. Don’t hammer, grease, or modify the mounting surface at the roadside. Professional service is safer when the wheel doesn’t sit flat.
Mount the Spare Tire Properly
Check the spare one more time before lifting it into place. Install it in the orientation specified by Toyota and make sure the valve stem remains accessible as intended. Lift carefully and align the wheel holes with the studs.
Align Tire With Bolts
- Slide the spare straight onto the wheel studs.
- Push the wheel inward until it sits flat against the mounting surface.
- Install every lug nut by hand.
- Turn each nut several full turns to confirm that it threads smoothly.
- Stop if a nut binds, tilts, or won’t turn by hand because it may be cross-threaded.
Don’t apply oil, grease, anti-seize compound, or another lubricant to the studs or nuts unless the applicable Toyota service information specifically instructs you to do so.
Tighten Lug Nuts Securely
With the truck still raised, hand-tighten the lug nuts so the wheel sits evenly against the mounting surface. If you use the lug wrench before lowering, apply only light force needed to seat the wheel; final tightening belongs after the truck is safely back on the ground.
Work across the wheel rather than tightening the nuts sequentially around the circle. This helps seat the wheel evenly before final torque is applied.
How Should You Tighten Toyota Tundra Lug Nuts?
Lower the truck slowly until all four tires are firmly on the ground, then remove the jack. Use a calibrated torque wrench and the exact wheel-nut specification listed for your model year and wheel.
- Start with one lug nut.
- Move across the wheel rather than to the next nut around the circle.
- Continue the crossing pattern until every nut has been tightened.
- Repeat the pattern with the torque wrench until every nut reaches the specified value.
- Do not add an extra turn after the torque wrench reaches the specified torque.
Don’t rely on a generic internet torque range. Tundra wheel specifications can depend on the model year, wheel construction, and installed hardware, so confirm the correct value in Toyota documentation before the final tightening step.
Lower the Vehicle and Check Stability
Lower the truck slowly and keep your hands, feet, tools, clothing, and other objects clear of the wheel and suspension. Watch the jack throughout the descent.
Ensure Proper Jack Placement
If the jack shifts while lowering, stop immediately. Don’t try to straighten it while the truck’s weight is moving. Operate the jack only as the owner’s manual directs and call for assistance if it no longer sits correctly.
- Keep the jack centered under the specified lift point.
- Lower the vehicle in a slow, controlled motion.
- Don’t rock or shake the truck to test stability.
- Remove the jack only after all four tires rest firmly on the ground.
- Collect the jack handle and extensions before moving the truck.
Check Vehicle Stability
Stand clear and visually confirm that the spare sits upright, the wheel appears flush against the mounting surface, and the truck rests normally on the ground. Complete the final wheel-nut tightening with a torque wrench.
If the wheel looks tilted, doesn’t sit flush, makes contact with another component, or produces unusual movement, don’t drive. Have the truck inspected where it sits.
What Can Change by Toyota Tundra Model Year?
The overall tire-changing sequence is similar across Tundra generations, but several details should never be assumed. Before lifting the truck, confirm these items in the manual for the exact model year and configuration:
- Jack and tool storage: The storage position can differ by cab style and generation.
- Spare-tire release: Tool assembly, access points, and retaining hardware can differ.
- Jacking points: Follow the diagram for the exact truck rather than choosing a convenient frame, axle, suspension, or body location.
- Wheel and spare specifications: Wheel-nut torque, tire pressure, spare size, and temporary-use restrictions must come from the applicable manual, vehicle label, or spare markings.
This is why a model-specific Toyota manual is more useful than a universal torque chart or generic jack-point diagram.
When Should You Call Roadside Assistance Instead?
Changing the tire yourself is not the right choice when the work area or equipment is unsafe. Call roadside assistance if the truck cannot be moved away from fast traffic, the surface is soft or sloped, visibility is poor, the jack cannot sit securely, the spare is damaged or underinflated, a wheel nut or wheel lock cannot be removed safely, or the specified jack point is damaged or inaccessible.
Also stop if the truck shifts while raised, the jack begins leaning or sinking, the replacement wheel will not sit flat, a lug nut will not thread smoothly by hand, or the installed spare contacts another part of the truck. Don’t improvise around a failed jack, damaged wheel hardware, or an unsafe roadside location.
Final Checks After Changing Your Flat Tire
- Verify wheel-nut torque: Use the exact value listed in the applicable owner’s manual or Toyota service information.
- Check tire pressure: Use the applicable vehicle-label or owner’s-manual specification rather than assuming the sidewall maximum is the operating pressure.
- Inspect the spare: Look for cuts, bulges, severe cracking, exposed cords, wheel damage, or a leaking valve.
- Store every tool: Secure the jack, handle, wrench, wheel-lock key, wheel cover, and flat tire.
- Remove the wheel chock or chocks: Do this only after the truck is fully lowered and ready to move.
- Check for restrictions: Follow any speed, distance, loading, four-wheel-drive, towing, or temporary-use instructions in the manual or on the spare.
- Watch the TPMS: TPMS behavior with the spare varies by model year and spare setup. Check the spare with a gauge and follow your Tundra’s TPMS instructions if the warning remains on.
- Drive cautiously: Accelerate, brake, and turn smoothly until the original tire is repaired or replaced.
- Arrange professional service: Have the damaged tire, wheel, studs, and lug nuts inspected promptly.
NHTSA explains that tire-pressure monitoring systems don’t replace regular pressure checks. Check the tires with an accurate gauge when they’re cold, including the spare when applicable.
Frequently Asked Questions
How do you change a flat tire on a Toyota Tundra step by step?
Park on firm, level ground, turn on the hazards, shift into Park, engage the parking brake, and place the wheel chock or chocks as directed in your manual. Lower the spare, loosen the lug nuts, lift at the specified jacking point, install the spare, lower the truck, and torque the nuts in a crossing pattern to the model-specific specification.
How do you take the spare tire off a Toyota Tundra?
Assemble the spare-tire lowering tool, insert it through the rear access point, engage the hoist, and turn it in the direction shown in your owner’s manual. Lower the tire completely, release the retaining plate or bracket as instructed, and slide the spare from beneath the truck without putting your body under the vehicle.
Where is the jack stored in a Toyota Tundra?
The location depends on the model year, cab, and equipment. It may sit behind or beneath a rear seat or in another secured storage area. Check the tire-changing section of your exact model-year owner’s manual rather than forcing a seat panel or storage cover.
Which side of a spare tire faces outward?
Install the spare in the orientation shown by Toyota and confirm that the wheel sits flat against the mounting surface. Keep the valve stem accessible as intended and follow any directional arrows, temporary-use labels, or installation markings on the wheel and tire.
How tight should Toyota Tundra lug nuts be?
Use the wheel-nut torque listed in the owner’s manual or applicable Toyota service information for your exact model year and wheel. Don’t rely on a generic internet range because the specification can depend on the wheel and vehicle configuration.
Is the Toyota Tundra spare tire always the same size as the regular tires?
No universal assumption is safe. Spare-tire size and wheel configuration can vary by model year and equipment, and some Tundra configurations use a spare that differs from the road tires. Check the exact owner’s manual, tire information, and markings on the spare before driving on it.
Can you drive normally after installing the spare?
Treat the spare as an emergency replacement until you confirm its restrictions. Follow every speed, distance, towing, loading, drivetrain, and temporary-use instruction in the owner’s manual or on the spare. Arrange repair or replacement of the damaged tire promptly.
Why is the tire-pressure warning still on after installing the spare?
TPMS behavior with a spare varies by model year and spare configuration. Check the spare’s pressure with a gauge, then follow the TPMS instructions in your exact model-year manual if the warning remains on.
Conclusion
Changing a flat tire on your Toyota Tundra is manageable when you work in a safe location and follow the correct model-specific sequence. Secure the truck before lifting it, use the designated jacking point, keep your body out from beneath the raised vehicle, seat the spare correctly, and finish with a torque wrench set to the specification for your exact truck and wheel.
Before driving away, check the spare’s pressure and restrictions, collect and secure every tool, and make sure the wheel sits correctly. Have the damaged tire and wheel inspected promptly so the spare doesn’t remain in service longer than necessary.
Sources
- Toyota Manuals and Warranties — model-specific owner’s manuals, jacking instructions, tool locations, spare procedures, and specifications
- National Highway Traffic Safety Administration TireWise — tire pressure, spare-tire inspection, TPMS, blowout response, tire aging, and maintenance guidance
- Toyota Technical Information System — official technical and service information, including documentation for Toyota vehicles