
A Toyota Tundra that will not crank does not automatically need a new starter. First separate a true no-crank problem from an engine that cranks normally but will not start, then test the battery, cable voltage drop, Park/Neutral circuit, starter command, and start authorization. Replace the starter only when those checks point to the starter or solenoid, and use the truck’s model year, engine, drivetrain, and VIN because Tundra starter location and removal procedures differ sharply by powertrain.
Last updated: September 19, 2026 — cost data refreshed, generation-specific starter access corrected, and Toyota cold-weather starter bulletin guidance added.
Quick Answer
To diagnose a Toyota Tundra starter, first determine whether the engine is failing to crank or cranking normally without starting. Test the battery under load, inspect cable voltage drop and grounds, try starting in Neutral, check the applicable fuses and relay, scan relevant modules, and verify that the starter receives both battery power and a valid start command. Replace the starter only after those tests point to an internal starter or solenoid fault.
Key Takeaways
- A resting battery-voltage reading alone cannot prove that the battery is capable of operating the starter.
- Rapid clicking, a single click, slow cranking, silence, and normal cranking each point to different possible faults.
- Starter location and replacement difficulty vary substantially by Tundra generation and engine; a 4.7L 2UZ-FE procedure is not the same as a 4.6L/5.7L UR-family or 2022-and-newer V35A-FTS procedure.
- Use the full 17-character VIN to verify the starter, gaskets, and related parts before disassembly.
- The conventional DIY procedure below does not apply to i-FORCE MAX engine-start operation, which Toyota performs through the hybrid motor-generator system.
At a Glance
| Time Required | Diagnosis time varies with whether the fault is intermittent. Replacement can range from a relatively direct external-starter job to a multi-hour repair involving intake or right-side exhaust/accessory removal, depending on engine and drivetrain. |
| Difficulty | Intermediate when the starter is externally accessible; advanced when intake, fuel, cooling, or hybrid-related components affect access. |
| Tools Needed | Digital multimeter, battery load or conductance tester, scan tool, socket set, extensions, torque wrench, trim or connector tools, cleaning supplies, and approved vehicle supports when access from below is required. |
| Cost | RepairPal’s U.S. estimate updated September 3, 2026 is $813–$1,230 before taxes, location adjustments, and related repairs. Year-specific estimates differ substantially. |
Warning: The starter’s main cable is connected directly to battery power. Disconnect the negative battery terminal before touching starter wiring. Never work under a truck supported only by a jack, and immediately cover exposed intake openings during disassembly. Do not apply this conventional starter procedure to i-FORCE MAX engine-start or high-voltage service; Toyota states that engine startup is performed through the hybrid motor-generator system, which requires model-specific hybrid procedures, training, and protective equipment.
Symptoms of a Failing Toyota Tundra Starter
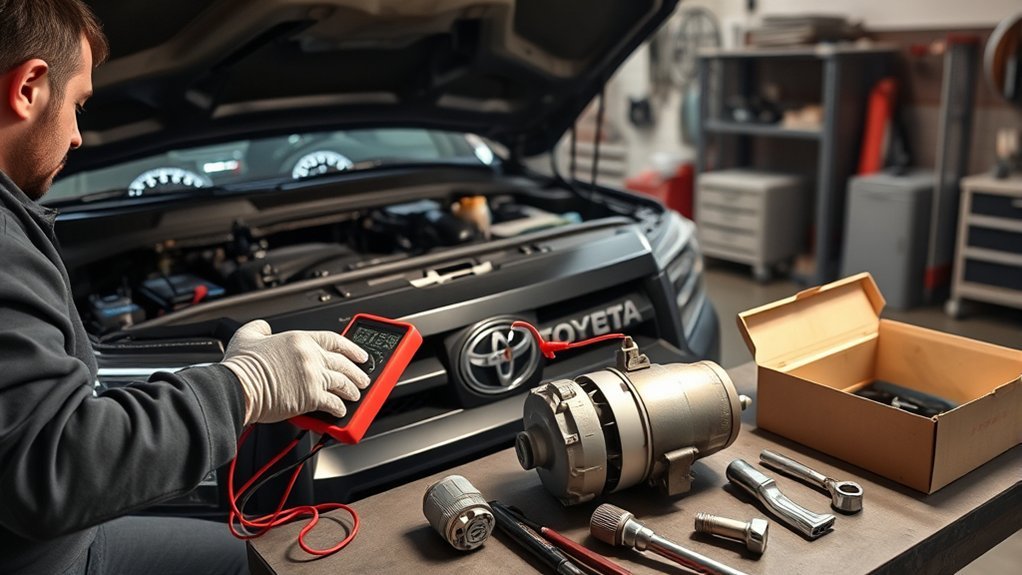
The sound and behavior you observe when attempting to start the engine provide the first diagnostic clues. Do not assume that every clicking sound means the starter motor has failed.
| What Happens | Likely Areas to Check |
| No sound and no cranking | Battery connection, fuse, starter relay, ignition or start switch, Park/Neutral circuit, smart-key authorization, immobilizer, wiring, or starter solenoid. |
| Rapid repeated clicking | Low battery charge, a weak battery under load, loose terminals, corrosion, or excessive resistance in a battery cable. |
| One solid click with no crank | Weak battery, high-resistance cable, starter solenoid failure, worn starter contacts, seized starter, or mechanical engine resistance. |
| Engine cranks unusually slowly | Battery capacity, cable voltage loss, poor engine ground, starter current draw, cold oil, accessory drag, or an internal engine problem. |
| Starter whirs but the engine does not turn | Starter drive or pinion not engaging, damaged ring-gear teeth, incorrect starter fitment, or a mounting problem. |
| Grinding during startup | Starter pinion, flywheel or flexplate ring gear, loose mounting, alignment, or incorrect part fitment. Stop repeated attempts to avoid further damage. |
| Engine cranks at normal speed but will not run | Usually not a starter failure. Diagnose fuel delivery, ignition, compression, engine-speed signals, security authorization, and related control systems. |
A starter has completed its basic job when it turns the engine at normal cranking speed. If the engine turns normally but does not start, continue with engine-management diagnosis instead of replacing the starter.
2022–2024 Gasoline Tundra: Check the Cold-Weather Starter Bulletin
Toyota bulletin T-SB-0019-24 applies to some 2022–2024 gasoline Tundras with the V35A-FTS engine that are difficult to start below -4°F (-20°C). Toyota’s bulletin directs technicians to inspect the starter’s main switch assembly and, when applicable, replace it with the updated starter solenoid switch rather than automatically replacing unrelated starting-system parts.
If your 2022–2024 non-hybrid Tundra has a cold-only starting problem at those temperatures, check T-SB-0019-24 in Toyota TIS before authorizing a complete starter replacement. The bulletin does not apply when the specified condition is absent, and it is not a substitute for normal battery, cable, control-circuit, or immobilizer diagnosis.
How to Diagnose a Failing Toyota Tundra Starter
1. Identify a No-Crank or Crank-No-Start Condition
Watch the tachometer, listen carefully, and observe the lights when you press the start button or turn the key. A no-crank condition means the starter is not rotating the engine. A crank-no-start condition means the starter is rotating the engine but the engine is not beginning to run.
Also note whether the problem occurs only when the engine is hot, only in cold weather, intermittently, or after the truck has been parked. An intermittent hot no-crank condition can involve worn starter components, but it can also come from a relay, connection, switch, or wiring fault.
2. Inspect and Test the Battery
Turn off the lights and accessories. Inspect the battery case for swelling, leakage, damage, or a loose hold-down. Check both terminals for corrosion and confirm that the clamps cannot be twisted by hand.
A fully charged conventional 12-volt battery often measures around 12.6 volts after resting, while a reading near 12.4 volts generally indicates less than a full charge. However, open-circuit voltage does not reveal how much current the battery can supply. Use a battery conductance or load test and monitor voltage during an attempted crank.
Note: If a jump start temporarily solves the problem, do not immediately blame the starter. Test the battery, charging output, terminal condition, cable resistance, and possible parasitic draw.
3. Check the Battery Cables and Grounds
Follow the positive cable toward the starter and inspect accessible portions for damaged insulation, corrosion, loose fasteners, heat damage, or previous repairs. Inspect the negative battery cable and the engine-to-body or engine-to-frame grounds.
A cable can appear clean from the outside while corrosion or broken strands create resistance inside the terminal or insulation. A voltage-drop test performed during a crank request is more useful than a visual inspection alone. Compare the positive and ground sides of the starter circuit with the specifications in the applicable Toyota repair manual.
4. Try Starting in Park and Neutral
Apply the parking brake and hold the service brake. Attempt to start the truck in Park, then move the selector to Neutral and try again. If it starts consistently in one position but not the other, inspect the shift-position or neutral-safety circuit before replacing the starter.
Do not move or bypass the switch merely to make the starter operate. The interlock prevents the engine from cranking while the transmission is in gear.
5. Inspect Fuses, Relays, and Start Authorization
Use the fuse-box diagram for the exact model year to identify the applicable starting-system fuses and relay. Replace a fuse only with the specified rating. If a replacement fuse opens again, locate the circuit fault instead of fitting a larger fuse.
On smart-key models, check for messages indicating that the key is not detected or the brake pedal is not recognized. Try the approved backup starting method in the owner’s manual. Security or immobilizer faults can prevent a valid start request even when the battery and starter are mechanically sound.
6. Verify Starter Command and Battery Power
The starter normally has a heavy battery cable that remains powered and a smaller control connection that receives a start signal. A technician can verify battery power, starter command, circuit voltage drop, and current draw while the fault is occurring.
If correct power and command reach the starter but it does not crank, the starter or its solenoid becomes a strong suspect. If the command is missing, continue diagnosing the relay, switch, interlock, immobilizer, wiring, and control modules.
7. Scan All Relevant Modules
A basic code reader may retrieve engine codes, but start-authorization faults can also be stored in body, smart-key, immobilizer, transmission, or other control modules. Use a scan tool capable of communicating with the systems installed on the truck.
8. Bench-Test the Starter Only After Circuit Diagnosis
A removed starter can be inspected and bench-tested, but a bench test does not evaluate the truck’s battery cables, grounds, control circuit, mounting, or engine load. Complete the on-vehicle electrical tests first whenever possible.
Pro Tip: Perform voltage-drop and starter-command tests while the fault is present. Intermittent wiring, solenoid, and heat-related problems may disappear after the truck cools or after a connection is disturbed.
Toyota Tundra Starter Location Varies by Year and Engine
The Tundra name covers several generations and powertrains, so there is no single starter location or removal route:
- 2000–2006 4.7L 2UZ-FE V8: Toyota’s service procedure removes the intake manifold before the starter, confirming that this starter is buried in the engine valley beneath intake components.
- 2000–2004 3.4L 5VZ-FE V6: The starter is externally mounted and can be removed without the V8-style intake-manifold teardown, although access remains tight.
- 2007–2009 4.7L 2UZ-FE V8: Toyota’s procedure still calls for intake-manifold removal before starter removal.
- 2010–2021 4.6L 1UR-FE and 2007–2021 5.7L 3UR-FE V8: Do not use the older “starter under the intake” assumption. Toyota service information places the starter on the right side and uses right-side exhaust/accessory access; the 5.7L factory sequence includes the right exhaust manifold.
- 2022-and-newer gasoline V35A-FTS twin-turbo V6: Use the gasoline-model starter procedure for the exact VIN and model year. Toyota also issued T-SB-0019-24 for certain 2022–2024 gasoline trucks with below-freezing starting difficulty.
- i-FORCE MAX hybrid: Toyota states that engine startup is performed through the hybrid motor-generator system. Do not treat it as a conventional starter-replacement job or use gasoline-model starter instructions for hybrid engine-start hardware.
Before disassembly, identify the model year, engine, drivetrain, and production information. Toyota’s Technical Information System supplies North American repair manuals, wiring diagrams, service bulletins, and diagnostic information.
Tools, Parts, and Supplies
The exact list depends on starter location, but a typical job may require:
- Digital multimeter and battery load or conductance tester
- Scan tool with access to relevant Toyota systems
- Metric sockets, ratchets, extensions, wobble extensions, and combination wrenches
- Torque wrench covering the required fastener ranges
- Connector, clip, and hose-removal tools
- Approved floor jack and correctly rated jack stands when under-vehicle access is required
- Safety glasses and suitable gloves
- Labels or photographs for connectors, hoses, brackets, and fasteners
- Clean lint-free covers for exposed intake passages
- New intake, throttle-body, coolant, or other one-time-use seals specified by the applicable procedure
- Approved coolant if the model-specific procedure requires opening the cooling system
- Battery-terminal and electrical-connection cleaning supplies
- The correct new or remanufactured starter verified by VIN
[Amazon Products Picked for You]

[Vehicle Fitment]: Compatible with Toyota 4Runner 2003-2009 V6 4.0L, Tundra 2005-2014 V6 4.0L (Except 2010 Cold Weather Model) --- Only Fit The Style With Nose Cone; Not Fit The Style Without Nose Cone. Check Original Style Before Purchasing.

[Vehicle Fitment]: Compatible with Toyota Sequoia 2010-2012 V8 4.6L, Tundra 2010-2019 V8 4.6L--Please Note that this is 1.5KW Starter, It will not work if your original starter is 2.0KW. Please double check your original Power Rating before purchase
Verify the Starter by VIN
Do not select a starter from appearance alone or rely on an isolated part number from a general article. Match the part to the full 17-character VIN, model year, engine, drivetrain, and production information. Toyota’s official parts catalog allows vehicle and VIN-based lookup.
Compare the electrical connections, mounting pattern, pinion design, clocking, power rating, and any supplied installation instructions before removing the old unit. Confirm whether the replacement carries a core charge and whether the warranty covers labor or only the part.
How to Replace Your Toyota Tundra Starter
The following sequence is a planning workflow for a conventional non-hybrid Tundra, not a universal bolt-by-bolt procedure. The access path changes by engine: for example, the 4.7L 2UZ-FE uses intake-manifold access, while the 5.7L 3UR-FE factory procedure uses right-side exhaust/accessory removal. Use Toyota’s repair manual for the exact VIN for fastener torques, removal sequence, sealing procedures, fluid requirements, and initialization instructions.
1. Prepare the Truck
- Park on a solid, level surface and allow the engine to cool.
- Apply the parking brake, place the transmission in Park, and chock the wheels.
- Record radio presets or settings that may be lost, if applicable.
- Turn the ignition fully off and keep the smart key away from the truck.
- Disconnect the negative battery terminal and isolate it so it cannot spring back into contact.
- If access from below is required, lift the truck only at approved points and support it with correctly rated stands.
2. Document Components Before Removal
Take clear photographs before moving hoses, connectors, grounds, brackets, intake ducts, and wiring retainers. Label similar connectors and store fasteners by component. This reduces the chance of pinched wiring, crossed connectors, vacuum leaks, and missing grounds during reassembly.
3. Gain Access to the Starter
Remove only the components specified in the model-specific Toyota procedure. Depending on the engine, this may include intake components on 2UZ-FE applications or right-side exhaust, heat-shield, belt-driven accessory, and related components on UR-family applications. Never copy an access sequence from a different engine simply because the model name is the same.
If an intake assembly is removed, clean loose dirt from the surrounding area before opening the engine. Cover every exposed intake port immediately with a clean, secure, lint-free barrier. Do not place tools, nuts, bolts, or loose material near open ports.
Warning: A washer, nut, clip, or piece of debris entering an intake port can cause severe engine damage. Count removed fasteners and verify that every opening remains protected until reassembly.
4. Disconnect the Starter Wiring
- Confirm again that the negative battery terminal is disconnected.
- Release wiring retainers without pulling on the wires.
- Remove the protective cap from the main starter terminal where fitted.
- Disconnect the small control connector or terminal.
- Remove the nut and cable from the main battery terminal.
- Position the cable so it cannot be trapped or damaged.
Inspect the terminal eyelet and nearby wiring for corrosion, heat discoloration, looseness, or damaged insulation. Repair cable problems before installing the replacement starter.
5. Remove the Old Starter
- Support the starter before removing the final mounting fastener.
- Remove the mounting bolts in the sequence required for the engine.
- Lift or lower the starter through the available access path without striking connectors, hoses, sealing surfaces, or intake openings.
- Inspect the mounting surface, dowels, shields, and visible ring-gear teeth.
Grinding, chipped pinion teeth, or damaged ring-gear teeth require further inspection. Installing another starter without correcting a mounting, alignment, or ring-gear problem can quickly damage the replacement.
6. Compare the Old and New Starters
Place the units side by side and compare:
- Mounting-hole position and housing shape
- Pinion size and tooth count
- Nose length and drive position
- Main terminal and control-terminal arrangement
- Heat shields, brackets, spacers, or locating features
- Electrical rating and application information
Do not install the replacement if these features differ unexpectedly. Recheck the VIN and catalog application.
7. Install the Replacement Starter
- Clean the starter mounting surface without allowing debris to enter the engine or bellhousing.
- Position the starter squarely against its mounting surface.
- Start all mounting fasteners by hand to prevent cross-threading.
- Tighten the mounting bolts to the Toyota specification for the exact engine.
- Reconnect the main cable and control connection using the specified terminal torque.
- Refit protective caps and route wiring through every original retainer.
Do not overtighten the electrical terminal. Twisting or cracking the insulated stud can damage the replacement starter.
8. Reassemble the Intake and Related Components
When intake components were removed, replace the seals or gaskets designated as non-reusable. Remove intake-port covers one at a time only as each passage is ready to be closed. Follow the specified tightening sequence and torque values.
Reconnect every vacuum hose, coolant hose, electrical connector, ground strap, bracket, and wiring retainer. Refill and bleed coolant if the applicable procedure opened the cooling system.
9. Reconnect the Battery and Test
- Inspect the work area for tools, loose fasteners, rags, and disconnected components.
- Reconnect the negative battery terminal and tighten it securely.
- Switch the ignition on without cranking and check for unusual warning messages.
- Start the engine while listening for grinding, delayed disengagement, or abnormal starter noise.
- Inspect disturbed intake and cooling connections for vacuum, air, fuel, or coolant leaks as applicable.
- Scan for stored or current diagnostic trouble codes.
- Confirm that the engine restarts correctly when warm.
If the starter continues cranking after the engine starts, if a cable becomes hot, or if grinding occurs, turn the ignition off immediately and disconnect the battery after it is safe to do so.
Toyota Tundra Starter Replacement Cost
RepairPal’s national U.S. estimate, updated September 3, 2026, places the average Toyota Tundra starter replacement at $813 to $1,230. It estimates labor at $553 to $811 and parts at $260 to $419. The figures exclude taxes, fees, location adjustments, and related repairs.
Model-year estimates differ. RepairPal’s current year table lists about $656–$838 for 2022–2025 Tundras, $792–$1,141 for 2014–2021, and roughly $914–$1,437 across 2007–2013 depending on the specific year. These are estimating-tool figures rather than guaranteed quotes, and RepairPal’s generic national range is not the same as every year-specific estimate.
Your final invoice can change because of:
- Model year, engine, drivetrain, and starter position
- Dealer, independent-shop, and regional labor rates
- Diagnostic time
- New, remanufactured, OEM, or aftermarket part choice
- Intake, throttle-body, coolant, or other replacement gaskets and seals
- Corroded or damaged cables and terminals
- Broken, seized, or previously damaged fasteners
- Coolant replacement or bleeding when required
- Core charges, shop supplies, taxes, and disposal fees
- Damage to the pinion, flexplate, flywheel, or ring gear
Ask for a written estimate that identifies the starter brand and part number, labor hours, warranty terms, gasket or fluid charges, diagnostic fee, and taxes. Compare estimates only when they cover the same parts and operations.
[Amazon Products Picked for You]

[Fitment] Compatible with Lexus LX570 2008-2011 V8 5.7L; Compatible with Toyota Land Cruiser 2008-2011 V8 5.7L, Toyota Sequoia 2008-2011 V8 5.7L(To 04/2011), Toyota Tundra 2007-2011 V8 5.7L(To 03/2011)
Complete Repair Coverage: Step-by-step repair procedures specific to your vehicle — from routine maintenance like oil changes and air filter replacement to complex engine and transmission repairs

Replacement Part Numbers: 19209N, 281000S050, 28100-0S050, 2810038080, 28100-38080, 41052467, 410-52467, 4280009091, 428000-9091, SND0786, 19209
New, Remanufactured, OEM, or Aftermarket Starter?
A replacement starter may be sold as new or remanufactured. Either can work well when it comes from a reputable supplier and is correctly matched to the truck.
- Genuine Toyota or OEM-supplier unit: Usually offers strong application confidence but may cost more.
- Quality new aftermarket unit: Can provide good value when the catalog match and warranty are clear.
- Remanufactured unit: May reduce cost, but quality depends on the rebuilder’s inspection, replacement components, testing, and warranty.
Because intake removal can make labor the largest part of the repair, choosing solely by the lowest purchase price may be a false economy. Review warranty length, labor coverage, roadside reimbursement exclusions, and the process for returning a defective unit.
[Amazon Products Picked for You]

Fitment: Starter Compatible with Toyota 2000-2009 Tundra 4.7L, 2001-2005 Sequoia, 2003-2009 4Runner 4.7L, Lexus 2003-2004 GX470, (w/ Standard Equipment; 1.4kW).(Please MATCH your vehicle on the left top before purchasing)

【Car Starter Part Number】17671N, 17671, 17697, 17707, 28100-07010, 28100-07010-84, 28100-0W070, 28100-62050, 228000-3750, 228000-3961, 228000-5300, 281006205084, 410-52127, 10461683, SX3743, 280-0150, 280-0375, 280-0167, 9622809-375, 446685, 446780, 446693, 91-29-5285 automotive replacement starter motor.【Starter Motor Specs】① Volts: 12V; ② Power Rating: 1.4KW; ③ Number of Teeth: 9; ④ Rotation: CW (Clockwise).【Installation Tips】1. Starter shall have good positioning contact with the engine block or gearbox without oil stain. 2. When fixing the screws, remember to tighten them crosswise to avoid the offset of the installation center. 3. After the starter is fixed, do not pry it with tools.

【Premium Quality】Brand new starters manufactured under the guidelines of OE specifications and ISO Quality Standards by the professional OEM manufacturer, 100% computerized load and power testing for reliability, durability and performance
Starter Maintenance and Failure Prevention
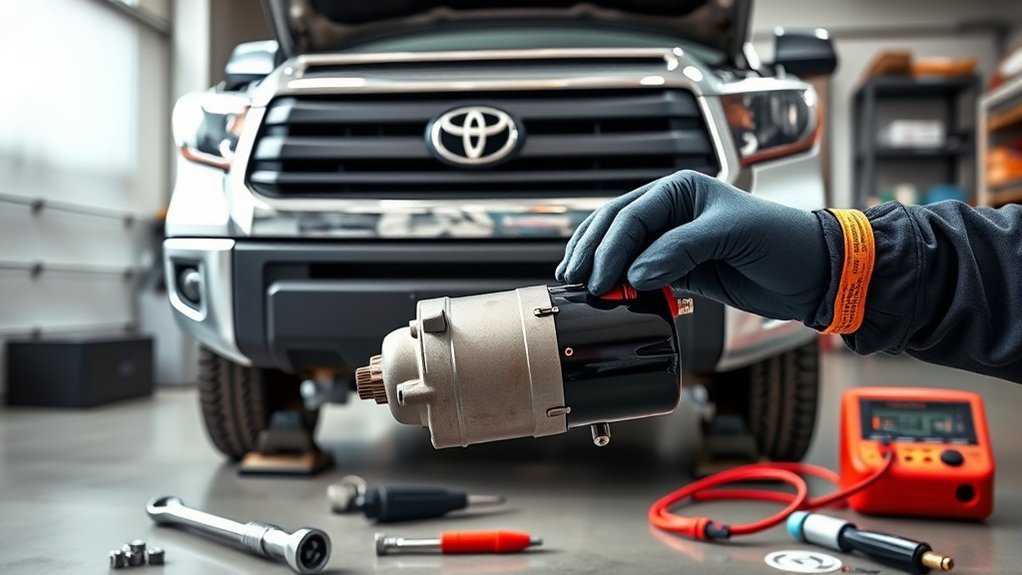
A starter is not normally serviced as a routine maintenance item, and no maintenance schedule can eliminate internal wear. However, several practices can reduce electrical stress and prevent connection problems from being mistaken for starter failure:
- Keep the battery properly secured, charged, and tested as it ages.
- Clean corrosion from battery terminals and repair damaged terminal clamps.
- Inspect engine and body grounds for looseness, corrosion, or broken strands.
- Repair oil or coolant leaks that contaminate nearby wiring and connectors.
- Avoid holding the starter engaged for long periods when the engine will not start.
- Allow the starter to cool between repeated attempts while diagnosing another engine problem.
- Investigate slow cranking, intermittent clicking, grinding, and hot cables promptly.
- Correct charging-system faults that leave the battery repeatedly undercharged.
- Verify that replacement accessories and aftermarket wiring are properly fused and grounded.
Repeated jump starts are a reason to test the battery and charging system, not proof that the starter has failed. A weak battery can also make a healthy starter crank slowly and overheat its cables and contacts.
Common Diagnostic and Installation Mistakes
- Replacing the starter after one click: A low battery or poor connection can produce the same symptom.
- Testing only resting battery voltage: Battery capacity and circuit resistance appear under load.
- Ignoring the ground side: A weak engine ground can imitate a defective positive cable or starter.
- Buying by model name alone: Tundra starters vary by model year, engine, drivetrain, and production details.
- Using the wrong generation’s removal guide: A 4.7L 2UZ-FE intake-manifold procedure does not describe the 4.6L/5.7L UR-family starter access path, and neither should be used for a 2022-and-newer V35A-FTS truck.
- Reusing specified one-time-use gaskets: This can produce intake or coolant leaks after reassembly.
- Leaving intake ports uncovered: Foreign objects can enter the engine.
- Guessing torque values: Loose starter bolts can cause noise and alignment problems; overtightened terminal studs can crack.
- Forgetting wiring retainers: An unsecured cable may contact hot or moving parts.
- Skipping post-repair scanning: Disconnected components or low battery voltage may leave useful diagnostic codes.
When Professional Starter Replacement Is the Better Choice
Professional diagnosis is advisable when:
- The truck is an i-FORCE MAX hybrid or the work involves high-voltage components.
- The starter is buried beneath intake components and you lack the required tools or experience.
- Fuel-system, coolant, turbocharger, or complex intake components affect access.
- The truck has immobilizer, smart-key, or module-communication faults.
- Battery and cable tests are inconclusive.
- A 2022–2024 gasoline Tundra has a below -4°F (-20°C) starting complaint that may fall under Toyota T-SB-0019-24.
- Mounting bolts are seized, rounded, broken, or heavily corroded.
- Grinding suggests flexplate, flywheel, or ring-gear damage.
- The engine may be mechanically seized or unusually difficult to rotate.
- You cannot support the vehicle safely.
Before paying for the repair, request the diagnostic results that led to the starter recommendation. Useful results include the battery test, starter current draw, starter-command status, and circuit voltage-drop measurements.
You can also check the truck’s VIN through the NHTSA recall lookup and Toyota’s recall or service-campaign resources before authorizing paid repairs.
Frequently Asked Questions
How much does it cost to replace a starter on a Toyota Tundra?
RepairPal’s national estimate updated September 3, 2026 is $813–$1,230 before taxes, location adjustments, and related repairs. Its year-specific table lists about $656–$838 for 2022–2025 trucks, $792–$1,141 for 2014–2021, and roughly $914–$1,437 across 2007–2013 depending on the year.
What are the basic steps for replacing a Tundra starter?
Confirm the diagnosis, identify the exact engine, verify the replacement by VIN, disconnect the negative battery terminal, gain access using the model-specific procedure, disconnect the starter wiring, remove the mounting bolts, compare the old and new units, install and torque the replacement, reassemble with required seals, reconnect the battery, and perform leak, noise, code, and restart checks.
Does one click mean the starter is bad?
No. One click can result from a weak battery, corroded terminal, high-resistance cable, poor engine ground, starter solenoid, seized starter, or mechanical engine resistance. Test the battery under load and perform circuit checks before replacing the starter.
Can a Toyota Tundra starter fail intermittently?
Yes. Worn internal contacts, a sticking solenoid, heat, vibration, and internal starter wear can cause intermittent operation. Relays, terminals, grounds, wiring, and Park/Neutral circuits can be intermittent as well, so testing should be performed while the fault is present.
Can I replace a Tundra starter myself?
Possibly, if you can diagnose the circuit correctly and have safe lifting equipment plus the Toyota procedure for your exact engine. A 4.7L 2UZ-FE may require intake-manifold access, while 4.6L/5.7L UR-family engines use a different right-side access sequence. i-FORCE MAX engine-start and high-voltage work should be handled with Toyota’s hybrid-specific procedures.
What is the most common reason a starter motor fails?
There is no single Toyota-specific cause that applies to every truck. Internal contacts, brushes, bearings, solenoids, and starter drives can wear, while heat, contamination, low battery voltage, excessive circuit resistance, and prolonged cranking can add stress. Proper testing is more useful than assuming one cause.
Where is the starter located on a Toyota Tundra?
It depends on the engine. The 4.7L 2UZ-FE uses an intake-manifold access procedure, while 4.6L 1UR-FE and 5.7L 3UR-FE trucks use a right-side starter access path involving exhaust or accessory components. The 2022-and-newer gasoline V35A-FTS has its own starter procedure, and i-FORCE MAX engine startup is handled through the hybrid motor-generator system.
Is there a Toyota Tundra starter bulletin for cold-weather starting?
Yes. Toyota T-SB-0019-24 covers some 2022–2024 gasoline Tundras with the V35A-FTS engine that are difficult to start below -4°F (-20°C). The bulletin directs inspection of the starter main switch assembly and use of an updated starter solenoid switch when the bulletin applies.
Conclusion
A clicking or slow-cranking Toyota Tundra may have a defective starter, but the battery, cables, grounds, relay, interlock, immobilizer, and wiring should be tested first. Once the diagnosis is confirmed, identify the exact model year and engine, verify the replacement by VIN, and follow Toyota’s model-specific removal, torque, sealing, and initialization procedures. Do not assume that the 4.7L intake-manifold access route applies to later 4.6L/5.7L V8s or to 2022-and-newer trucks.
DIY replacement is most reasonable when the electrical diagnosis is clear and you have the correct engine-specific procedure. Intake-manifold removal on 2UZ-FE trucks, right-side exhaust/accessory work on UR-family engines, hybrid high-voltage systems, damaged ring-gear teeth, and seized fasteners can all justify professional service. For a 2022–2024 gasoline Tundra with a cold-only problem below -4°F (-20°C), check T-SB-0019-24 before authorizing broader parts replacement.
Sources
- Toyota Technical Information System — factory repair manuals, wiring diagrams, service bulletins, diagnostics, and hybrid emergency information.
- Toyota Manuals and Warranties — model-specific owner information and official Toyota support resources.
- Toyota Parts Center Online — official vehicle and VIN-based parts lookup.
- National Highway Traffic Safety Administration Recall Lookup — VIN-based unrepaired safety-recall information.
- RepairPal Toyota Tundra Starter Replacement Estimate — national cost benchmark updated September 3, 2026.
