
Replacing U-joints on a Toyota Tacoma can stop driveline vibration, clunks, binding, and looseness when the joint is actually the cause. The exact parts, shaft layout, fasteners, lubrication points, and torque specifications vary by model year, 2WD or 4WD configuration, and one-piece or two-piece driveshaft, so confirm your Tacoma’s service information before you begin.
Quick Answer
To replace a Toyota Tacoma U-joint, safely support the truck, mark the driveshaft and flange positions, remove the shaft, remove the retaining rings, press the old joint out, inspect the yoke, press the correct replacement joint in without disturbing the needle bearings, reinstall the clips, then refit and torque the driveshaft using model-year specifications.
Key Takeaways
- Confirm the replacement U-joint by VIN, model year, drivetrain, and shaft position before ordering.
- Mark driveshaft and flange orientation before disassembly so the shaft goes back together in the same relationship.
- A good U-joint should move smoothly without noticeable free play, backlash, or binding.
- Do not assume every Tacoma U-joint has a grease fitting; some replacement parts are pre-lubricated or sealed.
- Use the factory repair information for removal steps and torque values because those details are not universal across Tacoma generations.
At a Glance
| Time Required | About 1–3 hours for an experienced DIYer once the correct parts and tools are ready; corrosion, seized cups, or carrier-bearing work can add time. |
| Difficulty | Intermediate to advanced. Safe lifting, driveshaft removal, pressing bearing cups, and correct reassembly are required. |
| Tools Needed | Wheel chocks, rated jack stands or a lift, paint marker, correct sockets/wrenches, snap-ring pliers, torque wrench, penetrating oil, and a U-joint press/shop press or suitable vise setup. |
| Cost | Varies by year, shaft position, part choice, and local labor. Toyota’s 2005–2011 rear U-joint bulletin listed 0.8–0.9 labor hour for one spider-kit replacement, but that is a warranty labor benchmark, not a current retail quote. |
Warning: Never work under a Tacoma supported only by a jack. Use properly rated support stands on a hard, level surface, chock the wheels, and follow the vehicle and lifting-equipment instructions. If you are unsure about lifting points, driveline phasing, pressing bearing cups, or torque specifications, have a qualified technician do the repair.
Confirm Your Tacoma Before Buying U-Joints
Tacoma driveline layouts differ by generation and configuration. Before buying parts, record the model year, VIN, 2WD or 4WD layout, cab and wheelbase if relevant, whether the rear shaft is one-piece or two-piece, and which joint you are replacing. A front driveshaft joint is not automatically the same part as a rear joint.
Use Toyota’s model-year repair information and a VIN-based parts catalog to verify fitment. Toyota’s technical information system is the safest reference for the exact removal sequence, fastener replacement rules, and torque values for your truck.
Owners of some 2005–2011 Tacomas should also know that Toyota issued a technical service bulletin for rear propeller-shaft U-joint-related drivetrain vibration or noise on specified vehicles. The bulletin instructs technicians to check for broken or separated bearing-cup seals, rust-colored dust, grease leakage, free play, backlash, binding, and yoke damage before deciding whether to replace a U-joint or the shaft assembly.
[Amazon Products Picked for You]

Spicer greaseable universal joint with snap rings

The ball joint tool kit is ideal for removing press-fit ball joints from pick-up trucks; Ball joint separator tool makes it easy to press out larger ball joints.
Tools and Materials Needed for U-Joint Replacement
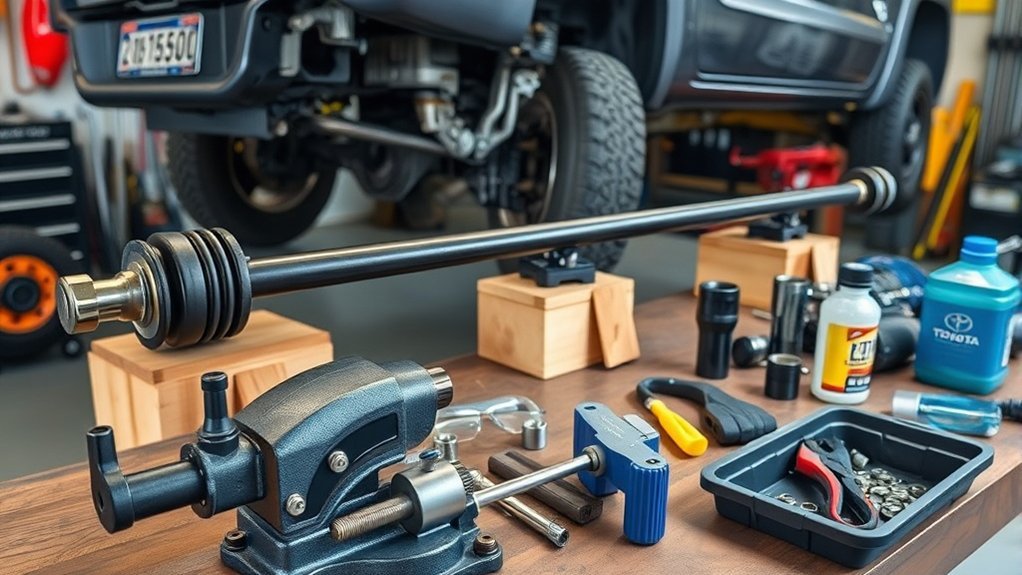
Gather the tools for your specific Tacoma before loosening the driveshaft. A typical U-joint replacement may require:
- Wheel chocks and properly rated jack stands or a vehicle lift.
- A paint marker or punch for indexing the driveshaft, flanges, and slip-yoke relationship before disassembly.
- The correct sockets and wrenches for your model-year flange and support-bearing hardware.
- A breaker bar for stubborn fasteners and a torque wrench for reassembly.
- Snap-ring pliers or suitable picks, depending on the retaining-ring design.
- A U-joint bearing remover/replacer, shop press, or a sturdy vise with correctly sized press adapters.
- Penetrating oil for corroded fasteners or retaining-ring grooves.
- A soft-face or plastic hammer for light seating and vibration only, not as a substitute for controlled pressing.
- The correct replacement U-joint, new retaining rings supplied with the kit, and any one-time-use hardware specified by Toyota.
- The lubricant specified for the joint or propeller shaft, but only where the component is designed to be lubricated.
A 24 mm socket may be used on certain Tacoma center-support or companion-flange hardware, but it is not a universal “U-joint removal” size. Verify your exact configuration before applying force.
Toyota has used both greaseable and pre-lubricated driveline components. Do not drill, modify, or add a grease fitting to a sealed or pre-lubricated joint. If your replacement joint includes a fitting, position it so it remains accessible without contacting the yoke through the joint’s full range of motion.
Assess Your Toyota Tacoma’s Driveshaft Condition
Do not replace a U-joint only because you feel a vibration. Tire imbalance, bent wheels, pinion-angle changes, a worn center support bearing, damaged yokes, differential problems, and other driveline faults can create similar symptoms. Confirm the source before disassembly.
Inspect the Driveshaft and U-Joints for Damage
With the vehicle safely supported and the drivetrain unloaded as required by the repair manual, inspect the shaft and every joint. On the affected 2005–2011 vehicles covered by Toyota’s bulletin, specific warning signs include broken bearing-cup seals, rust-colored dust, grease leakage, noticeable play, backlash, or binding.
- Look for dents, cracked welds, missing balance weights, heavy corrosion, or impact damage on the driveshaft tube.
- Check each bearing cup and seal for leakage, rust dust, distortion, or looseness.
- Inspect the yoke ears and bearing-cup bores for wear or missing material.
- If the truck has a two-piece rear shaft, inspect the center support bearing and its rubber isolator for tearing, sagging, roughness, or excess movement.
- Look for nearby transmission, transfer-case, and differential leaks before assuming the U-joint is the only problem.
Large tires, suspension lifts, or other modifications can change driveline load or operating angles, but they do not prove a U-joint has failed. Diagnose the joint itself rather than replacing parts based on the modification alone.
Identify Free Play, Backlash, or Binding
A worn U-joint can feel loose, notchy, or stiff. Toyota’s 2005–2011 bulletin specifically says binding should be checked after the propeller shaft is detached from the vehicle. Firmly hold one side of the joint and articulate the other. The joint should move smoothly without noticeable free play, backlash, or binding.
| Inspection | What to Look For | Likely Next Step |
|---|---|---|
| Visual check | Rust dust, grease leakage, damaged seal, dented shaft | Inspect the joint and yoke closely before ordering parts |
| Joint articulation | Notchy movement or binding | Replace the joint if confirmed and the yoke is serviceable |
| Twist check | Noticeable free play or backlash at the joint | Replace the worn joint and inspect the yoke bores |
| Center support bearing | Torn rubber, rough bearing, excessive sag or movement | Service the support bearing if the repair manual confirms it is faulty |
| Yoke inspection | Elongated bore, missing material, trunnion contact damage | Do not install a new joint into a damaged yoke; repair or replace the shaft as specified |
Evaluate the Center Support Bearing
If your Tacoma has a two-piece rear driveshaft, inspect the center support bearing while the shaft is accessible. A failed support bearing can cause vibration or movement that resembles a U-joint problem.
Do not assume the center bearing must be removed to replace every U-joint. On configurations where the shaft halves or companion flange must be separated, mark their relationship before disassembly. Some setups use a large retaining nut, but the socket size and torque are model-specific, so use the correct Toyota repair procedure rather than a universal 24 mm rule.
How to Safely Remove Old U-Joints
The safest process is to remove the propeller shaft from the truck and service the U-joint on a bench. Toyota’s bulletin for affected 2005–2011 Tacomas directs technicians to remove the propeller shaft, then follow the applicable repair-manual disassembly and reassembly procedure for the specific 2WD or 4WD configuration.
[Amazon Products Picked for You]

COMPATIBILITY – Fits 1996-1997 Lexus LX450; 1998-2007 Lexus LX470; 2003-2007 Lexus LX470; 2003-2009 Lexus GX470; 2010-2019 Lexus GX460; 2010-2014 Lexus GX460; 2015-2019 Lexus GX460; 2008-2008 Lexus LX570; 2009-2015 Lexus LX570; 1984-2016 Toyota 4Runner; 3

Compatibility: Fits Rover 80 1959–1962, Rover 2000 1968–1973, and Rover 3500S 1969–1974; Land Rover Range Rover 1970–1974 and Land Rover (Series models) 1962–1974; and Ram Dakota 2011
Prepare the Vehicle and Mark the Driveshaft
- Park on a hard, level surface. Secure the truck so it cannot roll, and support it safely if access requires lifting.
- Before loosening the shaft, use a paint marker to mark the driveshaft flange relative to the differential flange. If a slip joint, center section, or companion flange will be separated, mark those relationships too.
- Clean dirt from the fasteners and retaining-ring areas so debris does not fall into the joint during service.
- Apply penetrating oil to corroded fasteners or snap-ring grooves and allow it time to work.
Pro Tip: Take a clear photo of every alignment mark before the shaft comes apart. It gives you a second reference when you reinstall a multi-piece shaft.
Remove the Propeller Shaft
Support the shaft before the final fastener is removed. Unbolt the flange and center support bearing, if equipped, in the sequence specified for your Tacoma. Avoid letting the shaft hang from a remaining joint or seal. If the slip yoke comes out of a transmission or transfer case, be prepared for possible fluid leakage and protect the sealing surface from dirt or damage.
Keep all indexing marks visible. Do not clamp thin-wall driveshaft tubing so tightly that it can be crushed or distorted.
Remove the Retaining Rings and Press Out the Old Joint
Remove the joint’s retaining rings or clips and clean corrosion from the grooves. Support the yoke correctly and use a U-joint service tool, press, or suitable vise-and-adapter method to push one bearing cup out far enough to remove it. Reverse the setup and remove the opposite cup, then work the cross out of the yoke.
A soft hammer can help settle a yoke or free a clip after controlled press force, but heavy hammering can bend yoke ears or damage the shaft. Avoid open-flame heating around grease, seals, fuel lines, coatings, or nearby components unless the factory procedure specifically calls for heat and you have the equipment to control the hazard.
Once the joint is out, inspect the yoke bores, snap-ring grooves, and surrounding metal. If the yoke is elongated, cracked, badly worn, or missing material where a failed trunnion contacted it, replacing only the U-joint may not be enough.
Prepare New U-Joints for Replacement
Compare the new joint with the old one before installation. Check the bearing-cap diameter, overall span, retaining-ring style, grease-fitting design if present, and any kit-specific instructions. Confirm the part number by VIN or Toyota fitment data rather than relying only on model name.
- Keep the bearing cups clean and upright so the needle rollers stay in place.
- Do not pack a pre-lubricated or sealed joint with a different grease unless the joint manufacturer instructs you to do so.
- If the kit is greaseable, use the specified lubricant and install the fitting where it remains serviceable and clears the yoke.
- Lightly clean rust or burrs from the yoke bores and snap-ring grooves without removing material that controls bearing-cup fit.
- Replace damaged retaining rings with the correct parts; do not force a clip into a groove that is not fully exposed.
Toyota maintenance guides for applicable older Tacomas specify lithium-base chassis grease for propeller-shaft spiders and slide yokes, and molybdenum-disulfide lithium-base chassis grease for the double Cardan joint. That maintenance specification should not be confused with a blanket instruction to coat every new bearing cup with wheel-bearing grease.
[Amazon Products Picked for You]

These Drive Shaft Center Support Bearings and Universal Joints are Made from High-Quality Material, Ensuring Excellent Durability and Effective Vibration Dampening for a...
Install New U-Joints: Best Practices

Work slowly during installation. The most common assembly problem is a needle roller falling over inside a bearing cup, which prevents the cup from seating and can make the new joint bind.
- Remove only the bearing cups needed for the first yoke connection and keep the remaining cups clean.
- Insert the cross into the yoke. Hold the trunnion centered while starting the first cup straight into its bore.
- Press the cup in with controlled force. Do not drive it in at an angle.
- Install the opposite cup, again making sure every needle roller remains upright around the trunnion.
- Press the cups only far enough to expose the retaining-ring grooves, then install the correct rings.
- Repeat the process for the other axis of the joint.
- After all clips are seated, articulate the joint through its range. It should move smoothly without looseness or a hard spot.
If a snap ring will not seat, stop and find the cause. A tipped needle bearing, corrosion under a clip, an incorrectly sized joint, or a cup that is not square can all prevent proper assembly. Applying more press force can damage the yoke.
Note: Some genuine Toyota driveline parts are pre-lubricated rather than fitted with a serviceable Zerk fitting. Follow the replacement part instructions instead of assuming every new joint needs grease added after installation.
Reinstall the Driveshaft and Check Your Work
Reinstall the propeller shaft in the same orientation you marked before removal. Start all flange and support-bearing fasteners by hand, then tighten them in the required sequence and to the exact torque specified for your Tacoma’s model year and drivetrain.
Do not publish or rely on one universal Tacoma driveshaft torque number. Toyota uses different shaft designs and hardware across generations, and some fasteners may have replacement, thread-treatment, or staking requirements.
Before lowering the truck, verify that tools are clear, clips are fully seated, grease fittings clear the yoke if fitted, and the shaft rotates without obvious interference. After the repair, road-test the vehicle carefully. Toyota’s 2005–2011 bulletin specifically calls for a test drive to confirm that the vibration or noise condition is gone.
Troubleshooting Common Issues During U-Joint Replacement
| Problem | Likely Cause | What to Do |
|---|---|---|
| New joint feels tight or notchy | Tipped needle roller, cup pressed unevenly, yoke ear distorted, or clip not seated | Stop and disassemble as needed; do not drive with a binding joint |
| Snap ring will not fit | Cup not fully seated, debris in groove, wrong joint, or tipped needle | Clean and inspect; verify fitment before applying more force |
| Vibration remains after repair | Driveshaft reinstalled out of index, bent shaft, missing balance weight, center bearing fault, tire/wheel issue, or driveline-angle problem | Recheck your marks and diagnose the entire driveline |
| New joint has play | Wrong cup size or worn/damaged yoke bore | Do not keep driving; inspect the yoke and shaft assembly |
| Grease will not enter a serviceable joint | Blocked fitting, fitting under load, or incompatible joint design | Verify the joint is greaseable and follow its service instructions |
| Fluid appeared after shaft removal | Slip yoke was removed from a transmission or transfer-case output | Protect the opening, check the seal, and restore fluid level according to the repair manual |
How to Maintain U-Joints for Longevity
Inspect the driveline when you notice a new clunk, squeak, vibration, rust dust, grease leakage, or looseness. For greaseable propeller-shaft joints, follow the maintenance interval and grease type in the warranty and maintenance guide for your exact model year and operating conditions.
Maintenance intervals are configuration-specific. Toyota’s maintenance guides call for propeller-shaft lubrication on applicable 4WD Tacomas, with additional attention under some severe-use conditions, rather than one universal “every 5,000–10,000 miles” rule.
Keep the grease fittings clean before attaching a grease gun. Do not overfill a slip yoke in a way that can hydraulically lock the shaft or force excess grease where it does not belong. After deep-water use, mud, heavy towing, or off-road operation, inspect the shaft more often and follow Toyota’s severe-service guidance for your year.
If your Tacoma uses a pre-lubricated or sealed joint, there may be no periodic greasing step for that joint. In that case, maintenance means inspection and replacement when wear is confirmed.
How Does U-Joint Replacement Affect Your Tacoma’s Performance?
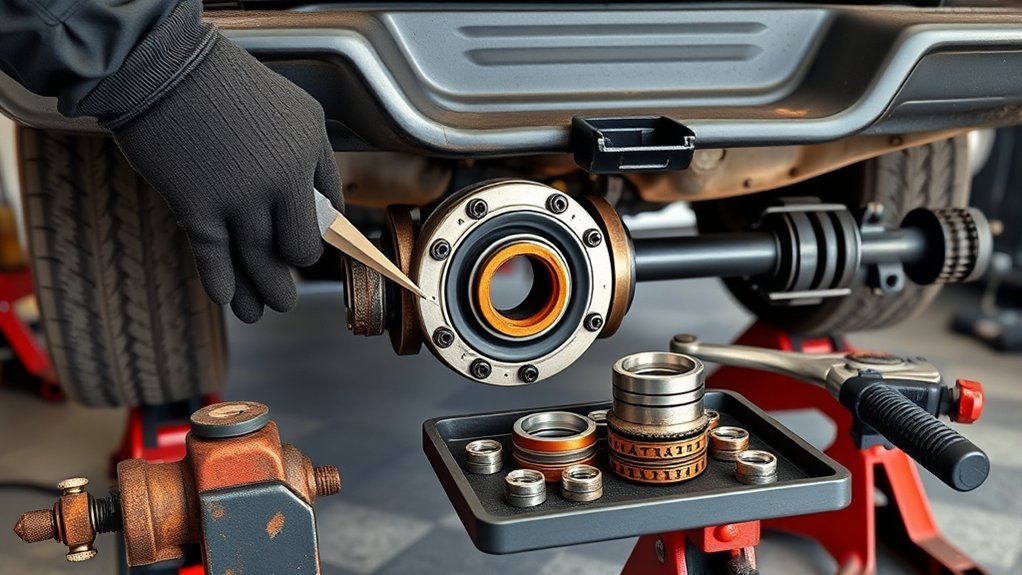
If a worn or binding U-joint was the source of the problem, replacement can restore smooth driveshaft articulation and eliminate the associated clunk, noise, or vibration. Toyota’s 2005–2011 bulletin specifically identifies U-joint replacement as a repair for confirmed rear propeller-shaft joint noise or vibration when the yoke itself is not damaged.
A U-joint replacement should not be promoted as a guaranteed fuel-economy or steering upgrade. Its main purpose is to restore correct driveline operation and prevent a known bad joint from damaging the yoke, shaft, or nearby components.
Sources
- Toyota T-SB-0302-17 Rev2: Rear Propeller Shaft Universal Joint — diagnosis and repair guidance for specified 2005–2011 Tacoma vehicles.
- Toyota Tacoma Manuals and Warranty & Maintenance Guides — model-year maintenance schedules and propeller-shaft service guidance.
- Toyota Technical Information System — model-specific factory repair procedures and torque specifications.
- Toyota Genuine Universal Joint Spider Kit — example of a model-specific Toyota U-joint component and fitment-check process.
- OSHA 1926.305: Jacks — general load-support and securing requirements for jack use.
Other Workshop Guides
Frequently Asked Questions
How much does it cost to replace the U-joint on a Toyota Tacoma?
There is no reliable one-price answer because the cost changes with the model year, shaft position, number of joints, OEM versus aftermarket parts, corrosion, and local labor rate. Toyota’s bulletin for certain 2005–2011 Tacomas listed 0.8–0.9 labor hour for one rear U-joint spider-kit replacement under warranty, but a retail repair can also include diagnosis, additional joints, carrier-bearing work, or a complete driveshaft if the yoke is damaged.
What year was the worst year for Toyota Tacoma?
There is no official “worst year” designation that applies to every Tacoma. For U-joint concerns specifically, Toyota published T-SB-0302-17 Rev2 for some 2005–2011 Tacomas with rear propeller-shaft vibration or noise. That does not mean every truck from those years is affected, so check the VIN, service history, recalls, and current condition of the individual vehicle.
How do you get U-joints out without a press?
A heavy bench vise with correctly sized sockets or press adapters can sometimes substitute for a shop press on a serviceable joint. Remove the retaining rings first, support the yoke squarely, and use controlled force to move the bearing cups. Do not rely on heavy hammering or open-flame heat; both can damage the yoke or create additional safety hazards.
What is the most common problem with the Toyota Tacoma?
There is no single problem that is “most common” across every Tacoma generation and configuration. For the driveline topic covered here, focus on symptoms you can verify: vibration, clunking, grease leakage, rust-colored dust, free play, backlash, or binding at a U-joint. Diagnose the actual source instead of assuming a general Tacoma problem applies to your truck.
What are the symptoms of a bad Tacoma U-joint?
Common signs include a clunk or vibration that follows driveline load, visible rust dust or grease leakage around a bearing cup, noticeable free play, and a joint that feels notchy or binds when articulated. Because other driveline and tire problems can cause similar vibration, confirm the joint before replacing it.
Should you replace every U-joint at the same time?
Not automatically. Inspect every joint on the shaft and replace the ones that are worn, binding, loose, leaking, or otherwise defective. Replacing multiple joints while the shaft is already out can make sense when they have similar age and wear, but the decision should be based on inspection, part availability, and the condition of the yokes.
Conclusion
Replacing a Toyota Tacoma U-joint is manageable for an experienced DIYer with safe lifting equipment, the correct part, a controlled pressing method, and access to model-specific service information. The key steps are accurate diagnosis, indexing the driveshaft before disassembly, protecting the needle bearings during installation, checking that the finished joint moves freely without play or binding, and using the factory torque specifications during reinstallation. If the yoke or shaft is damaged, or you cannot safely support and press the driveline components, professional repair is the better choice.
