
Replacing Toyota Tacoma tie rod ends can correct steering play, clunking, wandering, and uneven front-tire wear when a worn inner or outer joint is the confirmed cause. The basic job is to mark and measure the existing linkage, separate the outer joint, replace only the failed component, reassemble with the exact hardware and torque procedure for your model year, and finish with a wheel alignment. Because tie rods are safety-critical and Tacoma steering systems differ by generation, verify the truck by VIN and use Toyota service information before loosening steering fasteners.
Last updated: September 19, 2026 — clarified 2024+ electric-power-steering differences, strengthened diagnostic guidance, and updated internal references.
Quick Answer
To replace Toyota Tacoma tie rod ends, safely raise the front of the truck, mark the original tie rod position, separate the outer end from the steering knuckle, and replace the worn outer or inner joint. Reassemble it with model-specific hardware and torque values, then have the wheel alignment measured and corrected.
Key Takeaways
- Confirm your Tacoma’s model year, drivetrain, steering gear, and replacement-part numbers before disassembly.
- Do not rely on universal socket sizes or torque values. Check Toyota’s repair information for your exact vehicle.
- Counting turns and measuring the old tie rod length provide only a rough starting point for reassembly.
- Replace damaged boots, cotter pins, clamps, locking washers, and single-use nuts as required.
- Arrange a professional wheel alignment immediately after the repair.
- The redesigned 2024-and-newer U.S. Tacoma uses electric power steering, so do not apply hydraulic-rack leak diagnostics to those trucks.
At a Glance
| Time Required | Varies by repair scope, experience, corrosion, and tool access. Replacing only an outer end is usually simpler than replacing an inner joint; allow additional time for a professional alignment. |
| Difficulty | Intermediate to advanced. The repair involves safety-critical steering parts and model-specific torque procedures. |
| Tools Needed | Floor jack, jack stands, wheel chocks, torque wrench, correct sockets and wrenches, tie rod separator, pliers, paint marker, measuring tool, and an inner tie rod tool if replacing the inner joint. |
| Cost | Parts, replacement hardware, tool rental, and alignment prices vary by model year, part brand, and local labor rates. |
Warning: Tie rods are safety-critical steering components. Never work beneath a truck supported only by a hydraulic jack. Stop and use a qualified technician if you cannot verify the lifting points, replacement parts, fastener specifications, or condition of the steering rack.
Confirm the Problem and Your Tacoma Configuration
Before ordering parts, record the model year, VIN, drivetrain, trim, and any suspension modifications. Tacoma steering parts and repair procedures can differ between generations and configurations. Use Toyota’s Technical Information System for the repair procedure and Toyota’s manual portal for vehicle-specific owner information.
Confirm the replacement part by VIN or a reliable application catalog. Compare the new joint with the old one before installation, including its total length, thread diameter, thread direction, taper, boot design, and included hardware.
Generation check: Toyota introduced electric power steering (EPS) on the redesigned 2024 Tacoma. Earlier U.S.-market Tacomas use hydraulic power steering. That difference matters when interpreting fluid inside a rack boot and when following steering-gear service steps. See Toyota’s 2024 Tacoma technical overview and use the repair manual for your exact truck.
Signs of a Worn Tie Rod
Possible symptoms include looseness at the steering wheel, wandering, clunking over bumps, a steering wheel that no longer sits straight, or feathered wear across the front tires. A torn tie rod boot, escaping grease, corrosion, or visible movement at the joint also requires attention.
With the front wheel safely raised, a technician may check for movement by rocking the tire at the 3 and 9 o’clock positions while watching the inner and outer joints. Wheel-bearing, rack, control-arm, and ball-joint wear can produce similar symptoms, so do not replace a tie rod based on tire movement alone. If the truck also pulls or wanders, use the broader checks in Toyota Tacoma pulling to one side: troubleshooting causes.
| What You Observe | What It Points Toward | Next Check |
|---|---|---|
| Visible movement at the outer ball-and-socket joint | Outer tie rod end is suspect | Confirm the play is in the joint, not the knuckle, wheel bearing, or rack |
| Outer joint stays still but movement is felt under the rack boot | Inner tie rod joint is suspect | Inspect the inner joint and rack using the model-specific procedure |
| Power-steering fluid inside the boot on a hydraulic-steering Tacoma | Steering-rack seal leakage may be present | Diagnose the rack before treating the problem as tie-rod wear only |
| Play cannot be isolated to either tie rod joint | Another steering, hub, or suspension part may be responsible | Inspect the rack, wheel bearing, ball joints, control arms, and related hardware |
Note: Do not drive the truck if a tie rod joint is close to separating, the wheel has major side-to-side movement, steering response is unpredictable, or the rack is damaged. Arrange professional inspection or towing.
Tools You’ll Need for Replacing Tie Rod Ends
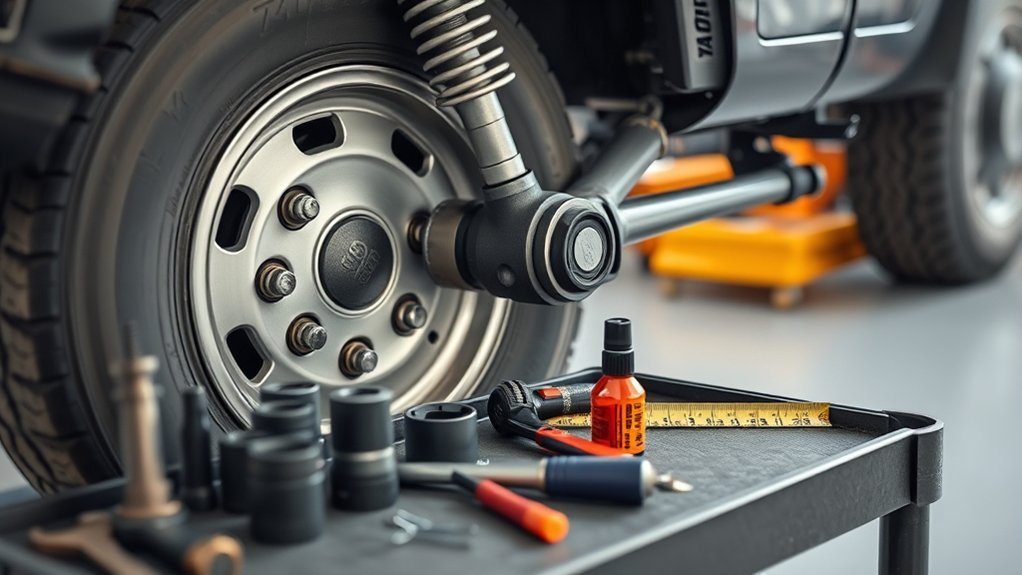
Gather all tools and replacement hardware before raising the truck. The exact socket and wrench sizes depend on the model year and the parts installed on your Tacoma.
- Floor jack with adequate capacity
- Load-rated jack stands
- Wheel chocks
- Safety glasses and mechanic’s gloves
- Breaker bar, ratchet, and correctly sized sockets
- Open-end or flare-style wrenches that fit the tie rod and jam nut
- Calibrated torque wrench covering the required ranges
- Cotter pin pliers or side cutters, when applicable
- Tie rod end puller or suitable separator
- Inner tie rod removal tool, when replacing the inner joint
- Paint marker and tape measure or caliper
- Penetrating oil for exposed, corroded threads
- New cotter pin, nut, locking washer, boot clamps, or other single-use hardware specified for the repair
Avoid assuming that a 19 mm, 21 mm, or 22 mm tool will fit every Tacoma. Test each tool on the actual fastener and avoid rounding the corners with an oversized wrench.
[Amazon Products Picked for You]

Removes tie rod ends and pitman arm assemblies from many cars and light trucks.

Effortless Tie Rod Removal: Engineered for professional and efficient removal of tie rods and Pitman arms in compact cars and light trucks, this tool significantly reduces effort and time.
Prepare and Safely Raise the Truck
- Park on a hard, level surface away from traffic.
- Center the steering wheel, shift into Park or first gear, apply the parking brake, and switch off the engine.
- Chock the rear wheels on both sides.
- Loosen the front wheel’s lug nuts slightly while the tire remains on the ground.
- Raise the truck only at an approved lifting point.
- Position jack stands at approved support points and lower the truck onto them.
- Gently test the truck’s stability before removing the wheel.
- Remove the lug nuts and wheel, then place the wheel away from your work area.
Keep the hydraulic jack in a secondary support position without allowing it to carry the truck’s full weight. Never place any part of your body beneath an unsupported suspension or frame.
Step-by-Step Process for Removing the Outer Tie Rod
Record the Original Position
Clean the exposed threads so you can see the jam nut and the outer tie rod clearly. Use a paint marker to mark the relationship between the outer tie rod, jam nut, and inner tie rod.
Measure from a repeatable point on the inner tie rod to the center of the outer joint. Photograph the position and write down the measurement. You should also count each complete turn during removal, but the measurement provides a useful second reference.
Loosen the Jam Nut
While the outer tie rod remains attached to the steering knuckle, hold the appropriate section of the inner tie rod with the correct wrench and loosen the jam nut. Do not clamp or twist a polished rack surface, and do not allow force to transfer into the steering rack unless the factory procedure permits it.
Apply penetrating oil to exposed corrosion and allow it time to work. Use controlled hand-tool pressure. Heat near boots, grease, wiring, brake hoses, or rack seals can cause damage and should not be used without the correct procedure and equipment.
Disconnect the Outer Tie Rod From the Knuckle
- If the joint uses a cotter pin, remove it and discard it.
- Remove or loosen the outer tie rod retaining nut according to the repair procedure.
- Install a tie rod end puller or separator so it presses the tapered stud out of the steering knuckle.
- If the approved procedure calls for striking the knuckle boss, strike only the specified area. Do not hit the threaded stud, boot, brake hose, wheel-speed sensor, or steering knuckle edge.
- Support the tie rod as it separates so it does not pull on nearby components.
Do not use an impact wrench for final tightening. Impact tools can hide cross-threading and make it difficult to control final clamp load.
Remove the Outer Tie Rod
Unscrew the outer tie rod while counting every complete turn. Stop periodically if needed to record partial turns accurately. Keep the jam nut near its marked position unless the replacement-part instructions require a different setup.
Place the old and new parts side by side. Confirm that the taper, threads, stud length, body shape, boot clearance, and overall dimensions match. A new part that differs in length can produce incorrect toe even when installed using the same number of turns.
Pro Tip: Keep a written record of the original measurement, turn count, hardware orientation, and part numbers. These references reduce gross toe error, but they do not replace an alignment machine.
How to Replace the Inner Tie Rod Effectively
If only the outer tie rod is worn and the inner joint, rack boot, and steering rack pass inspection, you may not need to remove the inner tie rod. Replace the inner joint only after confirming that it has excessive play, binding, damage, or another serviceable fault.
Remove the Rack Boot
- Remove the outer boot clamp using the method appropriate for its design.
- Remove the inner clamp without cutting the boot or damaging the steering rack.
- Disconnect any breather or equalization tube carefully, when fitted.
- Slide the boot off while checking for tears, hardened rubber, grease contamination, fluid, rust, or dirt.
On a hydraulic-steering Tacoma, power-steering fluid inside a rack boot may indicate a steering-rack seal problem rather than a simple tie rod fault. The 2024-and-newer U.S. Tacoma uses EPS and has no hydraulic power-steering circuit, so fluid-leak diagnosis is different. If you find unexpected fluid, grease, corrosion, or contamination inside the boot, stop and follow the steering-rack procedure for that generation before installing new parts. For a generation overview, see electric vs. hydraulic power steering on Tacoma.
Remove the Inner Joint
Inspect the attachment before turning the joint. Depending on the design, you may find a locking washer, staked area, locking plate, thread-locking compound, or another retaining method. Release it exactly as specified in the repair manual.
Fit the correct inner tie rod tool to the joint. Hold or support the steering rack only at the location allowed by the service procedure, then loosen and remove the inner joint. Do not transmit uncontrolled twisting force through the rack or electric steering components.
Install the New Inner Tie Rod
- Clean and inspect the rack threads without removing material.
- Confirm that the replacement joint includes the correct locking hardware.
- Install the joint by hand first to prevent cross-threading.
- Apply threadlocker, lubricant, or sealant only when Toyota or the part manufacturer specifically requires it.
- Tighten the joint to the exact specification for the vehicle and replacement-part design.
- Install and secure the locking washer, stake, plate, or other retainer as directed.
Do not reuse distorted locking hardware or substitute an improvised washer. The locking method helps prevent the inner joint from loosening inside the rack boot.
How to Secure the Boot and Properly Install the Outer Tie Rod
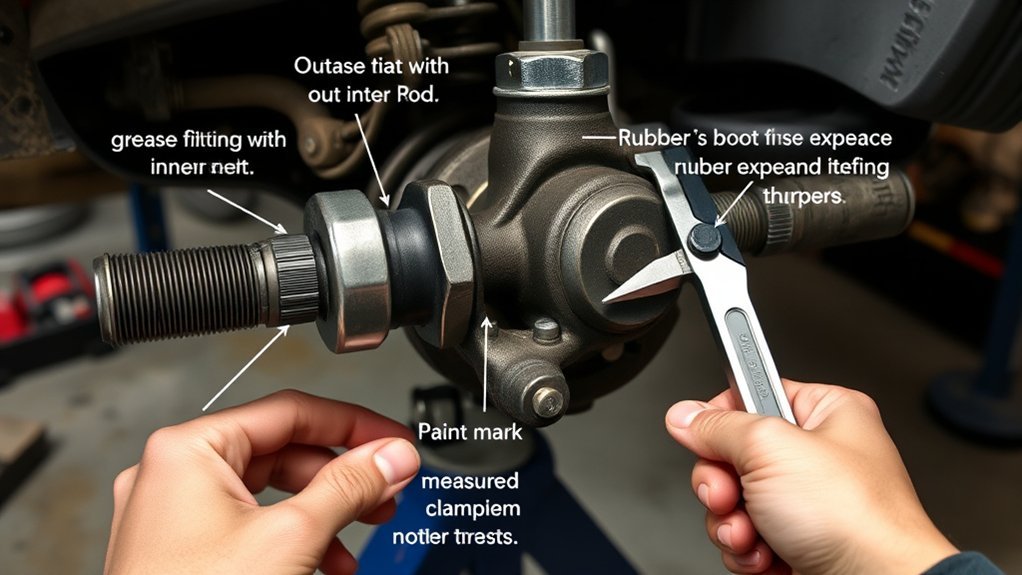
Reinstall the Rack Boot
Replace a torn, stiff, oil-soaked, or poorly fitting boot. Verify that the boot’s inner and outer sealing lips sit fully in their grooves. Reconnect the breather tube without kinking it, if the vehicle uses one.
Secure the boot with the specified reusable clamps or new replacement clamps. Do not automatically substitute ordinary cable ties. The clamp must seal the boot without cutting it or allowing it to slide.
Before finalizing the clamps, move the steering gently through its range and confirm that the boot does not twist, stretch excessively, collapse, or contact another component.
Install the Outer Tie Rod
- Thread the new outer tie rod onto the inner tie rod by the recorded number of turns.
- Compare the assembled length with the measurement recorded before removal.
- Insert the tapered stud into the clean steering-knuckle bore.
- Install the supplied or specified retaining nut.
- Tighten the nut to the exact model- and hardware-specific specification.
- If the design uses a castle nut and cotter pin, follow the factory direction for aligning the slots. Do not loosen a properly tightened nut merely to align a cotter-pin hole unless the repair procedure specifically permits it.
- Install a new cotter pin when required and bend it as directed.
- Hold the correct portion of the tie rod and tighten the jam nut to the specified value.
Some replacement tie rod ends use a prevailing-torque nut instead of a castle nut and cotter pin. Use the hardware supplied for the approved part and do not mix retention systems.
What Torque Specs Should You Use for Tacoma Tie Rod Ends?
Toyota Tacoma tie rod torque values should not be taken from an unsourced universal chart. Verify each value using the repair manual for the exact model year and configuration, along with any approved instructions supplied with the replacement part.
| Fastener or Detail | What to Verify |
|---|---|
| Inner tie rod to steering rack | Torque, locking washer or staking method, and any specified thread compound |
| Outer tie rod stud nut | Torque, nut type, cotter-pin procedure, and whether the nut is single-use |
| Tie rod jam nut | Torque and whether threads must remain dry or receive a specified treatment |
| Wheel lug nuts | Owner’s-manual specification, wheel type, tightening sequence, and recheck guidance |
| Rack boot clamps | Clamp type, position, installation method, and required clearance |
Use a calibrated torque wrench for final tightening. Do not apply anti-seize, oil, or threadlocker unless the applicable procedure calls for it because thread condition affects tightening force.
Should You Count Turns When Replacing Tacoma Tie Rod Ends?
Counting turns helps place the new outer tie rod close to the old position. It can reduce gross toe error before the alignment appointment, but it cannot reproduce factory alignment accurately.
- Mark the position: Draw reference marks across the outer tie rod, jam nut, and inner tie rod.
- Measure the assembly: Record a repeatable measurement from the inner tie rod or jam nut to the center of the outer joint.
- Count full and partial turns: Write the number down immediately.
- Compare old and new parts: Check thread depth and total length before copying the turn count.
- Use the marks only as a starting point: Have toe measured and corrected with alignment equipment.
Matching the old turn count can make the truck easier to move after the repair, but only an alignment measurement can confirm that toe is within specification.
Reinstall the Wheel and Complete Final Checks
- Clean the wheel-mounting surfaces and install the wheel.
- Thread every lug nut by hand.
- Snug the nuts evenly in the correct sequence.
- Raise the truck, remove the jack stands, and lower it carefully.
- Tighten the lug nuts in the specified pattern and to the owner’s-manual value.
- Turn the steering slowly from side to side while checking for binding, boot twisting, contact, or unusual noise.
- Confirm that all clamps, nuts, cotter pins, locking hardware, hoses, wiring, and wheel-speed sensor leads are secure.
- Inspect both front tires for irregular wear or damage.
- Verify that the steering wheel and front wheels appear reasonably centered before moving the truck.
If the wheels visibly point in different directions, the steering binds, the wheel has significant free play, or a fastener cannot be verified, do not road-test the truck. Correct the problem or have it transported to a repair facility.
Do You Need an Alignment After Replacing Tacoma Tie Rod Ends?
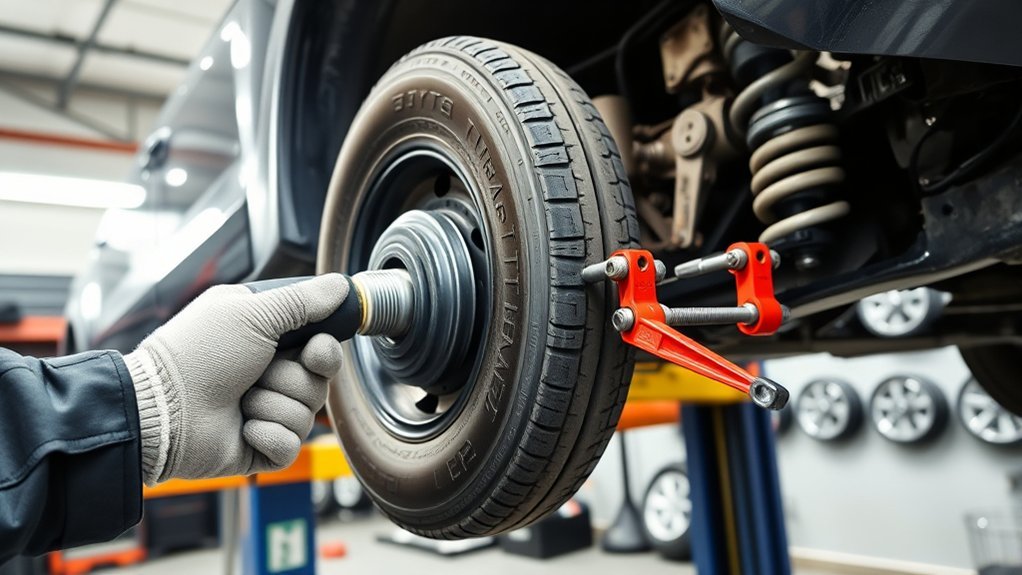
The tie rods control the front wheels’ toe adjustment. Removing, replacing, or rotating a tie rod changes the effective length of the steering linkage, even when the new part is installed using the old turn count.
| Condition | Possible Result | Alignment Check |
|---|---|---|
| Incorrect toe | Feathered or rapid tire wear | Measures and corrects individual and total toe |
| Off-center steering wheel | Poor straight-ahead feel | Centers the steering while setting toe |
| Pulling or wandering | Reduced stability or driver confidence | Checks toe and identifies other alignment or suspension concerns |
| Uneven tire wear | Shortened usable tire life | Provides measurements for comparison with vehicle specifications |
Arrange an alignment as soon as the installation is complete. Alignment equipment measures the truck against current vehicle specifications, while a technician can also check whether worn suspension parts or damaged tires would prevent an accurate adjustment. Review NHTSA’s tire-safety guidance and continue monitoring the front tires after the repair.
Some Tacoma alignment procedures include additional calibration steps after adjustment, such as yaw-rate-sensor zero-point calibration on certain configurations. Do not assume that step applies to every model year. Follow Toyota’s alignment procedure for the exact Tacoma and complete only the calibrations it specifies.
[Amazon Products Picked for You]
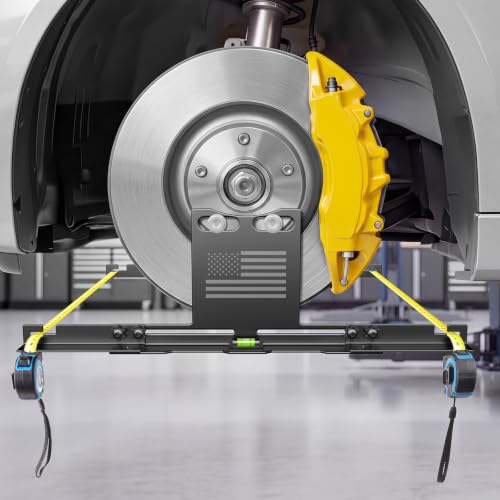
Skip the 2-3 Hour Shop Wait – Get professional wheel alignment done in just 15 minutes right in your own garage. No appointment, no waiting room, no wasting your weekend. Our DIY car alignment tool kit makes toe adjustment and camber setting fast and foolproof. Stop spending half a day at the shop—spend 15 minutes and hit the road. Save time, drive straight.

Achieve precision alignment accuracy up to ±0.1°—matching professional shop standards—with our heavy-duty steel toe alignment plates and camber adjustment tools. Perfect for front-end and rear toe settings, this wheel alignment kit delivers consistent, repeatable results that rival $100+ alignment shop services, all from your own garage.

Key Features: This wheel alignment tool helps restore the strut to its original camber position after removing and reinstalling components of your vehicle's undercarriage system, or check the amount of camber change before re-installation. Suitable for precise checking of the caster and camber angle
Avoid These Common Mistakes When Replacing Tie Rods
- Ordering by appearance alone: Confirm fitment with the VIN, drivetrain, and part number.
- Replacing parts without diagnosing the play: Rack, bearing, ball-joint, and control-arm faults can mimic tie rod wear.
- Working under a jack: Always lower the truck onto approved jack stands.
- Hammering the threaded stud: Use a proper separator and protect surrounding components.
- Using generic torque values: Obtain the correct specifications for the exact vehicle.
- Adding anti-seize automatically: Keep threads in the condition required by the repair procedure.
- Reusing single-use hardware: Replace cotter pins, locking washers, prevailing-torque nuts, and clamps when specified.
- Ignoring rack-boot damage: A damaged boot exposes the rack and inner joint to water and grit.
- Twisting the rack boot: Check its shape through the steering range before finalizing the clamps.
- Relying only on turn count: Measure the assembly and schedule an alignment.
- Driving with obvious toe error: Tow the truck if it cannot be moved safely.
- Skipping the final inspection: Recheck every fastener, retainer, clamp, hose, wire, and tire before driving.
Related Guides
Frequently Asked Questions
Do you need an alignment after replacing Toyota Tacoma tie rod ends?
Yes. Installing a tie rod by the old measurement or turn count only approximates the previous toe setting. A wheel-alignment system must measure the actual angles and correct them to the specification for your Tacoma.
Does the Tacoma model year affect the tie rod replacement procedure?
Yes. Part dimensions, steering gear, locking hardware, nut design, tool access, and torque requirements can vary. Identify the truck by VIN and consult the correct Toyota repair information before ordering parts or loosening fasteners.
Can you drive a Tacoma before getting the alignment?
A short, cautious trip directly to an alignment shop may be reasonable only when every fastener is verified, the steering operates normally, and the wheels appear close to their original position. Tow the truck if toe is visibly incorrect, steering binds, the wheel has excessive play, or you are uncertain about the repair.
Should inner and outer tie rods be replaced in pairs?
Not automatically. Replace every joint that fails inspection and examine the matching parts on both sides because they have experienced similar mileage and road conditions. Replacing serviceable parts is optional unless Toyota, the part manufacturer, or the repair situation requires paired replacement.
How can you tell whether the inner or outer Tacoma tie rod is worn?
Watch both joints while the steering linkage is loaded during inspection. Visible movement at the outer ball-and-socket joint points toward the outer end; movement felt under the rack boot while the outer joint remains steady points toward the inner joint. Because wheel bearings, ball joints, control arms, and the rack can create similar looseness, isolate the movement before replacing parts.
Conclusion
A successful Toyota Tacoma tie rod replacement depends on accurate diagnosis, secure vehicle support, correct parts, new locking hardware, and model-specific tightening procedures. Counting turns and recording measurements can place the steering linkage near its previous position, but they cannot establish final toe.
Before driving, inspect the rack boot, clamps, retaining hardware, steering movement, wheel installation, and tire condition. Finish the repair with a professional alignment and address any remaining play, binding, pulling, noise, or uneven tire wear immediately.
Sources
- Toyota Technical Information System — Toyota repair manuals, service information, and model-specific procedures.
- Toyota Manuals and Warranties — vehicle-specific owner’s manuals and maintenance information.
- Toyota USA Newsroom: 2024 Tacoma — Toyota’s technical overview confirming the redesigned Tacoma’s electric power steering.
- Toyota Parts and Service — official Toyota parts, repair, and fitment resources.
- National Highway Traffic Safety Administration TireWise — tire inspection, maintenance, and safety guidance.
- Hunter Engineering Alignment Systems — professional wheel-alignment measurement and steering-system service information.
