
A blown fuse can stop a Toyota Camry’s lights, power outlet, audio system, door locks, or another electrical component from working. Replacing an ordinary 12-volt blade fuse is often a simple DIY task, but the fuse locations, labels, sizes, and service limits vary by model year, powertrain, market, and equipment. Use the fuse-box lid and the owner’s manual for your exact Camry rather than relying on a generic diagram.
Quick Answer
Turn the Camry completely off, identify the failed circuit from the fuse-box lid or owner’s manual, and remove the suspected low-voltage blade fuse with the supplied puller. Install a fuse of the same physical type and amperage, close the cover, and test the circuit. Stop if the replacement blows again.
Key Takeaways
- Use the fuse diagram for your exact Camry model year; fuse locations and labels are not universal.
- Match both the amperage and the physical fuse type. Never install a higher-rated fuse.
- Use a plastic fuse puller and work only on ordinary 12-volt fuses identified as owner-serviceable.
- Do not keep replacing a fuse that blows again. A repeat failure indicates an overload, short circuit, damaged component, or wiring fault.
At a Glance
| Time Required | About 10–20 minutes for an accessible blade fuse |
| Difficulty | Easy for an owner-serviceable 12-volt blade fuse |
| Tools Needed | Owner’s manual, plastic fuse puller, flashlight, exact replacement fuse, and optionally a digital multimeter |
| Cost | Usually a few dollars for a blade fuse or small assortment; diagnosis costs more if the new fuse fails |
Warning: This guide applies only to ordinary 12-volt fuses identified as owner-serviceable. On a Camry Hybrid, never touch orange high-voltage cables, connectors, battery enclosures, inverter components, or the service plug. Toyota warns that the hybrid high-voltage system can cause severe burns, electric shock, or fatal injury. See the Toyota Camry Warranty & Maintenance Guide for official high-voltage precautions.
Common Fuse Problems in Your Toyota Camry

A fuse contains a metal element designed to open when current exceeds the circuit’s protected limit. This interrupts the circuit before excessive current can overheat wiring or damage a component.
Symptoms that may point to a blown fuse include:
- One or more interior lights no longer work.
- A power outlet, USB port, radio, or accessory has no power.
- Power locks, windows, seats, or mirrors stop operating.
- A headlight, horn, washer pump, or other electrical device fails.
- A warning message appears after a related circuit loses power.
- The vehicle does not enter accessory mode or start, although a discharged 12-volt battery and other faults can produce similar symptoms.
A blown fuse is only one possible cause. A failed relay, switch, motor, bulb, connector, control module, weak 12-volt battery, broken wire, or poor ground can leave the same component inoperative.
A fuse is a protective device, not the underlying repair. When a replacement fuse blows again, the circuit fault still exists.
How to Locate Your Toyota Camry’s Fuse Box
Many Toyota Camrys have one fuse box in the engine compartment and another beneath or behind the driver-side instrument panel. The exact position, cover shape, fuse count, and circuit labels vary. Do not assume that a diagram for another model year matches your vehicle.
[Amazon Products Picked for You]

Fitment: Compatible With Toyota Camry 2018 2019 2020 2021

Compatible with Toyota Camry 2007-2011

4 Types of Fuses: This assortment kit covers 4 types of fuses, they are Standard blade fuses, Mini blade fuses, Low Profile and Tall Profile STD Jcase box fuses. They are commonly used in most of vehicles such as Cars, Trucks, SUVs, ATVs, UTVs, Campers, RVs, Motorcycles, etc. This set is the best one to get if you are unsure what size fuses you should get for your car or if you have multiple cars.
Common Fuse Box Locations
Depending on the Camry generation and equipment, check these areas:
- Engine compartment: Look for a covered fuse and relay box, often near the 12-volt battery or along one side of the engine bay.
- Driver-side instrument panel: Look beneath the dashboard, behind a small removable lid, or near the driver’s knee area.
- Other model-specific locations: Some vehicles may use additional junction blocks or integrated fuse assemblies. Treat a location as valid only when it appears in your exact owner’s manual.
Toyota’s illustrated procedure for many Camry models shows an engine-compartment box and an instrument-panel box. The location illustrations and circuit assignments in the Toyota Camry Owner’s Manual OM33B27U are an example, not a substitute for the manual covering your model year.
Using Your Owner’s Manual
Use Toyota’s Manuals and Warranties portal or the manual supplied with the vehicle. Confirm the model year, model, powertrain, and market before following a diagram.
| Information to Find | Why It Matters |
| Fuse-box location | Prevents removal of unrelated panels or covers |
| Circuit name and position | Identifies the fuse connected to the failed component |
| Fuse type and amperage | Ensures the replacement fits and protects the circuit correctly |
| Owner-service restrictions | Identifies fuses or assemblies that should be handled by a technician |
Pro Tip: Photograph the fuse-box lid before setting it aside. The photo preserves the circuit map, cover orientation, and original fuse arrangement while you work.
Identifying the Blown Fuse: A Step-by-Step Guide
Start with the failed component, not a random fuse. A careful diagnosis reduces the chance of pulling the wrong fuse or disturbing an unrelated circuit.
Locate the Correct Fuse Box
- Write down exactly what stopped working and whether other components failed at the same time.
- Turn the vehicle off and remove the key or move the smart key away from the vehicle.
- Set the parking brake and switch off the lights and accessories.
- Use the manual or fuse-box lid to determine which box contains the related circuit.
- Open only the designated cover. Do not pry open sealed modules or high-voltage housings.
Identify the Specific Fuse
Match the failed component with the circuit abbreviation on the lid or in the manual. Abbreviations are not always self-explanatory, and one fuse may supply several components. Common labels can include abbreviations for power outlets, dome lights, electronic control units, door systems, audio equipment, washers, or accessory power.
Before removing the fuse, note:
- Its exact slot.
- The amperage number printed on the top.
- The physical body size and number of terminals.
- Whether adjacent fuses use similar colors but different ratings.
Do not rely on color alone. Automotive fuse colors help indicate amperage, but the printed rating and model-specific diagram are the controlling references.
Tools You Need for Fuse Replacement
- Owner’s manual or official digital manual: Confirms the location, circuit label, amperage, and service restrictions.
- Plastic fuse puller: Many vehicles store one inside an engine-compartment fuse box. It grips a blade fuse without placing metal near adjacent terminals.
- Flashlight: Helps with under-dash boxes and small amperage markings.
- Exact replacement fuse: It must match the original physical format and amperage.
- Digital multimeter: Optional but useful when the fuse element is difficult to inspect visually.
- Clean, dry cloth: Keeps dirt and moisture away from the open fuse box.
Automotive fuses come in several formats, including standard blade, mini, low-profile mini, micro, cartridge, and multi-fuse designs. Eaton’s automotive blade-fuse guide illustrates why two fuses with similar amperage ratings may not be physically interchangeable.
Note: Ordinary metal needle-nose pliers are not the preferred removal tool. If the supplied puller is missing, use a purpose-made plastic or insulated fuse puller. Do not place a metal tool into a crowded fuse box while the circuit is energized.
[Amazon Products Picked for You]

Great Design for Removing Tool - The relay puller pliers are specially designed with handle and thin tips, which allow access to relays and fuses in narrow areas. Suitable for removing and installing fuses and relays, making car repairs easily. The 6-pack relay fuse remover tools set will meet your daily needs.
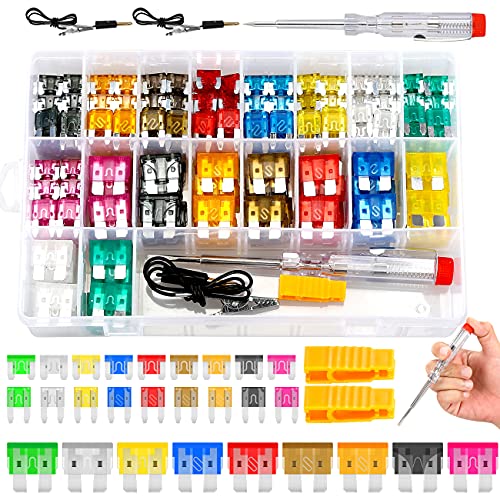
306PCS FUSES KIT: A full fuse set of 3 different sizes : Standard & Mini & Low Profile Mini,9 model: 2A/ 5A/ 7.5A/10A/ 15A/ 20A/ 25A/ 30A/ 35A,covers 27 commonly used blade fuses: 3 different sizes*9 models.Well organized in a plastic container,included: 90pcs Standard Fuses(10PCS of each model );108pcs Mini Fuses(12PCS of each model );108pcs Low Profile Mini Fuses(12 PCS of each model ).

【Meet all your needed size】-- The fuse kit includes micro size 50pcs, mini size 160pcs and standard size 90pcs. Three styles of auto fuses have 11 current specifications (2A /3A / 5A/ 7.5A/ 10A/ 15A/ 20A/ 25A / 30A/ 35A/40A), equipped with a fuse puller.(Not including micro2 fuse.)
Safely Remove a Blown Fuse
Shut Down the Vehicle and Open the Correct Box
- Park on a level surface away from traffic.
- Shift to Park, apply the parking brake, and turn the ignition or power switch completely off.
- Switch off lights, climate controls, chargers, and accessories.
- Wait briefly for electronic systems to shut down.
- Open the correct fuse-box cover using the tabs or release method shown in the manual.
Routine replacement of a small owner-serviceable blade fuse normally does not require disconnecting the 12-volt battery unless the owner’s manual or repair procedure specifically directs it. Disconnecting the battery can erase settings or require system initialization. Stop instead of improvising when the repair involves the battery terminal, a main fusible link, or a bolted high-current fuse.
Use Proper Tools
Grip the fuse body with the plastic puller and pull it straight out. Do not twist aggressively, crush the plastic housing, or pry against nearby fuses. If the fuse will not release with moderate pressure, confirm that it is an owner-removable blade fuse.
Stop and use professional service when you find:
- A bolted fuse, fusible link, cartridge assembly, or integrated multi-fuse block.
- A fuse the manual directs a Toyota dealer or qualified technician to replace.
- Melted plastic, a burned smell, blackened terminals, or a distorted fuse-box cover.
- A loose terminal that does not grip the fuse securely.
- Water, corrosion, or debris inside the fuse box.
- Orange high-voltage wiring or connectors near the work area.
Inspect and Test the Fuse
Hold a transparent blade fuse toward a light. A normal fuse generally has a continuous metal link. A blown fuse may have a visible gap, melted section, dark mark, or cloudy housing. Visual inspection is not conclusive when the housing is opaque, dirty, heat-damaged, or difficult to see through.
To check continuity with a multimeter:
- Keep the fuse removed from the vehicle and make sure the circuit is off.
- Set the meter to continuity or the lowest resistance range.
- Touch one probe to each blade.
- A good fuse normally produces a continuity tone or a reading close to zero ohms.
- An open fuse normally displays no continuity or an over-limit reading.
Do not test resistance across a live circuit. Follow the meter manufacturer’s safety instructions.
Choose the Right Replacement Fuse

Use the fuse-box lid and owner’s manual to match all of the following:
- Amperage: The number on the new fuse must equal the specified rating.
- Physical type: Match standard, mini, low-profile mini, micro, cartridge, or other format exactly.
- Terminal arrangement: Match the number, spacing, and shape of the blades or terminals.
- Application: Use a quality automotive fuse intended for the circuit voltage and vehicle environment.
Warning: Never install a higher-amperage fuse, bridge the slot with wire or foil, or insert another metal object in place of a fuse. Toyota warns that doing so can damage the vehicle and may cause a fire or injury.
A lower-rated fuse may open during normal use and is not a proper permanent substitute. Do not borrow a fuse from an airbag, braking, steering, engine-control, lighting, or other safety-related circuit.
[Amazon Products Picked for You]
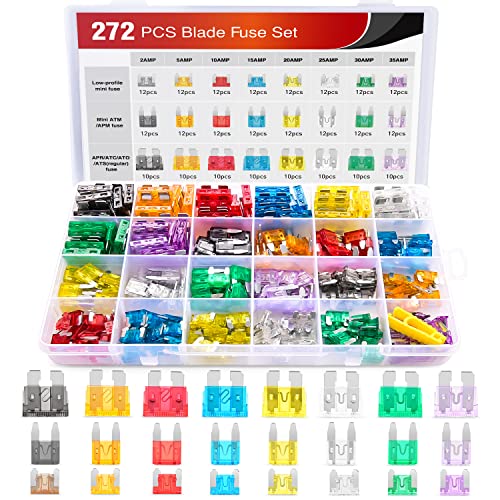
ALL SIZES YOU NEED: Covers 8 commonly used blade fuses, 272 PCs, mini: 2A 5A 10A 15A 20A 25A 30A 35A Blade Fuses, commonly used in most auto cars, trucks, SUVS, boats etc.

EDS 82620-33060 Fusible Block Link Fuse for Camry, Avalon and ES300h

Circuit Protection: As a core protective component of the automotive electrical system, every auto fuse undertakes a crucial mission. When an abnormal overload or short circuit occurs in the circuit, it can quickly blow, cut off the current in a timely manner, and nip potential risks in the bud
Properly Install the New Fuse: Key Tips
- Compare the old and new fuse side by side.
- Confirm the same amperage number, body shape, blade spacing, and terminal count.
- Check the slot for melted plastic, corrosion, looseness, or foreign material.
- Align the blades with the original slot.
- Press the fuse straight in until it is fully and evenly seated.
- Do not force a fuse that does not fit with light, even pressure.
- Reinstall the fuse-box cover and make sure every tab or seal is secure.
- Turn the vehicle on and test only the affected component first.
Standard two-blade fuses are not electrically polarized, so they do not have a required positive or negative installation direction. The important points are using the correct slot, matching the fuse specification, and seating both blades fully.
If the component works, briefly test related functions and check that no warning messages remain. Some systems may require an initialization procedure after power was interrupted; consult the exact owner’s manual before assuming a new fault exists.
Troubleshooting New Fuse Issues
If the replacement fuse blows immediately or shortly after the component is switched on, turn the vehicle off and stop replacing fuses. The circuit may have a short, overload, failed motor, damaged accessory, or wiring problem.
Common causes include:
- Wire insulation rubbed through against a bracket or body panel.
- A pinched harness after recent trim, stereo, lighting, or body repair.
- Water inside a lamp, connector, accessory socket, or fuse box.
- A seized power-seat motor, window motor, fan, pump, or other electrical load.
- An incorrect bulb or component that draws too much current.
- An aftermarket dash camera, amplifier, alarm, remote starter, charger, or lighting kit connected incorrectly.
- A damaged trailer or accessory harness.
- A loose fuse-box terminal creating heat and resistance.
Note when the fuse opens. For example, it may fail as soon as the ignition is switched on, only when the lights are used, when a door moves, when a power outlet is loaded, or after driving over a bump. This information can help a technician isolate the affected branch of the circuit.
If the fuse remains good but the component still does not work, check the owner’s manual for related fuses and operating conditions. The cause may be a relay, ground, connector, switch, module, broken wire, failed component, or weak 12-volt battery.
What to Do If You Can’t Fix Fuse Problems

Arrange professional diagnosis when:
- The correct replacement fuse blows again.
- The fuse holder is melted, loose, discolored, or corroded.
- Several unrelated systems fail at the same time.
- The vehicle will not start or enter READY mode after basic 12-volt battery checks.
- A warning for airbags, brakes, steering, hybrid systems, or engine control appears.
- The circuit includes an integrated, bolted, or dealer-serviceable fuse.
- The problem began after collision damage, water intrusion, accessory installation, or wiring repair.
- You cannot positively identify the correct fuse and amperage.
Provide the technician with the fuse label, amperage, affected component, conditions under which it failed, and any recent repairs or accessory installations. Toyota’s subscription-based Technical Information System provides factory repair information for technicians who need circuit diagrams and diagnostic procedures.
Tips for Keeping Your Electrical System Healthy
Fuses do not have a routine replacement interval. Leave an intact, correctly rated fuse in place unless a circuit failure or inspection gives you a reason to remove it.
To reduce future problems:
- Keep fuse-box covers closed and properly latched to limit moisture and dirt entry.
- Do not install oversized fuses or unapproved electrical accessories.
- Use accessory power sources and fuse taps only when the installation method and circuit capacity are properly verified.
- Repair water leaks that reach wiring, lights, floor harnesses, or junction blocks.
- Investigate hot-plastic smells, flickering equipment, intermittent power, or visibly discolored terminals promptly.
- Keep a small assortment of correct-quality fuses and a plastic puller in the vehicle, but verify every replacement against the manual.
- Retain a record of repeat electrical failures and recent accessory work.
Do not repeatedly remove fuses merely to inspect them. Unnecessary handling can loosen terminals, damage fuse bodies, or place the wrong fuse in the wrong slot.
Related Guides
Frequently Asked Questions
Can you replace Toyota Camry fuses yourself?
Yes. An owner can usually replace a small 12-volt blade fuse when the owner’s manual identifies it as serviceable. Use the specified location, fuse type, and amperage. Leave bolted fuses, fusible links, integrated fuse blocks, melted holders, and hybrid high-voltage components to a qualified technician.
How can you tell if a Toyota fuse is blown?
Remove the suspected fuse after turning the vehicle off. A transparent blade fuse may show a broken or melted internal link. If the condition is unclear, test the removed fuse for continuity with a multimeter. A fuse can look normal and still be open.
Which fuse is the Toyota Camry anti-theft fuse?
There is no single universal anti-theft fuse across all Camry model years. Immobilizer, alarm, smart-key, body-control, door-lock, and interior-light functions may share several circuits. Use the exact model-year fuse diagram and do not pull random security-related fuses as a troubleshooting shortcut.
What precautions should you take when replacing a blown fuse?
Park safely, set the parking brake, turn the vehicle and accessories off, work with dry hands, use a plastic fuse puller, and install the same fuse type and amperage. Never use a higher-rated fuse or metal substitute, and never touch orange hybrid high-voltage components.
Why does the new fuse keep blowing?
A repeat failure normally means the circuit is drawing more current than intended. Possible causes include a shorted wire, water intrusion, failed motor or pump, incorrect bulb, loose terminal, or poorly installed aftermarket accessory. Do not install another fuse until the cause is diagnosed.
Can you use a lower-amperage fuse temporarily?
A lower-rated fuse may open during normal operation and is not a proper permanent replacement. Use the exact rating specified by Toyota. Never use a higher-rated fuse, and do not borrow a fuse from a safety-critical circuit.
Sources
- Toyota Manuals and Warranties — model-year-specific owner’s manuals and vehicle documentation
- 2025 Toyota Camry Owner’s Manual — current Camry maintenance and fuse information
- Toyota Camry Owner’s Manual OM33B27U — illustrated fuse-box, fuse inspection, replacement, and safety guidance
- 2025 Toyota Camry Warranty & Maintenance Guide — hybrid high-voltage safety precautions
- Eaton Bussmann Automotive Blade Fuses — blade-fuse sizes, amperage ranges, and physical formats
- Toyota Technical Information System — factory repair information and electrical diagnostic resources
Conclusion
Replacing an owner-serviceable fuse in a Toyota Camry is straightforward when you use the correct model-year diagram, turn the vehicle off, remove the fuse with a plastic puller, and install the same physical type and amperage. Do not use an oversized fuse, metal substitute, or generic diagram. If the replacement blows again, the holder is damaged, or the repair involves a high-current or hybrid component, stop and have the electrical fault professionally diagnosed.
