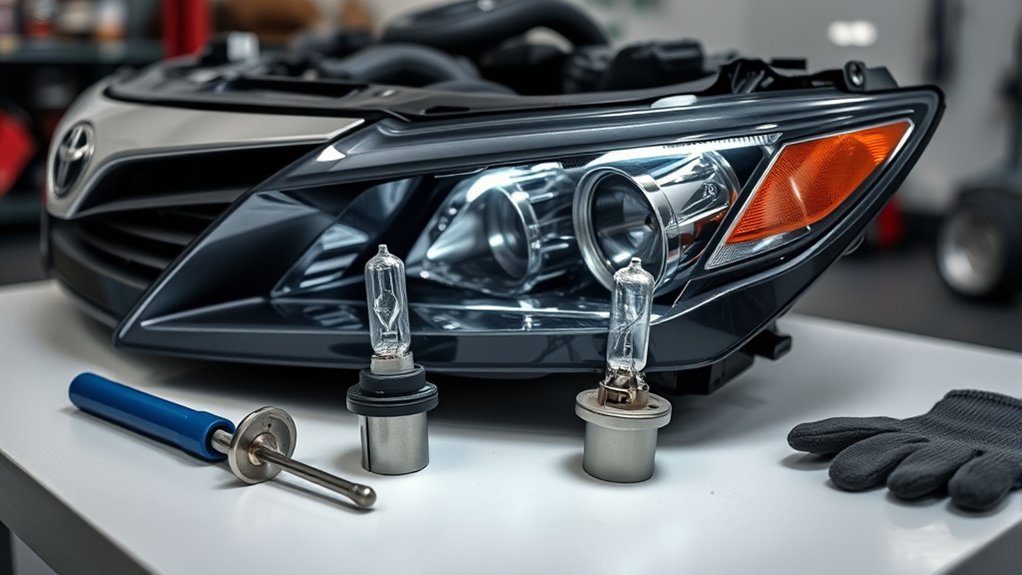
Replacing a Toyota Camry headlight bulb can be a straightforward DIY repair, but only when the failed light source is designed to be replaced separately. Camry lighting systems vary by model year, trim, market, and headlamp assembly. Older models may use accessible halogen bulbs, while newer Camrys can have integrated LED projectors that require assembly or module diagnosis instead of a simple bulb change.
Quick Answer
Confirm the Camry’s year, trim, market, and headlamp type before buying anything. For a removable halogen bulb, switch the vehicle off, open the hood, release the connector and bulb, install an exact-match replacement without touching its glass, reseal the housing, and test the beam. Integrated LED or HID systems usually need professional service.
Key Takeaways
- Check the model year, trim, market, VIN, and headlamp type before purchasing a replacement.
- A removable halogen bulb, a replaceable HID source, and an integrated LED headlamp require different procedures.
- Use the exact bulb category, base, wattage, and electrical specification listed for the vehicle.
- Do not install an LED or HID conversion bulb merely because its base appears to fit a halogen socket.
- Handle halogen bulbs by the base, fully reseat every seal, and check the beam pattern before driving at night.
- Stop when you find a sealed LED unit, HID high-voltage equipment, melted wiring, standing water, or access beyond your experience.
At a Glance
| Time Required | About 10–30 minutes for an accessible, serviceable bulb; longer when approved access panels or nearby components must be removed |
| Difficulty | Easy to moderate for a serviceable halogen bulb; advanced for HID, LED, bumper-removal, or electrical diagnosis |
| Tools Needed | Clean gloves, flashlight, lint-free cloth, owner’s manual, and only the trim tool or screwdriver specified by the procedure |
| Cost | Varies widely by bulb technology, model year, access requirements, and whether a complete LED or HID assembly needs diagnosis or replacement |
Is Your Camry’s Headlight Bulb Replaceable?
Do not purchase a replacement based only on the words “Toyota Camry.” The correct repair can change with the model year, trim, country, optional lighting package, and whether the vehicle still has its original headlamp assemblies.
Use the Toyota Manuals and Warranties portal for the applicable model year. You can also check the old bulb, the rear of the headlamp housing, a Toyota parts catalog, or a VIN-based parts lookup.
| Vehicle or System | What It Means for Replacement |
|---|---|
| U.S.-market 2025 Camry | Toyota states that every grade uses LED headlights and daytime running lights. A failed low or high beam is generally not a conventional halogen-bulb replacement. |
| Older Camry with removable halogen bulb | The bulb may be replaceable from behind the housing with a twist lock, retaining clip, or locking ring. |
| Camry with factory HID equipment | A replaceable source may be present, but the ballast and igniter can involve dangerous voltage. Follow the exact factory procedure or arrange professional service. |
| Aftermarket headlamp assembly | The original Toyota manual may no longer identify the installed bulb. Use the assembly manufacturer’s markings and approved replacement information. |
For a U.S.-market 2025 Camry, do not expect to find a conventional low- or high-beam halogen bulb: Toyota equips every grade with LED headlights.
Your Camry may use one of these arrangements:
- Replaceable halogen bulb: Usually has a removable electrical connector and a twist-lock base, retaining clip, or locking ring.
- Replaceable HID light source: May include a ballast, igniter, and high-voltage components. Follow the exact factory procedure or use professional service.
- Factory LED headlamp: The projector, driver, or light source may be integrated into the assembly rather than sold as a simple bulb.
- Combination assembly: Low beam, high beam, daytime running lamp, side marker, and turn signal functions may use different light-source types in the same housing.
Note: If you cannot identify a removable socket or the manual describes an LED assembly, do not cut, drill, pry, or force the housing. The repair may require assembly replacement, module testing, programming, or professional electrical diagnosis.
Diagnose the Failure Before Buying a Bulb
A dark headlamp does not always mean that the bulb itself has failed. Check the symptoms before ordering parts.
- Only one low beam is out: A failed serviceable bulb or a local connector problem is possible.
- Both low beams stopped at the same time: Consult the manual for a shared fuse, relay, switch, control module, or power-supply fault before assuming that two bulbs failed together.
- The light works intermittently or flickers: Look for a loose terminal, corrosion, heat damage, wiring movement, or an HID/LED driver problem.
- The lens contains water: Repair the leak or damaged housing. A new bulb alone will not correct ongoing water intrusion.
- The housing is cloudy but the bulb works: Lens oxidation can reduce apparent output even when the electrical system is operating normally.
- The bulb failed immediately after replacement: Recheck fitment, wattage, connector condition, seals, charging-system symptoms, and whether the bulb was contaminated or installed at an angle.
When testing which lamp has failed, switch the lights on only long enough to identify the affected function. Do not stare into the beam at close range. Switch the lights and vehicle off again before placing your hands behind the housing.
Warning: Do not drive at night or in other low-visibility conditions until the required low beams operate correctly. Use roadside assistance or arrange daytime transport when safe lighting cannot be restored.
Choose the Correct Replacement Light Source
Match the exact category, base, connector, wattage, voltage specification, and intended application shown in the owner’s manual, parts catalog, housing label, or original bulb. Similar-looking capsules can have different filament positions or electrical requirements.
A physical fit does not prove optical or legal compatibility. The headlamp reflector or projector was designed around a particular light-source geometry. An LED or HID conversion placed in a housing designed for a halogen filament can produce glare, dark spots, poor distance lighting, warning messages, excess heat, or a noncompliant beam pattern.
In the United States, FMVSS No. 108 defines regulated replaceable light sources and headlamp systems. A NHTSA interpretation concerning HID conversion equipment explains why a different technology does not become compliant merely because it is made to fit an existing halogen base. Requirements differ by country and province or state, so use an approved replacement for the exact application.
Warning: Do not substitute a higher-wattage bulb or install an unverified LED or HID conversion in a halogen headlamp. It can damage the connector or housing and may create an unsafe or noncompliant beam.
Gather Your Tools and Prepare Safely
Park on a hard, level surface away from moving traffic. Apply the parking brake, switch off the exterior lights and ignition, and keep the key or smart key away from the vehicle so the lighting system cannot be activated accidentally. Allow the headlamp and nearby engine components to cool.
For a typical serviceable bulb, gather:
- The exact replacement bulb specified for the vehicle
- Clean nitrile, latex, or mechanic’s gloves
- A flashlight
- A clean lint-free cloth
- The applicable owner’s manual
- A small screwdriver or trim tool only when the manual requires one
- A clean container or the new bulb’s packaging for the failed bulb
Disconnecting the 12-volt battery is not normally required for a simple halogen bulb when the lights and ignition are off, but the model-specific procedure takes priority. Battery disconnection can affect saved settings and may introduce additional procedures. Do not disconnect or work on HID or LED electrical components unless the factory instructions specifically direct you to do so and you understand the system.
Warning: Do not work on a powered HID system, probe headlamp terminals, bypass a fuse, bridge a connector, or handle damaged wiring with the lighting system energized. Stop if you find melted insulation, exposed conductors, smoke, or a connector that becomes hot.
How to Open the Hood of Your Toyota Camry
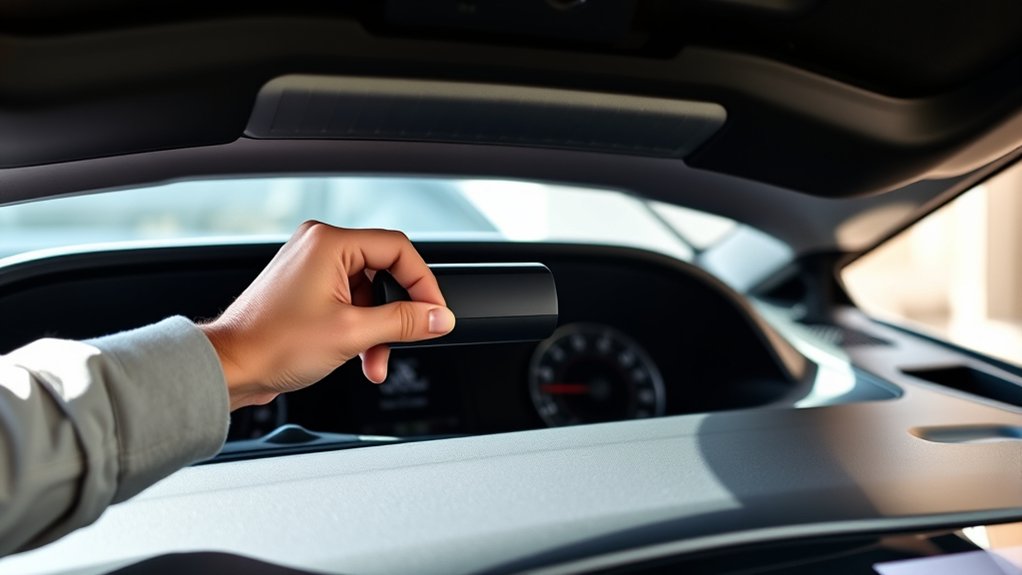
Sit in the driver’s seat and locate the hood-release lever, usually in the lower driver-side dashboard or footwell area. Pull the lever until the primary hood latch releases.
Move to the front of the vehicle. Slide your fingers beneath the front edge of the hood and locate the secondary safety latch near the center. Move the latch in the direction shown by the vehicle’s design, then lift the hood.
Secure the hood with its factory prop rod if equipped. Insert the rod into the marked support hole and confirm that it is fully seated before placing your hands in the engine compartment. If the hood uses support struts, raise it fully and verify that it remains stable.
Where to Find the Low-Beam Bulb
First, identify which low beam has failed. Switch the lights on briefly, observe the front of the vehicle from a safe position, and switch them off before opening the hood.
Stand behind the affected headlamp assembly and look for the connector, dust cover, socket, or access panel serving the low beam. Do not assume the low beam is always the inner or outer socket. Its position changes between headlamp designs.
Compare the housing with the bulb-replacement diagram in the owner’s manual. If several connectors are present, trace the failed lamp’s position from the front lens to its rear access point without unplugging unrelated components.
Some procedures may instruct you to move a removable air duct, plastic cover, washer-fluid filler neck, battery shield, or wheel-liner access panel. Remove only components identified by the applicable procedure. Do not bend refrigerant lines, disconnect airbag wiring, loosen headlamp aiming hardware, or force rigid engine-bay parts aside.
Step-by-Step: Remove the Low-Beam Bulb
These steps apply only after you have confirmed that the low beam uses a serviceable bulb. Work gently because aged plastic tabs, connectors, and dust covers can become brittle.
Locate the Bulb Behind the Headlight
- Confirm that the ignition and exterior lights are off.
- Allow the old bulb and nearby components to cool.
- Locate the rear access point for the failed low beam.
- Remove the dust cap or cover if the headlamp has one.
- Inspect the connector and note its installed orientation before moving it.
- Photograph the bulb angle, connector, tabs, and retaining system for reference.
| Check | What to Confirm |
|---|---|
| Bulb compatibility | The category, base, wattage, electrical rating, and application match the manual, parts catalog, housing, or original bulb. |
| Connector condition | The plug is not melted, green with corrosion, cracked, distorted, or loose. |
| Seal condition | The dust cap, O-ring, or gasket is clean, flexible, and undamaged. |
| Access path | Your hand and tools can reach the bulb without crushing wiring, hoses, seals, or nearby components. |
Use the Proper Removal Technique
Release the electrical connector according to its design. Some connectors have a locking tab that must be pressed before the plug can slide off. Hold the connector body rather than pulling on the wires.
Release the bulb using the method shown in the manual:
- Twist-lock bulb: Rotate the bulb or socket through its short unlocking movement, then pull it straight back.
- Retaining clip: Release the wire clip carefully while supporting the bulb so the clip does not spring away.
- Locking ring: Rotate or unclip the ring before withdrawing the bulb.
- Dust-covered assembly: Remove the cap first and keep its sealing surface clean for reinstallation.
If the bulb does not release with light hand pressure, stop and recheck the locking method. Forcing it can break the housing, socket, retaining mechanism, or aiming components.
Pro Tip: Place the removed bulb beside the new one without touching either glass capsule. Compare every tab, seal, connector key, and base dimension before installing the replacement.
Install Your New Low-Beam Bulb
Compare the new bulb with the old one before installation. The base, tabs, connector, seals, and overall shape should match. Do not rely only on a similar-looking glass capsule or a catalog entry that does not account for the exact trim and headlamp option.
- Put on clean gloves and hold the new bulb by its plastic or metal base.
- Keep the bulb glass away from fingers, grease, coolant, washer fluid, dirt, and engine-bay surfaces.
- Align the locating tabs with the matching slots in the housing.
- Insert the bulb straight and confirm that it sits fully and evenly.
- Lock it with the original twist movement, retaining clip, or locking ring.
- Reconnect the electrical plug until its locking tab engages.
- Reinstall the dust cover or cap with its seal evenly seated around the full perimeter.
- Reinstall only the access components removed under the approved procedure.
Sylvania’s halogen-bulb guidance advises using gloves or a clean towel and avoiding contact with the glass. If you accidentally touch the capsule, follow the bulb manufacturer’s cleaning instructions rather than wiping it with a dirty shop rag.
A bulb installed at an angle can create a weak or distorted beam, glare, or an incomplete weather seal. If it rocks in the socket, sits proud of the housing, or prevents the connector from latching, remove it and inspect the alignment again.
How to Remove the High-Beam Bulb
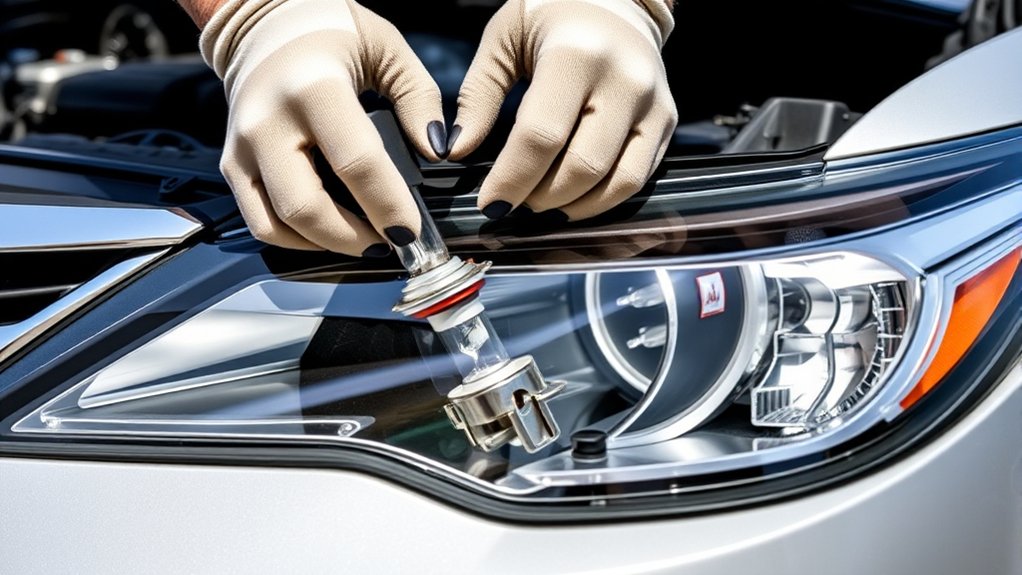
The high-beam light source may be separate from the low beam, combined with another function, or integrated into an LED projector. Use the owner’s manual diagram to identify its rear access point.
Locate the High-Beam Bulb
- Switch on the high beams briefly to confirm which side or function has failed.
- Switch all exterior lights and the ignition off.
- Open and secure the hood.
- Trace the high-beam position from the front lens to the rear of the assembly.
- Confirm that the component has a removable socket or bulb base.
- Check whether the high and low beams share an LED projector before attempting removal.
If the high beam is generated by a sealed LED module or integrated headlamp assembly, skip the bulb-removal steps and arrange proper diagnosis.
Remove the Bulb Safely
Remove any dust cover, then unlock the electrical connector without pulling on its wires. Release the bulb with the twist-lock, retaining-clip, or locking-ring method specified for your Camry.
Keep control of the bulb as it leaves the housing. It can fall into the engine compartment or strike nearby components if it releases suddenly. Place the failed bulb in a clean container or the replacement bulb’s packaging.
Avoid Contact With Halogen Bulb Glass
Handle a halogen bulb only by its base. Wear clean gloves or use a clean lint-free cloth to prevent skin oil, dirt, and moisture from reaching the glass capsule.
Do not install a bulb with cracked glass, a damaged seal, bent terminals, a loose base, or evidence that its packaging allowed the capsule to strike another object.
Install Your High-Beam Bulb
| Step | Action | Check |
|---|---|---|
| 1 | Align the locating tabs with the housing. | The bulb enters without force or tilting. |
| 2 | Seat the bulb fully and evenly. | The base sits flush and does not wobble. |
| 3 | Secure the twist lock, clip, or ring. | The retainer is fully engaged and not trapped against a tab. |
| 4 | Reconnect the plug and reinstall the cover. | The connector locks and the weather seal is even. |
Test the New Bulb Before Closing the Hood
Move tools, packaging, the old bulb, and loose parts away from belts, fans, pulleys, and other moving components. Switch the vehicle to the mode required for exterior-light operation, then test the applicable functions:
- Low beams
- High beams
- High-beam flash function
- Daytime running lamps, when their operating conditions are met
- Turn signals, parking lamps, and side markers near the repaired area
Daytime running lamps may not illuminate simply because the switch is turned. Depending on the vehicle, the power system may need to be ready, the parking brake may need to be released, the selector may need to be out of Park, or the ambient-light and switch conditions may need to be satisfied. Follow the manual’s test conditions.
Compare the repaired light with the opposite side. It should illuminate steadily without flickering. Do not stare directly into an illuminated headlamp at close range; stand to the side while checking it.
Check Bulb Seating and Beam Pattern
On level ground, point the vehicle toward a flat wall from a safe distance and compare the two low-beam patterns. This is a seating check, not a substitute for the factory aiming procedure.
- If the repaired beam has an unusual dark area, rotation, or sharply different cutoff, switch the lights off and reseat the bulb.
- If the complete headlamp was removed, replaced, or disturbed, have its aim checked using the model-specific procedure.
- Do not turn an aiming screw to compensate for a bulb that is crooked or not fully locked into its socket.
Troubleshooting After Headlight Bulb Replacement
| Symptom | Possible Cause | What to Check |
|---|---|---|
| New bulb does not illuminate | Loose connector, wrong bulb, defective bulb, damaged socket, fuse, wiring fault, or failed LED/HID module | Switch the system off, reconnect the plug, verify fitment, inspect the socket, and consult the manual’s fuse information. |
| Both low beams are out | Shared fuse, relay, switch, power feed, body-control fault, or integrated-system problem | Do not buy two bulbs without checking the model-specific circuit and fuse information. |
| Light flickers | Loose terminal, corrosion, heat-damaged connector, incompatible bulb, ballast fault, driver fault, or wiring problem | Inspect the connector with the lights off. Replace damaged components rather than wedging or tying the plug in place. |
| Beam pattern looks crooked | Bulb not fully seated, locating tabs misaligned, wrong light source, or damaged retainer | Remove and reseat the bulb before changing headlamp aim. |
| Moisture appears inside the housing | Dust cap not seated, damaged gasket, blocked vent, cracked housing, or previous collision damage | Inspect the cap and seal. Persistent droplets, pooling water, or repeated fogging needs further repair. |
| One side still appears dim | Cloudy lens, voltage loss, reflector damage, mismatched bulbs, poor seating, or an aging opposite bulb | Inspect the lens, connector, bulb position, and both bulb specifications. |
| Fuse opens again | Short circuit, damaged socket, pinched wire, water intrusion, incorrect wattage, or failing module | Stop replacing fuses and arrange electrical diagnosis. Never install a higher-rated fuse. |
If the replacement immediately fails, a fuse repeatedly opens, the connector becomes hot, or wiring shows melting or discoloration, stop using the affected circuit and arrange professional diagnosis.
Should You Replace Both Headlight Bulbs?
Replacing both serviceable halogen bulbs can provide more consistent color and output when the pair is the same age. It also reduces the chance that the second aging bulb will fail soon after the first.
Pair replacement is not a rule for every lighting system. Do not replace a complete LED assembly or expensive HID component on the working side merely to match a failed part unless diagnosis, output differences, manufacturer guidance, or damage justifies it. When replacing a pair, use matching approved bulbs with the same specification and product line.
A removed working bulb may be kept as an emergency spare only when its glass, base, seal, and terminals remain clean and undamaged. Store it in protective packaging rather than loose in the glove box or trunk.
Dispose of the Old Bulb Safely
Keep the failed bulb in its original or replacement packaging so it cannot break or cut someone. Do not leave it loose in the engine compartment, driveway, household rubbish bag, or vehicle interior.
Follow the bulb manufacturer’s instructions and local waste rules. HID lamps and electronic LED assemblies may require different handling from ordinary halogen bulbs. If a bulb breaks, keep people and pets away from the fragments, avoid handling shards with bare hands, and follow the manufacturer’s cleanup and disposal guidance.
Closing the Hood After Replacement
Before lowering the hood, account for every tool, cap, connector, fastener, glove, package, and removed access component. Confirm that nothing remains near a cooling fan, belt, pulley, hood latch, or hot surface.
- Hold the hood securely.
- Remove the prop rod from its support hole, if equipped.
- Return the prop rod to its retaining clip.
- Lower the hood using the closing method specified in the owner’s manual.
- Confirm that the hood sits evenly and cannot be lifted without operating the interior release.
Avoid pressing with concentrated force on the center of the hood panel. If it does not latch, open it again and inspect the latch area for an obstruction rather than repeatedly slamming it.
When to Get Professional Headlight Service
Arrange service from a qualified technician or Toyota service facility when:
- The headlamp uses a sealed or integrated LED light source.
- The manual identifies HID components, an igniter, or a ballast.
- The 2025 or other applicable model-year documentation identifies an LED projector rather than a replaceable bulb.
- Access requires bumper, wheel-liner, headlamp-assembly, or major body-panel removal beyond your experience.
- The connector or socket is melted, cracked, loose, or heavily corroded.
- The new bulb does not work after its fitment and connection are confirmed.
- A lighting fuse repeatedly fails.
- The headlamp contains standing water or has physical damage.
- The light flickers, changes color, shuts down after warming, or produces a warning message.
- The beam requires inspection or aiming after a collision, suspension change, or headlamp-assembly replacement.
Frequently Asked Questions
How do you replace a Toyota Camry headlight bulb?
Confirm the Camry’s model year and light-source type, switch off the vehicle, open and secure the hood, locate the correct rear socket, disconnect it, release the serviceable bulb, and install an exact-match replacement. Reconnect the plug, reinstall every seal, test the light and beam pattern, remove all tools, and verify that the hood is latched.
Can I replace my Camry headlight bulb myself?
You can often replace an accessible halogen bulb yourself when the owner’s manual provides a bulb-replacement procedure. Use professional service for integrated LED units, HID equipment, damaged wiring, difficult body-panel access, repeated fuse failure, or a fault that remains after the correct bulb is installed.
Does a 2025 Toyota Camry have replaceable headlight bulbs?
Toyota states that all U.S.-market 2025 Camry grades use LED headlights and daytime running lights. The low- and high-beam projectors are not conventional halogen bulbs reached through a simple rear socket. A failed light needs system diagnosis to determine whether the assembly, driver, wiring, connector, fuse, or another component is responsible.
Will AutoZone replace a headlight bulb for me?
AutoZone states that it does not provide mechanical or repair services for headlight replacement, although employees can help identify products and answer questions. Do not assume installation is available. Call the selected store before visiting to ask what product or informational assistance it can provide.
How do I know which headlight bulb fits my Toyota Camry?
Check the owner’s manual, the marking on the original bulb, the rear housing label, a Toyota parts catalog, or a reliable VIN-based lookup. Match the exact bulb category, base, connector, electrical rating, wattage, and application rather than choosing by appearance alone.
How can I tell whether my Camry has LED headlights?
Review the lighting specifications in the owner’s manual, Toyota’s model-year brochure, or parts information tied to the VIN. A factory LED headlamp may not have a conventional removable headlight-bulb socket. A visible rear cover does not necessarily mean that the LED projector is user-serviceable.
Can I replace a Camry halogen bulb with an LED bulb?
Do not choose an LED conversion simply because its base fits the halogen socket. The reflector or projector was designed around a specific light-source position and output. An unsuitable conversion can cause glare, poor distance lighting, warning messages, heat damage, or noncompliance with local lighting rules. Use only a replacement approved for the exact headlamp and jurisdiction.
Do I need to disconnect the battery before changing the bulb?
A 12-volt battery disconnection is not usually necessary for a simple halogen replacement when the ignition and lights are off, but the model-specific manual takes priority. Do not disconnect or service HID or integrated LED electrical components without the correct procedure, training, and safety precautions.
Why is the new headlight bulb still not working?
The plug may not be fully connected, the bulb may be incorrect or defective, or the vehicle may have a blown fuse, damaged socket, wiring fault, control-module problem, failed ballast, failed LED driver, or integrated headlamp fault. Switch the lights off before inspecting connections and arrange diagnosis when the cause is not visible.
Should I replace both headlight bulbs at the same time?
Replacing both serviceable halogen bulbs can provide more consistent color and output when they are the same age, but it is not always required. Use matching approved specifications on both sides. Do not automatically replace a working LED assembly or costly HID component solely to create a pair.
Conclusion
A Toyota Camry headlight bulb replacement is manageable when the vehicle has an accessible, separately serviceable bulb. The essential first step is identifying the exact model-year headlamp system rather than assuming every Camry uses the same bulb or access method.
Use the specified replacement, work with the lights and ignition off, protect halogen glass from contamination, restore every weather seal, and check the beam before driving. Stop when you encounter an integrated LED assembly, HID high-voltage equipment, melted wiring, repeated fuse failure, standing water, or disassembly beyond your experience.
Sources
- Toyota Manuals and Warranties: 2025 Camry — official model-year owner information and manual access.
- Toyota Manuals and Warranties: 2017 Camry — earlier model-year manual access and serviceable-lighting reference.
- Toyota: 2025 Camry Model Information — confirms LED headlights and daytime running lights on all U.S. grades.
- 49 CFR 571.108, Federal Motor Vehicle Safety Standard No. 108 — definitions and requirements for vehicle lamps, headlamps, and replaceable light sources.
- NHTSA Interpretation on HID Conversion Equipment — explains compliance concerns when a different lighting technology is made to fit a regulated halogen source.
- Sylvania Automotive Halogen Guidance — supports handling halogen bulbs with gloves or a clean towel and avoiding contact with the glass.
