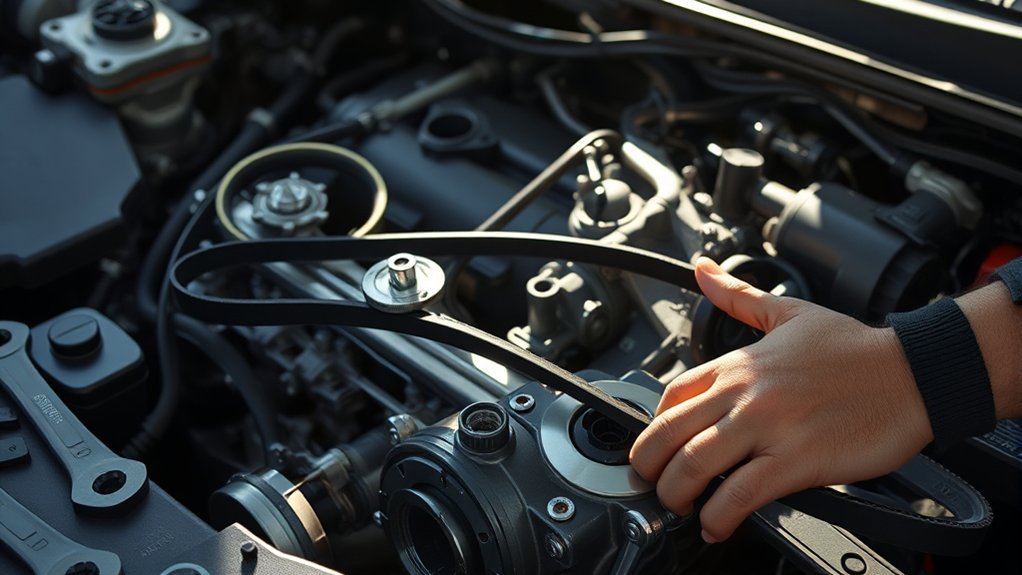
Replacing a Toyota Camry serpentine belt can be a manageable DIY repair, but the first question is whether your exact Camry has a conventional serviceable accessory belt. Belt layout, part number, routing, tensioner operation, and access vary by model year, engine, powertrain, and market. Identify the vehicle by VIN and obtain the matching Toyota procedure before buying parts or moving the tensioner.
Last updated: July 13, 2026
Quick Answer
First confirm that your Camry actually has a conventional serviceable drive belt. Then match the belt and procedure by VIN and engine, photograph the routing, unload the correct tensioner slowly, inspect all pulleys and leaks, install the belt with every rib seated, and watch its tracking from a safe position before driving.
Key Takeaways
- A single socket size, belt route, access method, or replacement interval does not apply to every Toyota Camry.
- The U.S.-market 2025 and 2026 Camry are hybrid-only, so owners must confirm that a conventional serviceable belt is present before ordering one.
- Use the VIN, engine information, Toyota parts data, under-hood label, and factory repair procedure to verify the belt and tensioner method.
- Inspect the tensioner, idlers, accessory pulleys, alignment, fluid leaks, and the old belt’s failure pattern before installing the replacement.
- Stop the repair if it requires unfamiliar engine support, high-voltage work, unsafe lifting, or control of a tensioner you cannot move smoothly.
At a Glance
| Time Required | Varies widely by engine, access, corrosion, and experience. Wheel-well panels, splash shields, mount-related procedures, or additional diagnosis can make the repair substantially longer than a simple top-access job. |
| Difficulty | Moderate. Restricted access, hidden lower pulleys, a strong tensioner spring, and model-specific routing can make the job unsuitable for a first repair. |
| Tools Needed | The specified tensioner tool, socket, or wrench; safety glasses; close-fitting gloves; flashlight; camera; routing reference; inspection mirror; and any lifting or access tools listed in the Toyota procedure. |
| Cost | Depends on the VIN-matched belt, related tensioner or pulley wear, access requirements, labor rate, and region. Obtain a current local quote rather than relying on a universal Camry price. |
Does Your Toyota Camry Have a Serpentine Belt?
Do not assume that every Camry has the same external drive-belt system. Toyota has sold the Camry with several gasoline engines, hybrid systems, drivetrains, and market-specific configurations. Some have a conventional V-ribbed accessory belt, while others use more electrically driven components and may not have the belt expected from a gasoline-model tutorial.
| Camry Configuration | What the Published Information Shows | What the Owner Should Do |
|---|---|---|
| 2025–2026 U.S.-market Camry | Toyota introduced the 2025 Camry as an exclusively hybrid model, and the 2025 maintenance guide does not list the drive-belt maintenance item found in the 2023 guide. | Do not order a conventional serpentine belt until Toyota parts data or the VIN-matched repair information confirms that one is fitted. |
| 2018–2024 Camry | Gasoline and hybrid configurations were offered. Toyota’s 2023 Camry maintenance guide includes drive-belt inspection, but applicability and routing still depend on the powertrain. | Identify the engine and hybrid or non-hybrid configuration before selecting a belt, routing diagram, or tool. |
| 2017 and earlier Camry | Numerous engine and accessory-drive arrangements were used across the generations. | Use the VIN and exact engine code. Do not transfer a route, socket size, or tensioning method from a different year or engine. |
| Camry sold outside the United States | Engines, trims, parts, and maintenance documentation can differ by market. | Use Toyota documentation and parts information for the country in which the vehicle was originally sold. |
For current-generation context, see Toyota’s 2025 Camry launch information, the current Toyota Camry product page, and the 2025 Camry Warranty and Maintenance Guide.
Note: A parts-store result or online video that says “fits Toyota Camry” is not enough. Match the model year, VIN, engine, hybrid status, drivetrain, market, and production information before treating the procedure as applicable.
Why Replace the Serpentine Belt on a Toyota Camry?
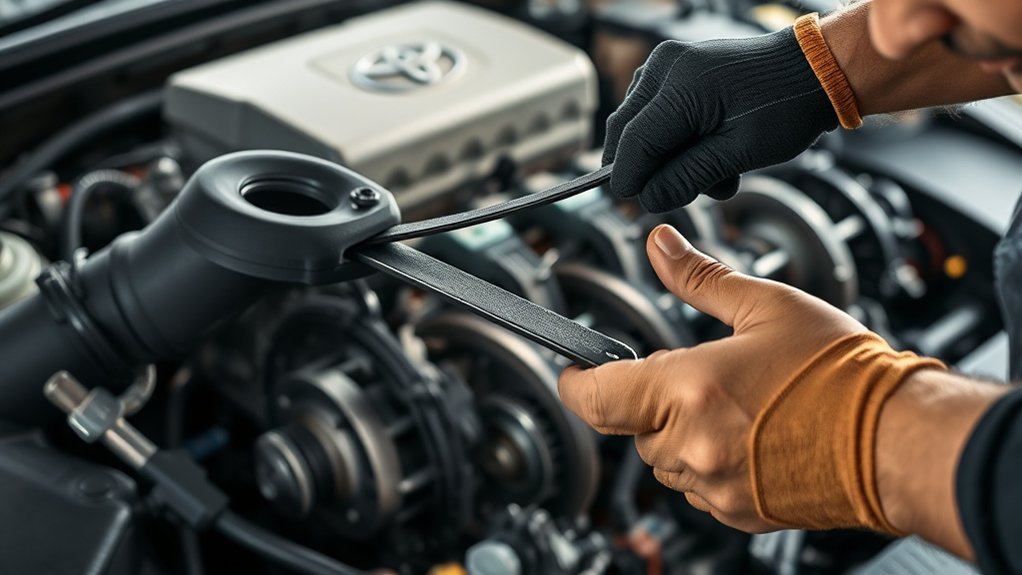
A serpentine belt, also called an accessory belt, drive belt, multi-rib belt, or V-ribbed belt, transfers power from the engine’s crankshaft pulley to selected accessories. Depending on the Camry’s year and engine, those accessories may include the alternator, air-conditioning compressor, water pump, or other components.
The exact layout is not the same on every Camry. Many versions use electric power steering rather than a belt-driven hydraulic pump. Hybrid powertrains can also use electric motor-generators and electrically operated accessories, so they may not have the same conventional serviceable belt found on a non-hybrid gasoline model.
A worn, contaminated, incorrectly routed, or misaligned belt can squeal, chirp, slip, fray, shed ribs, or come off a pulley. If the belt stops driving an alternator, water pump, or another essential component, the vehicle may develop a charging warning, overheating condition, or loss of the affected accessory. The consequences depend on what that belt drives on the exact engine.
Do not rely on one universal mileage interval. Check the maintenance guide for the exact vehicle through the Toyota Manuals and Warranties portal. Replace the belt when the applicable schedule, visible damage, rib wear, contamination, noise, poor tracking, or a qualified inspection indicates replacement is needed.
Serpentine Belt vs. Timing Belt or Timing Chain
A serpentine belt and an engine timing system are not interchangeable terms.
| System | Purpose | Typical Location and Service |
|---|---|---|
| Serpentine or V-ribbed belt | Drives external engine accessories selected by the powertrain design. | Runs on exposed external pulleys and may be replaceable without opening the engine. |
| Timing belt or timing chain | Synchronizes the crankshaft and camshaft so the engine valves operate at the correct time. | Located behind engine covers or inside the lubricated engine assembly. Replacement is a different and usually more involved repair. |
Do not use a timing-belt interval, timing-chain tutorial, or timing-cover diagram as a serpentine-belt reference. Confirm which system the maintenance document is discussing before ordering parts.
Confirm Your Camry Configuration Before Starting
Before ordering a belt, record the Camry’s model year, engine, drivetrain, market, and 17-character VIN. A parts catalog may show several belts for one model year because engine and accessory configurations differ.
- Confirm that a serviceable belt is present. Inspect the documented accessory-drive side of the engine and check the VIN-matched service information. Do not assume that every gasoline or hybrid Camry uses the same layout.
- Match the replacement by VIN. Confirm the Toyota or manufacturer application, printed part number, effective length, width, and rib count rather than comparing only its appearance.
- Identify the engine. Use the emissions label, owner documentation, VIN information, or Toyota parts catalog. Engine displacement alone may not identify every production difference.
- Find the correct routing. Check for an under-hood routing label and compare it with the correct owner information or factory repair manual.
- Verify the tensioner operating point. Identify the exact hex, square-drive point, or specified service tool. Do not confuse it with the pulley’s retaining bolt.
- Verify the movement direction. The direction used to unload the tensioner varies by engine. Moving it the wrong way can loosen or damage a fastener.
- Review the access procedure. Some versions require removal of a cover, splash shield, wheel, or wheel-well panel. More involved layouts may call for engine support or mount-related work that is better handled by a technician.
- Check for superseded parts. A replacement number may differ from the number printed on the removed belt. Confirm that the newer number officially supersedes the original application.
Note: Toyota’s Technical Information System contains model-specific repair manuals, service information, wiring diagrams, precautions, and tool guidance for North American Toyota vehicles. Use the procedure matching the VIN and engine.
Tools You Need for the Job
The required tool list depends on the tensioner design and the amount of access around the engine. Do not buy a socket or long-handled tool solely because it appears in a generic Camry tutorial.
[Amazon Products Picked for You]

Designed to provide access and leverage to hard to reach pulleys

Professional Belt Replacement: This serpentine belt tool kit is designed for removing and installing serpentine belts on vehicles with spring-loaded tensioners. It makes changing the serpentine belt easier
Essential Hand Tools
- The model-specific socket, wrench, breaker bar, or serpentine-belt tool used to unload the tensioner
- A ratchet and sockets for covers, splash shields, wheel-well fasteners, or other access pieces listed in the procedure
- A flashlight or work light
- A phone or camera for recording the original belt route
- A printed or clearly visible routing diagram
- A small inspection mirror for hidden pulley faces and lower belt ribs
- A nonmetallic brush for loose dry debris, when cleaning is permitted by the applicable procedure
- A torque wrench when the factory procedure requires removal and reinstallation of specified fasteners
- Wheel chocks, a suitable jack, and properly rated jack stands if approved access requires raising the vehicle
Do not use a socket size merely because it worked on another Camry. Also distinguish the tensioner’s operating point from the pulley’s center bolt. Turning or loosening the wrong fastener can damage the assembly or release the pulley unexpectedly.
Safety Equipment Required
- Safety glasses
- Close-fitting mechanic’s gloves that cannot catch on components
- Closed-toe shoes
- Wheel chocks when the vehicle could move
- Properly rated jack stands when the vehicle must be raised
Warning: Let the engine cool, select Park, apply the parking brake, switch the vehicle fully off, and keep the smart fob away. On a Camry Hybrid, verify that the READY indicator is off; a silent gasoline engine can start whenever the hybrid system remains READY. Never touch orange high-voltage cables or components, work near a moving belt, or go beneath a vehicle supported only by a jack.
Should You Disconnect the 12-Volt Battery?
Do not treat 12-volt battery disconnection as a universal first step. Follow the exact Toyota repair procedure. Some procedures may require power isolation, while unnecessary disconnection can erase stored settings, affect system initialization, or remove diagnostic information that may help identify a fault.
Disconnecting the 12-volt battery does not make orange hybrid high-voltage components safe for untrained work. If the specified procedure involves high-voltage disabling, orange components, or precautions you do not understand, arrange professional service.
Step-by-Step Guide to Removing the Old Serpentine Belt
- Park safely. Use a hard, level surface, select Park, apply the parking brake, switch the vehicle fully off, and allow the engine to cool.
- Verify shutdown. Remove a conventional ignition key where applicable. For a smart-key vehicle, keep the fob away. On a hybrid, confirm that READY is off.
- Open the correct repair procedure. Confirm the tensioner location, operating point, tool, movement direction, routing, lifting points, and access steps for the exact engine.
- Remove only the required access pieces. Follow the factory procedure for covers, shields, wheels, or wheel-well panels. Keep every fastener organized by location.
- Record the routing. Photograph the belt from several angles. Include the crankshaft pulley, tensioner, idlers, and every driven accessory.
- Inspect before removal. Look for frayed edges, missing ribs, glazed areas, packed debris, fluid contamination, poor tracking, and marks showing contact with a bracket or cover.
- Position the correct tool on the tensioner. Make sure it is fully seated and has a controlled path of movement without slipping into hoses, wiring, bodywork, or your hand.
- Unload the tensioner slowly. Move it only in the direction specified for that engine. Keep fingers away from every belt-to-pulley pinch point.
- Slip the belt from the specified pulley. Use the pulley recommended by the procedure. Do not assume that every smooth or readily accessible pulley is suitable.
- Return the tensioner carefully. Maintain control until it reaches its resting position. Do not let it snap against its stop.
- Remove the old belt. Work it around the remaining pulleys without pulling on wiring, hoses, connectors, sensors, or nearby components.
Warning: Never use the starter or ignition system to “walk” a belt onto or off a pulley. Never lever the belt into position with a screwdriver, pry bar, or other sharp tool.
After removal, compare the old and new belts only as a preliminary check. Confirm that the replacement has the correct catalog application, printed or superseding part number, width, and rib count. The belts should not have an obvious gross size difference, but apparent length alone does not prove fitment because handling, wear, and rib-profile loss can change how the removed belt lies.
What to Do If the Old Belt Broke or Came Off
If the belt has already broken, shredded, or fallen off, do not install another belt until the cause is investigated. The missing belt route must come from the VIN-matched factory diagram or a verified under-hood label—not memory or an image for a similar engine.
- Account for belt debris. Look around the crankshaft pulley, idlers, tensioner, accessory pulleys, covers, and nearby wiring. Remove only accessible loose debris with the engine off.
- Inspect every pulley. Check for a seized bearing, wobble, damaged groove, sharp edge, tilted pulley, or foreign object.
- Inspect the tensioner. Look for an abnormal resting angle, weak return, excessive play, binding, or travel outside its expected range.
- Look for fluid contamination. Oil or coolant may soften or swell the belt and must be traced to its source.
- Check surrounding components. A loose shield, displaced hose, wiring loom, or damaged mount can contact the belt.
- Do not assume the belt was the root cause. A failed tensioner, idler, accessory, bracket, or alignment problem may have destroyed an otherwise serviceable belt.
When a belt comes off or shreds, replacing the belt without finding the cause can lead to an immediate repeat failure.
Drawing Your Belt Routing Diagram
A routing diagram prevents one of the most common installation errors. Make it before moving the tensioner, even when an under-hood label is present.
Essential Diagram Features
Your diagram should identify every pulley, the side of the belt touching it, and the path between components. Mark the tensioner and idler separately, and note any point where the belt passes close to a bracket, hose, wiring harness, mount, or cover.
| Component | What to Record | Important Qualification |
|---|---|---|
| Alternator | Pulley location, belt contact side, and route to adjacent pulleys | Presence and position depend on the powertrain. |
| Power-Steering Pump | Record it only if the engine has a belt-driven hydraulic pump. | Many Camrys use electric power steering and have no belt-driven steering pump. |
| Air-Conditioning Compressor | Pulley location and whether the ribbed or smooth belt surface contacts it | Hybrid and engine configurations may use a different arrangement or an electrically driven compressor. |
| Water Pump | Record the pulley only when the exact engine uses a belt-driven pump. | Do not assume that every Camry water pump is driven by the accessory belt. |
| Idler Pulley | Location, contact side, and direction in which the belt changes course | An idler can be smooth or grooved depending on the design. |
| Tensioner | Operating point, movement direction, pulley contact side, and range of travel | Do not confuse the operating point with the pulley center bolt. |
Common Routing Patterns
The ribbed side of a multi-rib belt normally runs against matching grooved pulleys. The smooth back of the belt normally runs against smooth idlers or tensioner pulleys. That rule helps interpret a verified diagram, but it does not replace the complete route for the exact engine.
Start at the crankshaft pulley and trace the belt in one direction. Draw every change in direction and label each pulley. If the under-hood sticker conflicts with the installed route, stop and verify the vehicle configuration and service information before continuing.
Tips for Accuracy
- Take several photographs. One angle may hide a lower pulley, crossover, or rear belt span.
- Mark smooth and grooved pulleys. This identifies which belt surface should touch each pulley.
- Include the tensioner’s position. Record where the belt enters and leaves its pulley.
- Note nearby obstacles. Record brackets, hoses, wiring, shields, and mount hardware near the belt path.
- Keep the reference visible. Do not rely on memory once the old belt is removed.
- Compare two reliable references. Match the observed route with the under-hood label or correct factory repair information.
Pro Tip: When the vehicle-specific procedure allows it, leave one suitable easy-to-reach pulley until last. Route the belt around every other pulley, unload the tensioner, and slip the belt over the final pulley by hand. Never force it over a flange or pry it into place.
Checking Your Pulleys: Alignment and Functionality
The replacement belt is only one part of the accessory-drive system. Gates advises evaluating the belt, tensioner, idlers, and pulleys as a system because a worn tensioner or pulley can damage a newly installed belt. Its diagnostic guidance is available in the Gates Belt Inspection Changes technical bulletin.
[Amazon Products Picked for You]

Designed to keep drive belt at proper tension

Fitment---Fits for GMC Acadia 3.6L 3564CC 217Cu. In. V6 GAS DOHC Naturally Aspirated 2007-2012; for Buick Enclave 3.6L 3564CC 217Cu. In. V6 GAS DOHC Naturally Aspirated 2008-2012; for Saturn Outlook XE 3.6L 3564CC 217Cu. In. V6 GAS DOHC Naturally Aspirated 2007-2010,for Saturn Outlook XR 3.6L 3564CC 217Cu. In. V6 GAS DOHC Naturally Aspirated 2007-2010; for Chevrolet Traverse 3.6L 3564CC 217Cu. In. V6 GAS DOHC Naturally Aspirated 2009-2012

[Vehicle Fitment-1]: Compatible with Honda Accord 2003-2007 L4 2.4L (Models made in USA.), Civic 2006-2011 L4 2.0L, Civic 2012-2015 L4 2.4L, CR-V 2002-2012 L4 2.4L (Models made in USA.), CR-V 2013-2014 L4 2.4L, Element 2003-2011 L4 2.4L
Visual Inspection Techniques
With the belt removed and the engine fully off, inspect every accessible component:
- Pulley grooves: Look for packed debris, corrosion, damaged ribs, sharp edges, or missing sections.
- Pulley faces: Check for chips, unusual polishing, belt material, or edge contact marks.
- Idlers: Rotate accessible idlers by hand only when the repair procedure permits it. Feel for roughness, binding, looseness, or bearing noise.
- Tensioner pulley: Check for wobble, bearing noise, damaged grooves, or a tilted running surface.
- Tensioner arm: Look for a crooked position, weak or delayed return, excessive play, binding, or an indicator outside its expected range.
- Accessory pulleys: Inspect for wobble, physical damage, or resistance that differs from the applicable service specification.
- Crankshaft pulley: Look for visible deterioration, separation, wobble marks, or displaced material where the design uses a bonded damper.
- Nearby leaks: Look for engine oil, coolant, or another fluid that could reach the belt.
- Surrounding parts: Check shields, hoses, wiring, fasteners, and brackets for evidence of belt contact.
Do not force or spin a component in a way that conflicts with the factory procedure. Some accessories naturally resist rotation, contain clutches, or cannot be assessed accurately by hand.
Common Alignment Issues
Misalignment can produce frayed belt edges, repeated chirping, polished pulley edges, belt dust, or a belt that walks sideways. Possible causes include:
- A worn tensioner pivot or pulley bearing
- A damaged or incorrectly installed idler
- A bent or loose accessory bracket
- An accessory pulley that is loose, tilted, or incorrectly positioned
- A deteriorated crankshaft pulley or damper
- Debris trapped in pulley grooves
- An incorrect belt width or rib count
- A belt routed around the wrong side of a pulley
- A cover, hose, wiring loom, or mount component contacting the belt
A straightedge may help reveal an obvious offset across suitable pulley faces, but it cannot replace the model-specific alignment procedure. Stop if a pulley wobbles, sits at an angle, has a sharp damaged edge, or shows signs of structural failure.
What the Old Belt Can Tell You
| Observed Damage | Possible Meaning | Inspection Priority |
|---|---|---|
| Wear or fraying on one edge | Side tracking, pulley misalignment, tilted tensioner, or contact with a flange or bracket | Check the complete alignment and nearby clearance before installing a belt. |
| Glazed or polished surface | Slip, heat, incorrect tension, contamination, or a binding accessory | Inspect tensioner operation, pulley resistance, routing, and contamination. |
| Missing or damaged ribs | Pulley damage, debris, severe wear, incorrect seating, or edge contact | Inspect every groove and pulley edge and locate all loose belt material. |
| Oil or coolant contamination | A leak has reached the belt and may have altered its friction or material condition. | Repair the leak and clean affected pulleys by the approved method before installing a replacement. |
| Crosswise cuts or localized damage | Foreign-object damage, a damaged pulley, or contact with nearby hardware | Find the contact point or debris source before operating the engine. |
Installing Your New Serpentine Belt Properly
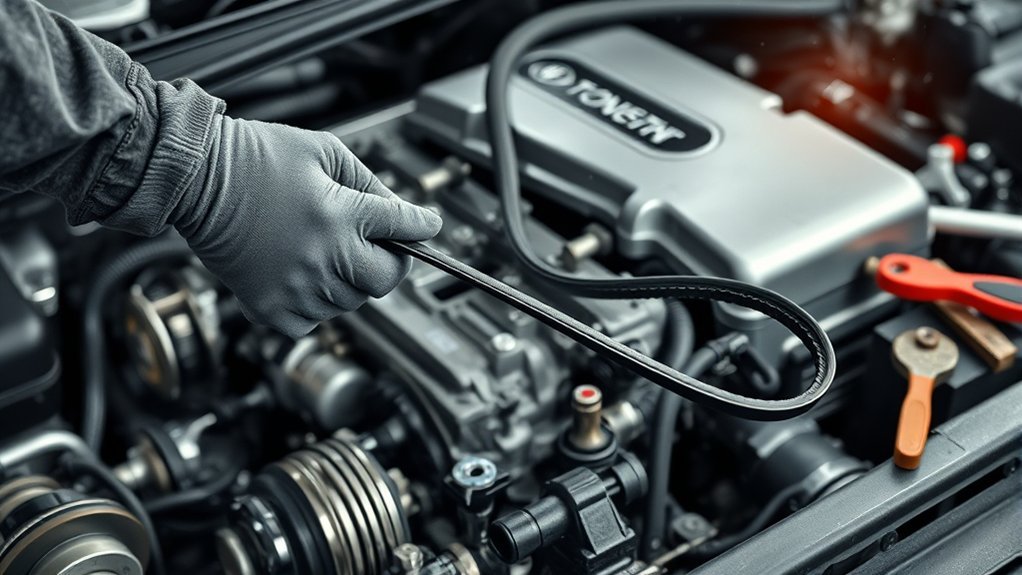
- Confirm the new belt again. Check the VIN-based application, part number or approved supersession, rib count, width, and specified length before feeding it into the engine bay.
- Check the belt for shipping damage. Do not install a belt with cuts, crushed ribs, exposed cord, contamination, or a permanent sharp kink.
- Follow the verified route. Begin around the lower or least accessible pulleys and leave the procedure-approved accessible pulley until last.
- Follow directional markings if present. Install the belt in the direction indicated by its manufacturer when arrows or other direction markings are printed on it.
- Seat each section completely. Every rib must sit inside its matching pulley groove. The belt must lie flat and centered on each smooth pulley.
- Check for twists. The belt must not flip between pulleys, cross itself, or run against a pulley flange.
- Unload the tensioner slowly. Use the correct operating point, tool, and movement direction.
- Slip the belt over the final pulley. Use your hand and the tensioner’s available travel. Do not pry, stretch, trim, or force the belt.
- Release the tensioner gradually. Watch the belt settle as the spring applies tension.
- Inspect every pulley again. Use a flashlight and mirror to check hidden lower ribs, smooth-pulley centering, and every belt edge.
A belt that appears correct on the upper pulleys can still be one groove off on a lower pulley. Check the complete route before reinstalling covers or starting the vehicle.
Top Installation Mistakes to Avoid
- Using a generic belt or tool listing. Confirm the application by VIN, engine, and powertrain.
- Assuming a current hybrid has the same belt as an older gasoline Camry. Verify that a serviceable belt exists before ordering one.
- Skipping the routing record. A guessed route can leave the belt improperly tensioned, contact a nearby component, or turn an accessory incorrectly.
- Turning the wrong tensioner fastener. Do not loosen the pulley center bolt unless the factory procedure specifically requires removal.
- Moving the tensioner in the wrong direction. Confirm the direction before applying force.
- Releasing the tensioner abruptly. A sudden release can damage the tensioner, belt, tool, or nearby components.
- Leaving one rib off a pulley. The belt can fray, walk off, shed ribs, or damage a pulley edge.
- Installing over a seized or rough pulley. A new belt will not correct a failed bearing, tensioner, or accessory.
- Ignoring oil or coolant contamination. Correct the leak and clean the drive system by the approved method before fitting another belt.
- Using belt dressing. Sprays can mask a symptom without correcting wear, contamination, incorrect tension, or misalignment.
- Using the starter to fit the belt. Starter-assisted installation creates severe pinch and entanglement risks.
- Starting the engine with tools in the bay. Account for every socket, light, wrench, fastener, rag, and diagram first.
How to Ensure Your Installation Is Successful
- Trace the full route. Compare it with your photographs, under-hood label, and verified diagram.
- Inspect every rib. Confirm that none rides on a pulley peak or hangs over an edge.
- Check smooth pulleys. The back of the belt should lie flat and centered on the applicable smooth surfaces.
- Check the tensioner position. Make sure it has applied tension and is not resting against an abnormal stop.
- Inspect clearances. The belt must not touch covers, brackets, hoses, wiring, engine-mount hardware, or shields.
- Reinstall access parts. Fit every shield, wheel-well panel, wheel, and cover according to the procedure. Tighten removed fasteners to the applicable specification.
- Remove all tools. Check the engine bay, wheel well, underbody, and work area twice.
- Start the vehicle safely. Stand clear of the belt path and observe from a stable position without leaning over rotating components.
- Watch the belt track. It should remain centered without lateral movement, whipping, smoke, loose strands, or severe noise.
- Shut the vehicle off and reinspect. After the initial observation, wait for all movement to stop and recheck rib seating, tracking marks, tensioner position, and nearby clearances.
- Perform a cautious local test only when normal. Stop immediately for warning lights, rising temperature, burning odor, abnormal noise, or loss of an accessory.
- Recheck after the first trip. With the engine off and cool, inspect tracking and belt edges again. A spring-loaded tensioner does not require arbitrary manual retightening.
A new belt cannot correct a seized pulley, failing tensioner, incorrect route, fluid leak, damaged damper, or pulley misalignment.
Troubleshooting After Serpentine Belt Replacement
| Symptom | Possible Cause | Next Step |
|---|---|---|
| Immediate squeal | Incorrect routing, contamination, weak tensioner, wrong belt, poor seating, or a binding accessory | Switch off the engine and recheck the complete system. Do not apply belt dressing. |
| Rhythmic chirp | Pulley misalignment, damaged groove, tilted pulley, or belt-edge contact | Inspect tracking, pulley faces, brackets, tensioner alignment, and belt position. |
| Belt moves sideways | One rib is off, a pulley is tilted, a damper is damaged, or the tensioner is worn | Stop the engine immediately. Correct the seating or alignment before further operation. |
| Frayed edge | Pulley-edge contact, incorrect width, damaged pulley, poor alignment, or nearby-component contact | Do not continue driving until the cause is identified and the damaged belt is assessed. |
| Black belt dust | Slip, misalignment, damaged grooves, incorrect belt, or rubbing | Shut the engine off and inspect the belt path, tensioner, grooves, and clearances. |
| Battery warning light | The alternator is not being driven correctly or a separate charging-system fault is present | Stop when safe, switch the engine off, and inspect the route and charging system. |
| Engine temperature rises | A belt-driven cooling component may not be operating on configurations that use one, or another cooling fault is present | Stop safely and switch off the engine. Do not continue driving an overheating vehicle. |
| Air conditioning stops cooling | The compressor is not being driven on a belt-driven configuration, the belt is slipping, or an unrelated A/C fault exists | Inspect the belt only when the vehicle is fully off. Diagnose the A/C system if belt operation is normal. |
| Belt comes off again | Incorrect route, serious misalignment, failed tensioner, damaged pulley, seized accessory, or wrong belt | Do not reinstall it repeatedly. Arrange a complete accessory-drive inspection. |
What Are the Signs You Need a New Serpentine Belt?
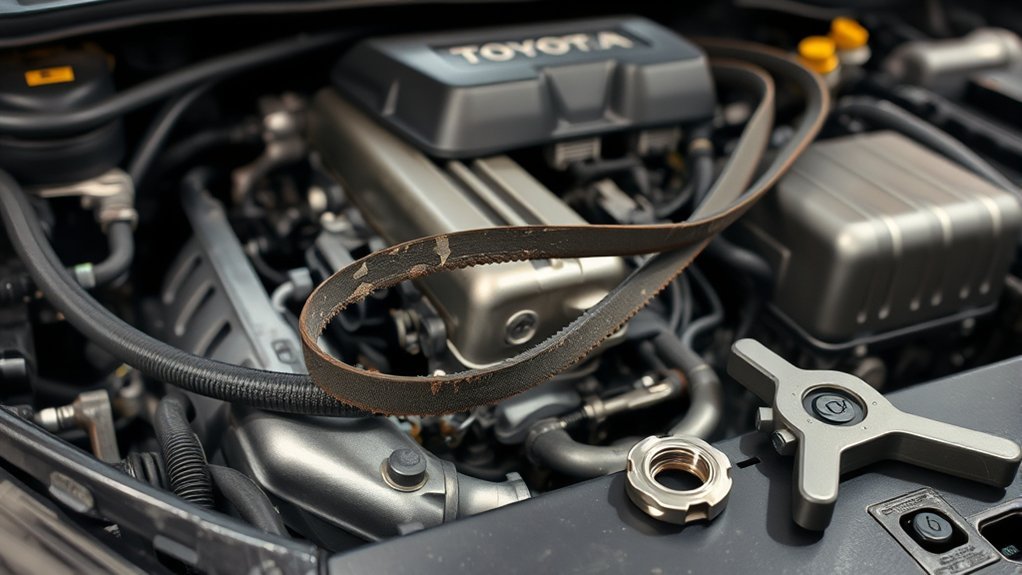
Inspect the belt and complete accessory-drive system when you notice any of these conditions:
- Frayed or damaged belt edges
- Missing ribs or pieces of belt material
- Deep cracks, cuts, punctures, exposed cord, or layer separation
- Rounded, widened, or visibly worn rib profiles
- A shiny, hardened, glazed, or contaminated surface
- Oil or coolant on the belt
- Squealing, chirping, slapping, rubbing, or grinding from the accessory-drive area
- A belt that rides near or over a pulley edge
- Visible tensioner wobble or excessive arm movement
- Black belt dust around the pulleys
- A charging warning or loss of a belt-driven accessory
- A belt that has come off a pulley
Modern automotive multi-rib belts commonly use EPDM compounds that can lose rib material without developing the obvious cracking associated with older belt materials. Do not judge belt condition by one crack-count rule. Review the rib profile, edges, contamination, tensioner, idlers, alignment, mileage, and accessory operation together. Gates explains this wear pattern in its belt-inspection technical bulletin.
How Quality Parts Impact Performance and Longevity
Select a replacement belt that matches the original application by VIN, engine, part number or approved supersession, rib count, width, and effective length. An OE-quality or reputable application-specific belt should fit the pulley system without forcing, stretching, trimming, rerouting, or bypassing an intended component.
Consider the belt together with the tensioner and idlers. Replacing the belt alone may produce only a temporary improvement when a bearing is rough, the tensioner is weak or misaligned, a damper is deteriorated, or an accessory is binding.
Do not automatically replace every related component solely because the belt is being changed. Inspect and test them according to the Toyota procedure, then replace parts that are defective, outside specification, or included in an applicable repair instruction.
A correct belt and healthy drive system support stable tracking, low noise, and normal accessory operation. Do not expect a replacement belt to create a measurable fuel-economy improvement or correct an unrelated engine-performance problem.
[Amazon Products Picked for You]

[Vehicle Fitment]: Compatible with Toyota Camry 2002 L4 2.4L (Location: Air Conditioning), Toyota Camry 2003-2006 L4 2.4L, Highlander 2001-2007 L4 2.4L, RAV4 2001-2003 L4 2.0L (Location: Air Conditioning), RAV4 2004-2005 L4 2.4L, Solara 2002 L4 2.4L (Location: Air Conditioning), Solara 2003-2008 L4 2.4L; Compatible with Scion tC 2005-2006 L4 2.4L (Without Aftermarket TRD Supercharger), xB 2008-2011 L4 2.4L --- Gas Only

[Vehicle Fitment]: ① Compatible with Toyota Camry 2012-2017 L4 2.5L, RAV4 2009-2018 L4 2.5L; ② Compatible with Scion tC 2011-2016 L4 2.5L --- Fits DOHC Engine Only
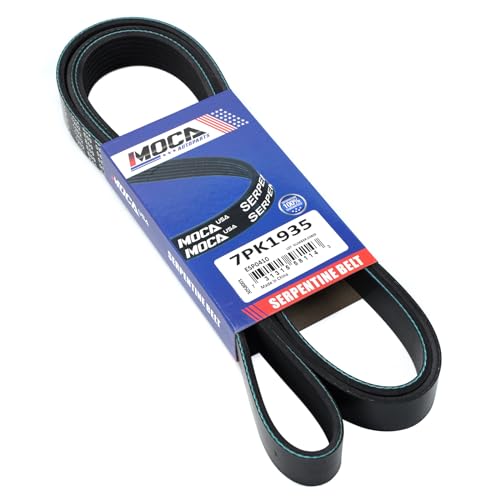
Please confirm this item fits for your vehicle (Check Fitment Data Above or see description below).
When Should a Professional Replace the Belt?
Arrange professional service when:
- You cannot confirm whether the vehicle has a conventional serviceable accessory belt.
- You cannot confirm the engine, belt, routing diagram, or tensioner operating point.
- The Camry Hybrid procedure places the work near orange high-voltage components.
- The repair requires high-voltage disabling, engine support, mount removal, or unfamiliar lifting procedures.
- The tensioner is difficult to control, binds, or does not return smoothly.
- A pulley wobbles, grinds, binds, sits out of alignment, or has a damaged edge.
- The crankshaft pulley or damper appears separated or distorted.
- Oil or coolant is leaking onto the belt.
- The previous belt came off or shredded without a confirmed cause.
- The new belt repeatedly squeals, wanders, frays, sheds dust, or comes off.
- A charging or overheating warning appears after installation.
- You lack safe lifting equipment for required wheel-well or underbody access.
Frequently Asked Questions
How much does it cost to replace a serpentine belt on a Toyota Camry?
The total depends on the model year, engine, belt specification, local labor rate, access requirements, and whether the tensioner, idlers, pulley, or leaking component also needs repair. Request a VIN-based local estimate rather than relying on one nationwide figure.
Is it easy to replace a serpentine belt by yourself?
It can be manageable on a gasoline model with clear access, a controllable tensioner, and a verified procedure. It is more difficult when routing is hidden, wheel-well access is required, the tensioner spring is strong, or engine-support or hybrid-system precautions are involved.
How often should I change the serpentine belt on my Toyota Camry?
Use the maintenance guide for the exact model year and powertrain. Replace the belt sooner when it is damaged, contaminated, misaligned, noisy, poorly tracked, or affected by a failed tensioner, idler, pulley, accessory, or fluid leak.
Where is the serpentine belt on a Toyota Camry?
On engines that use one, the belt is on the accessory-drive side of the engine and runs around the crankshaft pulley and selected accessories. Visibility may be better from above or through a wheel-well access area, depending on the engine and body configuration.
Do all Toyota Camrys have a conventional serpentine belt?
No. Belt layouts vary by model year, engine, hybrid system, and market. Some configurations use electrically driven accessories and do not have the same conventional serviceable accessory belt expected from a gasoline-model tutorial. Confirm the layout by VIN and Toyota documentation.
Does a 2025 or 2026 Toyota Camry have a conventional serpentine belt?
The U.S.-market 2025 and 2026 Camry are hybrid-only. Toyota’s 2025 maintenance guide does not list the drive-belt maintenance item found in the 2023 Camry guide. Do not purchase a conventional belt unless VIN-matched Toyota parts or repair information confirms that one is fitted to the exact vehicle.
Is the serpentine belt the same as the timing belt?
No. A serpentine or V-ribbed belt drives external accessories. A timing belt or timing chain synchronizes the crankshaft and camshaft inside or behind the engine’s timing covers. Their parts, intervals, procedures, and risks are different.
Should I replace the tensioner and idlers with the belt?
Inspect them whenever the belt is removed. Replace a component that binds, wobbles, grinds, returns weakly, sits out of alignment, falls outside specification, or is included in the applicable repair instruction. Do not assume every pulley must be replaced automatically.
What should I check if the old belt broke or came off?
Check for a seized or tilted pulley, failed tensioner, damaged crankshaft pulley, incorrect alignment, fluid contamination, foreign debris, nearby-component contact, and loose belt material. Find the root cause before installing another belt.
Can I drive with a squealing serpentine belt?
Persistent squealing can indicate contamination, slip, incorrect routing, poor seating, a weak tensioner, misalignment, or a binding accessory. Continued driving could lead to belt loss and loss of a driven component. Arrange prompt inspection and stop immediately for a charging or overheating warning.
Conclusion
A successful Toyota Camry serpentine belt replacement starts by confirming that the exact vehicle has a conventional serviceable accessory belt. This is especially important for the hybrid-only 2025–2026 U.S. Camry. Identify the VIN and engine, verify the belt and procedure, record the route, control the tensioner carefully, and inspect the full drive system before installing the replacement.
After installation, check every rib and clearance, account for all tools, observe the belt from a safe position, then shut the vehicle off and reinspect it. Stop immediately if the belt wanders, frays, smokes, sheds dust, or produces severe noise. When high-voltage components, engine support, unsafe access, a failed pulley, or an unexplained previous belt failure makes the repair uncertain, professional service is the safer choice.
Sources
- Toyota Technical Information System — model-specific repair procedures, precautions, wiring information, and tool guidance.
- 2025 Toyota Camry Warranty and Maintenance Guide — current-generation U.S. maintenance schedule and maintenance-item descriptions.
- 2023 Toyota Camry Warranty and Maintenance Guide — drive-belt inspection guidance for the applicable earlier-generation configurations.
- Toyota Camry Goes Exclusively Hybrid — Toyota’s official 2025 Camry powertrain announcement.
- Toyota Camry Official Model Page — current U.S. Camry powertrain information.
- Gates Belt Inspection Changes Technical Bulletin — EPDM rib wear, belt inspection, tensioner evaluation, and system-level diagnosis.
