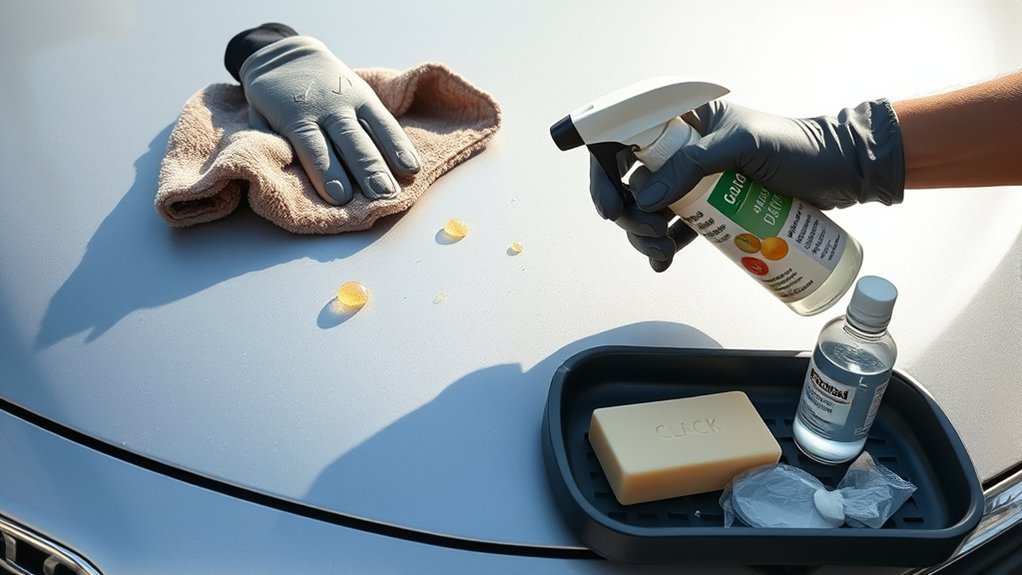
Tree sap is easiest to remove from a Toyota Camry when you work slowly, keep the paint cool, and begin with the least aggressive method. Wash away loose dirt first, soften the deposit, and use a cleaner specifically labeled for automotive paint. Reserve stronger solvents and detailing clay for residue that remains after the initial cleaning.
Quick Answer
Wash and dry the affected panel in the shade. Soften the sap with a damp microfiber towel, then apply a tree-sap or bug-and-tar remover labeled safe for automotive clear coat. Wipe gently, wash away the cleaner, and use lubricated detailing clay only for a thin film that remains. Finish with wax or sealant.
Key Takeaways
- Work on cool paint in the shade, and wash off loose grit before touching the sap.
- Use the mildest effective method first: warm water, automotive shampoo, then a labeled automotive sap remover.
- Do not scrape hardened sap with a blade or rub it aggressively with a dry towel.
- Use detailing clay only with plenty of lubricant and only after the main sap deposit has been removed.
- Stop and seek professional help if the clear coat is cracked, peeling, deeply stained, or still marked after the residue is gone.
At a Glance
| Time Required | About 15–45 minutes, depending on how old and hardened the sap is |
| Difficulty | Easy for fresh sap; moderate for dried or heat-baked deposits |
| Tools Needed | Automotive shampoo, water, clean microfiber towels, automotive sap remover, gloves, and optional fine-grade clay with clay lubricant |
| Cost | No added cost if you already have detailing supplies; otherwise it varies by the cleaner and paint protectant purchased |
Why You Need to Remove Tree Sap From Your Camry Promptly

Fresh tree sap may be soft enough to remove with automotive shampoo and warm water. As it sits in the sun, however, it can harden into a stubborn raised deposit. Dirt may also become embedded in it, increasing the chance of scratching the clear coat if you scrub or scrape the spot.
Delayed removal does not guarantee permanent damage, but old or heat-baked sap can leave staining, dullness, or an outline that remains after the sticky material is gone. That remaining mark may require machine polishing or professional paint correction rather than additional solvent.
Toyota publishes model- and year-specific exterior-care information through its official Manuals and Warranties portal. Check the manual for your Camry before using a strong cleaner, especially if the panel has been repainted or has an aftermarket coating.
Warning: Work on cool paint in a shaded, ventilated area. Isopropyl alcohol and many aerosol cleaners are flammable. Keep them away from cigarettes, flames, hot tools, sparks, and other ignition sources. Wear gloves, avoid eye contact, and never mix cleaning chemicals.
Inspect the Surface Before Removing Sap
Before choosing a cleaner, identify the surface beneath the sap and inspect its condition.
- Factory-style glossy paint: The procedure below is intended primarily for cured, clear-coated automotive paint in sound condition.
- Repainted panel: Ask the body shop how long the paint must cure and which solvents are permitted. Fresh repair paint may be more sensitive than the original finish.
- Matte or satin paint: Do not clay, polish, or wax the area unless the finish manufacturer specifically permits it. These actions can create a permanent glossy patch.
- Vinyl wrap or paint-protection film: Use only products approved by the wrap or film manufacturer. Solvents, heat, and clay can alter the film or its adhesive.
- Ceramic-coated paint: Use a cleaner approved by the coating manufacturer. Strong solvent treatment or clay may weaken the coating in the treated spot.
- Cracked, peeling, blistered, or exposed paint: Do not use solvent or clay. Have the area examined by a professional detailer or body shop.
Note: A sticky or raised spot is usually remaining contamination. A smooth mark that remains after cleaning may be staining or a clear-coat defect. More solvent will not necessarily remove it.
Essential Supplies for Safe Tree Sap Removal
Gather the supplies before you begin so the cleaner does not dry on the panel while you search for another towel or a bucket of water.
| Supply | Purpose | Required or Optional |
|---|---|---|
| Automotive shampoo and water | Removes loose dirt before sap treatment and washes away cleaner afterward | Required |
| Several clean microfiber towels | Softens, lifts, and wipes residue without reusing a contaminated section | Required |
| Automotive tree-sap or bug-and-tar remover | Dissolves or softens sap when its label lists automotive paint and tree sap | Recommended |
| Protective gloves | Reduces skin contact with sap and cleaning chemicals | Recommended |
| Fine-grade detailing clay | Removes a thin bonded film after the main sap deposit is gone | Optional |
| Dedicated clay lubricant | Allows detailing clay to glide without dragging across the clear coat | Required if using clay |
| Compatible wax or paint sealant | Restores protection after solvent cleaning or claying | Recommended |
Read the complete product label before application. Test the cleaner on a small, inconspicuous painted area and wait long enough to check for discoloration, haze, softening, or gloss changes.
[Amazon Products Picked for You]

SO EASY TO GET RESULTS (CWS_104_16SW) - Add this car wash bug remover to a wash bucket or foam cannon for maximum coverage; rinse easily without streaking or residue

FAST ACTING TAR AND SAP REMOVAL: Breaks down tar, tree sap, and asphalt residue in 30 to 60 seconds; spray on, allow to penetrate, and wipe clean without aggressive scrubbing

Cleans And Removed Bug, Tar/Asphalt, Bird Droppings, Tree Sap, Brake Dust, Gum, Sling and Stickers
Step-by-Step Process for Removing Tree Sap
[Amazon Products Picked for You]

✅ EFFECTIVE TREE SAP REMOVER FOR CARS: Nanoskin Tree Sap Remover is a fast-acting tree sap remover for car paint designed to break down stubborn, aged sap that can affect the appearance of your vehicle. This car cleaner helps restore exterior surfaces and supports regular car care and detailing routines.

Removes - Bumper stickers, gum, bird droppings, tree sap, spray paint, brake dust and asphalt, parking violation stickers and more!

Bug Remover for Cleaning the Bug and Insects off your Cars.
1. Park in the Shade and Let the Paint Cool
Move the Camry out of direct sunlight. The panel should feel cool or only slightly warm to the touch. Do not apply solvent to hot paint, and do not let any cleaner dry on the surface.
2. Wash the Affected Area
Rinse away loose dust and grit. Wash the panel with automotive shampoo and a clean wash mitt or microfiber towel, then rinse it thoroughly. Pat the area dry with a fresh microfiber towel rather than rubbing it forcefully.
3. Soften Fresh Sap With a Damp Towel
For fresh or slightly tacky sap, soak a clean microfiber towel in warm water, wring it out, and hold it over the spot for several minutes. The goal is to soften the deposit before moving it. Do not pick at the sap with a fingernail or try to roll a dry towel over it.
After softening, gently lift the deposit with the towel. Turn to a clean section after each pass so removed sap and grit are not dragged across the paint.
4. Apply an Automotive Sap Remover
If washing and warm water do not remove the sap, use a product whose label specifically lists tree sap and automotive clear coat. Apply it exactly as directed rather than assuming that all adhesive, citrus, or bug removers are paint-safe.
For example, Goo Gone Automotive Spray Gel is labeled for tree sap and automotive clear coat. Its manufacturer directs users to pretest the surface, allow the product a few minutes to work, wipe with a clean cloth, and clean the treated area with soap and water afterward.
Apply the remover to the sap or to a clean microfiber towel according to the label. Let it dwell only for the stated period. Hold or blot the towel against the spot, then wipe in short, gentle passes. Repeat the labeled process rather than increasing pressure.
5. Use Isopropyl Alcohol Only as a Controlled Fallback
If a dedicated automotive product is unavailable and the finish manufacturer does not prohibit alcohol, a small amount of isopropyl alcohol may soften isolated sap. It should not be treated as a harmless all-purpose cleaner.
- Patch-test the finish first.
- Apply a small amount to a microfiber towel instead of pouring it over the panel.
- Keep contact brief and controlled.
- Do not let the alcohol dry on the paint.
- Keep it away from heat, flames, sparks, and smoking materials.
- Wash the treated area with automotive shampoo and water immediately afterward.
- Do not use it on matte paint, wraps, paint-protection film, fresh repair paint, or damaged clear coat without manufacturer approval.
The CDC/NIOSH Pocket Guide for isopropyl alcohol identifies it as a flammable liquid and notes eye, skin, and respiratory irritation risks.
6. Use Lubricated Clay for a Thin Bonded Film
Use detailing clay only when the raised sap deposit is gone but the clean paint still feels slightly rough. Do not use clay to grind down a thick, hard lump.
- Wash the area again so no loosened sap or grit remains.
- Spray the paint generously with dedicated clay lubricant.
- Flatten a small piece of fine-grade clay into a clean pad.
- Move it in short, straight passes with almost no downward pressure.
- Add more lubricant whenever the clay begins to drag.
- Inspect the clay frequently and fold contamination into the center.
- Discard clay that falls on the ground.
Stop when the paint feels smooth. Repeated claying after the contamination is gone can create unnecessary marring.
Pro Tip: Use several small microfiber towels rather than one large towel. Moving to a fresh towel as soon as one becomes sticky reduces the chance of spreading softened sap or dragging debris across the clear coat.
7. Wash, Rinse, and Inspect
Wash the treated area with automotive shampoo to remove solvent, oil, dissolved sap, and clay lubricant. Rinse thoroughly and dry with a clean microfiber towel.
Inspect the panel under indirect daylight from several angles:
- Still sticky or raised: Sap remains. Repeat the labeled remover process after allowing the panel to cool.
- Smooth but dull: The cleaner may have removed wax, or the finish may have light staining or haze.
- Smooth with a visible outline: The residue may be gone, leaving a defect that requires polishing.
- Cracked, peeling, or discolored clear coat: Stop and consult a professional.
8. Restore Paint Protection
Once the paint is clean and dry, apply a compatible wax or sealant to the treated area. Solvent cleaning and clay can reduce or remove existing protection even when the underlying clear coat remains intact.
If the Camry has a ceramic coating, paint-protection film, matte finish, or another specialty surface, use only the maintenance product recommended by that finish manufacturer.
How to Remove Dried or Heat-Baked Tree Sap
Dried sap often requires several gentle treatment cycles. Trying to remove it in one aggressive pass is more likely to scratch or haze the paint.
- Cool and wash the panel.
- Hold a warm, damp microfiber towel over the deposit for several minutes.
- Apply a labeled automotive sap remover and allow only the recommended dwell time.
- Lift softened material with a clean section of microfiber.
- Wash the area before deciding whether another treatment is needed.
- Use lubricated fine-grade clay only if a thin rough film remains after the raised deposit is gone.
If the sap does not soften after repeated label-directed applications, stop. A professional detailer may be able to use controlled heat, specialized chemicals, or machine polishing with less risk than continued home experimentation.
The safest removal method is not the strongest chemical. It is the least aggressive process that releases the sap without changing the paint beneath it.
[Amazon Products Picked for You]

POWERFUL PRE WASH (CLDSPRAY101): Fast acting aerosol breaks down stuck-on bug splatter, tree sap, and tar residue on bumpers and mirrors so your wash mitt glides with less scrubbing.

POWERFUL PRE-WASH (CLDSPRAY10102): Fast-acting aerosol breaks down stuck on bug splatter, tree sap, and tar residue on bumpers and mirrors so your wash mitt glides with less scrubbing.

Heavy-Duty Cleaning Power: Quickly softens and breaks down stubborn road tar, tree sap, bird droppings, adhesive residue, road grime, and other tough contaminants for easier removal
Common Mistakes to Avoid When Removing Tree Sap

- Scrubbing before washing: Dirt around the sap can scratch the paint when it is dragged under a towel.
- Working on a hot panel: Heat can make cleaner evaporate quickly and can cause softened sap to smear.
- Using a fingernail, razor blade, knife, or metal scraper: These can cut or chip the clear coat.
- Using paper towels: They offer less softness and contamination control than a clean automotive microfiber towel.
- Applying excessive solvent: More product is not always more effective and may increase finish and safety risks.
- Allowing cleaner to dry: Residue may become harder to remove or leave a dull patch.
- Using dry detailing clay: Clay must be used on a clean, heavily lubricated surface.
- Applying heavy pressure with clay: Pressure can create marring without improving chemical removal.
- Skipping the final wash: Automotive sap removers, alcohol, and oily products should not be left on the paint.
- Forgetting paint protection: Restore compatible wax or sealant after the surface is clean.
Products and Tools Not to Use on Camry Paint
Avoid improvised methods that can remove sap by also damaging or abrading the finish:
- Acetone or nail-polish remover
- Gasoline or diesel fuel
- Lacquer thinner or paint thinner
- Household scouring powders
- Melamine foam or “magic eraser” pads
- Steel wool or abrasive kitchen pads
- Razor blades, knives, metal scrapers, or stiff brushes
- Dry clay or clay used with plain water when the clay manufacturer requires a dedicated lubricant
- Unlabeled solvent mixtures
Household dish detergent is also a poor routine choice because it is not formulated as an automotive wash lubricant and may remove existing wax. Use automotive shampoo for the cleaning steps.
Removing Sap From Glass, Trim, Wraps, and Special Finishes
Exterior Glass
Wash the glass first and use a product labeled for automotive glass and tree sap. Keep solvent away from nearby painted edges, rubber seals, camera lenses, and plastic trim. Do not use a blade near aftermarket tint film or on an uncertain surface.
Unpainted Plastic or Rubber
Patch-test any cleaner because some solvents can stain, lighten, swell, or dry out trim. Apply the cleaner to a towel for better control, remove the residue promptly, and wash the area afterward.
Vinyl Wrap or Paint-Protection Film
Follow the wrap or film manufacturer’s care instructions. Do not assume a cleaner that is safe on clear coat is safe on adhesive-backed film. Avoid clay, polishing compounds, and extended solvent contact unless the manufacturer approves them.
Matte or Satin Paint
Use only products designed for matte finishes. Do not polish, clay, wax, or repeatedly rub the spot because a change in surface texture can create a permanent glossy patch.
When to Call a Professional Detailer or Body Shop
Stop home treatment and seek professional help when:
- The sap covers a large part of the roof, hood, or trunk.
- The deposit does not soften after repeated label-directed treatment.
- The surface remains stained or outlined after it feels completely smooth.
- The paint becomes hazy, soft, discolored, or unusually sticky.
- The clear coat is cracked, peeling, blistered, or already failing.
- The panel was recently repainted.
- The vehicle has a matte finish, vinyl wrap, paint-protection film, or coating with uncertain chemical compatibility.
- Machine polishing or sanding appears necessary.
A detailer can determine whether the remaining mark is contamination or a paint defect. A body shop is the better choice when the clear coat or color layer has visibly failed.
How to Prevent Future Tree Sap Issues
Prevention will not make paint sap-proof, but it can reduce exposure and make later cleaning easier.
- Inspect the car regularly: Check the hood, roof, trunk, glass, mirrors, and upper doors after parking under trees.
- Remove fresh deposits promptly: Fresh sap is usually easier to soften than a sun-baked deposit.
- Keep the paint protected: Maintain a compatible wax, sealant, coating, or film according to its manufacturer’s schedule.
- Choose parking carefully: Avoid parking directly beneath trees that are actively dripping sap or shedding sticky residue.
- Use a clean, fitted car cover: A dirty or wind-loosened cover can grind dust against the paint. Wash the cover and car before prolonged use.
- Carry a small cleaning kit: Keep clean microfiber towels, water, and a label-approved automotive spot cleaner in the trunk.
- Wash with automotive products: Regular washing removes dust and organic residue before they combine into a harder deposit.
Related Guides
Frequently Asked Questions
How do I remove tree sap without damaging car paint?
Work on cool paint and wash away loose dirt first. Soften the sap with a warm, damp microfiber towel, then use a product labeled for tree sap and automotive clear coat. Allow the product to work, lift the deposit gently, wash off all residue, and restore paint protection. Do not scrape, scrub, or use dry detailing clay.
Will Goo Gone remove tree sap from car paint?
Goo Gone Automotive Spray Gel is specifically labeled for tree sap and automotive clear coat. Pretest the finish, follow the label’s dwell-time directions, wipe with a clean cloth, and wash the area with soap and water afterward. Do not assume every Goo Gone formula has the same approved surfaces or directions.
Can tree sap permanently damage car paint?
It can leave lasting staining, dullness, or a clear-coat defect, particularly when the deposit remains through repeated heat cycles or is removed aggressively. Permanent damage is not inevitable. If the surface feels smooth after cleaning but a mark remains, a professional may need to polish or correct the paint.
Will WD-40 remove tree sap from car paint?
WD-40 may loosen some sticky residue, but it is not the preferred first-line product for Toyota paint. Start with automotive shampoo and a remover specifically labeled for tree sap and clear coat. If WD-40 is used as a last resort, patch-test it, apply very little to a towel, keep it away from ignition sources, and wash the panel thoroughly afterward. Review the current product label and the manufacturer’s Safety Data Sheets before use.
Can isopropyl alcohol damage clear coat?
Brief, controlled use may be tolerated by sound, fully cured clear coat, but compatibility varies with the finish, concentration, exposure time, temperature, and previous repair work. Alcohol can remove wax and may affect specialty finishes. Use a dedicated automotive remover first, patch-test any fallback treatment, prevent it from drying, and wash the area immediately afterward.
Can I use a clay bar to remove tree sap?
Use fine-grade clay only after the main sap deposit has been dissolved and removed. Wash the surface, apply generous clay lubricant, and use light, straight passes. Clay is useful for a thin bonded film, but it should not be used dry or forced over a thick hardened lump.
Why is a mark still visible after the sap is gone?
If the surface feels smooth but an outline, dull spot, or stain remains, you may be seeing altered wax, staining, haze, or a clear-coat defect rather than sap residue. Wash and inspect the area before applying more solvent. Persistent marks should be assessed by a professional detailer.
Conclusion
To remove tree sap from a Toyota Camry safely, begin with a cool, clean panel and the mildest effective method. Soften the deposit before wiping, use a product specifically labeled for automotive paint, and reserve lubricated detailing clay for thin bonded residue. Avoid scraping, excessive pressure, uncontrolled solvent use, and treatments that are not approved for the vehicle’s finish.
After the sap and cleaner are gone, inspect the paint before applying more chemicals. A smooth mark that remains may need polishing rather than additional solvent. Restore compatible wax or sealant, inspect the Camry regularly when it is parked near trees, and seek professional help when the finish is damaged or the sap will not release through gentle, label-directed treatment.
Sources
- Toyota Manuals and Warranties — official access to model- and year-specific Toyota owner manuals and exterior-care guidance.
- Goo Gone Automotive Spray Gel — manufacturer-listed surfaces, tree-sap use, pretesting requirement, application directions, and soap-and-water cleanup.
- CDC/NIOSH Pocket Guide: Isopropyl Alcohol — flammability, exposure routes, symptoms, and handling precautions.
- WD-40 Company Safety Data Sheets — current safety and handling documentation for WD-40 products.
