
Caramelizing onions turns sharp raw onions into soft, sweet, golden-brown strands you can use in soups, burgers, dips, pizzas, pasta, omelets, and sandwiches. The process works best when you cook sliced onions slowly enough for their moisture to evaporate and their natural sugars to brown without burning.
Quick Answer
To caramelize onions quickly, slice them thinly, cook them in a wide pan with oil or butter over medium heat, stir often, and deglaze with small splashes of water when browned bits form. You can get soft, golden onions in about 20 minutes, but deep caramelized onions usually take 45 minutes or longer.
Key Takeaways
- Caramelized onions need steady heat, enough pan space, and regular stirring to become sweet instead of burnt.
- Yellow onions are the easiest choice because they balance sweetness, moisture, and savory flavor well.
- A wide skillet helps moisture evaporate faster, which makes quick caramelization easier.
- Small splashes of water, broth, vinegar, or wine can loosen browned bits and add flavor.
- Store cooled caramelized onions in an airtight container in the refrigerator for a few days, or freeze them for longer storage.
At a Glance
| Time Required | 20 to 60 minutes, depending on the method and how deeply browned you want the onions |
| Difficulty | Easy, but it requires patience and heat control |
| Tools Needed | Sharp knife, cutting board, wide skillet or sauté pan, spoon or spatula |
| Cost | Low; you mainly need onions, cooking fat, and optional seasonings |
Caramelization is not instant. At first, the onions soften and release water. As that moisture cooks off, the onions slowly brown and develop a deeper, sweeter flavor. The Maillard reaction also adds savory, nutty notes as the onions cook.
You can speed up the process, but you cannot skip it completely. High heat may brown the outside quickly, but it can leave the onions harsh, patchy, or scorched. The best quick method uses a wide pan, thin slices, steady stirring, and small splashes of liquid to keep the browned bits from burning.
Choosing the Right Onions for Caramelization
When you want caramelized onions with rich flavor and reliable browning, yellow onions are usually the best place to start. They have a balanced flavor that becomes sweet and savory as they cook. They also work well in French onion soup, burgers, dips, grilled cheese, steak sandwiches, and pasta.
Red onions can also caramelize well. They bring a milder, slightly fruitier sweetness and can add nice color to pizzas, flatbreads, tacos, and salads. They may keep a little sharpness, which can be useful when you want contrast instead of pure sweetness.
White onions can caramelize, but they often taste sharper and may not develop the same rounded sweetness as yellow onions. Sweet onions, such as Vidalia-style onions, can work well too, though they contain more moisture and may take longer to cook down.
Note: You do not need special onions for this technique. If you only have white, red, or sweet onions, use them. Just expect small differences in flavor, moisture, and cooking time.
Preparing Onions for Caramelization

Good preparation makes caramelizing onions easier. Start by peeling off the papery skin and trimming the stem end. Cut the onion in half from root to tip, then slice each half into thin, even half-moons. Even slices cook more evenly and reduce the chance of burnt thin pieces mixed with undercooked thick pieces.
For faster cooking, slice the onions about 1/8 inch thick. Thinner slices soften quickly and release moisture faster. However, do not slice them paper-thin unless you plan to stir often, because very thin pieces can scorch before the whole batch caramelizes.
A wide, heavy-bottomed skillet or sauté pan works best. The wide surface area helps water evaporate, while the heavy base spreads heat more evenly. Stainless steel and cast iron work well because they create flavorful browned bits on the bottom of the pan. Non-stick pans can work too, especially if you are worried about sticking, but they may not build as much fond.
Before adding the onions, heat a small amount of oil, butter, or a mix of both. Butter adds flavor, while oil raises the cooking fat’s tolerance for heat. Add the onions in an even layer, then sprinkle with a small pinch of salt to help draw out moisture.
Pro Tip: Use a larger pan than you think you need. Crowded onions steam instead of brown, so a wide pan gives you better color and faster results.
Cooking Techniques for Caramelizing Onions
| Cooking Technique | Time | Outcome |
|---|---|---|
| Sautéing | 15-20 minutes | Soft, lightly golden onions with mild sweetness |
| Caramelizing | 45-60 minutes | Deep brown, sweet, jammy, and flavorful onions |
| Slow Cooking | 4-6 hours | Very soft, dark onions with intense sweetness and a spreadable texture |
The cooking technique you choose depends on your goal. If you need a quick topping for sandwiches or eggs, a 15- to 20-minute sauté can give you soft, lightly browned onions. If you want true caramelized onions with deep color and sweet flavor, plan on 45 minutes or more.
Start with medium heat to get the onions moving, then lower the heat once they soften and release moisture. Stir every few minutes at first. As the onions darken, stir more often so the sugars do not burn on the bottom of the pan.
As the onions cook, they shrink dramatically. A full pan may look like too much at first, but it will reduce as the water evaporates. Once browned bits form on the pan, add a tablespoon or two of water, broth, wine, or vinegar and scrape them back into the onions. This is called deglazing, and it adds flavor while preventing scorching.
Warning: Do not leave onions unattended once they begin browning. The difference between deeply caramelized and burnt can happen quickly near the end of cooking.
[Amazon Products Picked for You]
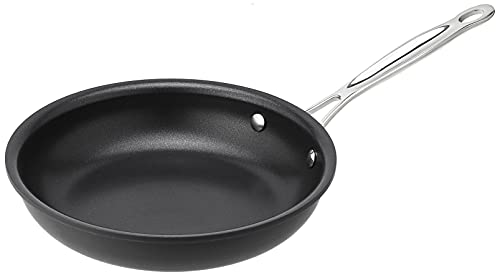
Hard anodized exterior for even heat distribution

Kitchen Tested Over 100,000 Times: Superior cooking performance backed by rigorous durability testing.

【SNOWFLAKE TECHNOLOGY】Our design is created through a laser etching process to provide both stainless steel and non stick surface. This dual surface allows to cook with less oil, grease, and butter.Our clad surface is 50% more than usual Hex surface non stick frying pans.
How to Caramelize Onions Quickly on the Stovetop
Quick caramelized onions work best when you accept that the result will be a little lighter than slow-cooked onions. You can still build sweetness and color in less time by helping moisture evaporate faster.
- Use a wide pan. More surface area helps the onions release steam instead of sitting in their own liquid.
- Slice evenly. Thin, uniform slices soften faster and brown more evenly.
- Start with medium heat. Let the onions soften and release moisture, then reduce the heat if they brown too fast.
- Salt lightly. A small pinch of salt helps draw moisture out of the onions.
- Deglaze as needed. Add small splashes of water to loosen browned bits and keep the pan from burning.
- Finish when they taste sweet. Color matters, but flavor matters more. Stop when the onions are soft, sweet, and browned to your liking.
Some cooks add a tiny pinch of sugar to encourage browning. This can help when onions taste very sharp or watery, but use it lightly. Too much sugar can make the onions taste candied instead of naturally caramelized.
[Amazon Products Picked for You]

EXCEPTIONAL DESIGN: The 5.5-Quart Saute Pan with Helper Handle and Flavor Lock Lid has straight high sides and a flat cooking surface to maximise capacity. Measurement markings provide you with ease of use every time with Drip-Free pouring
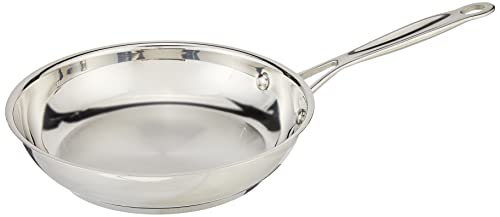
EXCEPTIONAL DESIGN: enjoy mirror finish, classic look and professional performance. Aluminum encapsulated base heats quickly and spreads heat evenly– eliminating hot spots
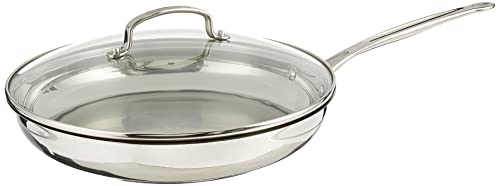
Should You Use Baking Soda for Faster Caramelized Onions?
A small pinch of baking soda can speed up browning by changing the onions’ pH. However, it also changes their texture. Too much baking soda can make onions mushy, slippery, or slightly soapy in taste.
If you try this shortcut, use only a tiny pinch for a full pan of onions. Stir it in after the onions have started to soften. This method works best for dips, soups, or sauces where a softer texture is acceptable. For burgers, sandwiches, or pizza toppings, the stovetop method without baking soda usually gives a better texture.
Note: Baking soda is optional. It can save time, but it is not the best choice when you want distinct onion strands with a silky bite.
[Amazon Products Picked for You]

PURE BAKING SODA - 100% Sodium Bicarbonate

For Baking, Cleaning, and Deodorizing

One 16 ounce carton of Baking Soda
Adding Flavor Enhancements to Caramelized Onions
Caramelized onions taste rich on their own, but a few simple additions can make them even better. Fresh thyme, rosemary, or bay leaf can add an herb flavor that works well in soups, roasts, and savory tarts. Add herbs early if you want them to infuse the cooking fat, or near the end if you want a fresher taste.
Salt is important, but add it carefully. A small pinch early helps draw out moisture. Another small pinch near the end can sharpen the flavor after the onions reduce. If you add salty broth, cheese, or cured meat later, keep the onions lightly seasoned.
Deglazing with balsamic vinegar, apple cider vinegar, red wine, white wine, beer, or broth adds depth. Vinegar gives the onions a sweet-tangy finish. Wine brings acidity and complexity. Broth keeps the flavor savory and works well when you plan to use the onions in soup, gravy, or sauce.
Sweeteners like brown sugar, maple syrup, or honey can push the flavor sweeter, but they should be used sparingly. Caramelized onions already develop sweetness on their own. Add extra sweetener only when you want a jam-like topping for burgers, crostini, or cheese boards.
The best caramelized onions taste sweet, savory, and slightly nutty. If they taste bitter, the heat was probably too high or the pan needed deglazing sooner.
Storing and Using Caramelized Onions

Once your onions are caramelized, let them cool before storing them. Transfer them to an airtight container and keep them in the refrigerator if you plan to use them soon. For longer storage, freeze them in small portions so you can add them to recipes without thawing a large batch.
A practical method is to freeze caramelized onions in tablespoon-sized portions on a lined tray, then move the frozen portions to a freezer-safe bag or container. This makes it easy to add a small amount to sauces, soups, omelets, rice bowls, and pan sauces.
Caramelized onions can upgrade many everyday meals. Stir them into soups for extra depth, spread them on sandwiches or burgers, fold them into mashed potatoes, mix them into dips, or add them to pasta. They also make an excellent topping for pizza, flatbread, steak, grilled cheese, and roasted vegetables.
Quick and Easy Recipes Using Caramelized Onions
Caramelized onions can turn simple recipes into something more flavorful. One classic option is French onion soup. The onions create a sweet, savory base for broth, toasted bread, and melted cheese. The deeper you caramelize the onions, the richer the soup will taste.
Another easy recipe is caramelized onion dip. Mix cooled caramelized onions with cream cheese, sour cream, mayonnaise, a little garlic, and black pepper. Chill the dip before serving so the flavors can blend. Serve it with chips, crackers, or fresh vegetables.
For a lighter option, add caramelized onions to a salad with mixed greens, goat cheese, toasted walnuts, and a simple vinaigrette. The onions add sweetness, the cheese adds tang, and the nuts add crunch.
You can also make a quick caramelized onion grilled cheese. Spread a thin layer of onions between slices of bread with sharp cheddar, Gruyère, or Swiss cheese. Cook until the bread is crisp and the cheese melts. The onions add enough sweetness to make the sandwich taste more complete.
Tips for Perfectly Caramelized Onions Every Time
Perfect caramelized onions depend on patience, pan space, and steady heat. If you rush the process, the onions may burn before they become sweet. If you overcrowd the pan, they may steam and stay pale. Give them enough room and enough time to brown naturally.
Use a mix of butter and oil when you want strong flavor with a little more heat protection. Butter gives the onions a rich taste, while oil helps reduce the risk of burning. Keep the heat moderate and adjust as needed.
Deglaze often near the end of cooking. When brown bits stick to the bottom of the pan, they carry a lot of flavor. A small splash of water, broth, or vinegar lifts those bits and blends them back into the onions.
Do not judge by the clock alone. Onion type, slice thickness, pan size, and heat level all affect cooking time. The onions are ready when they are soft, sweet, deeply golden to brown, and no longer sharp.
Common Mistakes to Avoid
One common mistake is using heat that is too high. High heat may seem faster, but it often creates bitter, burnt edges. Caramelized onions need controlled browning, not aggressive frying.
Another mistake is stirring constantly from the start. You should stir enough to prevent burning, but not so much that the onions never contact the hot pan. Let them sit briefly between stirs so they can brown.
Adding too much liquid can also slow the process. Deglazing helps, but the goal is to use small splashes, not enough liquid to simmer the onions. If the pan looks watery, let the liquid cook off before adding more.
Finally, avoid cooking too many onions in a small pan. A crowded pan traps steam. If you need a large batch, use a large skillet, Dutch oven, or cook the onions in batches.
Sources
- USDA Food Safety and Inspection Service: Leftovers and Food Safety — supports safe cooling and storage practices for cooked foods.
- FoodSafety.gov: Cold Food Storage Charts — supports general refrigerator and freezer storage guidance.
- Science of Cooking: Maillard Reaction — explains browning reactions that contribute flavor during cooking.
If you’re looking to upgrade your kitchen gadgets, you might also be interested in checking out the 5 Best Tea Infusers for Loose Leaf Tea article. Just like mastering the art of caramelizing onions quickly, finding the perfect tea infuser can make a big difference in your daily routine.
Related Guides
Frequently Asked Questions
What are caramelized onions?
Caramelized onions are onions cooked slowly until they become soft, browned, and sweet. The cooking process reduces moisture, softens the onion fibers, and develops deeper flavor through browning.
Why would I want to caramelize onions quickly?
Quick caramelization saves time when you need a sweet onion topping or recipe ingredient without waiting close to an hour. It works well for burgers, sandwiches, dips, omelets, and weeknight meals.
What are some quick methods for caramelizing onions?
Quick methods include using a wide pan, slicing onions thinly, cooking over medium heat, stirring often, and deglazing with small splashes of water. A tiny pinch of baking soda can speed browning, but it may make the onions softer.
Are there any tips for caramelizing onions quickly?
Use a wide skillet, avoid overcrowding, add a small pinch of salt, and stir more often as the onions darken. Deglaze the pan whenever browned bits start to stick so the flavor goes back into the onions instead of burning.
Can I caramelize onions in the microwave?
Yes, you can soften and brown onions in the microwave by cooking thin slices with a little oil in short intervals and stirring between rounds. However, the flavor is usually milder than stovetop caramelized onions because the microwave does not build the same browned pan bits.
How long do caramelized onions take?
Lightly browned onions can take about 15 to 20 minutes. Deep, jammy caramelized onions often take 45 to 60 minutes. The exact time depends on the onion type, slice thickness, pan size, and heat level.
What is the best pan for caramelizing onions?
A wide, heavy-bottomed skillet is best because it spreads heat evenly and gives moisture room to evaporate. Stainless steel and cast iron create strong browned bits, while non-stick pans are easier to manage but may produce less depth.
