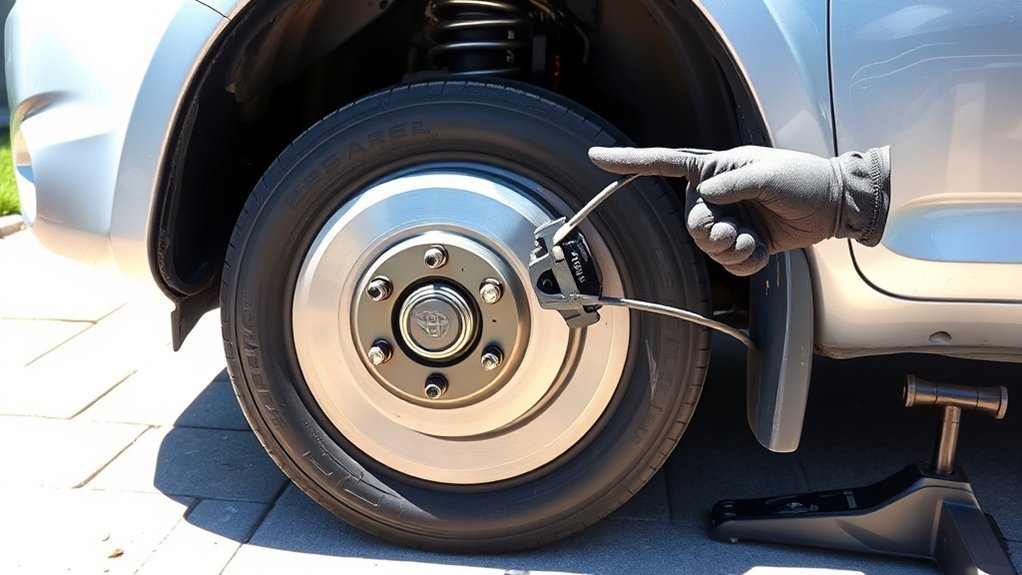
Replacing the driver-side parking brake cable on a 2011 Toyota RAV4 requires more than removing the rear wheel. The cable connects the parking brake lever to separate brake shoes inside the rear rotor, and proper routing and adjustment are essential for safe operation.
This guide explains how to diagnose a faulty cable, inspect the rear brake assembly, remove and install the replacement, and check the finished repair. It also covers important torque specifications and safety steps that are easy to overlook.
Quick Answer
To replace a 2011 Toyota RAV4 driver-side parking brake cable, safely support the vehicle, access the rear parking brake shoes, release the cable from its actuator and equalizer, and remove its mounting clips. Route the new cable correctly, reconnect the hardware, adjust shoe clearance, set lever travel, and confirm proper operation without brake drag.
At a Glance
| Difficulty | Advanced DIY; professional service recommended if airbag sensor or driveline removal is required |
| Tools Needed | 21 mm, 14 mm, 17 mm and other applicable sockets, jack stands, wheel chocks, torque wrench, brake spring tools, screwdriver, and cleaning supplies |
Diagnose the 2011 RAV4 Parking Brake
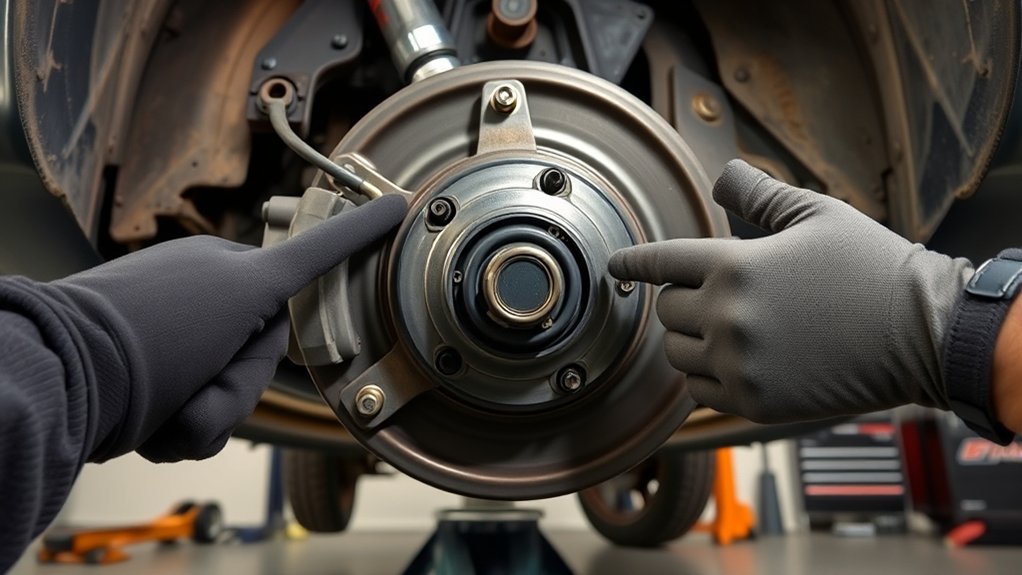
Before replacing the cable, confirm why the parking brake is not working. A weak holding brake does not always mean the cable is damaged. Incorrect shoe clearance, worn linings, and sticking hardware can cause similar symptoms.
The 2011 RAV4 uses a mechanical cable-operated parking brake. The rear parking brake shoes press against a drum surface inside each rear brake rotor. These shoes work separately from the normal hydraulic disc brake pads.
Look for these warning signs:
- Excessive lever travel: The lever rises unusually high before the parking brake holds.
- Poor holding force: The vehicle does not remain securely stationary when the brake is applied.
- Brake dragging: A rear wheel remains difficult to turn after releasing the parking brake.
- Uneven engagement: One rear parking brake appears to work while the other does not.
- Visible cable damage: The cable shows rust, broken strands, a damaged protective sheath, or seized movement.
Inspect the cable from the parking brake equalizer to the rear backing plate. The equalizer distributes force from the handbrake lever to the two rear cables.
Also inspect the lever and shoe mechanism before assuming that additional cable tension will solve the problem.
The Toyota parking brake service procedure specifies 6 to 8 lever clicks when pulled with approximately 200 N (44 lbf) of force, without rear brake dragging. A lever that moves farther than expected may need shoe adjustment rather than cable replacement.
The Toyota parking brake inspection and adjustment procedure identifies sticking cables, incorrect lever travel, damaged return springs, and shoe clearance as possible causes of parking brake drag.
Inspect the Driver-Side Brake Assembly
Inspect the left rear brake assembly before removing any cable hardware. This helps distinguish a damaged cable from worn shoes, a seized actuator, or damaged springs.
The rear disc brake pads and rotor should also be checked, although the parking brake uses its own internal shoes.
| Component | Inspect For | Why It Matters |
|---|---|---|
| Pads and rotor | Scoring, uneven wear, contamination | Affects normal hydraulic braking |
| Parking brake shoes | Thin lining, cracks, poor contact, contamination | Reduces parking brake holding force |
| Parking brake cable | Rust, fraying, kinks, seized movement | Prevents proper application or release |
| Springs and retaining clips | Distortion, incorrect installation, missing parts | Can cause poor shoe return or incorrect alignment |
Inspect the shoe actuator lever and its contact points. The lever should move and return correctly when operated.
For the RAV4 parking brake assembly, the service information lists a standard shoe lining thickness of 3.5 mm and a minimum of 1.0 mm. It also lists a standard parking brake drum inside diameter of 173 mm, with a maximum of 174 mm.
Measure these surfaces if the parking brake shows signs of wear. Replace worn components rather than trying to compensate by overtightening the cable.
Gather Tools for the RAV4 Brake Job
Prepare the tools before lifting the vehicle. Cable replacement involves both the rear brake assembly and mounting points under the vehicle, so access and vehicle support matter as much as the socket sizes.
The original procedure identifies these common tools:
- 21 mm socket: For the rear wheel lug nuts, where fitted with the original fasteners.
- 14 mm socket: For the rear caliper fasteners used in the described brake assembly.
- 17 mm socket and breaker bar: For the caliper bracket bolts.
- Flat screwdriver: For appropriate clips and the parking brake shoe adjuster.
- Brake spring tool and needle-nose pliers: For removing and installing the shoe springs.
- Rubber mallet: For gently freeing a rotor that is stuck to the hub.
- Torque wrench: For tightening the caliper, wheel, and cable mounting hardware accurately.
- Jack, rated jack stands, and wheel chocks: For safely lifting and supporting the RAV4.
Also prepare a trim removal tool, suitable smaller sockets, brake cleaner, protective gloves, and a way to support the caliper.
Confirm the tool sizes on your vehicle before disassembly. Rusted or previously replaced hardware may differ from the original fasteners.
For a more complicated replacement, consult the Toyota Technical Information System for the complete factory repair instructions matching your vehicle.
Warning: Work on a level, firm surface and chock the front wheels. Release the parking brake only after the vehicle is safely supported on rated stands. Never work under a vehicle supported solely by a jack. Brake dust may contain hazardous material; use appropriate brake cleaning methods rather than compressed air.
Remove the Wheel, Caliper, and Rotor
The rear rotor must be removed to access the parking brake shoes and cable actuator. On this RAV4, the parking brake shoes sit inside the rotor hat, which is the drum-shaped center section of the disc.
Follow this sequence:
- Loosen the wheel nuts: Break the lug nuts loose slightly while the tire is still on the ground.
- Raise and support the vehicle: Use the specified lifting points and secure the vehicle on jack stands.
- Remove the rear wheel: Remove the lug nuts and pull the wheel straight off the hub.
- Remove the caliper: Undo the appropriate caliper retaining bolts and carefully lift the caliper away from the pads.
- Support the caliper: Suspend it with a suitable hanger so its weight does not pull on the flexible brake hose.
- Remove the caliper bracket: Remove the bracket mounting bolts if bracket removal is needed for rotor clearance.
- Release the parking brake shoes: Remove the shoe-adjusting hole plug from the rotor. Back off the adjuster if the shoes are holding the rotor.
- Remove the rotor: Mark its position relative to the hub if reusing it. Pull it off evenly, using gentle mallet taps if corrosion is holding it.
Do not force the rotor against engaged parking brake shoes. Doing so can damage their lining, springs, or retaining hardware.
The Ferodo Toyota RAV4 III rear brake service guide illustrates the caliper, rotor, and internal parking brake shoe arrangement.
Once the rotor is removed, inspect the drum surface for scoring or rust buildup. Keep grease and oil away from every braking surface.
Disassemble the Driver-Side Parking Brake
With the rotor removed, the driver-side parking brake shoe assembly is exposed. The cable connects to an actuator lever that spreads the shoes when you pull the parking brake handle.
Before removing springs or clips, document their positions. The left and right assemblies have different orientations, so do not assume that the opposite side is an identical reference.
Access Driver-Side Assembly
Begin at the rear backing plate and identify the cable end, actuator lever, return springs, adjuster, and shoe retainers.
Check that the parking brake has been fully released and that the cable is not placing the mechanism under additional tension.
- Locate the driver-side cable where it enters the rear backing plate.
- Inspect the shoe actuator and identify how the cable end attaches.
- Record the original spring positions and cable routing with clear photographs.
- Check the backing plate for damage or heavy corrosion around its mounting points.
Access to the cable’s opposite end is provided through the center console area, where the parking brake equalizer connects the front cable to the rear cables.
This connection must be released when replacing the complete rear cable.
Remove Brake Shoes
The parking brake shoes are held in place by tension springs, retaining pins, and an adjuster assembly. Remove these parts carefully because the springs can release suddenly.
- Release the upper return springs using an appropriate spring tool or needle-nose pliers.
- Remove the shoe strut and related hardware while recording their orientation.
- Remove the lower return spring and adjusting screw set.
- Release the shoe retaining springs and pins.
- Lift the shoes away carefully and disconnect the cable from the shoe-mounted actuator lever.
Inspect both shoes for cracking, uneven contact, worn lining, or contamination.
Replace damaged springs and retainers. If the shoe linings are worn or contaminated, replace the affected parking brake shoes according to the service procedure.
Clean the backing plate and inspect each shoe contact point before reassembly.
Disconnect Parking Hardware
The rear cable is secured at the backing plate and at several locations along the vehicle body and suspension. Removing these attachments allows the old cable to be withdrawn without damaging nearby components.
- Release the cable end from the parking brake actuator lever.
- Remove the mounting bolt securing the cable housing to the backing plate.
- Release the cable brackets and clips along the trailing arm and vehicle body.
- Follow the cable toward its equalizer connection, identifying any additional retainers.
- Inspect the cable housing and surrounding mounting points for corrosion or damage.
Do not pry aggressively against the backing plate. It supports the parking brake shoes and must remain correctly aligned.
Some mounting fasteners may require penetrating lubricant or careful cleaning before removal.
Remove the Old RAV4 Parking Brake Cable
Full driver-side cable removal requires access to both the left rear backing plate and the parking brake equalizer. It is not simply a matter of pulling the cable out of the rear wheel assembly.
The RAV4 uses a front parking brake cable and two separate rear cables. Toyota parts catalogs identify the left rear cable as the No. 3 parking brake cable and the right rear cable as the No. 2 cable.
Production location and build date can affect the exact replacement part. Confirm fitment using the vehicle’s VIN and the 2011 RAV4 parking brake parts catalog before ordering.
| Area | Fastener | Action |
|---|---|---|
| Parking brake equalizer | Cable end connection | Release cable tension and disconnect the correct rear cable |
| Brake shoe lever | Cable end fitting | Disconnect the cable from the actuator |
| Backing plate | Cable mounting bolt | Remove and retain the mounting hardware |
| Cable body | Clamps and brackets | Release attachments along the original routing |
The factory-derived RAV4 parking brake cable removal and installation procedure includes these additional access operations:
- Disconnect the negative battery terminal and follow the specified supplemental restraint system safety procedure.
- Remove the necessary rear console components.
- Remove the center airbag sensor assembly where required by the factory procedure.
- Loosen the parking brake cable adjusting and lock nuts.
- Disconnect the rear cables from the equalizer.
- Remove the cable mounting points along the body and suspension.
- Complete any required driveline access operations before withdrawing the cable.
Warning: The documented removal procedure includes center airbag sensor removal and may require propeller shaft removal on AWD models. Toyota specifies waiting at least 90 seconds after disconnecting the negative battery terminal before working on the SRS system. Airbag sensor and driveline work require the complete factory procedure and proper training. Do not improvise these operations.
Once all required connections and retainers have been released, withdraw the old cable along its original route.
Do not pull against a bracket that is still secured. Compare the old cable with the replacement before installation, including its length, end fittings, protective sheath, and mounting points.
Install the New RAV4 Parking Brake Cable
Install the replacement cable along the same path as the original. The cable must remain clear of exhaust heat, moving suspension parts, and sharp edges.
Use the original mounting positions and factory retainer arrangement. Incorrect routing can cause the cable to bind or prevent complete parking brake release.
- Route the new cable: Position it along the vehicle body and suspension using the original path.
- Feed it into the backing plate: Pass the rear cable end through the backing plate opening and position its housing correctly.
- Connect the actuator: Secure the cable end to the parking brake shoe lever.
- Install the backing plate fastener: Seat the cable housing fully and tighten its mounting bolt to specification.
- Reattach the cable clamps: Secure the body, crossmember, and trailing arm mounting points.
- Connect the equalizer: Reconnect the cable to the correct rear position in the parking brake equalizer.
- Check movement: Confirm the cable operates smoothly and returns when released.
The service specifications list 8.0 N·m (71 in-lb) for the cable-to-backing-plate mounting bolt and 6.0 N·m (53 in-lb) for the specified cable clamp bolts.
The parking brake torque specifications also identify separate torque values for the lever and cable adjuster lock nut.
Do not substitute these small-fastener values for caliper mounting bolts or other larger fasteners.
Before final adjustment, confirm that the new cable has no twists, crushed sections, or interference with moving components.
Reassemble and Adjust the Parking Brake
Reinstall the parking brake shoe hardware before setting the cable tension. The correct adjustment order is essential: establish proper shoe clearance first, then adjust the lever travel.
Trying to compensate for excessive shoe clearance by tightening the cable can leave the parking brake weak or cause the shoes to drag.
Install Brake Hardware
Inspect the shoes, springs, retainers, actuator lever, and adjuster before assembly. Clean any reusable hardware and replace damaged parts.
Follow this sequence:
- Apply a light amount of suitable high-temperature brake grease only to the specified backing plate contact points.
- Reinstall the parking brake shoe actuator lever and connect the cable.
- Position the shoes and install their hold-down pins and springs.
- Install the adjuster screw set in its correct orientation.
- Reinstall the lower return spring and shoe strut.
- Install the upper return springs and verify that each hook is fully seated.
- Check that both shoes remain properly aligned and that the actuator moves freely.
Keep all friction surfaces clean and dry. Oil or grease on the parking brake lining or drum surface can reduce holding force.
The RAV4 parking brake overhaul instructions describe the spring positions, shoe retention, inspection limits, and adjustment sequence.
Adjust Shoe Clearance
The parking brake shoe adjuster sets the clearance between the shoes and the rotor’s internal drum. This adjustment must allow firm engagement while preventing drag when released.
The service procedure uses the following method:
- Install the rear rotor over the assembled parking brake shoes.
- Temporarily secure the rotor with the wheel nuts, following the service procedure.
- Remove the shoe-adjusting hole plug.
- Turn the star-wheel adjuster to expand the shoes until the rotor locks.
- Back off the adjuster until the rotor rotates smoothly. The service procedure specifies backing off 8 notches.
- Confirm the rotor rotates without parking brake shoe drag.
- Reinstall the adjusting hole plug.
Adjuster rotation direction depends on its orientation. Use the actual expansion and contraction direction of the assembly rather than assuming the same screwdriver movement works on both sides.
After adjusting the shoes, adjust the cable at the parking brake lever and equalizer connection.
The service specification calls for 6 to 8 lever clicks under approximately 200 N (44 lbf) of applied force. Tighten the cable adjuster lock nut to 6.0 N·m (53 in-lb).
Operate the lever three or four times and recheck its travel. The brake warning light should illuminate at the first click.
Also verify that the rear brakes release completely when the lever is lowered.
Pro Tip: If the lever travel is correct but the parking brake still does not hold, inspect shoe condition, drum contact, actuator movement, and the opposite rear brake. More cable tension is not a substitute for correctly adjusted and functioning brake shoes.
Reinstall the Brakes and Torque to Spec
Once the cable and parking brake shoes operate correctly, reinstall the rear disc brake components. Proper fastener torque and brake pad positioning are essential before returning the RAV4 to service.
Clean rust and debris from the hub mounting surface. If a suitable anti-seize compound is used at the hub-to-rotor contact area, apply only a thin amount and keep it away from friction surfaces and wheel stud threads.
- Position the rotor correctly on the hub and confirm that it seats fully.
- Reinstall the caliper bracket and tighten its mounting bolts to the applicable specification.
- Make sure the brake pads are seated correctly in their support hardware.
- Reinstall the caliper without twisting or stressing the brake hose.
- Tighten the caliper retaining bolts using the correct specification for the fasteners fitted.
- Reinstall the wheel, start every lug nut by hand, and lower the vehicle for final tightening.
- Tighten the wheel lug nuts evenly with a torque wrench.
The torque values identified for the brake assembly in the original procedure are:
- Rear caliper bracket bolts: 65 ft-lb (88 N·m).
- Rear caliper retaining bolts: 20 ft-lb (approximately 27 N·m), where this specification applies to the installed caliper hardware.
- Wheel lug nuts: 76 ft-lb (103 N·m).
Confirm each specification against the factory instructions for the particular vehicle and fastener. Different brake service procedures can list different caliper fastener torques.
If the hydraulic brake hose was disconnected during service, the hydraulic brake system requires proper bleeding and inspection before driving. Do not assume that reinstalling the caliper restores a disconnected hydraulic system.
Before moving the vehicle, press the brake pedal until it feels firm and the pads are correctly seated against the rotor.
Complete these final checks:
- Verify every cable retainer and backing plate connection is secure.
- Confirm the cable clears the exhaust, suspension, and other moving parts.
- Check that the parking brake lever engages and releases smoothly.
- Confirm that both rear wheels rotate freely when the parking brake is released.
- Check the brake pedal for normal firmness and inspect for fluid leaks.
- Check that the parking brake warning light responds correctly.
- Verify the parking brake holds the vehicle using a controlled stationary test before any road test.
If the brake fails its holding test, drags, or produces unusual noises, stop and correct the problem before driving.
Key Takeaways
- The 2011 RAV4 uses separate parking brake shoes inside the rear disc rotor.
- The left rear cable is not interchangeable with the right rear cable; confirm parts by VIN and production details.
- Complete cable replacement can require center console, airbag sensor, and driveline access.
- Adjust the rear brake shoes before setting cable tension.
- Verify the specified lever travel and confirm complete brake release before driving.
Frequently Asked Questions
How to Fix Parking Brake Malfunction on Toyota RAV4?
Fix a Toyota RAV4 parking brake malfunction by checking the lever travel, rear brake shoe clearance, cable movement, and return springs. Adjust the shoes before changing cable tension. Replace any seized cable or damaged hardware. If the vehicle still does not hold securely, have the complete parking brake system inspected.
Is 2011 a Good Year for a Toyota RAV4?
A 2011 Toyota RAV4 can be a practical used vehicle, but its condition and maintenance history matter more than the model year alone. Inspect the brakes, suspension, engine, transmission, and underbody corrosion before buying. Confirm that applicable recalls have been completed and review the vehicle’s repair history.
What Is the Class Action Lawsuit Against the Toyota RAV4?
The parking brake cable class-action allegation sometimes mentioned in discussions of the RAV4 should not be treated as established without a verifiable case name or court record. Lawsuits and manufacturer recalls are separate matters. To identify outstanding safety recalls or service campaigns for a specific RAV4, use Toyota’s official VIN recall lookup.
How Do I Replace the Parking Brake Cable?
Replace the parking brake cable by accessing the rear shoe actuator, releasing the cable from its equalizer, and removing the body and suspension retainers. Install the correct replacement along the original path. Reassemble the brake shoes, adjust their clearance, set lever travel, and check that the brake holds and releases correctly.
Conclusion
Replacing the driver-side parking brake cable on a 2011 Toyota RAV4 requires correct cable routing, careful rear brake assembly work, and precise adjustment. A new cable alone will not restore reliable holding force if the brake shoes, springs, or actuator are damaged.
Before returning the vehicle to service, confirm the lever travel, fastener torque, shoe clearance, and complete brake release. If the repair requires airbag sensor or driveline work beyond your experience, have a qualified technician complete and verify the procedure.
Sources
- Toyota Parts Center: 2011 RAV4 Parking Brake: Driver-side and passenger-side cable identification and parts fitment.
- Ferodo: Toyota RAV4 III Rear Brakes Installation Guide: Rear caliper, rotor, brake shoe removal, and assembly guidance.
- RAV4 Parking Brake System Inspection and Adjustment: Troubleshooting, lever travel, and cable adjustment specifications.
- RAV4 Parking Brake Service: Removal and Installation: Cable routing, equalizer disconnection, mounting hardware, and required access operations.
- RAV4 Parking Brake Service: Overhaul: Brake shoe removal, component inspection, reassembly, and shoe clearance adjustment.
- RAV4 Parking Brake Service Specifications: Cable retaining bolt and adjustment hardware torque values.
- Toyota Technical Information System: Manufacturer service documentation for vehicle-specific repair procedures.
- Toyota Safety Recall and Service Campaign Lookup: Official vehicle-specific recall status information.
