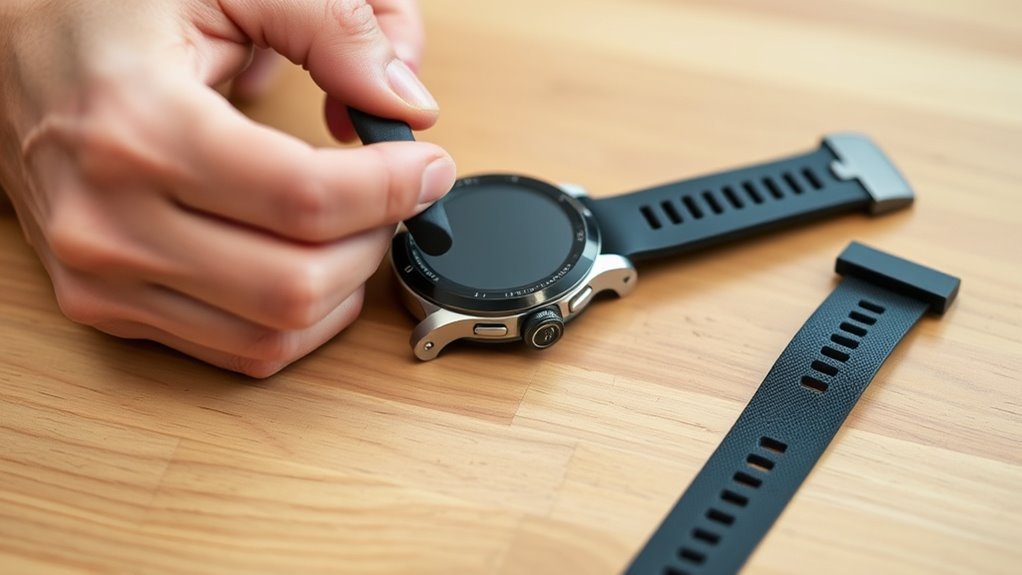
A Garmin QuickFit band changes without tools. First, place the watch on a soft cloth and slide the latch to release the old band. Align the new 20 mm band with the lugs, then press the quick-release mechanism inward until it clicks flush. Repeat on the other side. Check for gaps, wobble, or tilt, then tug lightly to confirm a secure fit. Compatible models and setup details follow below.
Key Takeaways
- Check that your Garmin watch supports a 20 mm QuickFit band before starting.
- Place the watch on a soft cloth to protect the case and screen.
- Align the band pins with the lugs, then press until the quick-release latch clicks.
- Tug lightly to confirm the band is seated firmly with no gaps or wobble.
- To remove, slide the latch fully open, then pull the band off gently.
What Is a QuickFit Garmin Band?
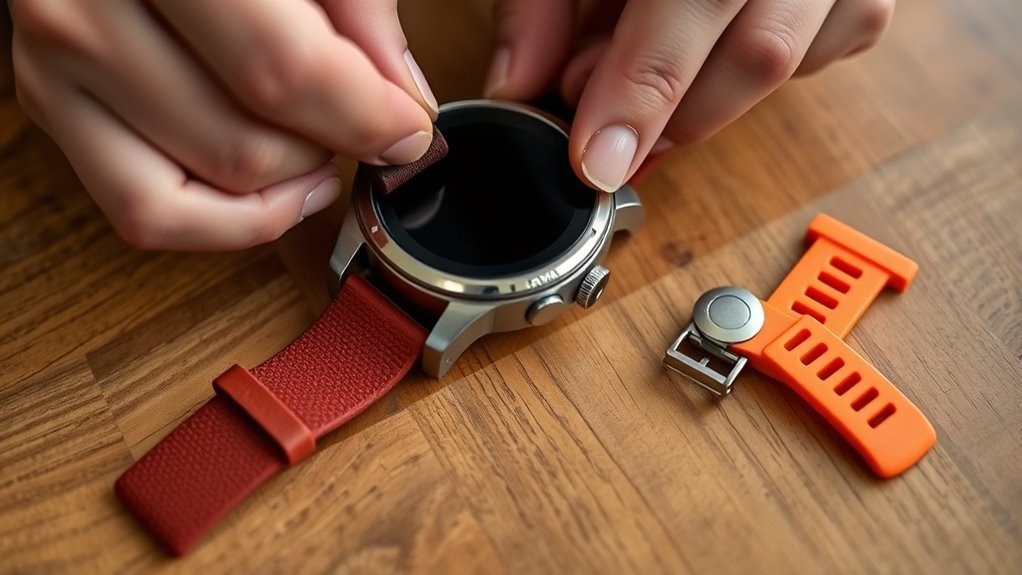
A QuickFit Garmin band is a specialized watch strap designed for tool-free swapping, allowing users to change styles quickly and easily.
QuickFit Bands serve users who want freedom from fixed hardware and the delay of conventional strap changes. They fit select Garmin models, including Fenix, Epix, and MARQ, where the locking interface provides a secure connection without extra tools.
Typically 20 mm wide, these bands use a quick-release system that supports rapid attachment and removal while maintaining stability during wear.
Materials vary by model, including silicone, leather, nylon, and metal, enabling adaptation to training, work, or formal use.
The design improves comfort by keeping the band seated firmly against the wrist.
For users seeking control over appearance and function, QuickFit Bands offer a practical, modular solution that streamlines personalization and supports a more mobile, less constrained ownership experience.
What You Need to Change a QuickFit Band
To change a QuickFit band, the user needs a compatible 20 mm QuickFit band made for the specific Garmin model, along with the Garmin watch itself.
A soft surface or microfiber cloth is also advisable to shield the watch face while the quick-release system is handled. No extra tools are required, because the band is designed for direct swapping.
The user should identify the locking tab mechanism before installation, since secure engagement depends on correct handling.
Identify the locking tab mechanism first, since secure engagement depends on correct handling.
Alignment matters: the new band must match the watch pins exactly and sit flush before being pressed into place. Proper fit should feel firm, with no wobble at the attachment points.
This setup supports a clean, efficient band change and preserves the freedom of quick customization without dependence on specialized equipment.
How to Remove a QuickFit Garmin Band
Sliding the latch on the QuickFit band disengages it from the Garmin watch, allowing the band to be removed without tools. The latch should be pushed until it fully clears the locking position before any pulling force is applied.
Once disengaged, the user can remove the band with a steady, controlled motion. Gentle handling is essential to protect both the watch case and the band hardware from unnecessary wear or impact. Excess force is not required and may compromise the mechanism.
After the band is free, it should be placed in a secure location to prevent misplacement or damage. A safe storage spot preserves readiness for future use and supports a clean, independent shift between bands.
The latch mechanism should then be inspected for smooth operation and proper return movement. If the mechanism resists or fails to seat correctly, it may need attention before the next installation.
This simple removal process restores flexibility while keeping the watch system intact.
How to Line Up the New Band
With the old band removed, the new band should be aligned so the watch pins sit correctly in the band slots and the spring bar lines up with the opposite side of the watch.
The band should face the correct direction and rest flush against the case, with no visible gaps. This alignment preserves the quick-release mechanism’s intended fit and keeps the assembly ready for a secure lock.
The user should align the spring bar carefully, matching it to the watch body before any pressure is applied. If the band sits skewed, it should be lifted and reset rather than forced, since force can misplace the pins and weaken the connection.
A proper fit feels controlled, precise, and free of wobble. Once the orientation is correct, the band is prepared for the next step, where it can be pressed into place with confidence and the watch can regain its secure, mobile form.
How to Attach a QuickFit Garmin Band
Once the new band is aligned correctly, the QuickFit attachment can be secured by inserting one side of the spring bar into its designated slot on the watch and positioning the opposite side in line with the matching mount. The quick-release mechanism should then be pressed inward until the band seats flush against the watch body. A firm click confirms that the latch has engaged and the band is locked without strain.
- Hold the watch steady and keep the band square to the lugs.
- Seat the spring bar into one slot before guiding the other end into place.
- Press until the quick-release catch closes fully over the pin.
- Tug lightly to verify a tight, gap-free fit before use.
Any visible gap or uneven edge suggests incomplete engagement and should be corrected immediately.
When secured properly, the band remains stable, ready for unrestricted movement and reliable daily wear.
How to Replace the Other Band
To replace the other band, the same removal process should be repeated by sliding the quick-release pin to release the band from the watch.
The replacement band must then be aligned with the watch in the same orientation as the original installation.
Once one side of the spring bar is seated and the pin is slid into place, a click should confirm secure attachment.
Remove Second Band
Next, the second band should be removed by turning the watch over and placing it on a soft surface to protect the case from scratches.
To remove the second band, the quick-release pin on the spring bar should be slid until it disengages fully.
- Confirm the watch is stable and face down.
- Slide the pin until the band loosens.
- Lift the band away with controlled pressure.
- Store the band safely for later use.
The spring bar should be handled gently to avoid damage, and the same removal procedure used on the first band should be repeated for consistency.
This method keeps the QuickFit system orderly, preserves component integrity, and supports a clean shift to the next installation step.
Align Replacement Band
With the first band removed, the replacement band can be aligned for installation on the watch body. The operator should align replacement band ends with the lugs, confirm orientation, and keep the fit snug against the case.
| Check | Result |
|---|---|
| Band orientation | Correct |
| Lug position | Matched |
| Fit at body | Snug |
| Latch state | Open |
| Alignment | Even |
Press the band firmly until a click is heard. That sound indicates the QuickFit latch has engaged with the pin. Inspect both sides for level seating and no visible gap. If the band sits crooked, release it and realign before use. Repeat the same sequence for the second band so both ends are ready for independent movement and secure operation.
Secure Final Attachment
The second QuickFit band is secured by repeating the removal process on the remaining side, sliding the latch to disengage it from the watch.
Then position the replacement so the orientation matches the watch body and the fit rests snugly without strain. Apply firm pressure until an audible click confirms the secure final attachment.
- Align the band ends with the pin.
- Press until the latch snaps shut.
- Verify the latch can close cleanly over the pin.
- Inspect for gaps, skew, or looseness.
A correct install gives the wearer a clean release from instability and restores full readiness.
Before use, confirm both bands are secure and functional, with no movement under light tension.
Common QuickFit Band Mistakes
Common QuickFit band mistakes often begin with misalignment, so the band should be matched carefully to the watch pins before any attachment attempt. A quick-release system depends on exact positioning; if the band is tilted, it may fail to seat cleanly.
Forcing the connector is another common error. Proper installation should require controlled pressure and end with a distinct click, not resistance. The latch mechanism should also be inspected before use, since a faulty latch can allow unexpected detachment during motion.
Forcing the connector is a common mistake; proper installation should click into place without resistance.
After installation, visible gaps between the band and watch body indicate incomplete engagement and should not be ignored. A brief gentle tug test on both ends confirms that each side is locked without strain.
These checks support secure wear and reduce avoidable failure. Precision at this stage preserves independence, keeps the device stable, and prevents the frustration of repeated resets.
How to Check the Fit and Security
The band should be checked for proper alignment against the watch body, with the fit remaining snug and even.
A distinct click should be heard during attachment, confirming that the band has locked securely into place.
Any gaps between the band and watch should be inspected and corrected, as they indicate improper seating.
Check Alignment
Once the new band is pressed into place, it should sit snugly against the watch body with both ends evenly aligned to the pins. To check alignment, examine the interface from both sides and confirm the band follows the watch contour without twisting. A correct fit preserves freedom of movement while keeping the system secure.
- Verify both ends rest level with the lugs.
- Inspect for gaps between band and case.
- Confirm the pin orientation matches the band slots.
- Gently tug the band to guarantee it does not shift.
Any visible offset suggests incomplete seating and should be corrected before use. The band must remain stable under light handling, since misalignment can compromise security and reduce confidence during movement, training, or daily wear.
Listen For Click
A definitive click should be heard as the QuickFit band locks into place, confirming that the latch has engaged securely with the watch pin. The installer should listen for a definitive click before assuming the band is seated correctly.
After the sound is confirmed, a gentle tug on the band helps verify that it remains fixed and that no movement exists between band and watch. The latch should also be checked visually to guarantee it sits fully over the pin. This simple verification supports independent use without worry.
If the attachment feels loose, the band should be removed and reseated until the lock is firm. Security should be rechecked regularly, especially after demanding activity, to preserve reliable wear and freedom of movement.
Inspect For Gaps
Inspect the QuickFit band immediately after attachment for any visible gaps between the band and the watch casing, as these indicate an incomplete seat. This inspect for gaps step confirms a secure fit and preserves stability during movement.
- View both band ends under bright light.
- Gently tug the strap to confirm stability.
- Rotate the watch through several angles.
- Recheck alignment if any shift appears.
A properly locked band should remain flush with the watch body and resist separation. If misalignment, looseness, or wear is detected, remove the band and seat it again until the latch engages fully.
Continued inspection supports durable use and personal autonomy, keeping the device ready without dependence on service. Regular checks also detect damage before it compromises security during daily wear.
Which Garmin Watches Use QuickFit Bands?
QuickFit bands are used on several higher-end Garmin watches, including the Fenix 5, Fenix 6, Fenix 7, and Epix series, as well as the MARQ line.
These models use a quick-release-style QuickFit interface that lets the band detach and lock in place without tools, reducing dependence on service or specialized equipment.
The MARQ series, built for luxury and adventure, also supports QuickFit for fast customization in the field.
The MARQ series blends luxury and adventure, with QuickFit enabling fast, field-ready customization.
Some Forerunner models, including the 245 and 945, may also accept QuickFit bands, though compatibility should be verified before purchase.
Most QuickFit setups are designed around 20 mm bands, providing a secure fit on supported watches.
For users who move constantly, the system supports rapid swaps between training, daily wear, and formal use.
That flexibility turns band changes into a self-directed process, not a constrained one.
Frequently Asked Questions
What Is the Difference Between Garmin Quickfit and Quick Release Bands?
QuickFit bands use a latch for tool-free swaps, while Quick Release bands use a spring-bar lever. Band Compatibility is typically 20 mm. QuickFit suits Fenix/Epix models; Quick Release suits Forerunner/Venu, offering greater style choice.
How Do I Change the Band on My Garmin Watch?
They change the band by sliding the QuickFit latch to release it, removing the old band, aligning the new one, and pressing until it clicks. Band Materials are best evaluated for durability, comfort, and freedom.
How Do I Replace the Strap on My Garmin Watch?
He replaces the strap by sliding the latch to release it, then aligning the new band for Band Compatibility, pressing until it clicks, closing the latch over the pin, and verifying secure attachment before use.
How to Get Garmin Wristband Off?
Like a key slipping free, the latch should be slid to disengage the Garmin wristband, then gently pulled away. The removed band should be stored safely, and Band Compatibility should be checked before reattachment.
Conclusion
Changing a Garmin QuickFit band is a simple mechanical exchange, but precision still matters. When the spring bars click into place, the watch and band should fit together like matched gears, secure and aligned. A careful check of both sides guarantees the connection holds under movement, sweat, and daily wear. With the proper fit confirmed, the watch is ready to perform again, carrying its new band like a fresh skin on a trusted instrument.
