
To connect trailer lights safely, first identify the connector on the vehicle and trailer, then verify each circuit by function instead of assuming the wire colors match. Use the vehicle’s factory tow socket or a compatible vehicle-specific wiring harness when available, establish a clean ground, make sealed connections, and test every lighting function before towing. Some vehicles also require a wiring converter to combine separate brake and turn-signal circuits.
Last updated: September 21, 2026
Quick Answer
To connect trailer lights, identify the vehicle and trailer connectors, use the correct wiring harness or converter, and match each circuit by function rather than color alone. On a typical North American 4-way flat connector, white is ground, brown is running lights, yellow is left stop/turn, and green is right stop/turn. Secure the ground to clean metal, seal each splice, and test the running lights, brake lights, and both turn signals before towing.
Key Takeaways
- Working trailer lights are essential for signaling and visibility; U.S. trailer lighting equipment is also subject to federal and applicable state requirements.
- Common North American trailer connectors include 4-way, 5-way, 6-way, and 7-way configurations.
- Match wiring by function first, not color alone, because connector conventions and previous repairs can change wire colors.
- A weak or corroded ground is a common cause of dim, flickering, or incorrectly operating trailer lights.
- Test the vehicle connector first, then test the trailer, so you know which side of the connection contains the fault.
At a Glance
| Time Required | Varies by whether you are plugging in an existing harness, installing a vehicle-specific harness, or repairing trailer wiring |
| Difficulty | Beginner for plug-in connections; intermediate for electrical diagnosis or permanent wiring repairs |
| Tools Needed | Wire strippers, correct crimping tool, multimeter or circuit tester, screwdriver set, sealed connectors or heat-shrink tubing, and socket wrench as required |
| Best First Step | Identify the connector and determine whether the tow vehicle already has a factory socket or vehicle-specific harness |
How Do Trailer Light Connectors Work?
Trailer lights carry the tow vehicle’s lighting signals to the trailer so drivers behind you can see when you brake, turn, or drive with the running lights on. A basic system normally includes stop lights, turn signals, tail or running lights, and a ground circuit.
The connector determines which circuits can pass between the tow vehicle and trailer. A small utility trailer may use a 4-way flat connector, while trailers with reverse-light, electric-brake, or auxiliary-power circuits commonly require additional connector positions.
| Connector | Common Functions | Typical Use |
|---|---|---|
| 4-way flat | Ground, running lights, left stop/turn, right stop/turn | Many small utility and boat trailers |
| 5-way flat | 4-way functions plus an additional circuit, commonly reverse-related | Trailers needing one extra circuit |
| 6-way round | Lighting plus additional brake or auxiliary circuits, depending on configuration | Specialized towing setups |
| 7-way | Lighting plus circuits commonly used for electric brakes, reverse lights, and auxiliary power | Travel, equipment, cargo, and other trailers with added electrical functions |
A 4-way flat connector normally handles the basic lighting circuits. A 7-way connector can carry additional circuits, but 7-way wire colors and pin conventions are not always identical between harnesses, so verify the terminal functions before connecting wires.
Understanding the connector before making repairs helps prevent crossed signals, blown fuses, and incorrect light operation. Check the tow vehicle manual, trailer documentation, connector markings, or a verified wiring diagram before making a permanent connection.
What Tools and Materials Do You Need?
Before you start a trailer light installation or repair, gather the tools that match the type of work. For a wiring repair, this commonly includes wire strippers, the correct crimping tool, a multimeter or circuit tester, a screwdriver set, and a socket wrench.
For exposed trailer wiring, sealed crimp connectors or adhesive-lined heat-shrink tubing provide better protection against road spray and corrosion than an unsealed splice. Electrical tape can provide supplemental protection, but it should not be treated as a substitute for a properly made weather-resistant connection where the wiring is exposed.
Choose replacement wire that matches the circuit requirements and the harness or connector manufacturer’s instructions. Lighting circuits and higher-current circuits such as auxiliary power, electric-brake output, or main ground may require different conductor sizes.
You may also need butt connectors, ring terminals, zip ties, clips, wire loom, or protective conduit. Use hardware that fits the conductor size and route the harness so it cannot drag, rub against sharp edges, or contact hot and moving components.
If you are replacing trailer lamps, use lights designed for the trailer and electrical system. LED and incandescent assemblies can both work when the lamp, wiring, mounting, and vehicle electronics are compatible.
Warning: Unplug the trailer electrical connector before cutting, stripping, or crimping trailer wires. When installing a vehicle-side harness, follow the harness and vehicle manufacturer’s instructions for battery disconnection, fuse installation, and power connections.
[Amazon Products Picked for You]
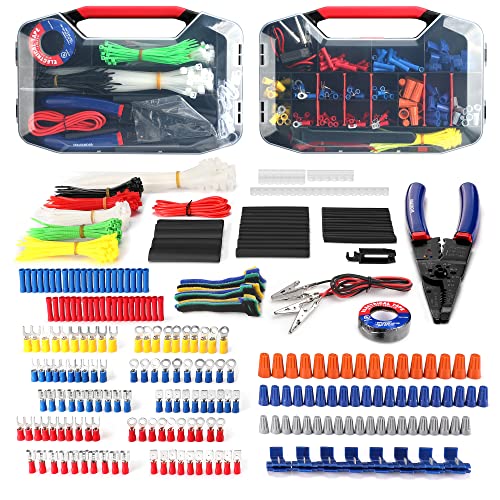
Assorted 582 electrical wire terminals and other accessories with transparent box for easy access

Time Saver: Solderless,crimpless, all you need is just a heat gun to finish the joint, much faster and easier than the old way

RELIABLE AND SAFE: The 4-Pin Flat 5-Wire trailer wiring harness kit is made of thick PVC-coated wire material that resists corrosion, and the plug cover keeps dirt and water out when not in use. The 18AWG pure copper wire has excellent conductivity and is protected by black nylon mesh tubing. You can rest easy in all weather, in all environments.
Where Is the Trailer Light Wiring Harness?

The next step is locating the trailer light wiring harness on both the trailer and the towing vehicle. On many vehicles, a factory trailer connector is mounted near the rear bumper or hitch. Other vehicles may use a connector stored inside a cargo panel or a vehicle-specific harness that connects behind the rear lamps.
If the vehicle has a factory tow package, use its intended trailer socket whenever possible. If it does not, check whether a plug-and-play vehicle-specific T-connector is available before cutting or tapping into factory wiring.
On trailers, the wiring harness is usually routed along the frame and should be secured so it cannot drag, rub through, or become pinched near the coupler, suspension, or moving parts.
For the trailer, follow the wires from the connector toward the lights. Look for worn insulation, crushed wires, loose clips, cracked connectors, exposed copper, or corrosion. Physical damage can cause intermittent lights, crossed circuits, shorts, or complete loss of a function.
Do You Need a Trailer Wiring Converter?
Not every tow vehicle sends its lighting signals in the same way. Many trailers use combined stop-and-turn circuits, where the left stop and turn signal share one circuit and the right stop and turn signal share another. Some vehicles use separate circuits for brake lights and turn signals.
If the vehicle and trailer use different lighting logic, the correct trailer wiring converter combines or separates those signals so the trailer receives the functions it expects. A vehicle-specific harness may already include the required converter. Do not assume that directly splicing the trailer wires into the vehicle’s rear-light wiring will work correctly.
CURT describes 3-to-2-wire converters specifically for vehicles with separate brake and turn-signal circuits that must operate a trailer with combined stop/turn wiring. Follow the instructions supplied with the harness or converter for your exact vehicle. See CURT’s taillight converter guidance.
How Do You Connect Trailer Lights to Your Vehicle?
Once you have identified the connectors and confirmed that the vehicle has the correct harness or converter, match the trailer circuits by function. Do not make a permanent connection based only on insulation color.
The table below shows the common North American color convention for a basic 4-way flat trailer harness.
| Typical Wire Color | Function | Vehicle-Side Function | Trailer-Side Function |
|---|---|---|---|
| Brown | Tail / Running Lights | Running-light output | Tail and marker lights |
| Yellow | Left Stop / Turn | Left stop/turn output | Left stop/turn lamp |
| Green | Right Stop / Turn | Right stop/turn output | Right stop/turn lamp |
| White | Ground | Ground | Ground |
This color convention is common for 4-way flat trailer wiring, but repaired trailers, vehicle-side wiring, replacement plugs, and 7-way harnesses can follow different conventions. Confirm each function with the connector diagram and a tester before making final connections.
For a permanent splice, strip only the amount of insulation specified for the connector you are using. With a butt connector, insert one stripped conductor into each end and crimp it with the correct-size crimping die. Perform a gentle pull test after crimping to confirm that the conductors are secure.
Seal exposed connections using the connector manufacturer’s specified method. Adhesive-lined heat-shrink connectors are useful where the splice is exposed to moisture and road spray. Keep completed splices supported so vibration is not carried directly by the copper conductor.
Note: Never rely only on wire color when the wiring history is unknown. Test the circuit function and confirm the connector pinout before making a permanent connection.
How Do You Ground Trailer Lights Correctly?
A reliable ground is critical to trailer-light operation. A loose, rusty, painted, or corroded ground point can create enough resistance to cause dim lights, flickering, cross-feeding between circuits, or complete lighting failure.
If the trailer harness uses the frame as part of the ground path, connect the ground terminal to clean, bare metal at the designated grounding point. Remove rust, paint, grease, or dirt that prevents metal-to-metal contact, then secure the terminal using appropriate hardware.
If the trailer uses dedicated ground wires to the lamp assemblies, inspect those connections as well. A good main harness ground cannot compensate for a failed ground at an individual light.
Strange behavior is often a useful clue. If both lamps glow weakly, a turn signal affects the wrong lamp, or the lights change when the trailer moves, inspect the ground and connector before replacing major components.
Pro Tip: After the connector is clean, dry, and working correctly, follow the connector manufacturer’s guidance for corrosion protection. Keep protective grease or sealant from becoming a substitute for cleaning damaged or heavily corroded contacts.
How Do You Test Trailer Lights?
Test the system before driving. The most efficient approach is to test the vehicle connector first and then move to the trailer. This prevents you from rewiring the trailer when the actual fault is a vehicle fuse, harness, converter, or socket.
With the trailer disconnected, use a compatible circuit tester or multimeter to confirm that the vehicle connector provides the expected running-light and turn/stop outputs. Follow the tester instructions and the vehicle wiring diagram, especially on 6- or 7-way sockets.
When the vehicle connector tests correctly, connect the trailer and check each function separately. Turn on the running lights, test the left signal, test the right signal, and press the brake pedal. If the trailer includes reverse lights, electric brakes, or auxiliary circuits, test those according to the trailer, brake-controller, and vehicle instructions.
If a function works at the vehicle socket but not at the trailer light, the fault is on the trailer side. Test progressively from the trailer plug toward the affected lamp until you find the point where the signal is lost.
Why Aren’t My Trailer Lights Working?
Trailer lighting faults usually become easier to diagnose when you separate the vehicle side from the trailer side instead of replacing parts at random. Start with the connector output, then the ground, then trace the affected circuit.
| Symptom | Possible Causes | First Check |
|---|---|---|
| No trailer lights work | No vehicle-socket output, blown tow fuse, disconnected harness, connector fault, or main ground problem | Test the vehicle connector, then inspect the main ground |
| Only one side works | Failed lamp, damaged side circuit, corroded connection, or local ground fault | Test for the correct signal at that lamp |
| Lights are dim or flicker | Weak ground, loose connector, corrosion, or damaged wiring | Clean and test the ground and connector |
| Wrong lamp flashes | Crossed circuits, incorrect pinout, or ground backfeeding | Verify each connector terminal by function |
| Vehicle socket has no output | Tow-package fuse or relay, harness power supply, converter, or vehicle wiring issue | Check the vehicle manual and harness instructions before working on the trailer |
If all lights are dead, do not assume the lamps themselves failed simultaneously. Confirm power at the tow-vehicle connector and inspect the connector condition and main ground first.
If only one side fails, inspect the affected stop/turn circuit, lamp assembly, connector, and ground on that side. Look for cut insulation, pinched conductors, loose terminals, moisture, or corrosion.
If the lights are dim or flicker while driving, inspect both sides of the plug and every ground point. Movement-related faults frequently indicate a loose connector or damaged conductor that opens and closes as the trailer moves.
If one signal activates the wrong light, stop and verify the terminal functions. The wires may be crossed, or a poor ground may be allowing current to return through another lamp circuit.
If you use a multimeter’s continuity or resistance mode to trace a wire, disconnect electrical power from the circuit first and follow the meter manufacturer’s instructions. Work from the trailer connector toward the lamp until you isolate the damaged section.
[Amazon Products Picked for You]

Battery not included:Trailer Light Tester Box Without battery.Including 3 types of detection plugs,for 7- Way Flat (Spade) Pin,6-Way Round Pin,4/5-Pin Connectors,Perfectly compatible with standard U.S.trailer plugs
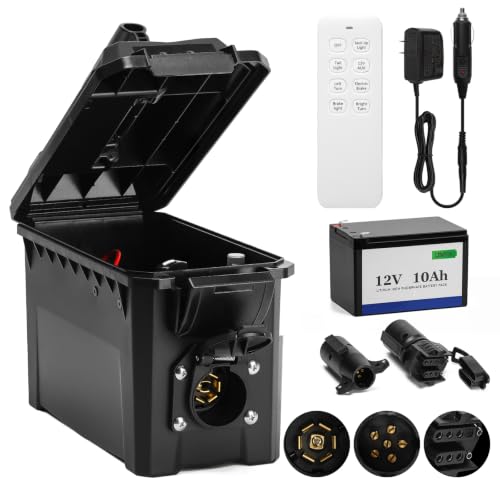
Wireless Remote Control Operation: The Zuomeng trailer tester box with battery is equipped with a wireless remote control, allowing you to operate the tester remotely, eliminating the need for running back and forth or working with multiple people, saving time, improving work efficiency, and easily completing testing.
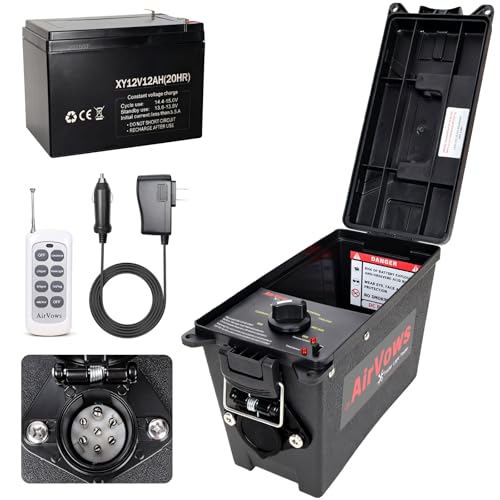
Widely Compatible:Trailer Light Tester Box with 12V 12AH Battery,Can be directly tested,Compatible with Various 7-Pin Round Trailer Connectors, Easily Meeting the Testing Needs of Different Trailer Types Without Additional Adapter
How Should You Secure and Protect Trailer Wiring?
Once all functions work, secure and protect the wiring for long-term reliability. Use suitable clips or zip ties to support the harness along the trailer frame. Keep it high enough that it cannot drag on the roadway or snag on debris.
Route wiring away from sharp edges, suspension movement, exhaust heat, rotating components, and tire contact points. Where the harness passes through metal, use suitable protection so vibration cannot wear through the insulation.
Use split loom, conduit, or other appropriate protective sheathing on exposed runs that face road spray or abrasion. Protection is especially useful near the tongue, frame openings, suspension area, and rear crossmember.
Leave enough cable movement near the tongue for the tow vehicle and trailer to turn without pulling the connector. Do not leave enough unsupported cable for it to drag, wrap around the coupler, or become pinched.
[Amazon Products Picked for You]

ALL-IN-ONE TRAILER LIGHTING KIT: Complete upgrade set includes 2 square rear combination tail lights, 6 marker lights (amber/red), 15" 11-LED 3rd brake/ID light bar, 25FT heavy-duty protective wiring harness, license plate bracket and mounting hardware—everything in one box.

Y-Harness Connector: 4 pin trailer wiring harness adapter features wishbone design, widely fits for rewiring trailer that allows 2 brown wires running left and right taillights simultaneously; No need for splicing other wires

4 Pin 5 Wire Trailer Wiring Harness: Our trailer wiring harness kit has 5 wires to save you the hassle of extra wiring, providing enough wire to connect all the necessary points without the need for extensions or complicated splices. trailer wiring kit fits trailers up to 80 inches and over 80 inches in width
How Do You Maintain Trailer Lights?
Check trailer lights before each towing trip. A quick functional check can find a failed lamp, weak connector, or damaged cable before you enter traffic.
Inspect light housings for moisture or damage and check the connector for bent contacts, dirt, or corrosion. Also inspect the harness wherever it passes close to the frame, suspension, tongue, or moving components.
Clean trailer light lenses with a soft cloth and a cleaner suitable for the lens material. Dirt, mud, and road film can reduce visibility.
Inspect wiring connections regularly for wear or corrosion. Repair damaged insulation properly, replace badly corroded connectors, and correct loose grounds instead of repeatedly repositioning the plug until the lights work.
Trailers exposed to water, road salt, mud, or frequent outdoor storage deserve more frequent connector and ground inspections because moisture and contamination accelerate electrical problems.
Final Check Before You Tow
Before moving the trailer, confirm that the connector is fully seated and that the cable has enough slack for turning without touching the road. Test the running lights, left turn signal, right turn signal, and brake lights one final time.
If a circuit does not behave correctly, diagnose it before towing. Start at the vehicle socket, verify the ground, and then trace the affected trailer circuit. Do not rely on wire color alone when the harness history or connector standard is uncertain.
Frequently Asked Questions
What are trailer lights?
Trailer lights are lamps mounted on a trailer to provide required or useful road-signaling functions such as stop, turn, tail, running, marker, and other lighting depending on the trailer configuration.
Why is it important to connect trailer lights?
Working trailer lights allow other road users to see your braking, turning, and nighttime-running signals. They are an essential part of safe towing and must meet the requirements that apply to your trailer and jurisdiction.
How do I connect trailer lights to my vehicle?
Use the compatible factory connector, vehicle-specific wiring harness, or required converter. Match the vehicle and trailer circuits by function, establish the ground, make weather-resistant connections where splicing is required, and test every light before towing.
What tools do I need to connect trailer lights?
For wiring work, common tools include wire strippers, the correct crimping tool, a multimeter or circuit tester, screwdrivers, sealed connectors or heat-shrink tubing, and basic hand tools. Plug-and-play harness installations may require fewer tools.
Are there different types of trailer wiring harnesses?
Yes. Common North American connectors include 4-way flat, 5-way flat, 6-way round, and several 7-way configurations. The correct connector depends on the trailer’s lighting, brake, reverse, auxiliary-power, and other electrical requirements.
Should I match trailer wires by color?
Use color only as a starting reference. On a common 4-way flat harness, white is ground, brown is running lights, yellow is left stop/turn, and green is right stop/turn, but repaired trailers and other connector standards can differ. Verify each circuit by function before making a permanent connection.
Does my vehicle need a trailer wiring converter?
It may. If the tow vehicle uses separate brake and turn-signal circuits while the trailer uses combined stop/turn circuits, the appropriate converter is needed to translate the signals. Many vehicle-specific trailer harnesses include the necessary converter electronics.
Do I need to test the trailer lights after connecting them?
Yes. Test the running lights, brake lights, left turn signal, and right turn signal before towing. If the trailer has additional electrical functions, test them according to the trailer and tow-vehicle instructions.
Why do my trailer lights work on one side only?
A one-sided failure can come from a failed lamp, damaged stop/turn circuit, corroded connection, or ground fault on that side. First confirm that the correct signal is present at the vehicle socket, then test the affected trailer circuit.
Can I connect trailer lights without cutting wires?
Often, yes. Many vehicles support a factory tow socket or vehicle-specific plug-and-play T-connector that connects to existing wiring without cutting the factory harness. Use the harness intended for the exact vehicle and follow its installation instructions.
Sources
- etrailer Trailer Wiring Guide — trailer connector types, common circuit functions, testing, and wiring guidance.
- CURT Trailer Wiring Diagram and Installation Guide — common 4-way, 5-way, 6-way, and 7-way connector functions and color conventions.
- CURT 3-to-2-Wire Taillight Converters — explains converter use when vehicle and trailer stop/turn circuits differ.
- NHTSA Interpretation on Trailer Lighting Requirements — U.S. FMVSS No. 108 context for required trailer lighting equipment.
