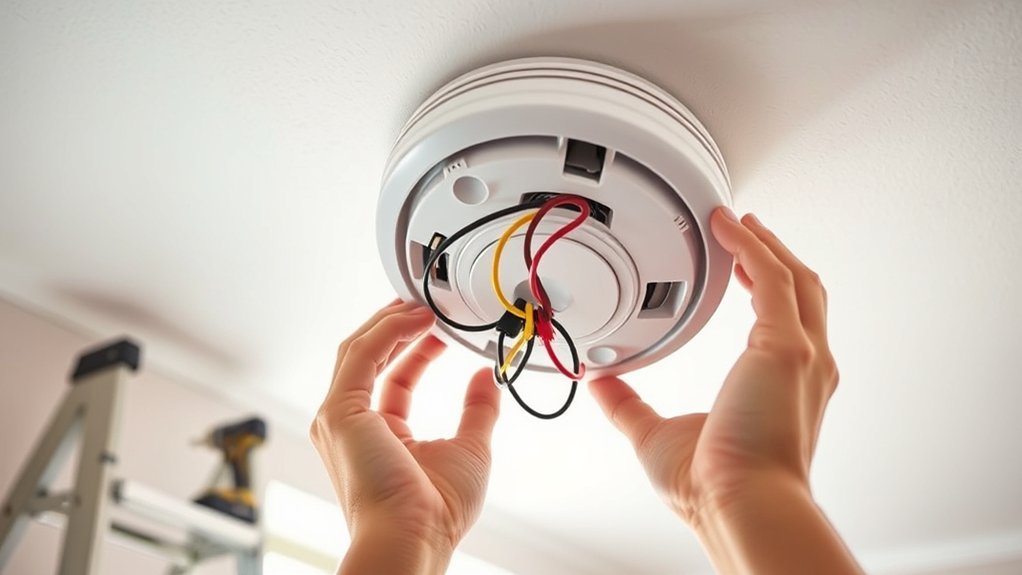
To change a Kidde hardwired smoke detector battery safely, first identify the exact model and confirm that its backup battery is actually replaceable. Turn off the alarm circuit at the breaker, remove the alarm from its mounting plate, disconnect the Quick Connect harness if required, and install the battery specified on the label or in the manual. Keep AC power off while reconnecting and mounting the alarm, then restore power and test it. Sealed 10-year backup batteries are not meant to be replaced.
Quick Answer
For a Kidde hardwired alarm with a replaceable backup battery, switch off AC power at the breaker, remove the alarm, disconnect its Quick Connect harness, replace the battery with the exact type specified for that model, reconnect and mount the alarm, restore AC power, and press Test. Do not open or replace a sealed 10-year battery.
Key Takeaways
- Check the model number and battery instructions before removing the alarm; Kidde hardwired models can use replaceable AA or other batteries, while some have sealed 10-year backup batteries.
- Turn off the correct circuit breaker before disconnecting a hardwired alarm, but remember that a working backup battery may keep the alarm itself powered.
- Keep AC power off while reconnecting the Quick Connect harness and mounting the alarm.
- Test the replacement battery before reinstallation when the model instructions call for it, then perform a final test after AC power is restored.
- If chirping continues, check battery seating, alarm age, AC power, cleanliness, and the model-specific reset procedure instead of repeatedly removing the battery.
At a Glance
| Time Required | About 10–20 minutes for a straightforward battery change |
| Difficulty | Easy for battery replacement; electrical wiring changes require more expertise |
| Tools Needed | Correct replacement battery; stable step ladder if needed; needle-nose pliers or screwdriver only if the model uses a tamper-resistant feature |
| Cost | Usually only the cost of the specified replacement battery; sealed-battery or expired alarms require whole-unit replacement |
Warning: Switch off the alarm circuit at the service panel before disconnecting a hardwired alarm. A backup battery can keep the alarm electronics operating even when AC power is off, so do not assume the unit itself is completely unpowered. If you would need to alter household wiring, cannot identify the correct circuit, or see damaged wiring, use a qualified electrician.
Check Your Kidde Alarm Type First
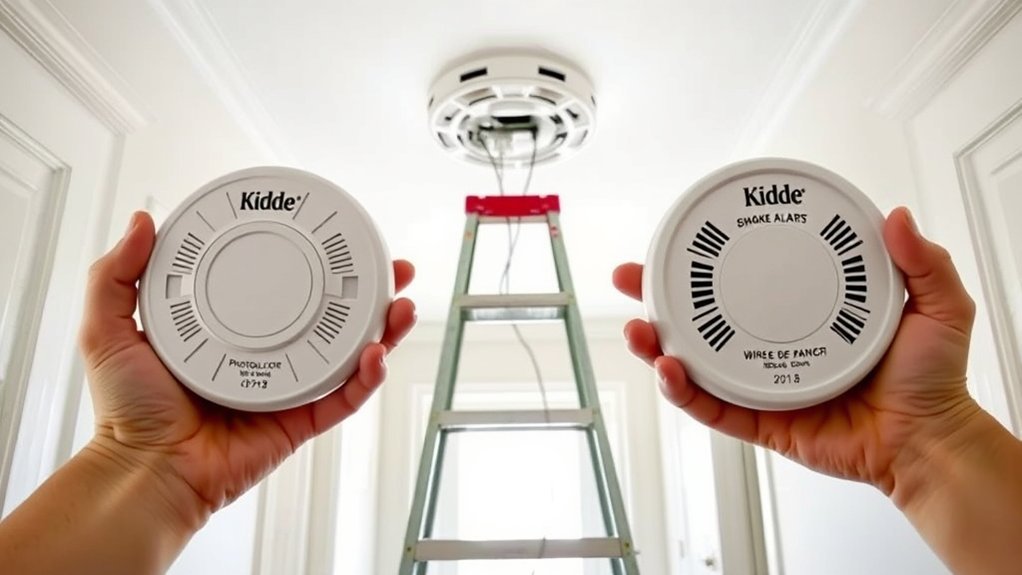
Before replacing anything, remove or inspect the alarm only as directed by its manual and find the model number, manufacturing or date code, and power information on the back or side label. Kidde uses different battery arrangements across its product line, so the model number determines the correct procedure.
Confirm whether the alarm is battery-operated, AC hardwired with a replaceable backup battery, or AC hardwired with a sealed long-life backup battery. Current Kidde products include hardwired models with replaceable AA batteries as well as models with sealed 10-year backup batteries. A sealed battery is not a normal service item and should not be opened or replaced.
For a standard smoke alarm, also check its age. The U.S. Fire Administration recommends replacing smoke alarms after 10 years. Combination smoke/CO alarms can have model-specific end-of-life requirements, so follow the date label and manufacturer instructions for those units.
If the alarm is interconnected with other alarms, record the model before buying a replacement. Kidde warns that interconnected devices should be models specifically approved to work together.
Note: If the alarm has a sealed 10-year battery, a low-battery or end-of-life warning usually means the alarm needs model-specific service or whole-unit replacement rather than a conventional battery swap.
[Amazon Products Picked for You]

First Alert's Precision Detection advanced sensing technology complies with new industry standards to reduce cooking nuisance alarms and provides early warning in the event of a home fire emergency.

Produces fire safety products including smoke and CO alarms

QUICK CONNECT ADAPTER: Connects new Kidde hardwired smoke and combination detectors to existing Kidde wire harnesses; for use with select compatible Kidde branded detectors only*
Turn Off Power and Remove the Alarm
For an AC hardwired Kidde smoke alarm, turn off the correct circuit breaker or remove the appropriate fuse before disconnecting the alarm. The goal is to de-energize the household AC wiring connected to the unit.
Do not assume that switching off the breaker makes the smoke alarm itself silent or completely inactive. A functioning backup battery is designed to keep a hardwired alarm operating during an AC outage.
To remove the alarm, grip it securely and rotate it in the direction of the OFF arrow on the mounting plate. On many Kidde models this means turning it counter-clockwise. If it will not rotate normally, stop and check for a tamper-resistant pin or locking tab rather than forcing the housing.
Never defeat or remove a smoke alarm simply to stop a real alarm condition. If the unit is sounding its fire-alarm pattern or you see or smell smoke, leave the building and follow your emergency plan.
Kidde models may use either a removable tamper pin or a locking tab. A pin can require needle-nose pliers, while a locking tab may need to be depressed as described in the model’s instructions before the alarm can turn off the mounting plate.
Once removed from the bracket, support the alarm so its wiring is not hanging by the conductors.
Disconnect the Kidde Quick Connect Harness
Confirm again that AC power remains off at the breaker. Locate the Kidde Quick Connect harness on the back of the alarm. Kidde’s hardwired removal instructions describe squeezing the locking arms on the connector while pulling the plug away from the alarm body.
Grip the plastic connector rather than the individual wires. Do not yank the conductors, twist the harness unnecessarily, or pry the connector loose with excessive force.
If the connector will not release, check whether both locking arms are fully compressed. The exact connector shape can vary by model, so compare it with the diagram in the user guide before applying additional force.
Once disconnected, inspect the plug and visible wiring for scorching, melted plastic, loose terminals, damaged insulation, or corrosion. Stop and use a qualified electrician if the fixed wiring appears damaged.
Pro Tip: Take a clear photo of the model label and existing connector before buying a whole replacement alarm. That makes it much easier to confirm battery type, mounting requirements, and interconnect compatibility.
Install the New Backup Battery Correctly
With the alarm disconnected as required for the model, locate the battery compartment and verify the specified replacement battery type. Do not assume that all Kidde alarms use the same size or chemistry.
Remove the old replaceable battery and install a fresh battery with the positive (+) and negative (-) terminals aligned with the markings in the compartment. The battery should seat firmly without forcing it.
Close the battery door completely. Some Kidde designs include battery-reminder mechanisms that prevent the compartment from closing unless a battery is installed correctly.
For models where Kidde instructs you to test on battery power before ceiling installation, press the Test button while the alarm is still disconnected from AC. The alarm should sound its test sequence.
[Amazon Products Picked for You]

Keep your family safe with this hardwired smoke alarm the battery backup means constant monitoring, even if there's a power failure

【Advanced Photoelectric,Reduce False】Alarms Equipped with high-sensitivity photoelectric smoke sensor, this electric smoke alarm responds in 1 second and delivers 5x higher accuracy than traditional detectors. It effectively identifies slow smoldering fires and combustion particles, greatly minimizing false alarms from cooking and daily interference. Real-time monitoring provides reliable home fire safety protection for kitchen, living room and whole-house use.

Steady Power Supply for 24/7 : Designed exclusively for smoke detectors and alarms, PKCELL carbon zinc 9V battery provides steady, uninterrupted power to keep your home safety devices active around the clock.
Match Battery Type
Use only the battery size and type specified for the exact alarm model. Current Kidde hardwired products can use replaceable AA backup batteries, while older units may use another battery format.
- Read the model label before buying a battery.
- Check the user guide for the approved battery size and replacement interval.
- Use fresh batteries of the specified type.
- Do not substitute a rechargeable or different-chemistry battery unless the manufacturer specifically permits it.
- Do not attempt to open or replace a permanently sealed backup battery.
Battery-replacement frequency is also model-specific. For example, Kidde’s current 20SAR hardwired smoke alarm uses two replaceable AA batteries and instructs owners to replace them every six months or when the low-battery warning sounds. Kidde’s broader smoke-alarm guidance says replaceable batteries should be changed at least annually and when a low-battery warning occurs. The model manual should control.
Align Battery Connectors
Check the molded polarity symbols inside the compartment before inserting the battery. Reversed polarity, loose contacts, or a battery that is not fully seated can cause chirping or prevent the alarm from passing its test.
If the compartment has a latch, reminder finger, or locking mechanism, close it exactly as the manufacturer specifies. Never tape a battery door shut or defeat a mechanism that is preventing closure.
If the battery compartment will not close, remove the battery and recheck its size, orientation, and seating. Forcing the door can damage the alarm.
Test Backup Power
Before reconnecting AC power, perform the battery-only test described in the model instructions when applicable. Kidde’s general replacement procedure for rear-loading hardwired alarms calls for installing the battery, closing the compartment, and pressing Test before the unit is put back on the ceiling.
If the detector does not sound during the battery test, recheck battery polarity and seating. Try a fresh battery of the correct type if necessary.
Do not rely on an alarm that repeatedly fails its test. An expired or malfunctioning alarm should be replaced according to its manual rather than left in service.
Reconnect the Alarm Before Restoring AC Power
Keep the circuit breaker off while reconnecting the alarm. Align the Quick Connect harness with the matching socket on the alarm and press it into place until the locking mechanism is fully engaged.
Next, align the alarm with its mounting plate and rotate it toward the ON position until it sits securely. Only after the harness is connected and the alarm is properly mounted should AC power be restored at the breaker.
After restoring power, check the normal AC-power indicator described in your model’s manual and perform a final Test-button check.
Reconnect Wiring Harness
Use this sequence for a typical Kidde hardwired alarm with a replaceable backup battery:
- Leave the circuit breaker OFF.
- Confirm that the correct backup battery is installed and its compartment is closed.
- Align the Quick Connect plug with the alarm’s socket.
- Push the connector in until it is securely locked.
- Mount the alarm onto its bracket.
- Restore power at the circuit breaker.
- Press the Test button and confirm the interconnected system behaves as expected.
If you are replacing the entire detector rather than only its battery, do not assume an old connector or interconnected system is compatible with a new alarm. Kidde’s interconnection guidance says approved model combinations should be verified in the product documentation.
Twist Alarm Into Place
Align the detector with the mounting bracket and rotate it toward the ON position until it seats securely. The unit should sit flat without hanging from the wiring or wobbling loosely on the plate.
The Quick Connect harness should already be attached before AC power is restored. Do not energize exposed or disconnected household wiring simply to test whether power is present.
After the alarm is mounted, restore power at the breaker. Check the model-specific power indicator and then press the Test button.
Test the Kidde Alarm After Battery Replacement
Press the Test button after the alarm has been reinstalled and AC power restored. Follow the model’s instructions for how long to press the button and what sound or voice sequence to expect.
If the alarm is part of a compatible interconnected system, verify that the other interconnected alarms respond as described in their manuals. A failure to interconnect can indicate compatibility, wiring, or configuration problems even if the individual alarm itself sounds.
- Confirm that AC power has been restored.
- Confirm the backup battery is seated correctly.
- Press Test and verify a clear alarm response.
- Check any status LEDs or voice messages against the user guide.
- Repeat functional testing at least monthly.
The U.S. Fire Administration recommends testing smoke alarms every month and replacing smoke alarms when they reach 10 years of age.
Note: A brief low-battery chirp is not the same as an active smoke alarm. If the detector enters its fire-alarm pattern, announces a fire, or smoke is present, treat it as an emergency instead of troubleshooting the battery.
Stop Chirping After a Kidde Battery Change
If the alarm continues to chirp after a new battery is installed, start with the simplest checks. Confirm that the replacement battery matches the model requirements, is fresh, is inserted with correct polarity, and is making firm contact with the terminals.
Next, confirm that AC power has been restored to a hardwired unit. A loss of AC power can produce status indications or chirping on some models even though the backup battery is working.
Check the detector’s age and status indicators. An end-of-life warning cannot be corrected by repeatedly installing new batteries. Standard smoke alarms should generally be replaced after 10 years, while combination or specialty alarms should follow their model-specific end-of-life instructions.
Dust, insects, steam, humidity, or cooking aerosols can also contribute to nuisance alarms. Clean the unit only according to the manufacturer’s instructions; do not open the sensing chamber or insert objects into it.
If a reset is appropriate, follow the procedure for the exact model. Kidde’s support instructions for hardwired alarms generally involve turning off/disconnecting AC power, removing a replaceable battery where applicable, holding the Test button to discharge/reset the unit, then reconnecting the power and battery in the specified order. Because Kidde reset instructions can differ among models, use the user guide rather than relying on a universal button-hold time.
If chirping continues after correct battery installation, power restoration, cleaning, and the approved reset procedure, replace an expired alarm or contact Kidde support for model-specific troubleshooting.
[Amazon Products Picked for You]

SMOKE DETECTION: Model 20SAR detects smoke over 25% faster*; sounds a loud 85-decibel alarm with red LED light for clear visual warnings; suitable for homes

SMOKE DETECTION: Model 20SAR detects smoke over 25% faster*; sounds a loud 85-decibel alarm with red LED light for clear visual warnings; suitable for homes

Keep your family safe with this 3 pack of hardwired smoke alarms; the battery backup means constant monitoring, even if there's a power failure
Frequently Asked Questions
Can I replace a hardwired smoke detector battery myself?
A replaceable backup battery can usually be changed by following the alarm’s user guide and switching off AC power before disconnecting the unit. Replacing or modifying fixed household wiring is different. If the connector must be rewired, wiring is damaged, the circuit cannot be identified safely, or local rules require licensed electrical work, use a qualified electrician.
My Kidde hardwired smoke detector keeps going off. What can I do?
First determine whether it is producing a true smoke-alarm signal, a low-battery chirp, or another status warning. Never silence or disable a detector when smoke or fire may be present. For nuisance alarms, check the model manual, clean the alarm as directed, verify its location is not being affected by steam or cooking aerosols, confirm battery and AC power, and replace an expired or malfunctioning unit.
Is there a replacement for an older Kidde hardwired smoke and carbon monoxide alarm?
Yes, Kidde sells current hardwired smoke and combination smoke/CO alarms, but compatibility should be checked by exact model. Do not assume the old mounting plate, plug, or interconnect circuit will work with every new detector. Compare the replacement model’s user guide and compatibility information before installation.
How can I stop my Kidde smoke alarm from chirping?
Install the correct fresh battery, verify polarity and battery-door closure, confirm AC power on hardwired models, check the alarm’s age, and follow the model-specific cleaning and reset instructions. If the unit has reached end of life or continues to fail testing, replace the alarm instead of repeatedly removing the battery.
Will a hardwired Kidde alarm still work after I turn off the breaker?
It can. A hardwired model with a working backup battery is designed to continue operating when AC power fails. Turning off the breaker de-energizes the household AC supply to the alarm, but the backup battery can still power the detector’s electronics and sounder.
Can I replace the battery in a Kidde 10-year sealed alarm?
No. A permanently sealed long-life battery is not intended for normal user replacement. Follow the model’s instructions if it reports a low-battery or end-of-life condition. Do not pry open the alarm or attempt to install another battery inside it.
Dispose of an Old Kidde Smoke Alarm Safely
If the smoke alarm itself has reached end of life, replace it promptly and follow its disposal instructions. Remove replaceable batteries where applicable and dispose of those batteries according to local battery-recycling or waste rules.
Some ionization smoke alarms contain a very small sealed amount of americium-241. The U.S. Environmental Protection Agency says these alarms are safe when intact and used normally and should never be dismantled or tampered with.
Residential disposal requirements can vary. EPA guidance notes that household disposal may be permitted for ionization detectors, while communities can have separate recycling or disposal programs. Kidde also recommends checking local municipal requirements and the instructions for the specific detector.
Sources
- Kidde — Smoke Alarm Battery Replacement — battery installation, polarity, testing, Quick Connect reconnection, and model-specific guidance.
- Kidde — Smoke Alarm Removal — hardwired alarm removal, Quick Connect harness, and tamper-resistant features.
- Kidde — Interconnected Alarm Compatibility — approved model compatibility and hardwired interconnection safety.
- U.S. Fire Administration — Smoke Alarms — monthly testing, backup-battery maintenance, placement, and 10-year smoke-alarm replacement guidance.
- U.S. EPA — Americium in Ionization Smoke Detectors — safe handling and disposal information for ionization alarms.
Conclusion
Changing the battery in a Kidde hardwired smoke detector is straightforward only after the exact alarm type is identified. For a model with a replaceable backup battery, switch off AC power, remove and disconnect the alarm as directed, install the specified battery with correct polarity, test the backup power, reconnect and mount the alarm while the breaker remains off, then restore AC power and perform a final test.
Do not attempt to replace a permanently sealed 10-year battery, and do not assume that a persistent chirp always means the battery is weak. Alarm age, loss of AC power, battery seating, contamination, end-of-life warnings, and compatibility problems can produce other symptoms. A detector that is expired, damaged, or unable to pass its test should be replaced rather than relied on for fire protection.
