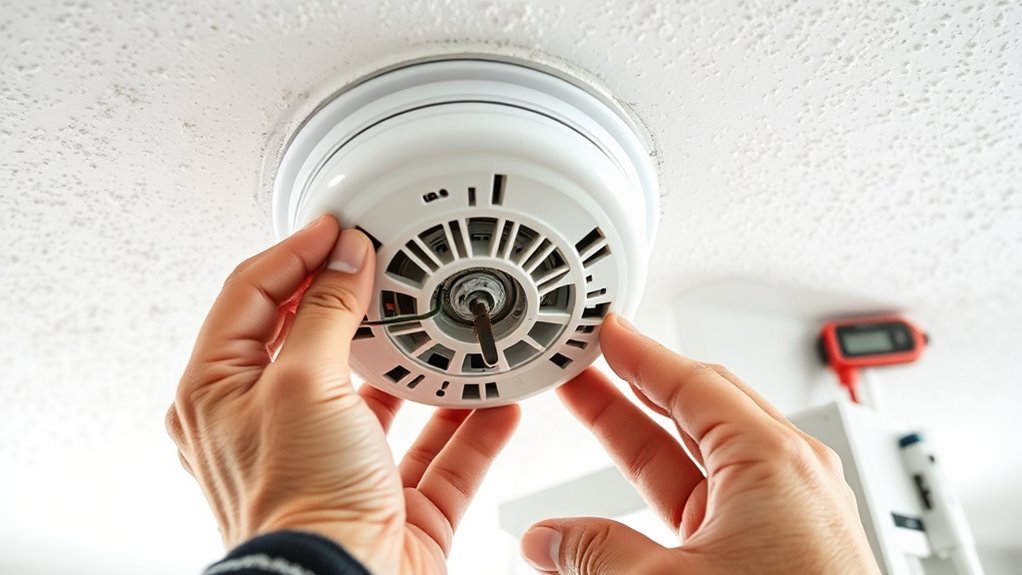
A 35-year-old hardwired smoke alarm should be replaced now. U.S. fire-safety guidance calls for replacing smoke alarms about 10 years from the manufacture date, so an alarm installed decades ago is far beyond its intended service life. Before replacing it, identify the exact model, check the entire interconnected system, confirm the current manufacturer-approved replacement, and follow the alarm manual and local electrical requirements.
Quick Answer
A 35-year-old hardwired smoke alarm is far beyond the normal 10-year replacement interval and should be replaced now. Use a currently listed, interconnect-compatible alarm, follow the exact manufacturer wiring instructions, and treat 120V wiring as electrical work. After installation, test every alarm in the interconnected network.
Key Takeaways
- Replace a smoke alarm that is about 10 years old or older; a passing test does not extend its rated service life.
- Do not identify a battery-only alarm simply by seeing a battery door; many hardwired alarms also have backup batteries.
- Verify the exact model, power connector, interconnect system, sensor type, and manufacturer compatibility before buying a replacement.
- For First Alert hardwired installations, follow the current product manual and local electrical code; manufacturer instructions for line-voltage wiring may require a licensed electrician.
- After replacement, test every alarm individually and confirm that all compatible interconnected alarms sound.
- Follow local disposal rules, remove only user-replaceable batteries, and never dismantle an ionization smoke alarm.
At a Glance
| Time Required | Varies by the number of alarms, connector compatibility, and whether wiring changes are required. |
| Difficulty | Moderate; line-voltage wiring and junction-box work should follow the manufacturer manual and local electrical requirements. |
| Tools Needed | Stepladder, screwdriver, the replacement alarm and its manual; electrical test and wiring tools should be used by a qualified person when wiring work is required. |
| Cost | Varies by alarm model, adapter requirements, number of units, and local electrician labor. |
When to Replace a Hardwired Smoke Alarm
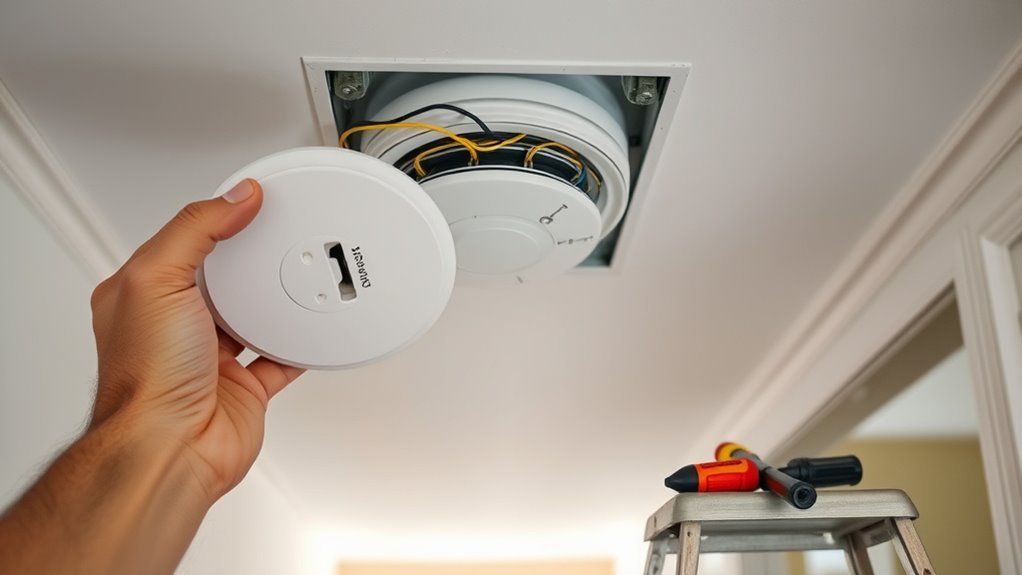
The U.S. Fire Administration says smoke alarms should be replaced 10 years from the manufacture date. A unit that is 35 years old is therefore well beyond the normal replacement interval, even if its indicator light still works or its test button still sounds the horn.
Smoke alarms do not last indefinitely: the normal replacement point is about 10 years from the manufacture date.
Age is not the only reason for replacement. Replace an alarm that is physically damaged, painted over, contaminated, unable to pass its prescribed test, or displaying an end-of-life or fault signal that the manual identifies as requiring replacement.
A chirp by itself does not always mean the entire alarm has failed. Depending on the model, chirping can indicate a low backup battery, end-of-life condition, missing battery, power problem, or another fault. Check the model’s indicator pattern before deciding what the chirp means.
Paint can obstruct the alarm’s sensing openings, and visible cracking, heat damage, corrosion, or evidence of water intrusion warrants closer inspection. If an old alarm or the wiring around it shows damage, stop and have the system evaluated rather than simply attaching a new alarm.
Note: Pressing the test button checks important alarm functions, but a successful test does not reset the 10-year replacement clock or make a decades-old sensing chamber current again.
How to Identify Your Current Alarm
Before purchasing a replacement, record the brand, model number, manufacture date, power type, connector style, sensor type, and interconnect information shown on the existing alarm and in its manual. This is more reliable than guessing from the alarm’s appearance.
Power Source Type
Do not assume that an alarm with a battery compartment is battery-only. Many hardwired smoke alarms include a backup battery so they can continue providing protection during a power outage.
A hardwired alarm normally connects to household power through a wiring connector or junction box. First Alert’s U.S. hardwired products commonly use a 120V AC supply with battery backup, but the exact electrical requirements must come from the model’s manual.
If the installation type is uncertain, use the model label and documentation rather than opening energized wiring. A 35-year-old installation may use a connector, bracket, or interconnect arrangement that differs from current products.
Manufacture Date Label
The manufacture date is normally printed on the back or side label of the alarm. The exact date format varies by manufacturer, so look for wording such as “date of manufacture,” “manufactured,” or a clearly identified production date.
If the alarm is 10 years old or older, replace it. If the date is missing or unreadable and there is no reliable record proving the alarm is within its service life, replacement is the prudent choice.
Pro Tip: Before the old alarm is removed, photograph its model label, connector, mounting bracket, and any interconnect information. That makes it much easier to check the new alarm’s compatibility against the manufacturer’s current documentation.
Check the Whole-Home Smoke Alarm Coverage
A 35-year-old system should not automatically be replaced one-for-one without checking whether the home has enough alarms. Current USFA guidance calls for smoke alarms inside every bedroom, outside each separate sleeping area, and on every level of the home, including the basement.
If several interconnected alarms were installed at the same time decades ago, check the date on every unit. Replace every alarm that has reached the end of its service life rather than leaving equally old units in the network.
Local building, fire, rental, or renovation rules can require specific alarm types, locations, interconnection methods, or combination smoke/CO protection. Those local requirements take priority over a generic replacement guide.
Homes with occupants who are deaf or hard of hearing may also need compatible visual or tactile notification equipment rather than relying only on an audible horn.
Choose a Compatible First Alert Model
A replacement alarm must match more than the voltage. Check its listing, power source, connector or approved adapter, hardwired interconnect compatibility, backup-battery design, mounting instructions, and sensor type.
First Alert still documents legacy alarms such as the 9120B and 7010B, but its current catalog also contains newer hardwired products. Do not assume that an older model number is the best product to purchase in 2026 simply because it appears in an old interconnect list.
Match Wiring Type and Connector
First Alert hardwired alarms commonly use 120V AC power and a quick-connect plug. The exact connector must be checked against the replacement alarm’s documentation. A new alarm may use the same connector, a manufacturer-approved adapter, or a new harness.
An approved adapter can sometimes avoid altering the existing branch-circuit conductors, but it must be specifically approved for the old and new alarm models. Never force an incompatible plug or assume that plugs from different brands are electrically interchangeable.
Warning: Hardwired smoke alarms involve household line voltage. Turn off the correct circuit before an alarm is removed. Follow the exact manufacturer manual and local electrical code. First Alert hardwired installation instructions state that applicable wiring and installation must be performed by a licensed electrician.
Check Interconnect Support
Interconnect compatibility is essential because a replacement alarm must communicate correctly with the other alarms in the system. A physical connector that fits does not, by itself, prove that two alarm models are approved to interconnect.
| Model | Status / Sensor | 2026 Replacement Check |
|---|---|---|
| First Alert 9120B | Legacy hardwired ionization alarm with battery backup and interconnect | First Alert’s product information identifies SMI100-AC as a replacement; newer product generations also exist. Verify the current compatibility list before purchase. |
| First Alert 7010B | Legacy hardwired photoelectric alarm with battery backup and interconnect | First Alert’s 7010B product information lists a newer replacement model. Confirm the exact current replacement and interconnect list for the existing system. |
| Current hardwired models | Newer sensing, battery-backup and interconnect options | Check the current model manual, listing, connector, compatible-alarm list, and local code rather than relying on a legacy table. |
First Alert’s current compatibility information still lists several older First Alert/BRK models alongside newer alarms. That is useful for checking an existing network, but compatibility should always be confirmed against the manual for the exact replacement being installed.
Compare Alarm Sensor Type
Ionization and photoelectric smoke alarms respond differently to different fire conditions. The U.S. Fire Administration explains that ionization alarms tend to respond faster to smoke from flaming fires, while photoelectric alarms tend to respond faster to smoke from smoldering fires.
Neither technology is universally best for every possible fire. USFA recommends protection that incorporates both technologies, either through both alarm types or appropriate dual-sensor protection, while local codes and the manufacturer’s installation instructions still control the specific installation.
Modern standards have also changed. UL 217 has been updated with newer fire-test and cooking-nuisance requirements, and current products are available that conform to newer editions. First Alert’s newer hardwired SM2-W01, for example, is listed by the manufacturer as conforming to UL 217 10th Edition.
Features such as voice alerts, location announcements, smart notifications, sealed backup batteries, and end-of-life warnings can be useful, but they do not override the need for correct listing, placement, wiring, and interconnect compatibility.
Replace the Alarm Step by Step
The safest replacement process starts before the old alarm is disconnected. Because the system uses household power, use the exact instructions supplied with the replacement alarm and comply with local electrical requirements.
- Identify every alarm in the network. Record the existing model numbers, manufacture dates, sensor types, power connectors, and interconnect arrangement. Replace all alarms that have reached the end of their service life.
- Select an approved replacement. Confirm that the new alarm is intended for the existing 120V system, is appropriately listed, and is approved to interconnect with the remaining alarms. If an adapter is required, use only the manufacturer-approved adapter for those models.
- Shut off the alarm circuit. Turn off the correct breaker before removing a hardwired alarm. Do not rely on a wall switch. Line-voltage wiring should be handled according to the manufacturer’s electrician requirements and local code.
- Remove the old alarm and mounting hardware as directed. Many alarms twist or release from a mounting bracket and then unplug from a quick connector. Do not pull on the conductors.
- Install the new bracket, connector, or approved adapter. If the job requires opening the junction box or altering household wiring, the wiring must follow the exact alarm diagram rather than a generic color-matching rule.
- Install or activate the backup battery. Use the specified battery if the alarm has a user-replaceable backup battery. For a sealed-battery model, follow its activation procedure instead of attempting to open the battery compartment.
- Secure the alarm. Attach it firmly to the correct mounting bracket so that it sits as the manufacturer specifies.
- Restore AC power. Confirm the normal power/status indication described in the manual.
- Test the new alarm and the complete interconnect system. Test every alarm individually and confirm that all compatible interconnected alarms sound when each unit is tested.
The safe sequence is: de-energize the circuit, verify compatibility, install according to the manufacturer instructions, restore power, and test every alarm in the interconnected system.
What the Wire Colors Mean on First Alert Examples
Some First Alert hardwired alarm manuals identify black as hot, white as neutral, and orange as the interconnect conductor. Those colors describe specific First Alert products; they are not a universal rule for every alarm brand or every older installation.
If the existing conductors, connector, or junction box do not match the new manual exactly, stop and have the wiring evaluated rather than improvising a connection.
Test Interconnected Alarms
After installation, press the test button as instructed by the alarm manufacturer and verify that the expected interconnected alarms also sound. First Alert’s adapter instructions specifically call for testing each alarm individually and making sure all connected alarms respond when each unit is tested.
The U.S. Fire Administration recommends testing smoke alarms at least monthly. Some manufacturer manuals specify more frequent testing, so follow whichever schedule applies to the installed model.
If one alarm does not respond during an interconnect test, do not assume the rest of the system is adequate. Check the affected model’s power, backup battery, connector, interconnect compatibility, and installation instructions. If the problem involves line-voltage wiring, have it corrected by a qualified electrician.
Never test a smoke alarm with an open flame. Use the test procedure specified by the manufacturer.
Dispose of Old Smoke Alarms Safely
Once the replacement system is working, dispose of the old alarm according to its type, manufacturer instructions, and local waste rules.
Remove a user-replaceable battery before disposal when the product instructions call for it, and recycle or dispose of that battery through the appropriate local program. Do not attempt to remove or dismantle a permanently sealed battery.
Ionization smoke alarms contain a very small sealed radioactive source, typically americium-241. The U.S. Environmental Protection Agency says these alarms do not present a radiation health threat when intact and used normally. EPA also says outdated ionization alarms may be discarded with household garbage where local rules allow, although communities may offer separate recycling programs.
Never dismantle, crush, burn, or tamper with an ionization alarm. Check the alarm manual, local waste authority, and manufacturer support for any model-specific recycling or return program before disposal.
Frequently Asked Questions
What Is the Life Expectancy of a Hard Wired Smoke Alarm?
A hardwired smoke alarm is generally replaced about 10 years from its manufacture date. Hardwiring does not make the sensing chamber last indefinitely. Backup-battery maintenance depends on the model: follow its manual and replace any user-replaceable battery when required or when the alarm gives a low-battery signal.
Do I Need an Electrician to Replace Hard Wired Smoke Detectors?
Follow the specific alarm manual and local electrical rules. First Alert hardwired installation instructions state that applicable wiring and installation must be performed by a licensed electrician. This is especially important when an old harness must be changed, a junction box must be opened, wiring is damaged, or the existing 35-year-old system does not match the new connector.
Is a 20 Year Old Smoke Detector Still Good?
No. A 20-year-old smoke alarm is already about twice the normal 10-year replacement interval. Replace the complete alarm even if it still has power or sounds when its test button is pressed.
Do Hard Wired Smoke Alarms Need to Be Replaced Every 10 Years?
Yes, the general U.S. fire-safety recommendation is to replace smoke alarms about 10 years from the manufacture date. Continue testing the alarm during its service life, but testing does not extend that replacement interval.
Can I Reuse the Old Hardwired Smoke Alarm Plug?
Only when the new alarm’s manufacturer specifically approves that connector or provides an approved adapter for the old and new models. A plug that physically fits is not enough to establish electrical or interconnect compatibility.
Should I Replace All Interconnected Smoke Alarms at the Same Time?
Replace every alarm that is at or beyond its service life. If the interconnected alarms were installed together 35 years ago, they are all overdue. Replacing an aging group also gives you an opportunity to verify that every new unit is approved to interconnect with the others.
Conclusion
Replacing a 35-year-old hardwired smoke alarm is a necessary safety upgrade. Start with the manufacture date and model number, then verify the home’s overall alarm coverage, current replacement model, connector, and interconnect compatibility. Do not improvise with 120V wiring: follow the alarm manual and local electrical requirements. Once the replacement is installed, restore power and test every interconnected alarm individually so the entire warning system is confirmed to work together.
Sources
- U.S. Fire Administration — Smoke Alarms — replacement age, testing, placement, interconnection, and sensor guidance.
- First Alert — Current Hardwire Smoke Alarm With Battery Backup — current hardwired product features, listing, battery backup, and interconnect information.
- First Alert — Compatible Smoke and CO Alarms — current manufacturer interconnect compatibility information.
- UL Solutions — UL 217 Smoke Alarm Requirements — current smoke-alarm performance and testing developments.
- U.S. EPA — Americium in Ionization Smoke Detectors — ionization-alarm safety and disposal guidance.
