Replacing a wired Amika alarm starts with identifying the existing smoke alarm and finding a compatible replacement. The mounting bracket, electrical connector, and interconnected alarm system must all be considered. This guide explains how to check the model, understand the removal and installation process, and confirm that your home remains protected.
Quick Answer
To replace a wired Amika smoke alarm, identify its exact model, purchase a compatible hardwired replacement, and arrange safe electrical installation. Turn off the correct circuit before removal, follow the mounting plate’s release instructions, and use only approved wiring connections. Restore power and test both the new alarm and its interconnected units.
At a Glance
| Difficulty | Electrical work requires a qualified electrician. |
| Tools Needed | Stable step ladder, screwdriver, flashlight, appropriate voltage tester, and the replacement alarm’s instructions. |
Why You Need to Change Your Wired Amika Alarm
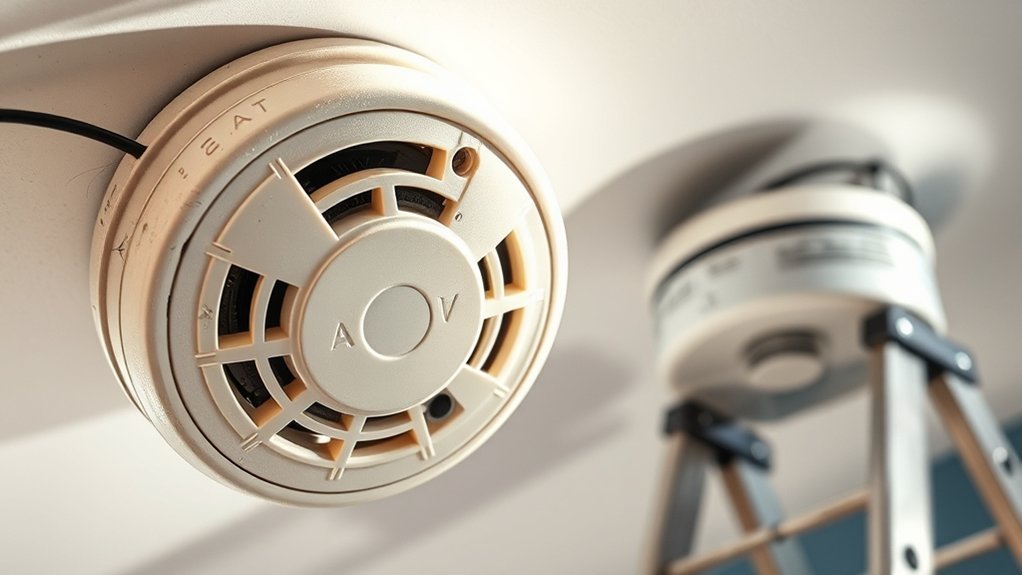
Smoke alarms have a limited service life. Even if an older alarm sounds during a button test, its sensing components may no longer provide dependable protection.
The U.S. Fire Administration’s smoke alarm guidance recommends replacing smoke alarms every 10 years from their manufacture date.
Replacement may be necessary sooner if the alarm fails testing, develops a persistent fault, or reaches its manufacturer-defined end of life.
Check the date printed on the back of your existing unit. If the date is missing or unreadable, consider replacing the alarm rather than assuming it remains within its service life.
Hardwired alarms also need working backup power. Replace removable backup batteries according to the manufacturer’s instructions and whenever the low-battery warning appears.
Some newer alarms use sealed backup batteries designed to last for the alarm’s service life. These batteries are not intended for routine removal or replacement.
Step-by-Step Guide to Removing Your Old Alarm
Removing an old hardwired alarm involves releasing it from its mounting bracket and disconnecting its electrical connector. The exact method depends on the model.
Before starting, identify the alarm’s manufacturer and read its removal instructions.
Warning: Hardwired smoke alarms connect to household electrical power. Switch off the correct circuit breaker before removal. Do not rely on removing the backup battery to disconnect mains power. If you cannot confirm that the circuit is safely isolated, stop and contact a qualified electrician.
- Prepare safe access. Place a sturdy step ladder on a level surface. Keep the surrounding area clear and avoid leaning sideways while working.
- Turn off electrical power. Switch off the appropriate circuit breaker and have the circuit checked with a suitable voltage tester.
- Release the mounting lock. Check whether the old alarm has a tamper-resistant pin or locking tab that must be released first.
- Remove the alarm from its bracket. Follow the direction marked OFF or REMOVE. Many hardwired models release by turning counterclockwise, but the printed directions take priority.
- Disconnect the electrical harness. If the model uses a quick connector, press its locking clips and gently separate the plug from the alarm.
- Inspect the existing components. Check the connector, mounting plate, and accessible wiring for visible damage before proceeding.
Never pull the unit down by its wires or force a connector that will not release.
If a locking tab prevents removal, consult the manufacturer’s instructions rather than breaking the bracket.
For an example of the release mechanism, see Kidde’s hardwired smoke alarm removal instructions.
These directions describe Kidde products and should not be treated as confirmed instructions for an unidentified Amika model.
Tips for Purchasing the Right Replacement Alarm
The correct replacement must suit your home’s electrical installation and existing alarm network. Matching the shape or appearance of the old unit is not enough.
Before purchasing, identify the old model, power requirements, harness, mounting bracket, and interconnection features.
Compatibility With Existing Harness
The wiring harness is the connector that joins the smoke alarm to its electrical supply. Different alarm models can use different connector designs.
Compare the existing harness with the replacement manufacturer’s approved compatibility information.
For example, Kidde offers adapters for selected older Kidde and Firex models. Its hardwired alarm adapter compatibility guidance explains why both the original and replacement model numbers must be checked.
An adapter is not universal. Do not assume it works simply because the plugs appear similar.
Verifying the harness type is crucial to avoid connection issues during the installation of a new smoke alarm unit.
Bring the old alarm or a clear photograph of its identification label to the store. Include the connector and mounting plate in your photographs.
If the replacement requires changes to household wiring, have a qualified electrician perform the work.
Brand Consistency Matters
Choosing the same manufacturer may simplify replacement, but brand consistency does not guarantee compatibility. Manufacturers can change connectors, brackets, and interconnection technology between product generations.
This also matters when replacing only one alarm in an interconnected system.
According to Kidde’s interconnection guidance, connecting unsupported models can cause unwanted alarms, equipment damage, or failure to sound during an emergency.
| Aspect | Importance |
|---|---|
| Same Brand | May simplify compatibility, but does not guarantee it |
| Correct Model Number | Helps confirm approved connections and replacement options |
| Updated Features | May provide improved detection, backup power, and notifications |
If your model is discontinued, ask the manufacturer for an approved replacement or adapter.
Features That Enhance Safety
A replacement alarm should provide reliable smoke detection and appropriate backup power. Additional features can improve convenience and make warnings easier to understand.
Consider these options:
- Photoelectric detection: Responds well to smoke from smoldering fires.
- Dual-sensor detection: Combines photoelectric and ionization sensing technologies.
- Battery backup: Maintains protection during electrical outages.
- Interconnection: Allows compatible alarms to sound together.
- Voice alerts: Can identify the type of emergency or warning condition.
- Smart notifications: Supported models can send alerts to a connected mobile device.
Smart features do not replace the need for working local alarms. Confirm compatibility before adding a smart model to an existing wired network.
How to Identify the Right Wired Amika Smoke Alarm Model
The most reliable way to identify your existing alarm is to read its rear identification label. The product name alone may not provide enough information to select a replacement.
For a unit described as an Amika alarm, confirm the actual manufacturer printed on the product before ordering parts.
Look for the following information:
- Manufacturer or brand name.
- Exact model number.
- Manufacture date or replacement date.
- Electrical supply rating.
- Smoke-only or combination smoke and carbon monoxide detection.
- Connector and interconnection specifications.
On many alarms, the label is hidden against the ceiling or mounting plate.
For example, Kidde’s model identification guide explains where to find its model information.
Once you have the exact model number, compare the replacement’s documentation with the existing system.
If you cannot identify the old alarm or establish compatibility, have a qualified installer assess the system rather than choosing a replacement by appearance.
What Tools Do You Need for Installation?
A stable ladder, suitable screwdriver, flashlight, and appropriate electrical testing equipment are the main tools used during replacement.
The exact toolkit depends on whether the new alarm uses the existing approved connector or requires electrical modifications.
Essential Ladder Type
Use a sturdy step ladder that allows you to reach the ceiling comfortably. Position it on a firm, level surface.
Avoid standing on furniture, overstretching, or leaning against the alarm while removing it.
For unusually high ceilings, arrange suitable professional access equipment rather than using an unstable ladder.
Required Tools Checklist
Prepare the replacement alarm and its installation manual before the old unit is disconnected.
The following items cover common installation needs:
- Stable step ladder for ceiling access.
- Screwdriver for the mounting bracket or locking mechanism.
- Flashlight for viewing labels and connectors.
- Suitable voltage tester for checking electrical isolation.
- Approved replacement mounting plate and connector, if required.
- Safety gloves and eye protection where appropriate.
Wire strippers and wire cutters may be needed when electrical connections must be changed. Such work should be handled by a qualified electrician.
Safety Precautions Needed
Safe installation requires electrical isolation, suitable access equipment, and the correct replacement components.
These precautions help prevent injury and avoid damage to the alarm system.
| Tool | Purpose | Safety Tip |
|---|---|---|
| Screwdriver | Securing the mounting bracket | Use a suitable insulated tool when required |
| Wire Cutters | Electrical modifications when necessary | For qualified electrical work with power isolated |
| Ladder | Accessing the installation location | Place on a firm, level surface |
Do not cut an existing connector simply to make an incompatible alarm fit.
Common Installation Challenges and Solutions
The most common replacement problems involve incompatible connectors, different mounting plates, locked brackets, and alarms that fail to communicate with the rest of the system.
Identifying the cause before modifying anything helps prevent unnecessary damage.
- The alarm will not twist off: Check for a tamper-resistant pin, locking tab, or printed release direction.
- The new harness does not fit: Confirm both model numbers and use only a manufacturer-approved adapter or replacement connector.
- The mounting bracket does not align: Use the replacement’s specified bracket rather than forcing the alarm into the old one.
- The replacement does not power on: Have the circuit, connector, and installation checked.
- Other alarms do not sound during testing: Check the approved interconnection requirements and arrange professional troubleshooting.
Using a sturdy ladder is crucial; unstable ladders can lead to serious accidents during installation.
Older interconnected systems can be particularly difficult to update because replacement parts may no longer support the original wiring arrangement.
In some cases, replacing multiple alarms is necessary to maintain a compatible interconnected network.
How to Safely Install Your New Wired Amika Alarm
A successful installation depends on using the correct replacement equipment and following its manufacturer-approved procedure.
The process includes electrical isolation, connector verification, secure mounting, power restoration, and functional testing.
Essential Safety Precautions
Do not begin installation until the replacement model and its electrical requirements have been confirmed.
Before electrical work starts:
- Make sure the correct circuit breaker is switched off.
- Have electrical isolation verified with appropriate testing equipment.
- Use a stable ladder with clear access to the alarm.
- Inspect the replacement alarm and approved accessories for damage.
- Follow the exact manufacturer’s installation instructions.
Note: The U.S. Fire Administration recommends that only qualified electricians install hardwired smoke alarms. Use a professional for electrical connections, uncertain compatibility, damaged wiring, or installations requiring changes to the existing system.
Step-by-Step Installation Guide
Once the correct replacement has been selected, the installer can follow the model-specific installation sequence.
- Confirm the replacement. Compare its specifications with the old alarm and the existing interconnected system.
- Prepare the mounting location. Check the mounting plate and replace it if the new model requires a different approved bracket.
- Connect the new alarm. Use the specified harness or approved adapter. Any required wiring changes must be completed by a qualified electrician.
- Fit the backup battery. Install a removable battery if the model requires one, or activate the sealed backup system according to its instructions.
- Secure the alarm. Align it with the mounting plate and rotate it in the indicated installation direction until it locks.
- Restore electrical power. Switch the circuit breaker back on after installation is complete.
- Test the alarm. Press its test button and confirm the expected sound and indicator behavior.
- Check interconnection. Where alarms are interconnected, confirm that the other compatible units respond as specified in the manufacturer’s instructions.
If the replacement fails any required test, do not assume the system is operating correctly.
Arrange troubleshooting before relying on the new alarm for protection.
Essential Features for Modern Smoke Alarms
Modern smoke alarms offer improved detection, clearer warnings, and more convenient backup power options.
The most useful features depend on your existing installation and the protection your household needs.
Common options include:
- Photoelectric sensors: Detect smoke using optical sensing technology.
- Ionization sensors: Respond to changes in an ionized sensing chamber.
- Dual-sensor technology: Combines both detection methods in one alarm.
- Voice notifications: Provides spoken warnings on supported models.
- Smart connectivity: Enables supported mobile notifications and remote status monitoring.
- Combination smoke and CO detection: Provides protection against both hazards in a single compatible device.
- Sealed backup batteries: Reduce the need for routine battery changes.
The U.S. Fire Administration recommends protection using both photoelectric and ionization technologies, either through separate alarms or dual-sensor models.
For U.S. residential smoke alarms, look for appropriate certification to UL 217.
UL Solutions explains the smoke alarm certification standards, including updated testing for modern fire conditions and cooking-related nuisance alarms.
A combination smoke and carbon monoxide alarm must also meet the applicable requirements for CO detection.
Remember that a smoke-only alarm does not detect carbon monoxide.
Best Practices for Maintenance and Testing After Installation
Smoke alarms need regular testing and basic cleaning throughout their service life. Installation alone does not guarantee continued protection.
Test each alarm at least once a month using its test button.
Routine testing of smoke alarms is essential for ensuring their reliability; press the test button monthly to stay familiar with the alarm’s sound.
Follow this maintenance routine:
- Monthly: Press the test button and check that the alarm operates as expected.
- During cleaning: Remove surface dust and debris using the method recommended by the manufacturer.
- For replaceable batteries: Follow the specified replacement interval and change them promptly after a low-battery warning.
- For sealed batteries: Do not attempt to open or replace the sealed power source.
- At the end of service life: Replace the complete alarm rather than relying on continued battery changes.
Keep a simple maintenance record showing the alarm’s manufacture date, installation date, battery changes, and test results.
If an alarm begins chirping, identify the warning pattern before taking action.
A low-battery signal, sensor fault, and end-of-life warning may sound different. Refer to the model’s manual rather than assuming every beep means the same thing.
Kidde’s chirping troubleshooting guidance describes how warning patterns can indicate battery problems, malfunctions, or end-of-life conditions.
If cleaning and an appropriate battery replacement do not resolve the warning, the alarm may require replacement or professional inspection.
Local Fire Safety Guidelines for Smoke Alarms
Smoke alarm requirements vary by location, building type, and applicable electrical or fire codes.
For U.S. homes, general fire safety recommendations include installing alarms:
- Inside every bedroom.
- Outside each separate sleeping area.
- On every level of the home, including the basement.
- On ceilings or high on walls, following the manufacturer’s placement instructions.
Interconnected alarms provide an additional benefit because a warning from one compatible unit can activate the others.
Make sure everyone in the home recognizes the alarm sound and understands the escape plan.
For people with hearing loss, specialized alarms with flashing lights or vibrating alert devices may provide more accessible warnings.
Some local fire departments offer free or reduced-cost smoke alarms and installation assistance. Contact the department’s nonemergency number to learn about available programs.
Local requirements may also determine whether a licensed electrician is needed for a replacement or whether a particular alarm type is required.
Key Takeaways
- Check the manufacture date on the rear label rather than estimating the alarm’s age from its appearance.
- A matching brand does not automatically mean the existing connector, bracket, or interconnection system is compatible.
- Follow the mounting plate’s release direction and check for tamper-resistant locks before removing an old alarm.
- Replace removable backup batteries as directed; sealed backup batteries are not intended for routine replacement.
- After installation, verify the alarm’s operation and check that all compatible interconnected units respond correctly.
Frequently Asked Questions
Can I Change a Hardwired Smoke Detector Myself?
Some replacement units use plug-in connectors, but hardwired alarms remain connected to household electrical circuits. The U.S. Fire Administration recommends qualified electricians for hardwired installation. Have a professional handle wiring changes, uncertain compatibility, or any installation your local rules reserve for licensed workers.
Do I Need an Electrician to Replace Hardwired Smoke Detectors?
A qualified electrician is recommended for hardwired smoke alarm installation. Professional assistance is especially important when the wiring harness must change, the electrical circuit needs troubleshooting, or the interconnected system contains incompatible models. Local electrical rules may also require licensed installation.
Can I Replace Just One Hardwired Smoke Detector?
Yes, you can replace one hardwired smoke alarm if the new unit is approved for the existing interconnected system. Check the exact model and connector compatibility. If the remaining alarms are near their replacement dates or cannot communicate with the new model, additional replacements may be necessary.
How Do I Stop My Hardwired Smoke Detector From Beeping?
First, identify whether the sound is a full alarm or an occasional warning chirp. Treat a full alarm as an emergency until you know otherwise. For chirping, check the manual, battery, manufacture date, and fault indicators. Replace the unit if it has reached the end of its service life.
Conclusion
Replacing a wired Amika alarm requires more than finding a smoke detector that fits the ceiling. Confirm the actual model, check electrical and interconnection compatibility, and arrange qualified installation where required.
Once the replacement is installed, test its operation and the connected alarm network. Continue monthly testing and replace the complete unit when it reaches the end of its service life.
Sources
- U.S. Fire Administration — Smoke Alarms: Replacement intervals, installation guidance, battery maintenance, testing, and recommended alarm locations.
- Kidde — Smoke Alarm Removal: Mounting direction, locking mechanisms, and electrical connector removal.
- Kidde — Hardwired Alarm Adapter: Approved adapter compatibility and replacement model requirements.
- Kidde — Alarm Interconnection Compatibility: Compatibility restrictions and electrical safety precautions.
- Kidde — Model Number Identification: Locating manufacturer and model information on an existing alarm.
- UL Solutions — Smoke and Gas Device Certification: Smoke alarm standards and certification requirements.
- Kidde — Consistent Chirping Causes: Low-battery warnings, fault indications, and end-of-life troubleshooting.
