
Replacing a light bulb in a Toyota RAV4 can take only a few minutes, but the correct procedure depends on the model year, trim, lamp position, and lighting technology. Older RAV4s use more serviceable halogen and incandescent bulbs, while newer models contain several integrated LED lamps that may require complete assembly replacement or professional service.
Quick Answer
Turn off the RAV4 and its lights, let the bulb cool, and confirm the exact bulb number in the owner’s manual. Remove the socket or retaining hardware, install an identical bulb without touching its glass, secure every connector, and test the light. Integrated LED lamps usually require professional replacement.
Key Takeaways
- Confirm the model year, trim, lamp function, bulb number, and wattage before buying a replacement.
- Do not use a generic RAV4 bulb chart because specifications vary widely between generations and trims.
- Switch off the ignition and lights, allow the bulb to cool, and handle the replacement with clean gloves or a dry cloth.
- Some rear lamps require removal of the complete lamp assembly instead of access through an interior panel.
- Newer headlights and many other exterior lamps use integrated LEDs that are not owner-serviceable.
At a Glance
| Time Required | Usually 10 to 30 minutes for an accessible bulb; longer when trim or a lamp assembly must be removed |
| Difficulty | Beginner for accessible bulbs; intermediate for lamp-assembly removal |
| Tools Needed | Owner’s manual, correct bulb, clean gloves, dry cloth, trim tool, screwdriver, and any socket specified for your model |
| Cost | Varies by bulb type; a complete integrated LED lamp assembly costs considerably more than a serviceable bulb |
Why Working RAV4 Lights Matter
Headlights help you see the road, while turn signals, brake lights, tail lights, marker lights, and backup lights help other road users understand what your RAV4 is doing. A failed or incorrectly fitted bulb can reduce visibility, produce an uneven beam, or prevent another driver from seeing your signal.
Federal Motor Vehicle Safety Standard No. 108 establishes performance requirements for original and replacement lamps, reflective devices, and associated equipment. You should therefore use the correct lamp type and avoid modifications that change the intended color, beam pattern, brightness, or signaling function. You can review the standard in 49 CFR 571.108.
The correct replacement depends on the RAV4’s model year, trim, market, lamp function, and whether the lamp contains a serviceable bulb or integrated LEDs.
Before You Change a RAV4 Light Bulb
Identify the Exact Bulb or Lamp Assembly
Do not purchase a bulb based only on the words “Toyota RAV4.” Start with the model year and trim, then check whether the vehicle is gasoline, hybrid, or plug-in hybrid. Lighting equipment can differ between trims produced in the same year.
- Open the lighting or do-it-yourself maintenance section of your owner’s manual.
- Locate the lamp function, such as low beam, front turn signal, rear turn signal, or backup light.
- Confirm whether Toyota lists a bulb number and wattage or directs you to a Toyota dealer.
- Compare the old bulb’s number with the new bulb before installation.
You can find the correct manual through Toyota’s official manuals and warranties page. Enter the exact model year rather than relying on a retailer’s general fitment chart.
Note: The examples below show why a single universal RAV4 bulb chart is unreliable. They apply only to the listed U.S.-specification model years and may still vary by equipment type.
| Lamp Function | 2008 RAV4 Example | 2025 RAV4 Example |
|---|---|---|
| Headlight | 9005 high beam and 9006 low beam | Headlights listed as dealer-replacement LED lamps |
| Front turn signal or parking light | 7443 | 7444NA on applicable bulb-type assemblies |
| Rear turn signal | 7440 | WY21W |
| Backup light | 921 | W16W |
The figures above come from Toyota’s official 2008 RAV4 Owner’s Manual and 2025 RAV4 Owner’s Manual.
Tools You May Need
- The exact replacement bulb specified for your RAV4
- Clean nitrile or cotton gloves
- A clean, dry, lint-free cloth
- A plastic trim-removal tool
- A flathead or Phillips-head screwdriver
- A Torx driver or small socket set when specified by the manual
- A flashlight
- A multimeter when electrical diagnosis is required
Do not assume every tool is necessary. Some front bulbs release with a simple quarter-turn, while certain rear lamps require screws or lamp-assembly removal.
Safety Precautions
Warning: Turn off the light and let it cool before touching it. A recently used bulb can cause burns. Do not install a scratched, dropped, cracked, or incorrectly rated bulb.
| Precaution | Why It Matters |
|---|---|
| Park on a level surface and apply the parking brake | Keeps the vehicle stable while you work around it |
| Turn off the ignition and lighting controls | Prevents the circuit from operating during replacement |
| Allow the bulb to cool | Reduces the risk of burns |
| Wear clean gloves | Keeps skin oils and moisture off the bulb glass |
| Match the bulb number and wattage | Prevents poor fit, excess heat, and electrical problems |
| Do not force a socket or lamp assembly | Protects retaining tabs, wiring, seals, and locating pins |
You normally do not need to disconnect the 12-volt battery for a routine owner-serviceable bulb replacement. Follow the exact manual if it gives different instructions. Unnecessary battery disconnection may reset stored settings or require some systems to be initialized again.
Types of Lights Used in a Toyota RAV4
A RAV4 may use several lighting designs:
- Serviceable halogen headlight bulbs: Common on older generations and some lower-trim vehicles.
- Serviceable incandescent or halogen signal bulbs: Often found in turn signals, backup lights, side markers, and older interior lamps.
- Wedge-base bulbs: Insert directly into a socket and are common in marker, interior, and signaling applications.
- Festoon bulbs: Cylindrical bulbs with contacts at both ends, used in some interior lamps.
- Integrated LED assemblies: The LEDs are built into the lamp and may not be individually replaceable.
Do not assume that an LED lamp is owner-serviceable. Toyota’s 2025 RAV4 manual identifies the headlights and many daytime running, parking, marker, fog, tail, stop, high-mounted stop, and license-plate lamps as dealer-replacement components.
How to Replace a Serviceable RAV4 Headlight Bulb
Use this procedure only when the owner’s manual lists a removable headlight bulb. If the manual directs you to a dealer or describes the lamp as an LED assembly, skip to the next subsection.
- Park the RAV4, turn off the ignition and headlights, open the hood, and allow the bulb to cool.
- Locate the rear of the correct headlight housing. Confirm whether you are working on the high beam, low beam, or a combined high-and-low bulb.
- Remove any dust cover only if your model uses one.
- Release the electrical connector by pressing its locking tab. Pull on the connector body rather than the wires.
- Turn the bulb base counterclockwise or release its retaining clip, depending on the design.
- Remove the old bulb without striking it against the housing.
- Compare the new and old bulb numbers, bases, locating tabs, and electrical contacts.
- Install the new bulb in the correct orientation. Hold it by its plastic or metal base.
- Lock the bulb or retaining clip, reconnect the wiring, and reinstall the dust cover.
- Test the low and high beams, then check that both beam patterns appear even.
Pro Tip: If the new headlight works but its beam looks scattered, unusually low, or unusually high, switch it off and check that the bulb’s locating tabs are fully seated. A crooked bulb can distort the beam even when the lamp illuminates.
When the Headlight Uses Integrated LEDs
An integrated LED headlight does not contain a conventional removable halogen bulb. Diagnosis may involve the complete lamp assembly, its driver module, wiring, connectors, fuses, and vehicle control circuits. Professional service is the safer choice when Toyota does not provide an owner replacement procedure.
Warning: Do not install a plug-in LED headlight bulb merely because its base fits a halogen socket. A 2024 NHTSA interpretation stated that LEDs were permitted in compliant integral-beam headlamps but were not permitted as replacement light sources in replaceable-bulb headlamps under the federal standard at that time. State laws may also apply.
How to Change a Front Turn-Signal Bulb
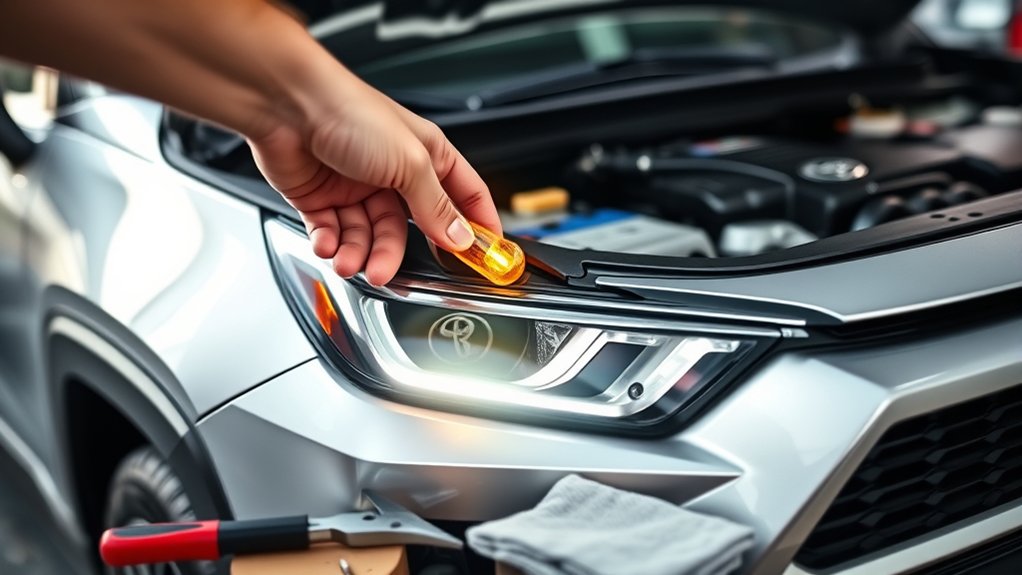
Many RAV4 front turn-signal bulbs can be reached from the engine compartment, but newer trims may use an integrated LED signal that requires professional replacement.
- Confirm that your owner’s manual identifies the front turn signal as a bulb-type lamp.
- Open the hood and locate the turn-signal socket behind the headlight assembly.
- Grip the socket and turn it counterclockwise. Do not twist the wiring.
- Pull the old bulb from the socket or release it using the method shown in the manual.
- Insert the correct new bulb until it is fully seated.
- Insert the socket into the lamp and turn it clockwise until it locks.
- Activate the turn signal and hazard lights to confirm normal operation.
| Step | Check |
|---|---|
| Identify | Confirm that the lamp uses a removable bulb |
| Remove | Turn the socket without pulling or twisting the wires |
| Install | Seat the correct bulb and lock the socket |
| Test | Check the turn signal, hazards, and dashboard indicator |
How to Replace a Rear Turn-Signal Bulb
Rear turn-signal access varies by generation. Some RAV4s provide an interior access opening, while others require removal of the outer tail-lamp assembly.
Models With an Interior Access Panel
- Open the liftgate and locate the trim cover behind the affected lamp.
- Use a plastic trim tool or protected screwdriver to release the cover.
- Turn the turn-signal socket counterclockwise.
- Remove the old bulb and install the correct replacement.
- Lock the socket and reinstall the cover.
Models Requiring Lamp-Assembly Removal
- Open the liftgate and remove the small cover beside the lamp.
- Remove the lamp-retaining screws with the specified tool.
- Support the lamp with both hands and pull it straight toward the rear of the vehicle. Do not pry it sideways against the paint.
- Turn the rear turn-signal socket counterclockwise and remove the bulb.
- Install the replacement and lock the socket.
- Align the lamp’s locating pins and grooves before pressing it straight into place.
- Reinstall the screws and trim cover without overtightening them.
If the lamp will not release with moderate straight pressure, stop and recheck the manual. Hidden clips or fasteners can break when the assembly is forced in the wrong direction.
How to Change a Backup-Light Bulb
Backup lights may sit in the liftgate or the outer rear lamp, depending on the RAV4 generation. The 2025 RAV4 uses an access cover inside the liftgate for its owner-replaceable backup bulb.
- Turn off the vehicle, apply the parking brake, and open the liftgate.
- Locate the trim cover behind the backup lamp.
- Protect the trim tool or screwdriver tip with a clean cloth before releasing the cover.
- If the wiring is held by a clip, release the cord before turning the bulb socket.
- Turn the socket counterclockwise and remove it.
- Pull out the old bulb and install the correct replacement.
- Insert the socket and turn it clockwise until secure.
- Return the wiring to its clip and reinstall the access cover.
Test the backup light only when the area behind the vehicle is clear. Keep the parking brake applied, hold the brake pedal, and have a helper observe from the side rather than standing directly behind the RAV4.
Interior, Marker, and License-Plate Bulbs
Older RAV4s may use serviceable wedge or festoon bulbs in map, dome, vanity, cargo, side-marker, and license-plate lamps. Newer vehicles may use integrated LEDs or assemblies that Toyota does not list as owner-serviceable.
- Check the manual for a removal procedure and bulb specification.
- Switch the interior-light control off.
- Use a plastic trim tool at the designated notch rather than prying around the entire lens.
- Remove the bulb by pulling it straight out or releasing it from its spring contacts.
- Install the same bulb type and wattage.
- Reattach the lens or housing and test the light.
Stop if the lens flexes heavily, the trim begins to mark, or no release notch is visible. Forcing a lens can break clips that are not sold separately from the lamp assembly.
Final Checks After Installing the Bulb
Test the repaired lamp and related functions before driving:
- Headlights: Check low beams, high beams, and the high-beam indicator.
- Turn signals: Check the left and right front and rear signals.
- Hazard lights: Confirm that all four corners flash normally.
- Parking and marker lights: Walk around the vehicle and compare both sides.
- Brake lights: Ask a helper to observe while you press the brake pedal.
- Backup lights: Test them using the safe procedure described above.
- Interior lights: Test manual and door-linked operation.
Check that all covers, sockets, dust caps, screws, wiring clips, and trim panels are secure. A missing seal or loose socket can allow water and dirt into the lamp.
Troubleshooting a RAV4 Light That Still Does Not Work
| Symptom | What to Check |
|---|---|
| New bulb does not illuminate | Confirm the bulb number, seating, connector lock, socket contacts, and relevant fuse. |
| Turn signal flashes rapidly | Inspect all signal bulbs on that side, the socket, connector, and wiring. An incompatible LED conversion can also alter the flash rate. |
| Bulb flickers when the vehicle moves | Check for a loose bulb, weak socket tension, damaged connector, corrosion, or broken wiring. |
| Bulb fails repeatedly | Verify the wattage, housing seal, socket condition, charging voltage, and whether vibration is affecting the lamp. |
| Fuse blows again immediately | Stop replacing fuses. A short circuit or overloaded circuit requires diagnosis. Never install a higher-amperage fuse. |
| Light works but headlight beam is uneven | Check that the bulb tabs are seated correctly and the retaining clip or locking ring is secure. |
| Light lens has light misting | Temporary condensation can occur after rain or a car wash. Monitor it to confirm that it clears. |
| Large droplets or pooled water appear inside | The housing, vent, socket seal, or lens may be leaking. Arrange professional inspection. |
| Connector or socket looks melted | Do not reinstall a bulb until the damaged connector, socket, and cause of overheating are repaired. |
Tips for Maintaining Your RAV4’s Lighting
- Include a walk-around light check in routine maintenance and before long nighttime trips.
- Clean exterior lenses so dirt does not reduce usable light output.
- Inspect sockets for green corrosion, heat discoloration, looseness, or damaged seals.
- Use only the bulb number and wattage specified for the exact lamp.
- Make sure dust covers, access covers, and wiring clips are returned to their original positions.
- Consider replacing both serviceable halogen headlight bulbs when one fails if you want similar color and output on both sides.
- Do not automatically replace turn signals, reverse lights, or marker bulbs in pairs when the other bulb is operating normally.
- Avoid unverified LED headlight conversions that can create glare, warning messages, poor beam patterns, or regulatory problems.
Related Guides
Frequently Asked Questions
Can I use an LED bulb instead of a halogen headlight bulb in my RAV4?
Do not assume a plug-in LED bulb is a legal or safe substitute simply because it fits the socket. NHTSA stated in a 2024 interpretation that LEDs were allowed in compliant integral-beam headlamps but were not permitted as replacement light sources in replaceable-bulb headlamps under FMVSS No. 108 at that time. State law may also regulate the installation.
How often should I check my RAV4’s light bulbs?
Check the exterior lights during routine maintenance, before a long nighttime trip, and whenever you notice dimming, flickering, rapid turn-signal flashing, a warning message, or an uneven beam.
What should I do if the new bulb does not light up?
Confirm the bulb number and wattage, make sure it is fully seated, reconnect the plug until its lock clicks, and inspect the socket and fuse. If a correct bulb and fuse fail again, the circuit needs professional diagnosis.
Are front and rear RAV4 bulb types different?
Usually. Each lamp function may use a different bulb number, wattage, color, and base. Specifications also change between model years and trims, so verify each position separately in the owner’s manual.
Do I need to disconnect the battery before changing a bulb?
Not for most routine owner-serviceable bulb replacements. Turn off the ignition and lighting controls and allow the lamp to cool. Disconnect the battery only when the exact Toyota procedure instructs you to do so.
How do I find the correct bulb size for my Toyota RAV4?
Use Toyota’s official manual for the exact model year and confirm the lamp function, bulb number, and wattage. Check the number printed on the removed bulb before installing the replacement.
Why is my RAV4 turn signal blinking faster than normal?
Rapid flashing often indicates a failed signal bulb, poor socket connection, wiring fault, or an incompatible replacement. Check the front and rear signal on that side and inspect the socket and connector.
Can I replace a sealed LED RAV4 headlight myself?
A sealed LED headlight usually requires diagnosis or replacement of the lamp assembly or an electronic module rather than a simple bulb. Follow the owner’s manual and use a qualified technician when Toyota does not provide an owner replacement procedure.
Conclusion
Changing a serviceable Toyota RAV4 bulb is manageable when you begin with the correct model-year information. Turn off the lights, let the bulb cool, match the bulb number and wattage, protect the glass from skin oils, and make sure the socket and connector lock securely.
The most important step is knowing when the job is not a simple bulb replacement. Integrated LED headlights, damaged wiring, melted sockets, repeated fuse failure, water inside a lamp, and assemblies that do not release normally should be inspected by a qualified technician.
Sources
- Toyota Manuals and Warranties — official model-year owner’s manual lookup
- 2025 Toyota RAV4 Owner’s Manual — current bulb locations, owner-serviceable lamps, replacement steps, and warnings
- 2008 Toyota RAV4 Owner’s Manual — earlier-generation bulb specifications and replacement precautions
- 49 CFR 571.108, Federal Motor Vehicle Safety Standard No. 108 — requirements for original and replacement vehicle lighting equipment
- NHTSA LED Headlight Interpretation, February 13, 2024 — federal guidance concerning integral LED headlights and plug-in LED replacement light sources

