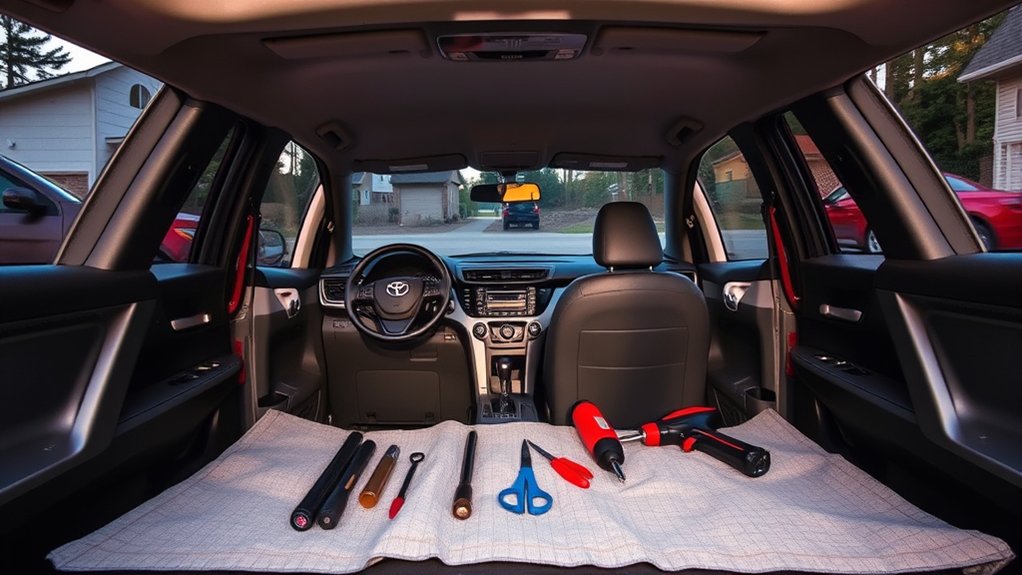
2014 RAV4 soundproofing can reduce unwanted road roar, engine drone, and wind noise, but the best fix depends on where the sound enters. Some noise comes from vibrating body panels, while other sounds come from tires, worn seals, or mechanical problems. Before removing trim or buying insulation, identify the loudest source and rule out problems that soundproofing cannot repair.
Quick Answer
To make a 2014 Toyota RAV4 quieter, identify the main sound first. Tire roar calls for tire checks and floor or wheel-well treatment; wind whistles call for seal repairs; engine drone may call for firewall damping. Start with simple maintenance, then add butyl mats and a separate sound barrier where needed.
Last checked: October 23, 2026. Dates and figures were verified against official sources.
At a Glance
| Difficulty | Easy for basic checks; moderate to advanced for interior disassembly |
| Tools Needed | Trim tools, utility knife, application roller, cleaning supplies, socket set, and protective gloves |
Find the Biggest 2014 RAV4 Noise Source
)
The first step in 2014 RAV4 soundproofing is identifying whether you hear road, tire, engine, or wind noise. These sounds travel through different parts of the vehicle. Treating the wrong area can add weight and expense without solving the problem.
Start with a controlled test drive on familiar roads. Have a passenger help identify the sound’s location so you can stay focused on driving.
- Listen on smooth and rough pavement. Noise that increases sharply on coarse asphalt usually points toward tire and road noise.
- Compare gentle acceleration with steady cruising. A sound that rises with engine speed may come from the engine, exhaust, or firewall area.
- Listen at highway speeds. Whistling or rushing near the windows, mirrors, or upper doors suggests an air-sealing problem.
- Check the cargo area. A hollow rumble from behind the rear seats may involve the rear wheel wells, cargo floor, or loose interior panels.
- Notice unusual humming or vibration. A new sound that follows road speed or changes during turns can indicate tire, wheel-bearing, or other mechanical trouble.
Before adding insulation, inspect tire pressure and tread condition. The NHTSA tire safety guidance recommends using the vehicle’s door-jamb pressure label and checking for irregular wear, damage, and vibration.
Also, Michelin’s tire FAQs identify uneven tread wear as a common cause of excessive tire noise. Repairing that problem may help more than covering the interior with damping sheets.
If your tires are already worn and need replacement, consider a road-focused tire known for low noise while maintaining the correct size, load rating, and safety performance.
Understand Why the 2014 RAV4 Is Loud
A 2014 RAV4 may sound loud because tire, road, engine, and wind noise reach the cabin through several paths. The amount you hear depends on road texture, tire condition, driving speed, and the vehicle’s seals and insulation.
The RAV4 is not unusually loud in every situation. Some drivers find it comfortable on smooth roads but notice more tire roar on rough highways.
Four sound paths are worth understanding:
- Firewall transmission: Engine and accessory noise can travel through the metal and openings between the engine compartment and passenger cabin.
- Rear structure resonance: Tire impacts can make the wheel wells, cargo floor, and nearby panels vibrate and transmit sound.
- Door leakage: Worn weatherstripping, window seals, or gaps around exterior trim can allow more wind noise into the cabin.
- Sheet-metal vibration: Large metal panels can vibrate and radiate sound when excited by tires, engine movement, or road impacts.
These problems require different treatments. A vibration-damping mat helps control panel movement, but it does not replace a damaged door seal or eliminate noise from a failing wheel bearing.
Likewise, dense sound barriers can reduce airborne noise, but they cannot stop every sound traveling through the suspension and vehicle structure.
The practical goal is to reduce the largest noise paths first instead of covering every available surface.
Choose Materials and Tools for Soundproofing
Choose soundproofing materials according to the type of noise you want to reduce. A 2014 RAV4 benefits most from combining vibration damping, airborne sound blocking, and selective sound absorption rather than relying on one material everywhere.
Match damping and barrier materials to each noise path and panel for the most effective RAV4 cabin noise reduction.
Butyl Sound-Damping Mats
Butyl mats reduce vibration in metal panels. Damplifier Pro is one example of a butyl-based damping sheet with a foil layer.
These mats work well on accessible floor sections, wheel-well metal, door skins, and roof panels.
They do not need to cover every square inch of metal to reduce resonance. Strategic coverage on broad, vibrating sections can be effective when properly bonded.
Mass-Loaded Vinyl Barriers
Mass-loaded vinyl, or MLV, is a dense, flexible material that helps block airborne sound. Luxury Liner Pro combines MLV with closed-cell foam, which separates the barrier from the metal underneath.
This separation is called decoupling. It helps the barrier work without being directly coupled to a vibrating panel.
The manufacturer’s vehicle soundproofing installation guide recommends approximately 60% coverage for Damplifier Pro and near-complete coverage for Luxury Liner Pro where the barrier is installed.
Those are product-specific guidelines, not measured coverage requirements for every RAV4.
Sound-Absorbing Foam
Acoustic foam absorbs sound that reflects inside cavities. It is useful in selected door and roof locations, but it does not replace a heavy sound barrier.
Automotive foam must be suitable for temperature and moisture exposure in its installation area.
Avoid ordinary household foam that lacks the needed automotive properties.
Tools and Preparation
Gather the tools before removing trim:
- Plastic trim-removal tools for interior panels and clips
- Socket set and suitable tools for approved fasteners
- Utility knife or heavy scissors for cutting materials
- Hand roller for bonding adhesive damping sheets
- Vacuum, clean cloths, and manufacturer-approved surface cleaner
- Protective gloves and suitable eye protection
- Cardboard or paper for making cutting templates
- Containers for clips, screws, and other removed hardware
Measure each area before cutting. Account for the thickness and weight of the new material, particularly where carpet, seats, and trim must fit back into place.
Strip the 2014 RAV4 Interior Safely
Interior disassembly gives you access to the RAV4’s floor, wheel housings, and other metal panels. However, removing seats and nearby trim can expose airbag wiring, seat-belt components, and electrical connectors.
Begin with the cargo area if you want a smaller project. Full floor treatment requires more extensive removal and careful reassembly.
Warning: The 2014 RAV4 has supplemental restraint system components, including seat-mounted airbags and curtain airbags. Before work involving these systems, turn the ignition off, disconnect the negative battery terminal, and follow the specified waiting procedure. I-CAR identifies a minimum 90-second wait for this vehicle. Seat removal and restraint-system work should follow Toyota repair procedures and be handled by a qualified technician if you are unfamiliar with them.
The I-CAR 2014 RAV4 restraint-system reference documents the battery-disconnection precautions.
- Clear the interior. Remove personal items, floor mats, and loose cargo so you can reach the trim without obstruction.
- Remove accessible cargo trim. Lift out the cargo-floor panels and storage inserts, then release suitable trim pieces using plastic tools.
- Document the fasteners. Take reference photos and store clips and screws in labeled containers.
- Remove larger components only when necessary. Front seats, the center console, and rear seat assemblies may need removal for full-floor access. Follow the vehicle-specific repair instructions and correct reinstallation procedures.
- Lift the carpet carefully. Keep factory insulation intact where possible and identify wiring, brackets, sensors, and mounting points beneath it.
- Inspect the exposed metal. Look for rust, standing water, loose wiring, damaged plugs, or signs of previous leaks before applying anything.
Do not disconnect restraint-system connectors with the electrical system powered. Avoid probing airbag connectors or modifying their wiring.
If a seat or seat-belt anchor has been removed, reinstall it using the correct Toyota procedure and specified fasteners and torque values.
Do not drive until all seating and safety-related components are correctly reinstalled and any warning lights or faults have been resolved.
Soundproof the 2014 RAV4 Floor
The RAV4 floor is a useful treatment area for reducing road and tire noise that travels through the lower body. A two-layer approach combines butyl damping on the metal with a dense sound barrier above it.
The cargo floor and areas above the rear wheel housings are sensible starting points when the loudest noise comes from behind the rear seats.
Step 1: Clean and Inspect the Metal
Vacuum exposed metal, remove loose debris, and inspect for moisture or corrosion. Repair leaks and rust before installing soundproofing materials.
Use the cleaner recommended by the damping-material manufacturer. Allow the surface to dry completely before applying adhesive sheets.
Step 2: Apply Butyl Damping Sheets
Cut Damplifier Pro into manageable pieces and fit them directly onto the cleaned metal.
Concentrate on broad, flat sections that may vibrate. Press the sheets down with a hand roller, working from the center toward the edges to remove trapped air.
Keep factory mounting holes, electrical connections, drain points, and access covers clear.
Step 3: Add the Sound Barrier
Place Luxury Liner Pro above the damping layer to reduce airborne noise transmission. Follow the product’s installation instructions, with the foam decoupling side facing the vehicle floor.
Cut the barrier carefully around seat mounts, carpet attachment points, and other necessary openings.
Fit adjacent pieces closely and seal barrier seams as directed by the manufacturer. Large gaps reduce the effectiveness of a continuous airborne sound barrier.
Step 4: Test Carpet and Trim Fitment
Before fastening anything permanently, test-fit the carpet and interior panels.
Check that added material does not interfere with seat mounting, seat tracks, wiring, pedals, or floor-mat retention points.
If panels no longer fit correctly, trim the added material rather than forcing components into place.
Once everything fits, reinstall the original components and inspect the cabin for rattles or trapped wiring.
Quiet Wind Noise in the 2014 RAV4 Doors
Wind noise in the 2014 RAV4 usually needs a sealing repair before additional sound-damping material. Butyl sheets can reduce door-panel vibration, while intact weatherstripping and properly fitted windows are more important for stopping whistles and air leaks.
Start by checking the door perimeter, window channels, and side-mirror mounting areas.
Treating the inner door skins with Damplifier Pro can reduce panel resonance, but fixing air leaks is the priority when a door whistles at highway speed.
Inspect the Door Seals First
- Examine the weatherstripping around each door for cracks, flattening, tears, or missing sections.
- Check that the window closes fully and sits evenly in its channel.
- Look for damaged seals near the side-mirror base and upper door frame.
- Check whether exterior trim is loose or creating a gap that catches airflow.
- Replace damaged seals with correctly fitting parts rather than covering the gap with interior soundproofing.
A seal that has lost its shape may allow wind noise even when the door closes normally.
Apply Door Damping and Acoustic Foam
If road noise or door resonance remains, remove the door trim carefully and inspect the accessible metal.
Apply Damplifier Pro to suitable sections of the door skin. Roll the material firmly to obtain full contact with the metal.
Mega Zorbe can help absorb sound inside suitable door cavities. The manufacturer’s Mega Zorbe specifications describe it as hydrophobic acoustic foam intended for areas such as doors and roof cavities.
However, do not cover window mechanisms, wiring, speakers, drain holes, or factory moisture barriers.
Door cavities must still drain water normally. Never seal the bottom drain openings or place loose material where moving window components could catch it.
After reassembly, test the windows, locks, speakers, and door handles. Check that the weatherstripping still fits evenly around the opening.
Stop Roof Boom in the 2014 RAV4
Roof soundproofing can reduce vibration from the large metal panel above the cabin. It is most useful when the roof itself produces a hollow booming sound or vibration rather than a whistle from a door or window seal.
However, reaching the roof skin requires careful headliner access, making this a more advanced project.
Identify Roof Resonance
Listen for a broad, hollow sound that changes with road conditions or airflow. Also inspect roof trim and mounted accessories for looseness.
A roof rack or loose exterior component can create noise that interior damping will not fully eliminate.
Confirm the source before taking down the headliner.
Treat the Roof Panel Carefully
After safe access to the roof metal, clean and dry the surface. Apply Damplifier Pro to suitable open metal sections between structural supports.
Roll the sheets firmly and avoid covering factory wiring routes, mounting points, or structural connections.
Suitable acoustic foam may also be installed in approved spaces above the headliner, provided there is enough clearance.
Never obstruct curtain airbags or their deployment paths. The headliner, roof-side trim, and pillar areas contain important safety components.
If accessing the metal requires disturbing restraint-system hardware, use a qualified technician.
What Noise Reduction Should You Expect?
Some roof soundproofing installations are described as producing cabin-noise improvements of 3–5 dB. However, that figure has not been established here as a controlled result for roof-only treatment on a 2014 RAV4.
The improvement depends on whether roof resonance was an important source in the first place.
Roof treatment may complement floor and door work, but it is unlikely to solve tire roar coming mainly through the lower body.
Quiet the RAV4 Firewall, Hood, and Wheel Wells
The firewall, hood, and wheel wells need different materials because they face different operating conditions. The firewall carries engine noise toward the cabin, while the wheel wells receive tire vibration and road impacts.
Use cabin-rated barriers inside the vehicle and suitable automotive materials in areas exposed to heat, water, dirt, or road debris.
Reduce Engine Noise at the Firewall
For engine noise that enters through the front of the cabin, treat accessible cabin-side firewall metal with a suitable damping material.
Damplifier Pro can reduce vibration in the exposed metal. Luxury Liner Pro can then provide a decoupled barrier against airborne engine and road noise.
Fit the barrier closely around safe, accessible areas without blocking factory components.
Do not cover pedal mechanisms, steering components, wiring, factory grommets, or service openings that must remain accessible.
Full firewall access can require significant dashboard and interior disassembly. This part of the project is better left to a professional when the necessary access is unfamiliar.
Add Suitable Hood Insulation
A purpose-made hood insulation kit can help absorb some engine sound inside the engine compartment.
Use material specifically approved for under-hood temperatures and installation conditions.
Keep the hood latch, factory ventilation paths, wiring, and required clearances unobstructed. Do not substitute cabin foam for under-hood insulation.
Hood treatment may reduce reflected engine noise, but it cannot repair unusual engine knocking, exhaust leaks, or damaged mounts.
Reduce Tire Roar at the Wheel Wells
Wheel-well treatment can be effective when road noise comes through the rear sides of the RAV4.
Spectrum is a coating designed to damp vibration on suitable metal wheel-well surfaces.
The manufacturer’s Spectrum wheel-well installation guide describes a three-coat application totaling 3 mm and claims a 3–5 dB cabin-noise reduction from the treatment.
This is a manufacturer-stated result, not a guaranteed improvement for every 2014 RAV4.
For a proper application:
- Access the metal wheel-well surface. Remove wheels or liners only when the vehicle can be supported and serviced safely.
- Prepare the surface. Remove dirt and loose material, then follow the coating manufacturer’s cleaning and preparation instructions.
- Protect surrounding parts. Mask brakes, suspension components, wiring, and other surfaces that must not receive the coating.
- Apply the recommended layers. Follow the manufacturer’s coating thickness, drying conditions, and curing instructions.
- Inspect the completed work. Confirm that the coating has cured and that all components and liners can be reinstalled correctly.
Spectrum’s manufacturer does not recommend applying this wheel-well treatment to plastic liners, fiberglass, or other unsuitable obstructions.
Warning: Never work beneath a vehicle supported only by a jack. Use the correct lifting and support procedures. Keep coatings away from brakes, moving suspension parts, hot exhaust components, and electrical connections. Allow all products to cure as directed before driving.
Once the work is complete, inspect the treated areas periodically for peeling, trapped moisture, corrosion, or damage.
Avoid Common 2014 RAV4 Soundproofing Mistakes
The biggest soundproofing mistakes are treating the wrong noise source, using unsuitable materials, and failing to prepare the installation surfaces. Even good products can perform poorly when installed over dirt, moisture, or loose trim.
Soundproofing also works best when the material matches the problem. Vibration damping, sound blocking, and sound absorption are not interchangeable.
| Mistake | Effect | Correction |
|---|---|---|
| Dirty or damp surfaces | Poor adhesion and possible trapped moisture | Clean, repair leaks, and dry thoroughly |
| Gaps in a sound barrier | Airborne noise bypasses the barrier | Fit pieces closely and seal appropriate seams |
| Ignoring the main noise source | Little improvement despite added material | Diagnose tires, seals, and mechanical noise first |
Other mistakes worth avoiding include:
- Using damping sheets as the only noise barrier: Butyl controls vibration but does not block airborne sound as effectively as a suitable mass barrier.
- Using household foam: Unsuitable products may absorb moisture, break down, or fail to meet the demands of automotive use.
- Covering drains or wiring: Material must not interfere with water drainage, electrical components, or mechanical movement.
- Adding too much thickness: Overbuilt layers can prevent carpet, door panels, and other trim from fitting correctly.
- Ignoring product weight: Dense barriers add vehicle weight. Use them where the expected noise reduction justifies the extra material.
- Leaving trim loose: Poorly secured panels can create fresh rattles that cancel some of the comfort gained.
Do not assume that a premium material always guarantees better results. Damplifier Pro and Luxury Liner Pro are different products with different jobs, and their value depends on correct placement.
Check the manufacturer’s installation requirements, including surface preparation, temperature limits, and suitable locations.
Check the Results and Fix Remaining Noise
After completing a soundproofing project, repeat your original test drive under similar conditions. This helps you tell whether the treatment reduced the noise you targeted or simply changed the sound you notice most.
Use the same road, approximate speed, ventilation settings, and tire pressures whenever practical.
- Listen for the original noise. Check whether tire roar, engine drone, or wind noise has decreased.
- Check for new rattles. Listen around the cargo trim, door panels, center console, and reinstalled components.
- Test vehicle functions. Confirm that windows, locks, seat adjustments, and other disturbed components operate correctly.
- Inspect safety indicators. Do not ignore an airbag, seat-belt, or other warning light after reassembly.
- Recheck treated areas. Look for loose material, moisture, or signs of poor adhesion where inspection is possible.
A sound-level meter can also help you compare before-and-after readings. Position it consistently and keep the driving conditions as similar as possible.
Decibels use a logarithmic scale. The Canadian Centre for Occupational Health and Safety’s decibel reference explains that a 3 dB reduction represents approximately half the sound energy.
That does not mean every person will hear the sound as half as loud. Perceived loudness depends on frequency and other factors.
If the cabin remains noisy, do not automatically add more material. Return to the diagnosis and identify which sound path is still dominant.
Key Takeaways
- Inspect tire pressure, tread wear, door seals, and loose trim before investing in extensive insulation.
- Use butyl damping sheets for vibrating metal and a separate dense barrier for airborne road or engine noise.
- Start around the cargo floor and rear wheel housings when tire roar is strongest behind the rear seats.
- Protect airbag systems, window mechanisms, drainage openings, and factory mounting points during installation.
- Treat advertised decibel reductions as product claims unless a comparable, controlled vehicle test supports them.
Frequently Asked Questions
How Can I Soundproof My Toyota RAV4?
Start with the noise source, then treat the matching area. Use Damplifier Pro on vibrating sheet metal, Luxury Liner Pro on the floor or cabin-side firewall, Spectrum on suitable metal wheel wells, and Mega Zorbe in approved door or roof cavities. Keep seals, wiring, drains, and restraint systems clear.
Why Is RAV4 so Noisy?
A 2014 RAV4 can sound loud on rough pavement because tire roar travels through the wheel areas and floor, while engine and wind noise enter through other paths. Tire tread, pressure, seals, road texture, and loose trim can matter as much as factory insulation. A sudden new hum needs inspection rather than added foam.
What Is the Class Action Lawsuit Against the Toyota RAV4?
One documented case, Murphy v. Toyota, concerned a battery-terminal defect in certain 2013–2018 RAV4 vehicles, not cabin noise or inadequate soundproofing. The settlement became final in November 2024, and the claim deadline was July 1, 2025. Toyota denied wrongdoing.
Are RAV4s Loud Inside?
Some owners find the 2014 RAV4 loud at highway speeds, especially on coarse roads, but it is not uniformly noisy. Tire choice and wear, road surface, speed, and the condition of seals make a large difference. Diagnosis is more useful than assuming every RAV4 needs a complete soundproofing job.
Can I Make the RAV4 Quieter Without Removing Seats?
Yes. You can first adjust tire pressures to the door-jamb label, have noisy tires checked, inspect door seals, secure loose cargo panels, and address wheel-well noise from outside. Treating the cargo area may also need less disassembly than stripping the full floor. Avoid disturbing airbag wiring unnecessarily.
Will Soundproofing Fix a Wheel-Bearing Hum?
No. Damping sheets can mask some noise but cannot repair a failing bearing, worn tire, or loose mechanical part. A hum that rises with road speed, changes during turns, or comes with vibration should be checked by a mechanic before interior insulation work.
Conclusion
Effective 2014 RAV4 soundproofing starts with the noise source, not the amount of insulation you install. Check tires and seals first, then focus on the floor, rear wheel wells, doors, roof, or firewall according to what your test drive reveals.
Use the correct material for each job and protect the vehicle’s safety systems during installation. Finally, repeat your test drive to confirm the improvement before adding another layer.
Sources
- National Highway Traffic Safety Administration — Tire Safety: Tire pressure, wear, vibration, and maintenance guidance.
- Michelin — Tire Frequently Asked Questions: Tire noise and irregular tread-wear causes.
- Second Skin Audio — Vehicle Soundproofing Packages: Damplifier Pro and Luxury Liner Pro materials, coverage recommendations, and installation guidance.
- I-CAR — 2014 Toyota RAV4 Restraint-System Information: Vehicle-specific airbag disabling precautions and waiting time.
- Second Skin Audio — Mega Zorbe: Acoustic foam properties, appropriate locations, and restrictions.
- Second Skin Audio — Spectrum Wheel-Well Soundproofing Kit: Manufacturer-reported noise reduction, coating procedure, thickness, and placement restrictions.
- Murphy v. Toyota — Official Settlement Website: Lawsuit subject, vehicle eligibility, settlement approval, and claim deadlines.
- Canadian Centre for Occupational Health and Safety — Noise Basics: Decibel scale and the relationship between decibel changes and sound energy.