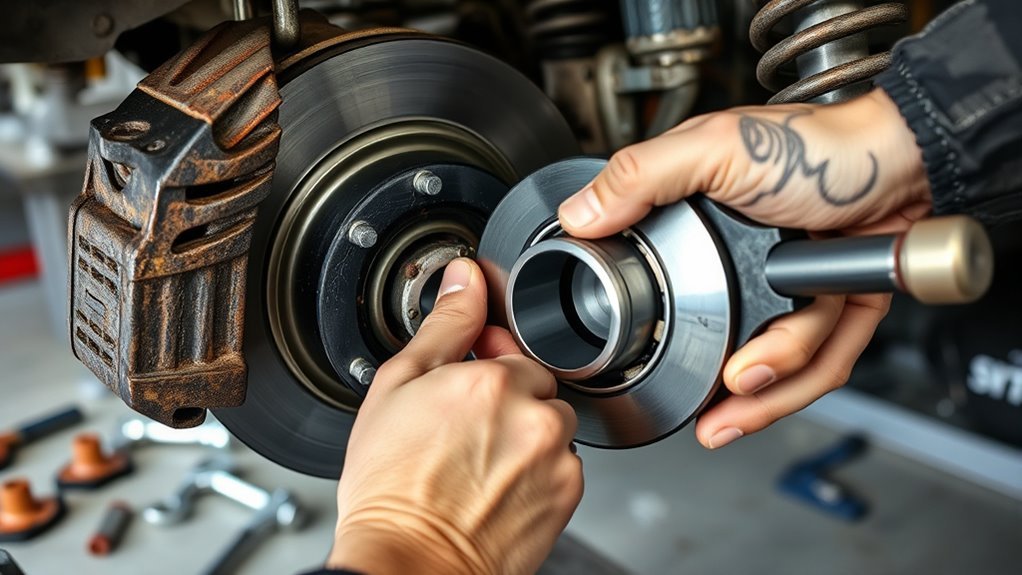
Right front wheel bearing removal on a 2017 vehicle involves checking the fault, removing the brake components, disconnecting the ABS wiring, and separating the wheel hub from the steering knuckle. The process is manageable with the correct tools, but a wrong torque setting or damaged axle can make the repair unsafe. Before starting, identify the exact vehicle and confirm that it uses a bolt-on hub assembly.
Quick Answer
To remove a right front wheel bearing, safely support the vehicle, remove the wheel and brake components, disconnect the ABS wiring, remove the axle nut and hub mounting bolts, and pull the hub from the steering knuckle. Clean the mounting surface, install the correct replacement, and tighten every fastener to the vehicle manufacturer’s specifications.
At a Glance
| Difficulty | Intermediate for a bolt-on hub; press-fit bearings require specialized equipment. |
| Tools Needed | Floor jack, jack stands, wheel chocks, socket set, breaker bar, torque wrench, caliper hanger, penetrating oil, and an appropriate hub puller if needed. |
Confirm a Bad Right Front Wheel Bearing
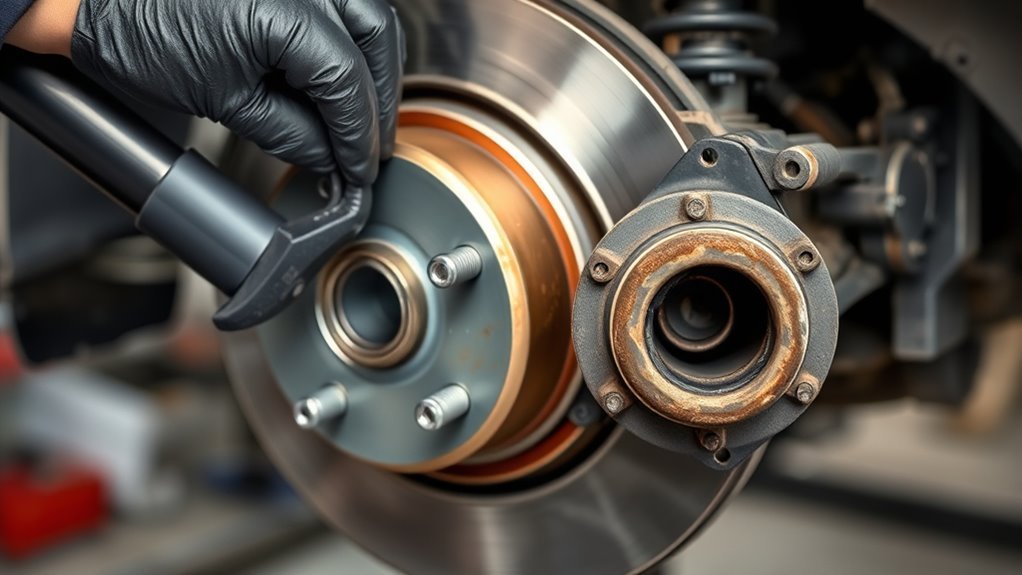
Before removing the right front wheel bearing, confirm that it is the source of the problem. A failing bearing often produces a humming, growling, or rumbling sound that increases with vehicle speed. The noise may also change while turning.
However, tire noise, brake problems, and worn suspension parts can produce similar symptoms. Check the wheel carefully rather than replacing the bearing based on sound alone.
Common signs of a failing wheel bearing include:
- Humming or rumbling: Noise that becomes more noticeable as the vehicle moves faster.
- Grinding: A rough mechanical sound that may indicate advanced bearing wear.
- Wheel movement: Excessive looseness when checking the wheel with the vehicle properly supported.
- Vibration: Steering wheel vibration that changes with speed or cornering.
- ABS warning: A possible wheel-speed signal problem associated with the hub, sensor, or wiring.
These symptoms are also described in MOOG’s wheel-bearing diagnostic guidance.
With the vehicle securely raised, grasp the tire at the top and bottom and check for abnormal movement. Then rotate the wheel by hand and listen for grinding or roughness. Also inspect the ball joints and other suspension components because they can create similar movement.
A worn bearing does not always show obvious play, so a quiet hand-spin test cannot completely rule out internal damage.
Check the ABS Sensor and Wiring
An ABS or traction control warning does not automatically mean the bearing has failed. Use an ABS-capable scan tool to retrieve the diagnostic trouble codes and, where supported, compare live wheel-speed readings.
Some hubs have an integrated wheel-speed sensor, while other designs use a separate sensor and a magnetic encoder ring. A damaged wire, poor electrical connection, rust, or sensor gap problem can also cause warning lights.
For an example of how corrosion and magnetic encoder problems affect wheel-speed signals, see MOOG’s ABS sensor troubleshooting guidance.
Confirm the faulty wheel before beginning removal, especially when noise appears to travel through the vehicle.
Gather Tools and Raise the Car Safely
Prepare the tools, replacement hub, and safe lifting equipment before taking the wheel apart. The original procedure mentions 21 mm and 15 mm sockets, but actual sizes depend on the vehicle. Verify them against the repair manual and the fasteners fitted to your car.
Gather Required Tools
For a typical bolt-on front hub assembly, gather the following equipment:
- Hydraulic floor jack and correctly rated jack stands.
- Wheel chocks and safety glasses.
- Breaker bar and suitable socket set, including the correct axle nut socket.
- Torque wrench with the required torque range.
- Ratchet and extensions for difficult mounting bolts.
- Caliper hanger or sturdy support wire.
- Penetrating fluid for corroded fasteners.
- Wire brush, abrasive sponge, or fine sandpaper for cleaning mounting surfaces.
- Slide hammer kit or suitable hub puller if corrosion prevents normal removal.
- New hub assembly and replacement fasteners required by the manufacturer.
Make sure the new part matches the vehicle’s make, model, drivetrain, and original equipment configuration.
Secure Vehicle On Stands
Park on firm, level ground, engage the parking brake, and block the wheels that will remain on the ground. Follow the vehicle manufacturer’s approved lifting points instead of assuming every frame rail or suspension component can support a jack stand.
- Position wheel chocks securely against the rear tires when servicing the front of the vehicle.
- Loosen the wheel lug nuts slightly while the tire is still on the ground.
- Raise the vehicle using the specified jacking location.
- Place appropriately rated jack stands at approved support points.
- Lower the vehicle carefully onto the stands and confirm that it is stable.
- Remove the lug nuts and take off the right front wheel.
OSHA’s guidance on hydraulic jacks and securing raised loads reinforces the need to support a load after lifting it.
Warning: Never work beneath a vehicle supported only by a hydraulic jack. Use properly placed jack stands on stable ground. A removed tire may provide additional clearance protection, but it is not a substitute for correctly rated stands.
If the vehicle uses a center cap covering the axle nut, remove it as needed to access the fastener.
Remove the Brake Caliper and Axle Nut
The brake caliper, rotor, and axle nut must be cleared before a typical front hub assembly can be removed. Work carefully around the brake hose and axle splines. Do not force a component that remains attached by a hidden bolt or clip.
Remove Caliper Assembly
Start by removing the brake caliper and its mounting bracket as required by the vehicle design. The original procedure identifies two 21 mm caliper bracket bolts, although other vehicles use different fastener sizes.
- Locate the caliper mounting and bracket bolts.
- Remove the required bolts with the correct socket and breaker bar or ratchet.
- Carefully lift the caliper away from the rotor.
- Support the caliper using a hanger or strong wire attached to a suitable suspension point.
- Remove the caliper bracket if it still blocks rotor removal.
Never allow the caliper to hang from its flexible brake hose. Excessive pulling or twisting can damage the hose and create a braking problem.
Inspect the exposed brake pads, rotor, and nearby hardware for unusual wear or damage.
Loosen Axle Nut
The axle nut holds the drive axle and hub assembly together on many front-wheel-drive and four-wheel-drive vehicles. Its removal procedure depends on the bearing design and manufacturer instructions.
- Identify the axle nut and check whether it has a staked edge, locking feature, or other retainer.
- Release the locking feature using the approved procedure.
- Use the correct socket and breaker bar to loosen the nut.
- Prevent axle rotation with an approved hub-holding tool or another method specified by the manufacturer.
- Remove the nut and retain the associated washers or hardware for identification.
If the nut is seized, apply penetrating fluid where appropriate and allow time for it to work. Avoid striking the axle threads or using a screwdriver in a way that damages the rotor, cooling vanes, or wheel studs.
Check whether the axle nut must be loosened with the hub loaded or unloaded. Some bearing designs can be damaged by following the wrong sequence.
The Timken hub removal and installation guide explains the general removal process and the importance of following vehicle-specific instructions.
Clear Brake Rotor
Once the caliper and any separate bracket are out of the way, remove the brake rotor to expose the wheel hub and steering knuckle.
- Check for a rotor retaining screw or clip and remove it if fitted.
- Pull the rotor straight away from the hub.
- If corrosion prevents removal, use the approved rotor removal method without damaging the braking surface.
- Set the rotor on a clean, stable surface.
Inspect the exposed hub flange for rust, debris, and damaged studs. Keep the brake friction surfaces free of oil, penetrating fluid, and grease.
Extract the Wheel Bearing Hub Assembly
On a bolt-on design, the wheel bearing hub assembly is removed by disconnecting the wheel-speed wiring, removing its mounting bolts, and separating the hub from the steering knuckle. Corrosion often makes this the most difficult part of the job.
First, confirm whether the vehicle uses a complete bolt-on hub or a bearing that is pressed into the knuckle. A press-fit bearing needs a different removal procedure and suitable pressing equipment.
Step-by-Step Hub Removal
- Disconnect the ABS wiring. Locate the wheel-speed sensor connector and release it without pulling on the wires.
- Free the wire retainers. Remove the clips and any retaining screw that prevent the harness from moving. The original procedure mentions an 8 mm screw, but the hardware must be confirmed.
- Access the mounting bolts. Locate the bolts connecting the hub to the steering knuckle. The original article describes three bolts removed with a 15 mm socket.
- Remove the bolts. Support the assembly and back out the fasteners evenly. Keep track of any backing plate or shield orientation.
- Separate the axle. If the axle splines remain engaged, use the specified axle-separation tool rather than striking the axle shaft directly.
- Release the hub. Apply penetrating fluid around the hub-to-knuckle joint if corrosion has formed.
- Extract the assembly. Use a correctly mounted hub puller or slide hammer when necessary. Apply force in a controlled direction and protect the steering knuckle.
- Inspect the opening. Check the knuckle bore, axle splines, backing plate, and mounting threads for corrosion or damage.
Do not use excessive hammer blows on the axle end or wheel bearing. Heavy impacts can damage the axle, threads, seals, or surrounding suspension components.
Pro Tip: Before disconnecting the ABS harness, photograph its routing and clip positions. The photo can help you reinstall the wire away from the tire, brake rotor, and moving suspension parts.
After removing the old hub, use a wire brush or fine abrasive to clean loose rust from the knuckle’s mounting surface. Avoid removing excessive metal or damaging the machined surface.
A clean, flat mounting face helps the replacement hub seat correctly.
Install the New Right Front Wheel Bearing
Installing a new right front wheel bearing requires the correct replacement assembly, clean contact surfaces, and careful alignment. The hub must seat flush against the steering knuckle without forcing the axle splines or damaging the ABS components.
The original article mentions a Motch wheel bearing hub assembly. Before installation, confirm that the chosen replacement part number matches the exact vehicle application.
Position and Secure the New Hub
- Compare the new hub with the removed assembly, including the mounting holes, wheel studs, seals, and sensor connections.
- Confirm that the knuckle mounting surface is clean and free of burrs.
- Align the axle splines with the new hub where applicable.
- Position the hub squarely against the steering knuckle.
- Start every mounting bolt by hand to prevent cross-threading.
- Tighten the mounting bolts in the specified sequence using a torque wrench.
- Route the ABS harness along its original path and reconnect the electrical connector.
- Secure all wiring clips and any retaining screw so the harness cannot rub against moving parts.
Align the hub squarely, hand-start the bolts, and secure the ABS lead to prevent pinch points.
Follow the correct procedure for any backing plate or dust shield installed between the hub and knuckle.
Do not use bolts to pull a badly misaligned hub into place. Remove the assembly and correct the interference instead.
MOOG’s hub assembly installation instructions emphasize proper spline alignment, secure ABS connections, clean mounting surfaces, and tightening fasteners to the manufacturer’s specifications.
If your vehicle uses a press-fit bearing, follow its dedicated pressing procedure. Applying force through the wrong bearing race can damage a new bearing before the vehicle is driven.
Reassemble, Torque, and Test the Repair
After the new hub is secured, reinstall the axle hardware, brake rotor, caliper, and wheel. Correct torque is essential because these parts carry wheel loads and affect braking, steering, and bearing life.
Reassemble the Front Wheel Components
- Install the axle nut and any required washer or locking hardware.
- Replace the axle nut if the manufacturer specifies a single-use fastener.
- Tighten the axle nut using the required torque value, sequence, and hub-loading procedure.
- Reinstall the brake rotor on the hub flange.
- Position the brake caliper bracket and install its bolts.
- Tighten the caliper mounting fasteners to their individual specifications.
- Reinstall the caliper and confirm that the brake hose is not twisted.
- Check the ABS wiring for proper routing and secure connections.
- Install the wheel and start all lug nuts by hand.
- Lower the vehicle as required by the specified wheel-torquing procedure and tighten the lug nuts in the correct pattern.
The axle nut, hub bolts, caliper bracket bolts, caliper guide bolts, and lug nuts may all require different torque values.
Warning: Do not use a generic torque setting based only on the vehicle’s model year. Incorrect axle nut torque can damage the bearing or allow a critical fastener to loosen. Confirm every required value and tightening procedure using the exact make, model, drivetrain, and manufacturer service instructions.
The original procedure also mentions Loctite on the wheel bearing bolts. Apply threadlocker only if the vehicle or replacement-part instructions specify it. Do not automatically add threadlocker, oil, or anti-seize to fasteners whose torque specifications require clean, dry threads.
Check the Repair Before Driving
Inspect the completed assembly before moving the vehicle. A successful repair requires more than a new hub that appears securely installed.
- Confirm all mounting bolts and wheel fasteners have been tightened correctly.
- Verify that the ABS wiring and clips are secure.
- Make sure the brake hose is not stretched or twisted.
- Check that the brake rotor turns without unusual binding or contact.
- Check for excessive wheel movement.
- Pump the brake pedal until it feels firm before moving the vehicle.
- Check for ABS or traction control warnings.
When everything checks out, complete a cautious, low-speed test drive in a safe area. Listen for humming, grinding, or scraping and confirm normal brake response.
If warning lights remain illuminated, read the ABS codes again and check the wheel-speed data. Inspect sensor connections, harness routing, and hub fitment before assuming the new bearing is defective.
Note: Wheel bearing replacement affects steering, braking, and wheel retention. If the hub will not seat correctly, a fastener is damaged, or the required torque procedure is unavailable, have a qualified mechanic complete or inspect the repair before driving.
Frequently Asked Questions
How to Get a Wheel Bearing off Without a Puller?
A bolt-on wheel hub may come free without a puller after its mounting bolts are removed and corrosion is cleaned away. Apply penetrating oil around the joint and use the approved separation method. If the hub remains seized, a slide hammer or suitable puller is usually safer than heavy hammer blows.
What Is the Easiest Way to Remove a Wheel Bearing?
The easiest method depends on whether the bearing is bolt-on or press-fit. For a bolt-on hub, remove the wheel, brake components, axle nut, ABS connections, and hub mounting bolts. Then separate the assembly using the proper tool. A press-fit bearing requires suitable pressing equipment and a different procedure.
How to Change Right Wheel Bearing?
Changing the right front wheel bearing involves safely lifting the vehicle, removing the wheel and brakes, disconnecting the relevant wiring, and removing the old hub or bearing. Install the correct replacement, follow the specified torque procedure, and check the brakes and ABS system before driving.
How Do I Remove a Stuck Wheel Bearing From the Spindle?
Use penetrating fluid and the correct bearing or hub removal tool to separate a stuck assembly. A slide hammer can help remove a seized bolt-on hub. Avoid striking the axle threads or heating nearby seals and wiring. Press-fit bearings require the appropriate press tools and support fixtures.
Can You Drive With a Bad Right Front Wheel Bearing?
Driving with a damaged wheel bearing can be dangerous, especially if it has excessive play, grinding, or severe vibration. Continued use may worsen the damage and affect steering or wheel retention. If the bearing appears seriously worn or loose, avoid driving and arrange professional inspection or towing.
Conclusion
Right front wheel bearing removal is straightforward in principle, but correct diagnosis, safe lifting, controlled hub extraction, and accurate reassembly make the difference between a reliable repair and a serious mechanical problem.
Before replacing the bearing on a 2017 vehicle, identify its exact make, model, and hub design. Use the correct replacement assembly, protect the ABS wiring, and verify every torque specification. Finish with a careful inspection and test drive to confirm smooth rotation, safe braking, and normal wheel-speed sensor operation.
Sources
- MOOG — How Long Do Wheel Bearings Last?: Bearing failure symptoms, noise, vibration, and common causes of wear.
- MOOG — Resolving Error Codes Following Hub Replacement: ABS wheel-speed sensing, encoder rings, and the effects of corrosion on sensor signals.
- OSHA — Jacks: Lever, Ratchet, Screw, and Hydraulic: General requirements for lifting equipment and securing raised loads.
- Timken — Removing and Installing a Hub Unit Bearing: Hub removal, sensor wiring, cleaning, mounting procedures, and torque precautions.
- MOOG — How to Install a Hub Assembly: Correct alignment, hub installation, mounting bolt torque, and axle nut precautions.

