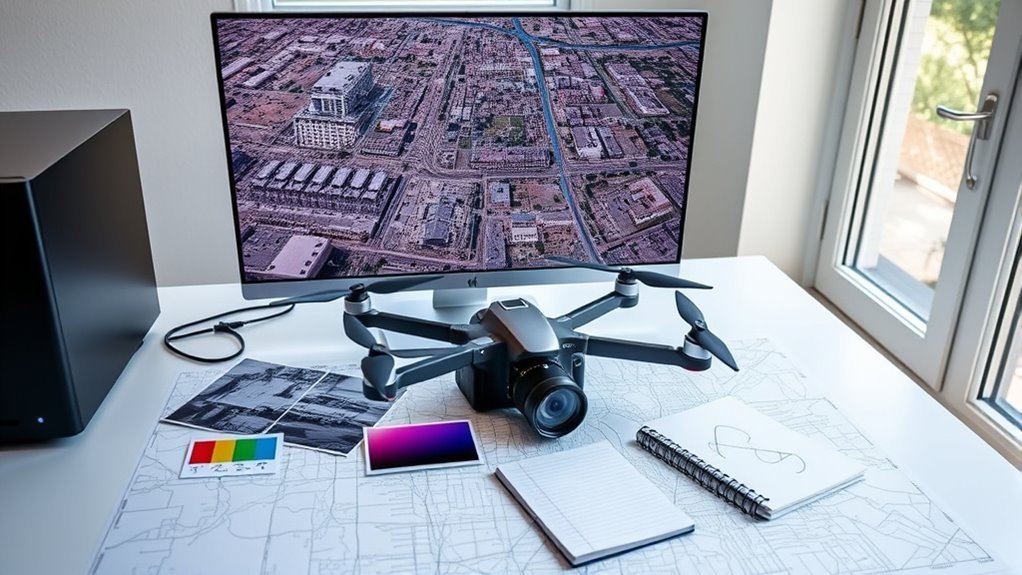
Merging orthomosaic files into one image starts with confirming every file shares the same georeferenced coordinate system, pixel depth, and band count. From there, you combine them with a raster-mosaicking tool — ArcGIS Pro’s mosaic dataset, QGIS’s Merge tool, the GDAL command line, or your drone software’s built-in merge feature — and export the result as a single GeoTIFF. This guide walks through the compatibility checks, the ArcGIS Pro workflow, and the free alternatives, with verified menu paths and commands for each.
Quick Answer
To merge orthomosaic files into one image, verify all files share the same coordinate system, pixel depth, and band count, then combine them in ArcGIS Pro (mosaic dataset), QGIS (Merge tool), GDAL (gdal_merge.py), or your drone software’s merge feature, and export the result as a single GeoTIFF with pyramids built.
Key Takeaways
- Match coordinate system, pixel depth, and band count across every orthomosaic before you start.
- Ground control points and wide overlap between flights keep the merged image aligned.
- In ArcGIS Pro, build a mosaic dataset, add the rasters, then export one GeoTIFF.
- QGIS, GDAL, and OpenDroneMap all include their own raster-merge tools for non-Esri workflows.
- Clean up footprints and mask no-data edges so the tile seams don’t show.
- Export the final file as GeoTIFF and build pyramids for fast viewing.
Last checked: September 29, 2026 — menu paths and commands below were verified against current ArcGIS Pro, QGIS, GDAL, OpenDroneMap, and Pix4D documentation.
Why Merge Orthomosaics?
Merging orthomosaics is necessary when a project spans a larger area or multiple acquisition phases, because separate drone flights often differ in lighting, timing, and coverage. Combining them into one file gives you a single, coherent image instead of a set of disconnected tiles.
This process turns fragmented spatial data into a seamless layer suitable for analysis and reporting. In ArcGIS Pro, several orthomosaics can be assembled into one mosaic dataset, which simplifies visualization and data management across large sites.
Positional accuracy matters most during this step. Ground control points (GCPs) help keep the images aligned as they’re combined, and Pix4D’s own guidance is that every project you plan to merge should be georeferenced with GCPs first so the accuracy carries through into the merged output. The resulting file supports construction monitoring by documenting site change over time, environmental assessment by revealing land conditions, and agricultural analysis by showing crop variability across a field.
A properly merged orthomosaic gives you one precise map layer instead of several partial ones, which makes it far easier to measure, compare, and share.
Check Orthomosaic Compatibility First
Before stitching begins, check each orthomosaic for compatibility to avoid alignment errors and failed merges. Every file needs to share the same georeferenced coordinate system and coordinate reference so the merge stays mathematically stable.
Band count should match across all inputs; a mismatch can cause the merge to fail or produce a distorted output. Confirm the overlapping extent too, since shared coverage between tiles is what lets the software blend them without visible gaps.
Check for no-data zones and apply masking where needed so the final mosaic looks uniform. In ArcGIS Pro, you can inspect layers, check coordinates, and confirm compatibility before running the merge using the Explore tool and the raster’s item properties.
This validation step protects the integrity of the dataset. Skipping it is the most common reason a merge produces visible seams or rejects a file outright.
Note: The menu names and dialog labels below match the current ArcGIS Pro release. If you’re on an older version, the same options exist but may sit in a slightly different panel.
Other Ways to Merge Orthomosaics (QGIS, GDAL, and Drone Software)
ArcGIS Pro isn’t the only option. If you don’t have an Esri license, these tools can merge orthomosaic tiles just as effectively.
Merge Orthomosaics in QGIS
QGIS includes a built-in Merge tool for combining raster tiles. Open the Processing Toolbox and run Raster > Miscellaneous > Merge (algorithm ID gdal:merge). Add your orthomosaic files under Input layers, set the nodata value if your tiles have transparent edges, choose an output data type that matches your source rasters, and run the tool to produce one merged file.
Every input raster must already share the same coordinate reference system before you run Merge; QGIS does not reproject them for you as part of this tool.
Merge Orthomosaics with GDAL from the Command Line
If you’re comfortable with a terminal, gdal_merge.py gives you the most direct control. A typical command looks like this:
gdal_merge.py -o merged_orthomosaic.tif -n 0 -of GTiff tile1.tif tile2.tif tile3.tifThe -n flag tells GDAL which pixel value to treat as nodata so it skips those pixels instead of stitching them into the output, and -of sets the output format. Where two tiles overlap, GDAL keeps the pixels from whichever file is listed later on the command line, so order your inputs based on which orthomosaic has the cleaner edge.
Warning: Running gdal_merge.py with the wrong -n value can treat real image data as nodata and drop it from the output. Test the command on copies of your tiles first if you’re not certain which pixel value your files use for nodata.
Merge Outputs Straight from Your Drone Mapping Software
Some drone-mapping platforms handle this without external GIS tools. OpenDroneMap’s --merge flag combines the outputs of a split dataset, and you can set it to all, orthophoto, pointcloud, or dem so you only merge the outputs you actually need.
Pix4Dmapper doesn’t merge orthomosaics inside the application itself. Pix4D’s official guidance is to export each project as a GeoTIFF, then combine those files using Global Mapper’s Map Catalog, provided every project was georeferenced with GCPs first.
Pro Tip: Run your first merge attempt on copies of the source files. If footprints or nodata masking need adjusting afterward, you can redo the step without touching the original flight data.
Set Up a Mosaic Dataset in ArcGIS Pro
To create a mosaic dataset, right-click the target geodatabase in the Catalog pane and choose New > Mosaic Dataset. Name the dataset and set its coordinate system; this doesn’t need to match the orthomosaics you’re about to add, since ArcGIS Pro reprojects on the fly when it renders the mosaic.
Once the mosaic dataset exists, right-click it and choose Add Rasters, or run the Add Rasters To Mosaic Dataset tool from the Geoprocessing pane for more control over the settings. Before adding anything, confirm your orthomosaics share the same band count and pixel depth; ArcGIS Pro will reject or distort rasters that don’t match the rest of the mosaic.
In the Add Rasters tool, turn on Calculate Statistics and Build Raster Pyramids. Statistics improve how the mosaic renders, and pyramids are downsampled copies of each raster that keep the display responsive when you zoom out. Nearest neighbor is the default resampling method, though bilinear or cubic convolution generally look better on continuous aerial imagery like an orthomosaic.
Finish by turning on Update Boundary and Update Overviews so the mosaic dataset’s footprint and preview both reflect everything you just added.
Add Orthomosaic Rasters to the Dataset
- Confirm every orthomosaic file shares compatible metadata and spatial reference before adding it.
- Run Add Rasters to append the source files to the mosaic dataset; this references the originals rather than copying pixel data into the geodatabase.
- Inspect the resulting footprints, then run Update Footprints if any of them include no-data margins.
- Review the assembled mosaic in the Catalog pane to confirm every input tile is present and correctly placed.
Refine Footprints and No-Data Edges
Footprint cleanup adjusts raster boundaries to remove no-data margins so each orthomosaic contributes only its valid coverage. No-data masking excludes empty pixels from the merge, which reduces edge artifacts and keeps seams from showing. Together, these two steps are what separate a clean stitched output from one with visible tile lines.
Footprint Cleanup
Refining raster footprints removes no-data margins and aligns each orthomosaic more closely with its actual area of valid coverage.
In ArcGIS Pro, run Update Footprints on the mosaic dataset, which recalculates each footprint against the raster’s real extent. This trims empty borders and helps the finished mosaic read as one composite with fewer visible seams at the tile edges.
- Identify excess borders in each orthomosaic.
- Check footprint geometry against the raster’s actual extent.
- Run Update Footprints to sync the dataset’s boundaries.
- Confirm the merged output looks seamless at the tile edges.
No-Data Masking
No-data masking isolates valid orthomosaic pixels from empty margins and other edge artifacts so they don’t affect the display or any analysis you run afterward.
Check each orthomosaic for no-data values before you add it to the mosaic dataset, since inconsistent handling of null pixels is one of the most common causes of visible seams. Masking constrains the display to valid pixels only, which keeps the stitched image’s edges clean without altering the measurement accuracy of the data underneath.
Done correctly, this step produces a cleaner orthomosaic with controlled edges and dependable analytical value.
Export the Merged Orthomosaic as GeoTIFF
To export the merged mosaic, first validate the mosaic dataset for completeness, then run the Copy Raster tool with the pixel type matched to your source orthomosaics, typically 8-bit unsigned for standard RGB imagery.
This produces a single GeoTIFF that keeps your original geographic coordinate data intact. Because the format retains its spatial reference, you can open the exported file in other GIS or CAD software without losing georeferencing.
Build raster pyramids on the export before you close out the project so the merged file opens quickly the next time you view it. Expect the resulting file to be large, commonly in the 2–5 GB range depending on coverage area and resolution.
- Validate the mosaic dataset for completeness before exporting.
- Match the pixel type to your source rasters to avoid radiometric distortion.
- Build raster pyramids so the exported file stays responsive to view.
- Confirm the exported GeoTIFF opens correctly in your GIS software of choice.
Pro Tip: Keep the mosaic dataset itself even after you export the GeoTIFF. If you need to re-export at a different pixel type or extent later, you’ll skip re-adding every raster from scratch.
Frequently Asked Questions
How Do I Choose the Best Central Image for Stitching?
Pick the tile with the sharpest focus, consistent lighting, and the least distortion near the center of your project area. Starting from a strong central image reduces how much correction the rest of the merge needs, since every other tile gets aligned relative to it.
Which Feature Detector Works Best for Orthomosaic Alignment?
SIFT (Scale-Invariant Feature Transform) is the most widely used feature detector for aligning overlapping aerial imagery, since it holds up well against changes in scale, rotation, and lighting between flights. Most photogrammetry and drone-mapping software, including OpenDroneMap, uses SIFT or a similar feature-matching algorithm during processing, so you typically won’t need to choose one yourself.
How Should Overlapping Regions Be Blended to Avoid Seams?
Start with enough overlap during the flight itself. Pix4D’s official guidance recommends at least 75% frontal overlap and at least 60% side overlap for standard mapping, with higher minimums (80%+) over flat agricultural fields or dense vegetation. Wide overlap gives the stitching software more shared pixels to blend from, which is what actually prevents visible seams — feathering and color matching during the merge only clean up what the overlap leaves behind.
Can Labels Be Stitched Alongside Orthomosaic Images?
Yes, but keep labels and annotations on a separate layer rather than burning them into the orthomosaic itself. This keeps the underlying imagery clean for analysis and lets you turn labels on or off, update them, or restyle them without re-merging the source rasters.
What File Naming Scheme Helps Automate Batch Orthomosaic Stitching?
A consistent, collision-free naming pattern such as project_date_tile-number (for example, farmfield_20260915_tile03.tif) makes batch processing far easier. It lets scripts and GDAL commands select files by pattern instead of by hand, and it keeps flights from different dates or sites from overwriting each other by accident.
Do I Need ArcGIS Pro to Merge Orthomosaic Files?
No. ArcGIS Pro’s mosaic dataset is one option, but QGIS’s free Merge tool, the command-line gdal_merge.py utility, and the merge features built into drone-mapping software like OpenDroneMap can all combine orthomosaic tiles into one image without an Esri license.
Conclusion
Merging orthomosaics into a single georeferenced image is not merely a convenience; it is a spatial alignment problem. When compatibility is verified, footprints are refined, and no-data edges are managed, the stitched output behaves like a continuous aerial sheet rather than a set of fractured tiles. Whether you build that structure in an ArcGIS Pro mosaic dataset, QGIS’s Merge tool, or a GDAL command, the same principle holds: get the inputs aligned first, and the export takes care of itself. The resulting GeoTIFF can then function as a coherent map, ready for analysis, measurement, and interpretation.
Sources
- Esri, Create a mosaic dataset – ArcGIS Pro
- Esri, Add Rasters To Mosaic Dataset (Data Management Tools)
- Esri, Raster pyramids – ArcGIS Pro
- GDAL, gdal_merge documentation
- QGIS, Raster miscellaneous – Merge algorithm
- OpenDroneMap, merge argument documentation
- Pix4D Support, How to merge Orthomosaic Files with Global Mapper
- Pix4D Support, Image acquisition (overlap recommendations)
