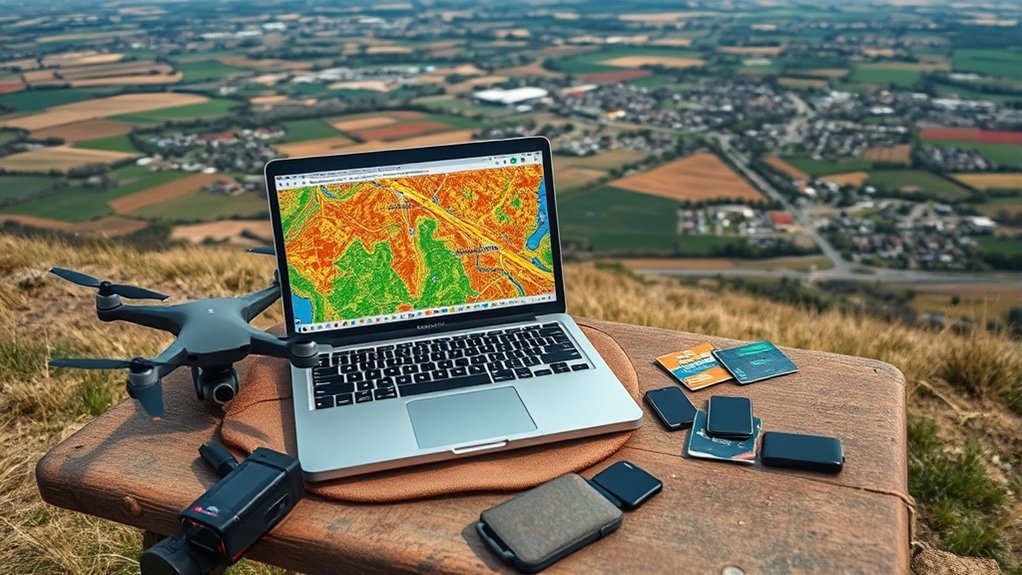
Creating an orthomosaic in WebODM starts with good aerial imagery, enough computer resources, and processing settings that match the job. For a local installation that also handles processing, current WebODM documentation recommends planning around 16 GB RAM and 100 GB of free disk space. After WebODM is running, create a project, upload overlapping images, add ground control points when needed, choose the appropriate processing options, inspect the result, and export the orthophoto.
Quick Answer
To create an orthomosaic in WebODM, start WebODM, create a project, upload a well-overlapped aerial image set, add GCPs if higher georeferencing accuracy is required, review the processing options, and run the task. When processing finishes, inspect alignment and accuracy before downloading the orthophoto GeoTIFF and any other required outputs.
Key Takeaways
- For a standalone WebODM installation with local processing, plan around at least 16 GB RAM and 100 GB of free disk space.
- For typical 2D and 2.5D mapping, WebODM recommends roughly 70–80% image overlap, with higher overlap useful around complex vegetation and structures.
- Use well-distributed GCPs when you need stronger georeferencing, and reserve independent checkpoints when you need to measure accuracy.
- Default settings are a sensible starting point; enable Fast Orthophoto, DSM, DTM, or higher-detail options only when the project calls for them.
- Inspect the completed map for gaps, warping, alignment problems, and checkpoint error before treating it as a finished mapping product.
At a Glance
| Time Required | Setup usually takes less time than photogrammetry processing. Processing can range from minutes to many hours or longer depending on image count, image resolution, hardware, scene complexity, and selected options. |
| Difficulty | Beginner to intermediate for a basic orthomosaic; intermediate or advanced when using survey control, checkpoints, RTK data, or custom processing settings. |
| Tools Needed | WebODM, a web browser, aerial images, and sufficient storage/RAM. Docker and Git are needed for the manual Docker installation. GCP measurements are optional. |
| Cost | WebODM can be run locally without a software subscription. Hardware upgrades, optional hosted processing, field equipment, RTK/GNSS equipment, and other services can add cost. |
Set Up Docker for WebODM
Before processing imagery locally, make sure the computer has enough memory and storage for the dataset. Current WebODM installation documentation recommends a minimum of 16 GB RAM and 100 GB of free disk space for a standalone installation that includes local processing.
Windows and macOS users can use the current official installer or perform a manual Docker installation. For the documented Docker workflow, install Git and Docker; Windows and macOS users performing a Docker installation normally use Docker Desktop.
WebODM can process small jobs with less memory than the standalone recommendation, but large image sets quickly increase RAM requirements. WebODM publishes conservative estimates like these:
| Approximate Image Count | Conservative RAM or RAM + Swap Estimate |
|---|---|
| 40 | 4 GB |
| 250 | 16 GB |
| 500 | 32 GB |
| 1,500 | 64 GB |
Those figures are planning estimates rather than guarantees. Image dimensions, scene complexity, flight altitude, processing options, concurrency, and other factors can change actual memory use. More CPU cores can improve processing speed, but they can also increase peak memory demand.
Warning: Do not routinely delete WebODM containers or Docker volumes just to obtain a “fresh” start. WebODM stores project information in Docker volumes by default. Use the supported stop, restart, update, and backup procedures, and confirm that important data is backed up before performing destructive Docker cleanup.
If WebODM has not yet been installed through Docker, the current manual workflow is:
git clone https://github.com/WebODM/WebODM --config core.autocrlf=input --depth 1
cd WebODM
./webodm.sh start
For an existing installation, run the start command from the WebODM directory. The first launch can take longer because Docker may need to download and initialize components, but there is no universal 10- or 15-minute startup time.
Useful management commands include:
./webodm.sh start— start WebODM../webodm.sh stop— stop WebODM../webodm.sh update— update the Docker installation.
[Amazon Products Picked for You]
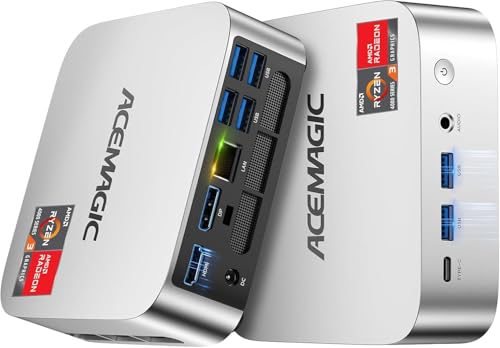
[AMD Ryzen 3 Pro 7330U, which is more powerful than the N150/3500U] - ACEMAGIC Mini PC is powered by Latest Processor AMD Ryzen 7330U(4Cores/8Threads, BASE 2.3GHz, MAX TO 4.3GHz) , delivers more than 28% higher performance than N150(Reference from PassMark). Performance at least +40%, GPU at least +23% compared with the previous CPU - N95/N100/3300U. Remarkably power-efficient at 28W, it outperforms its predecessors, even rivaling some mainstream mobile processors from the past


Start WebODM and Create a Project
After WebODM starts successfully, open localhost on port 8000 in a browser. On the first local setup, create the WebODM login account requested by the interface.
- Create a new project from the WebODM dashboard.
- Give the project a descriptive name.
- Create a processing task by selecting the aerial images.
- Add a GCP file or image-geolocation data if the project requires it.
- Review the processing options before starting the task.
A WebODM project groups related work, while a task is the processing unit that turns a set of images into outputs such as an orthophoto, point cloud, and textured model.
For a first test, default settings are normally a better starting point than changing many advanced parameters at once. WebODM’s documentation describes its untuned settings as a practical compromise among processing quality, speed, and memory use.
Pro Tip: Before committing a very large survey to a demanding configuration, process a representative subset or use reduced image resolution to confirm that the imagery aligns correctly and the selected settings produce the output you need.
Add Images for a WebODM Orthomosaic
The quality of the orthomosaic depends heavily on the images captured before WebODM ever begins processing. Upload photographs that cover the entire project area with consistent overlap and enough sharp surface detail for feature matching.
WebODM can use GPS information stored in image metadata when it is available. It also supports ground control points and separate image-geolocation files, so ordinary consumer-grade EXIF GPS is not the only way to georeference a project.
Select Source Images
Review the source photographs before upload. Remove accidental frames that do not belong to the mapping mission, and look for problems such as severe motion blur, missed strips, extreme exposure changes, images dominated by sky, or isolated images that do not overlap the main survey.
For typical 2D and 2.5D mapping, the official WebODM flying guidance recommends approximately 70–80% overlap with the camera slightly off nadir. Complex buildings and vegetation may benefit from overlap closer to 80–83%.
For 2D and 2.5D mapping, roughly 70–80% image overlap is a useful WebODM planning target, with more overlap often helping complex scenes.
Full 3D reconstruction has different collection needs. WebODM’s current guidance describes a combination of nadir imagery and higher-overlap angled cross-grid imagery when high-quality 3D geometry is the goal.
If the camera uses a rolling shutter and the aircraft was moving during capture, current WebODM processing guidance recommends evaluating rolling-shutter correction. Do not enable options simply because a drone is consumer-grade; confirm the camera and survey conditions first.
Upload And Organize
Open the project, choose the image/GCP upload control, and add the prepared aerial photographs. Keep original filenames stable when using a GCP or geolocation file because WebODM matches observations to filenames.
| Step | Action | Purpose |
|---|---|---|
| 1 | Upload the mission images | Create the photogrammetry dataset |
| 2 | Review resize settings | Balance processing load and image detail |
| 3 | Add and verify GCPs if used | Strengthen georeferencing and accuracy control |
| 4 | Review processing options | Generate only the outputs the project needs |
Use Ground Control Points and Checkpoints Correctly
Ground control points (GCPs) connect identifiable locations in the images to accurately measured ground coordinates. According to the WebODM GCP documentation, five well-distributed GCPs work for many jobs, while larger projects may use more.
Place control across the survey rather than clustering it in one corner. Include points near the outer portions of the mapped area and points toward the center, while accounting for elevation changes.
Each GCP should be clearly visible in multiple photographs. WebODM’s file-format guidance calls for at least three image observations per control point, while additional clear observations can make point marking more robust.
If you need an independent accuracy check, reserve some surveyed points as checkpoints rather than allowing every measured point to influence the reconstruction. Current WebODM guidance supports labeling checkpoint observations with the CHK- prefix so they are excluded from bundle adjustment and reported as independent accuracy measurements.
Note: A map that looks correctly aligned on screen is not proof of survey accuracy. When positional accuracy matters, use appropriate survey control and independent checkpoints rather than relying only on image GPS or visual inspection.
Choose WebODM Orthomosaic Settings
For an ordinary orthomosaic, begin with the default processing configuration unless the project has a reason to change it. The current WebODM options reference exposes many controls, but changing several advanced parameters at once can make troubleshooting harder.
[Amazon Products Picked for You]


24”x24” AERIAL TARGETS - Designed for low to medium altitude drone mapping and scanning, these drone GCPs were made for drone mapping up to 400 feet. The standard 24”x24” size is useful when scaling and verifying the map, providing a standard reference distance during post-processing.
Processing Preset Selection
WebODM interfaces may expose predefined processing choices, while the underlying processing engine provides individual options. The exact labels shown can vary with software version and processing engine, so focus on what the option actually changes rather than relying solely on a preset name.
| Goal | Useful Approach | Main Tradeoff |
|---|---|---|
| General orthomosaic | Start with default settings | Balanced speed, memory use, and quality |
| Very fast 2D result on suitable terrain | Enable Fast Orthophoto | Skips dense reconstruction and the full 3D model |
| Digital Surface Model | Enable DSM | Adds DEM processing time and storage |
| Digital Terrain Model | Enable DTM | Ground classification can require tuning for difficult terrain |
| More detailed buildings/point cloud | Consider higher point-cloud quality | Higher RAM use and much longer processing |
Fast Orthophoto should not be confused with an ordinary quality setting. WebODM documents it as an option that creates an orthophoto from the sparse reconstruction and skips dense reconstruction and 3D-model generation. It is most appropriate when speed matters and the terrain is suitable for that shortcut.
Likewise, DSM and DTM generation are not enabled by default. Turn them on only when those elevation products are part of the required deliverables.
Image Resize Choices
Reducing the processing resolution of source photographs can significantly lower RAM demand and processing time. Current WebODM guidance uses resize-to: 2048 as an example for very fast processing.
Resizing is useful for preliminary work, field checks, limited hardware, or datasets where full sensor resolution is unnecessary. It also reduces the detail available to feature extraction and the final products, so avoid aggressive resizing when small objects or very fine ground detail are important.
Do not assume that a specific number of photographs always corresponds to a specific processing time. A 46-image project on one computer can behave very differently from a similar-sized project on another because image megapixels, overlap, terrain, storage speed, RAM, CPU, processing options, and other variables all matter.
Output Quality Tradeoffs
Output quality is controlled by both the survey and the processing settings. Software cannot fully repair a dataset with missing coverage, severe motion blur, inadequate overlap, or weak surface texture.
WebODM’s orthophoto resolution setting is expressed in centimeters per pixel. A lower numeric value requests a finer-resolution orthophoto, but the effective result is constrained by the imagery’s estimated ground sampling distance and available source detail.
Higher point-cloud and mesh settings increase processing cost. For buildings and vertical structures, current WebODM guidance suggests that higher point-cloud quality can improve geometry and building edges, but it also consumes substantially more resources.
Choose settings according to the deliverable rather than automatically selecting the most demanding option.
Process Your Orthomosaic in WebODM
After the images, optional GCPs, and processing settings have been checked, start the WebODM task.
- Confirm that the correct images are attached to the task.
- Confirm that GCPs or geolocation files use the intended coordinate reference system.
- Review image resizing and output options.
- Enable DSM or DTM only when those products are needed.
- Use Fast Orthophoto only when its reduced processing pipeline suits the project.
- Start processing and monitor task progress.
- If processing fails, read the task output or error information before changing settings.
Photogrammetry does not have a dependable “minutes per image” formula. Processing may take a few minutes for a small, reduced-resolution dataset or many hours or longer for a large, high-resolution survey. Available RAM, storage speed, CPU resources, image dimensions, overlap, scene complexity, and output settings all influence runtime.
For machines with limited storage, WebODM also provides an optimize-disk-space option that removes heavy intermediate files. The tradeoff is reduced ability to restart processing from an intermediate stage.
View and Export Your WebODM Orthomosaic
Once the task completes, open the map view and inspect the orthophoto at several zoom levels. Do not download the output immediately without checking the reconstruction.
- Confirm that the entire expected survey area is present.
- Look for holes or missing flight strips.
- Inspect roads, roofs, fences, and other straight features for obvious bending or double edges.
- Look for sudden seam changes or locally blurred patches.
- Check whether isolated images failed to align.
- Compare control/checkpoint results when positional accuracy matters.
WebODM exposes completed assets for download. The orthophoto is available as a GeoTIFF, and other available assets can include point-cloud and textured-model files depending on the selected processing configuration. WebODM also supports downloading packaged task assets.
For GIS work, the georeferenced orthophoto GeoTIFF is normally the most useful raster deliverable. Optional processing settings can also create formats such as Cloud-Optimized GeoTIFF, PNG, KMZ, and additional point-cloud or 3D outputs when required.
Validate Orthomosaic Quality and Accuracy
Visual quality and positional accuracy are different checks. An orthomosaic can look sharp while still being shifted horizontally or vertically.
Use this validation sequence before final delivery:
- Check reconstruction coverage: verify that all required areas were reconstructed.
- Inspect geometric features: look for duplicated edges, warped structures, stretched borders, and local misalignment.
- Review image-registration problems: disconnected or weakly connected photos can indicate poor overlap or weak features.
- Check GCP residuals: unusually large residuals may point to incorrect coordinates or incorrectly marked image observations.
- Use independent checkpoints: checkpoint error gives a better indication of external accuracy than GCP residuals alone.
- Confirm the coordinate reference system: make sure exported data is in the CRS expected by the downstream GIS or client workflow.
When the map will support measurements, engineering, surveying, construction, or other accuracy-sensitive decisions, define the required accuracy before the flight. Processing settings alone cannot compensate for inadequate control or poor field data.
Fix Slow WebODM Orthomosaic Processing
Slow processing usually comes from some combination of high image resolution, a large dataset, demanding reconstruction settings, insufficient RAM, slow storage, or generation of outputs that the project does not actually need.
Use the following troubleshooting order:
- Check available RAM. If the machine is swapping heavily or a task runs out of memory, reduce processing load or increase available memory.
- Check free disk space. Photogrammetry creates large intermediate files in addition to final outputs.
- Reduce image resolution. Use an appropriate
resize-tovalue for test or lower-detail work. - Skip unnecessary outputs. If only an orthophoto is required, avoid generating products that do not serve the project.
- Consider Fast Orthophoto. For suitable flat scenes, it can reduce processing substantially by bypassing dense reconstruction.
- Check overlap. Insufficient or disconnected imagery can create failed or incomplete reconstruction regardless of hardware.
- Check image quality. Blur, low texture, repeated patterns, water, snow, or large uniform surfaces can make feature matching difficult.
- Update WebODM properly. For the Docker installation, use
./webodm.sh updaterather than deleting the environment as routine maintenance.
If the system reports “No space left on device”, investigate Docker’s available storage as well as ordinary host free space. If the task reports an out-of-memory error, lowering image resolution or quality settings may allow the task to finish, but additional RAM is the stronger solution for consistently large datasets.
Frequently Asked Questions
How to Make an Orthomosaic Map?
Capture a set of overlapping aerial photographs that covers the entire site, then process the imagery in photogrammetry software such as WebODM. In WebODM, create a project and task, upload the images, add GCPs when required, choose appropriate processing options, run the task, inspect the completed orthophoto, validate its accuracy, and export the GeoTIFF.
What Are the Key Differences Between WebODM and OpenDroneMap?
They are now separate projects. Current WebODM documentation states that WebODM has officially decoupled from OpenDroneMap and supports processing engines including ODX, MicMac, and LGT. WebODM focuses on a browser-based project and processing workflow. OpenDroneMap’s ODM project is a separate command-line toolkit for turning aerial imagery into georeferenced maps, models, point clouds, and elevation products.
What Is the Best Software for Drone Photogrammetry?
There is no single best platform for every project. WebODM is useful when you want a browser-based workflow and control over local or connected processing. ODM provides a command-line workflow, while other open-source and commercial products may offer different cloud, surveying, automation, support, and collaboration features. Choose according to required accuracy, outputs, hardware, workflow, and support needs.
How Much Money Can You Make Drone Mapping?
There is no authoritative universal hourly rate or profit figure for drone mapping. Earnings vary by location, project size, travel, equipment, processing time, required accuracy, deliverables, insurance, licensing, and whether the number represents employee pay, business revenue, or profit. In the United States, small-drone work or business operations generally need to comply with FAA Part 107 requirements.
Conclusion
A reliable WebODM orthomosaic begins with the survey, not the processing button. Capture sharp images with enough overlap, use well-distributed control when accuracy requires it, give WebODM adequate RAM and storage, and start with conservative processing settings. Enable specialized options only when the deliverable needs them. After processing, inspect both visual quality and positional accuracy before exporting the finished orthophoto.
Sources
- WebODM Installation and Hardware Requirements — installation commands, storage, RAM requirements, Docker management, and hardware scaling.
- WebODM Flying Tips — recommended image overlap and flight patterns for 2D, 2.5D, and 3D reconstruction.
- WebODM Ground Control Points — GCP placement, formatting, observations, and georeferencing guidance.
- WebODM Options and Flags — current Fast Orthophoto, DSM, DTM, resolution, point-cloud, and disk-space options.
- WebODM Options Selection Guide — setting selection, rolling-shutter guidance, fast-processing options, and checkpoint workflow.
- FAA Guidance for Certificated Remote Pilots and Commercial Operators — U.S. requirements for small-drone work and business operations.
