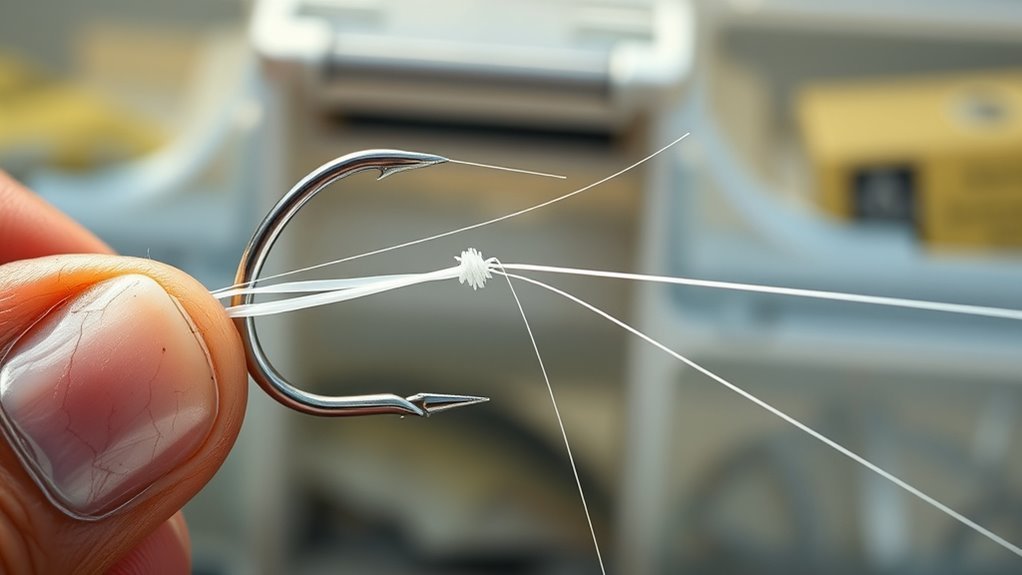
For tying monofilament fishing line directly to a hook, the Improved Clinch knot and Palomar knot are both proven choices. The Improved Clinch works especially well when the hook eye is small or you want a compact terminal knot, while the Palomar is simple, fast, and exceptionally strong when the doubled line fits easily through the eye. Whichever knot you choose, clean wraps, lubrication, slow tightening, and a final inspection matter as much as the knot name.
Quick Answer
For monofilament line, use either an Improved Clinch or Palomar knot. The Improved Clinch is easy to tie on small hooks; the Palomar is simple and very strong when doubled line fits through the eye. Wet the knot, tighten slowly, inspect the coils, test it firmly, and trim a short tag.
Key Takeaways
- Use an Improved Clinch or Palomar knot for a dependable monofilament-to-hook connection.
- For an Improved Clinch, leave about 6 inches of tag line and wrap the tag 5 to 7 times around the standing line.
- Wet the knot before cinching so the mono can slide into position with less friction.
- Restart the knot if the coils cross, bunch, kink, or visibly damage the line.
- Inspect the finished knot and nearby mono for abrasion, then give the connection a firm controlled test before fishing.
At a Glance
| Time Required | About 1–2 minutes after practice |
| Difficulty | Easy |
| Tools Needed | Monofilament line, hook, line clippers, clean water or saliva for lubrication |
| Cost | No added cost beyond normal fishing tackle |
Best Knot for Mono Line?
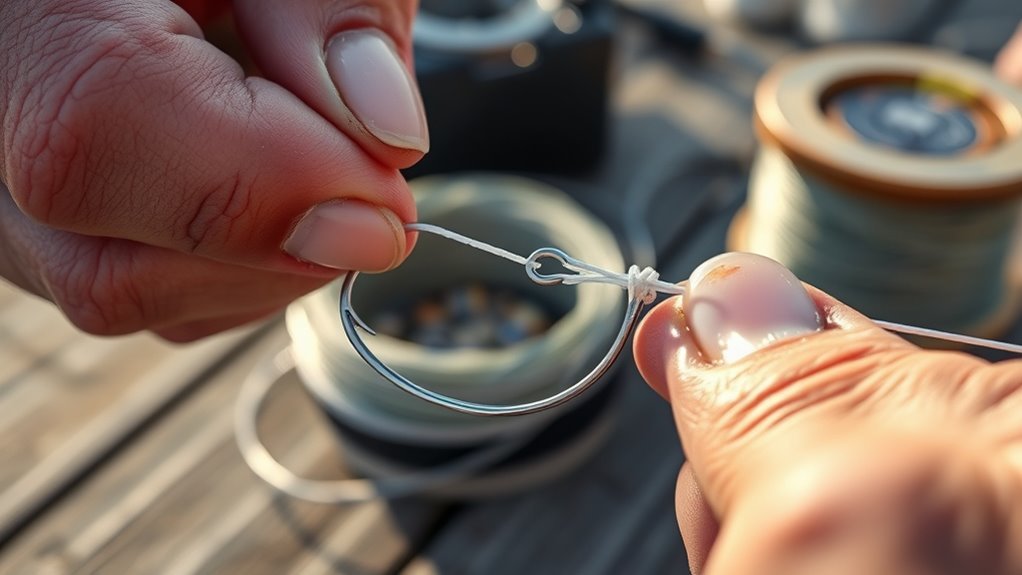
There is no single knot that is automatically best for every monofilament line, hook, and fishing situation. The Improved Clinch Knot is one of the standard terminal knots for mono because it is compact, easy to learn, and works well with hooks, lures, and swivels. Mississippi State University Extension teaches it as a basic knot for non-braided fishing line.
The Palomar Knot is another excellent choice. It uses a doubled section of line through the hook eye and has a simple structure with relatively few opportunities for poorly arranged wraps. Sufix and Rapala describe the Palomar as one of the strongest and most reliable fishing knots.
The better knot is the one that matches the line and tackle and that you can tie cleanly and consistently.
The Improved Clinch is often more convenient when the hook eye is small or when passing an entire lure through a Palomar loop would be awkward. The Palomar is attractive when speed and a simple doubled-line connection matter. Knot strength can vary with line brand, diameter, age, abrasion, and tying quality, so published percentages should not be treated as guarantees for every setup.
Pro Tip: Before committing to a knot for a new spool of mono, tie several samples to the same hook style and pull-test them carefully. Consistent clean knots are more useful than choosing a knot solely from a published strength percentage.
How to Tie Mono Line to a Hook
For a standard Improved Clinch Knot, pass the mono through the hook eye and leave enough tag line to make the wraps without struggling. Five to seven wraps is a useful starting range for common mono, although very light, heavy, or stiff line may respond better to the line manufacturer’s knot recommendation.
- Thread the eye: Pass the mono through the hook eye and leave roughly 6 inches of tag end.
- Make the wraps: Wrap the tag end around the standing line 5 to 7 times. Keep the turns neat and beside one another.
- Enter the first loop: Pass the tag end through the small opening beside the hook eye.
- Complete the improved turn: Pass the tag end through the larger loop that was created by the previous step.
- Lubricate: Wet the knot with clean water or saliva before tightening.
- Dress and cinch: Guide the coils into position while applying slow, controlled tension. Then pull the standing line until the knot seats firmly against the eye.
- Inspect and trim: Check that the coils are smooth and compact, pull-test the knot, then trim the tag while leaving a small amount rather than cutting into the knot itself.
This sequence matches widely taught Improved Clinch methods from fisheries and angling education sources. The important detail is that the tag wraps around the standing line; it does not wrap around a doubled section as a standard Improved Clinch step.
Warning: Keep the hook point directed away from your hands, face, and body while tightening. Do not wrap tensioned monofilament around a finger for extra pulling force; thin line can cut skin, and a slipping knot or broken line can release suddenly.
How to Tie a Palomar Knot With Mono
The Palomar is often faster once learned because it uses an overhand knot rather than a series of wraps.
- Double about 6 inches of mono to form a loop.
- Pass the doubled loop through the hook eye. If the doubled line will not pass easily, thread a single section through the eye first and bring it back through to create the doubled section.
- Tie a loose overhand knot with the doubled line, keeping the hook hanging below it.
- Pass the large loop completely over the hook.
- Make sure the strands are not crossed, wet the knot, and pull the standing line and tag section until the knot seats firmly. Trim the remaining tag.
A Palomar requires enough loop to pass over the hook or lure, so it can use more line and may be inconvenient with bulky terminal tackle. Its simple structure remains a strong option for ordinary monofilament when the hook eye provides enough room.
How to Seat the Knot at the Eye
A fishing knot should reach the hook eye smoothly instead of stopping in a loose bunch. Before final tightening, arrange the wraps neatly and wet the line so the coils can slide into position with less friction.
Apply pressure slowly. A rushed, dry cinch can create heat, crossed wraps, kinks, or visibly stressed mono. If the knot does not draw down evenly, cut it off and start again rather than forcing a damaged knot into position.
Proper seating is confirmed when the knot lies compactly against the eye, the coils are orderly, and the nearby line shows no obvious abrasion, flattening, or sharp curl.
Align Knot At Eye
A clean seat starts with enough tag end to work comfortably. The direction from which the line enters a normal hook eye is not what makes an Improved Clinch secure; neat wraps and correct tightening are more important.
Before tying, inspect the hook eye. A rough edge, open gap, corrosion spot, or metal burr can damage monofilament under load. Replace damaged hooks rather than relying on a stronger knot to compensate.
As the knot begins to close, guide the turns with your fingers so they stay in order. Do not allow one coil to jump over another. Once the knot has dressed correctly, use the standing line to bring the knot firmly against the eye.
Finish by trimming the excess tag with line clippers. Avoid cutting so close that the cutter touches or nicks the loaded portion of the knot.
Wet Before Cinching
Moisture helps the line slide as the coils compress. This reduces friction during the most critical part of tightening and makes it easier to seat the turns cleanly. Educational knot guides from University of Missouri Extension and other angling programs likewise emphasize drawing knots down snugly and correctly.
| Step | Action | Why It Matters |
|---|---|---|
| 1 | Add moisture | Reduces friction while the knot moves |
| 2 | Draw the knot snug slowly | Lets the coils settle in order |
| 3 | Seat against the eye | Removes unwanted slack |
| 4 | Check alignment | Finds crossed or bunched coils |
| 5 | Pull-test the finished knot | Confirms the connection before casting |
Practicing the same wetting, dressing, and tightening sequence helps make the process repeatable when tying with cold, wet, or tired hands.
Pull Tag Ends Even
Controlled tension on the tag end and standing line helps the knot begin to close without twisting. The goal is not to yank both ends as hard as possible; it is to keep the wraps organized while the knot dresses.
With an Improved Clinch, use the tag end to maintain control while the coils are settling. Once the knot is properly dressed and lubricated, the standing line provides the final pull that seats the knot against the eye.
If the mono turns sharply white, becomes visibly flattened, develops a kink, or shows rough abrasion beside the knot, cut away the damaged section and retie.
After cinching, inspect the connection from more than one angle and give it a firm controlled pull before trimming the tag. A knot that slips during this test should be replaced immediately.
Palomar or Improved Clinch for Mono?
Both knots work with monofilament, and neither should be treated as a guaranteed winner for every line. Published fishing guides sometimes report very high break-strength retention for the Palomar, while extension programs also document strong performance from the Improved Clinch. Actual results depend on the line and how well the knot is tied.
| Factor | Palomar | Improved Clinch |
|---|---|---|
| Construction | Doubled line through the eye | Tag wrapped around standing line |
| Best practical advantage | Few steps and excellent strength when tied cleanly | Compact and convenient on small hooks or terminal tackle |
| Main limitation | Requires doubled line through the eye and a loop large enough to pass over the hook or lure | More wraps create more opportunities for crossing or poor dressing |
| Good choice when | The eye accepts doubled mono easily | You want a compact knot and already tie it consistently |
Both knots should be lubricated and tightened slowly. If your line manufacturer recommends a particular knot for a heavy, stiff, or specialty monofilament, follow that recommendation.
Palomar Knot Strength
The Palomar Knot has a strong reputation because the line passes through the eye as a doubled strand and the finished structure is compact. Fishing-industry and educational references have reported very high retained strength when it is tied correctly.
Those percentages are not universal guarantees. A knot tied in fresh premium mono under controlled testing may perform differently from the same knot in old, abraded, stiff, or incorrectly cinched line.
To preserve strength, keep the doubled strands parallel, make sure they do not cross inside the knot, wet the line, and tighten gradually.
The Improved Clinch remains a dependable alternative, particularly for ordinary lighter monofilament and small terminal tackle.
For practical fishing, consistent execution is more important than chasing a small theoretical difference between two correctly tied knots.
Improved Clinch Ease
The Improved Clinch is popular with monofilament because it uses a straightforward wrapping sequence and does not require the entire hook or lure to pass through a large loop.
| Step | Action | Benefit |
|---|---|---|
| 1 | Pass the tag through the eye | Creates the terminal connection point |
| 2 | Wrap the tag 5–7 times around the standing line | Builds the gripping coils |
| 3 | Return through the loops, wet, dress, and cinch | Seats the coils cleanly against the eye |
Repeated practice increases speed, but neat line placement should come before speed. If the coils overlap or the mono kinks during tightening, retie instead of accepting a questionable connection.
Mono Line Use
For monofilament tied directly to a hook, the Palomar and Improved Clinch cover most ordinary situations. Their practical differences are straightforward:
- Palomar: simple structure, doubled line, and strong performance when the eye has enough room.
- Improved Clinch: compact terminal knot that is convenient with many small hooks and lures.
- Light mono: both can work well when properly tied and lubricated.
- Heavy or stiff mono: verify the knot recommended by the line manufacturer and make sure the eye is large enough for the required passes.
The best field choice is the knot you can tie correctly with the specific line and tackle in your hand.
How to Make Mono Knots Stronger
Strong mono knots begin with undamaged line, correct knot geometry, lubrication, and controlled tightening. Brute force does not improve a poorly dressed knot.
Wet the knot before cinching and watch the coils as they close. If a wrap crosses another wrap or the line becomes kinked, stop and retie. A clean knot should tighten progressively rather than suddenly locking into a distorted shape.
Wet, dress, tighten slowly, inspect, and test: those habits protect knot strength more reliably than forcing extra wraps into an incorrectly tied knot.
The Palomar can deliver excellent strength in mono, while the Improved Clinch remains a proven terminal knot. Do not assume that randomly doubling a section of line or adding excessive wraps automatically improves either knot. Use the established tying method and adjust only when the line manufacturer’s instructions call for it.
Inspect the first section of line above the knot for nicks, flattened areas, roughness, or discoloration. Damage near the terminal connection is a reason to cut back to clean mono and retie.
Regular inspection becomes especially important after fishing around rocks, timber, shell, dock pilings, or other abrasive cover.
Common Mono Knot Mistakes to Avoid
Most mono-knot problems come from tying technique or damaged line rather than a mysterious failure of the knot itself.
- Tightening dry: friction can make the knot harder to dress and can stress the mono as it cinches.
- Crossing the wraps: overlapping coils create uneven pressure and make the finished knot harder to inspect.
- Using the wrong wrap path: an Improved Clinch wraps the tag around the standing line before the tag returns through the loops.
- Forcing the knot: violent tightening can kink the line instead of seating the knot cleanly.
- Ignoring damaged mono: abrasion or a sharp curl immediately above the knot is a reason to cut and retie.
- Trimming carelessly: cutting into the knot or nicking the standing line can weaken an otherwise good connection.
Also inspect the hook eye itself. A burr, open joint, or corrosion can damage mono repeatedly even when the knot is tied correctly.
Troubleshooting a Slipping or Damaged Knot
If an Improved Clinch slips during a pull test, check that the tag followed the complete improved path through both loops and that enough neat wraps were used. If a Palomar looks uneven, make sure the doubled strands did not cross before tightening.
If the mono turns milky white, flattens, curls sharply, or develops a rough spot beside the knot, do not simply pull harder. Cut away the damaged section and start with fresh line.
Note: Monofilament and fluorocarbon are different materials. A knot that works with both may still require different handling because stiffness, diameter, and surface characteristics vary between lines.
How to Practice Mono Knots Faster
A useful way to learn the line path is to begin with oversized cord or rope. The larger diameter makes each loop, wrap, and crossover easy to see, particularly when learning the Improved Clinch or Palomar for the first time.
Once you understand the sequence, switch to actual monofilament and the hook sizes you normally fish. Real mono behaves differently from practice cord, so the final stage of practice should always use real tackle.
There is no need to reach an arbitrary number such as 100 repetitions. Practice until you can tie the knot several times in a row without referring to the instructions and each finished knot looks the same.
Training in a well-lit, controlled area also makes it easier to spot crossed coils and damaged line. Once the movement becomes familiar, practice with wet hands or reduced light to better match field conditions while still handling the hook safely.
When to Retie Mono Line Knots
Even a well-tied mono knot needs inspection. New York Sea Grant advises checking monofilament for nicks and fraying and retying knots before fishing trips.
- Before fishing: inspect the terminal knot and nearby line, especially if the rig was stored already tied.
- After a hard snag or abrasion: run your fingers carefully along the mono and retie if you find roughness or flattening.
- After a hard fight: inspect the knot and line closely; retie if there is visible damage or any doubt about the connection.
- After repeated lure changes: cut back to fresh line if the working end has become short, curled, or damaged.
- Whenever the knot slips or looks distorted: replace it immediately rather than relying on another pull to fix it.
Lubrication during tying helps the knot seat cleanly, but it cannot repair worn monofilament. Retie from an undamaged section whenever abrasion or deformation is visible.
A fresh, carefully tested terminal knot is inexpensive insurance against losing a fish or lure because of a damaged connection.
Frequently Asked Questions
How to Tie a Hook on Mono?
For an Improved Clinch, pass the mono through the hook eye, leave about 6 inches of tag, wrap the tag 5 to 7 times around the standing line, pass it through the small loop beside the eye and then through the larger loop, wet the knot, cinch slowly, inspect it, and trim the tag.
How to Join Mono Line to Mono Line?
A Blood Knot is a good option for joining two sections of monofilament that are reasonably similar in diameter. Overlap the lines, wrap each tag around the opposite standing line, return both tags through the center opening in opposite directions, moisten, and tighten by pulling the standing lines.
What Is the Best Knot to Tie on an Eye Hook?
The Improved Clinch and Palomar are both reliable choices for an eyed hook and monofilament line. The Improved Clinch is compact and convenient with small eyes; the Palomar is simple and strong when doubled line passes easily through the eye.
What Is the Best Knot for Tying a Hook to a Line?
For ordinary monofilament, start with the Improved Clinch or Palomar. Neither is automatically best for every diameter and hook. Choose the knot that fits the eye and tackle, follow the correct tying sequence, lubricate it, and use the knot you can reproduce consistently.
Can You Use a Palomar Knot With Monofilament?
Yes. The Palomar works with monofilament and is widely regarded as a strong terminal knot. Keep the doubled strands parallel, avoid crossing them, lubricate the knot, and tighten it slowly.
How Many Wraps Should an Improved Clinch Knot Have?
Five to seven wraps is a practical starting point for common monofilament. Very light, heavy, stiff, or specialty line may need different treatment, so check the line manufacturer’s recommendation when available.
Conclusion
Secure mono line knots depend on correct knot choice, clean line, proper threading, lubrication, and controlled tightening. The Improved Clinch is a compact and dependable option for many hooks and lures, while the Palomar offers a simple doubled-line connection when the eye has enough room. Published strength figures vary with the line and test method, so the most important habits are to dress the knot correctly, inspect it for damage, pull-test it before fishing, and retie whenever the line becomes abraded, kinked, or questionable.
Sources
- Mississippi State University Extension — Sportsfishing — Improved Clinch and Palomar knot use, tying guidance, and knot-strength context.
- University of Missouri Extension — Supplemental Angling Skills — Palomar construction, knot-strength guidance, and proper tightening.
- New York Sea Grant — Fishing Knots and Hooks — Improved Clinch use with monofilament, Blood Knot guidance, and inspection/retying advice.
- Berkley — Why Use Monofilament — monofilament knot characteristics and Palomar strength context.
- Sufix / Rapala Knot Tying Guides — Improved Clinch and Palomar applications and tying guidance.

