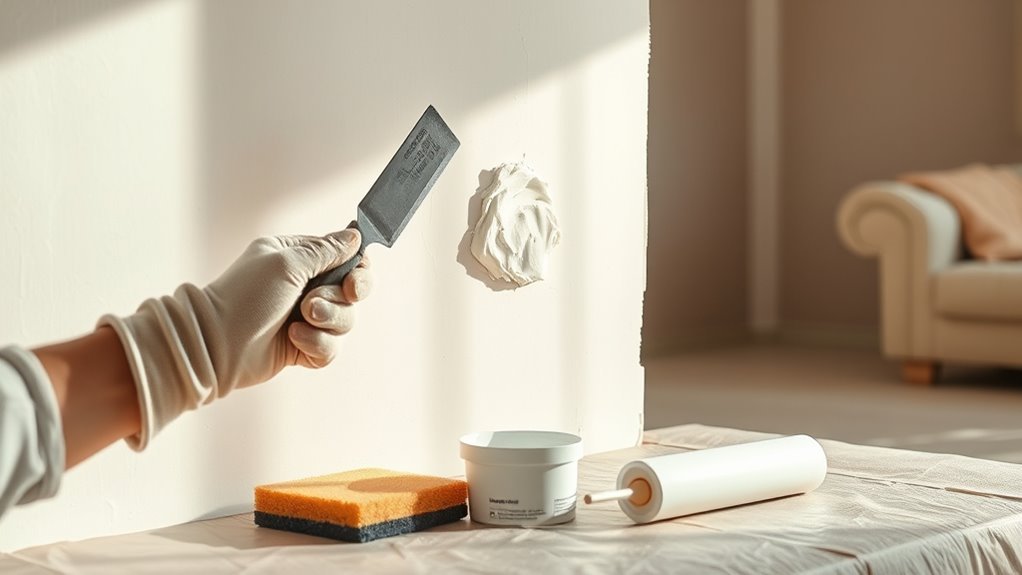
When a toilet paper holder pulls loose from drywall, the damage can range from a slightly enlarged anchor hole to torn facing paper and a fractured opening through the gypsum core. A durable repair means more than hiding the hole: remove loose material, seal damaged paper, support any opening that cannot hold filler on its own, finish the patch smoothly, and give the mounting screws a solid place to hold when the fixture goes back on the wall.
Quick Answer
Remove the holder and failed anchors, trim crumbled drywall back to solid material, and seal exposed brown paper with a drywall problem-surface sealer. Back larger blown-out openings with wood or a rated patch, fill and feather with joint compound, sand and prime, then remount into a stud, wood backer, or sound drywall with a suitable heavy-duty anchor.
Key Takeaways
- Seal torn paper before mudding: Cut away loose paper and use a product intended to seal damaged drywall before applying joint compound.
- Match the repair to the damage: Small, solid anchor holes may only need filler, while fractured through-holes need backing or a patch system.
- Know the difference between setting and drying: Setting-type compound can harden quickly, but ready-mixed finish coats often need much longer to dry before sanding or painting.
- Give the holder solid support: A stud or installed wood backer is best. If you use a hollow-wall anchor, install it through sound drywall according to the anchor manufacturer’s instructions rather than relying on weak repair filler.
At a Glance
| Time Required | About 2 to 4 hours of active work, usually spread over 1 to 2 days when drying, priming, and painting time are included |
| Difficulty | Intermediate DIY; easier if the damage is small and more involved if the fixture must return to the same location |
| Tools Needed | Utility knife, taping knives, sanding sponge, drill/driver, vacuum, eye protection, and suitable dust protection |
| Cost | Low to moderate; the main costs are patching compound, sealer/primer, reinforcement or backing, replacement fasteners, and matching paint |
Deal tip: For larger repairs where you cut out a damaged section, an oscillating multi-tool makes clean, controlled cuts. The DEWALT DCS356 is one of our DEWALT deals for Prime Big Deal Days.
Assess the Toilet Paper Holder Damage
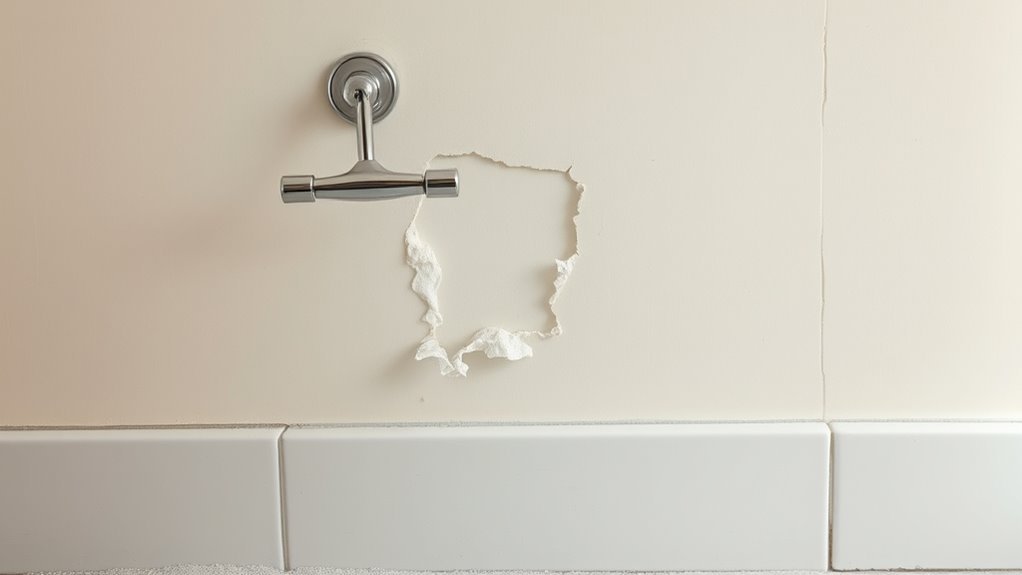
Before mixing compound or cutting the wall, remove the decorative holder and mounting bracket so you can see the entire damaged area. Confirm that the surface is actually drywall. Plaster, cement board, tile backer, and tiled walls require different fastening and repair methods.
Drywall thickness also varies. Many interior walls use 1/2-inch gypsum board, while 5/8-inch Type X panels are common components of certain fire-resistance-rated assemblies. Do not assume the wall thickness or fire rating from the room alone. If the opening exposes an edge of the board, use that to confirm its thickness before cutting or choosing an anchor.
When a mounted holder is pulled outward or downward, you may see two different kinds of damage:
- Anchor Blowout: A screw or anchor pulls toward the room, enlarging the hole and crushing or breaking the gypsum around it.
- Bracket Crushing: The mounting plate presses into the wall, leaving dents, cracked paper, crushed gypsum, or a shallow depression around the screw location.
Press gently around the damaged area. Sound drywall should feel firm. If it flexes, crumbles, rattles, or feels soft beyond the visible hole, mark the weak area and plan to cut back to solid board. Also look for discoloration, dampness, swelling, or mold-like spotting. Water-softened drywall should not simply be filled; find and correct the moisture source first.
Warning: Plumbing and electrical wiring can be hidden behind bathroom walls. Do not plunge a utility knife, drill bit, or drywall saw deep into the cavity. Cut only as deeply as needed to penetrate the known wallboard thickness. If the repair is close to an outlet, switch, or other electrical device, shut off the relevant circuit before opening the wall.
Choose the Repair Path Before You Patch
Decide where the toilet paper holder will be mounted after the wall is repaired. That choice affects the best patch method.
- Small hole with firm surrounding drywall: Remove the failed anchor and loose material, seal torn paper if present, and fill the hole with an appropriate patching compound.
- Fractured or blown-out opening: Use wood backing, a drywall plug, or a manufacturer-rated patch system so wet compound is not hanging unsupported over a cavity.
- Holder returning to the exact same location: Installing wood blocking behind the opening is usually the most dependable option because the new mounting screws can bite into wood instead of repair material.
- Holder can move slightly: Patch the old damage and place the new bracket over a stud or a section of undamaged drywall that can accept an appropriate hollow-wall anchor.
- Soft or water-damaged board: Correct the moisture problem and replace damaged board rather than trying to strengthen it with compound.
Note: If the wall is part of a known fire-resistance-rated assembly, avoid unnecessarily enlarging the opening and restore the board thickness and layers required by that assembly.
Gather Your Drywall Repair Materials
A durable repair is easier when you have the patching and remounting materials ready before opening the wall further:
- Setting-Type Joint Compound: A powder compound such as USG Sheetrock Easy Sand is useful for deeper fills because it chemically sets, provides low shrinkage and strong bond, and allows faster recoating than ordinary air-drying compound.
- Ready-Mixed All-Purpose or Topping Compound: Useful for the final thin finish coat because it feathers easily and is generally easier to sand smooth.
- Reinforcement: Fiberglass mesh tape, paper drywall tape, a manufacturer-rated metal patch, or a piece of replacement drywall, depending on the shape and size of the opening.
- Wood Backing: A 1×2 strip, plywood strip, or similar solid blocking is especially useful when the holder must return to the same location.
- Damaged-Drywall Sealer: Use a sealer made for exposed drywall paper. Zinsser GARDZ is a water-based problem-surface sealer specifically intended for damaged drywall. Shellac- or oil-based sealing primers are other common options. Do not confuse these products with ordinary latex wall primer.
- Taping Knives: A narrow 2- to 4-inch knife for filling and bedding, plus a flexible 6- to 8-inch knife for feathering finish coats.
- Abrasives: A drywall sanding sponge or paper in roughly the 120- to 220-grit range. Use coarse grits sparingly so you do not tear the surrounding drywall paper.
- Replacement Fasteners: Wood screws for a stud or installed backer, or a manufacturer-rated hollow-wall anchor that fits the mounting bracket and existing wall thickness.
Prep the Broken Drywall Edges
Joint compound bonds best to clean, stable material. If crushed gypsum, dusty edges, or loose facing paper remain underneath the patch, the surface can blister, crack, or break loose later.
Clean Broken Edges
Remove the old bracket screws and failed anchors. With a sharp utility knife, cut away pulverized gypsum that is no longer attached firmly to the surrounding board. Where useful, lightly bevel a crumbled edge so the patching compound can contact sound gypsum rather than a thin, broken lip.
Vacuum the openings with a brush attachment. Removing loose gypsum dust and debris improves contact between the repair material and the existing board. Avoid soaking the opening with water during cleaning.
Pro Tip: After trimming loose facing paper, seal exposed brown drywall paper before applying wet compound. A damaged-drywall sealer such as GARDZ or a suitable shellac/oil sealing primer prevents the exposed paper from absorbing moisture unevenly and reduces the chance of bubbling.
Trim Loose Drywall
Cut away ragged paper that has separated from the gypsum core. Do not keep peeling once you reach paper that is firmly bonded. If the surface layer has delaminated around a dent, score a neat boundary around the damaged portion before removing the loose section.
If two nearby anchor holes have fractured the material between them, converting the irregular damage into one small square or rectangular opening can make a stronger repair. Use shallow cuts and remove only the material that is loose or badly crushed.
Provide Backing and Fill the Holes
A small anchor hole surrounded by firm board can often be filled directly. A larger opening that passes through the panel and cannot support wet compound needs a backer, drywall plug, or rated patch system. This is especially important when the toilet paper holder will be installed at the same location.
Select the support method according to the condition of the opening and the final mounting plan:
- Wood Backer Block — Best for Same-Location Remounting: Insert a strip of 1×2 lumber or plywood through the opening so it overlaps sound drywall on both sides. A strip roughly 3 to 4 inches longer than the opening usually gives enough overlap for a small repair. Hold it against the back of the board and secure it through the face of the existing drywall with screws. The block supports the patch and later provides solid material for the holder’s mounting screws.
- Drywall Plug: For a neatly cut opening, fit a piece of drywall of matching thickness into the hole and screw it to the installed backing. This is a good choice when the original board has lost a larger section.
- Self-Adhesive Reinforced Patch: For a small-to-medium opening where the holder will not be screwed through the repaired spot, a manufacturer-rated metal or reinforced mesh patch can bridge the void. Follow the patch maker’s maximum opening size and finishing instructions rather than relying on a universal hole-size limit.
Mix setting-type compound with clean water according to its package instructions. Use a 4-inch taping knife to press compound firmly against the sound edges and backing. For a deeper repair, leave the first fill slightly below the surrounding wall surface so the tape and finish coats can be feathered without creating a hump.
Reinforce the Patch With Drywall Tape
When a repair includes seams around a drywall plug or cutout, drywall tape helps bridge those joints and limits cracking as the wall moves slightly over time.
If you use fiberglass mesh drywall tape, use a setting-type joint compound for the first coat over the mesh. USG specifically recommends setting-type compound for the first coat over fiberglass tape; ready-mixed drying compound can then be used for later finish coats.
If you use paper tape, spread a thin bedding coat of compatible joint compound over the seam, center the tape in the wet compound, and draw a taping knife across it firmly enough to remove excess mud without squeezing the joint completely dry. Avoid leaving bubbles under the tape.
Apply the next coat over the reinforcement and feather it several inches beyond the repair. Each coat should become wider and thinner toward the outside edge so the finished patch blends gradually into the existing wall.
Let the Compound Dry and Recoat
Do not treat “set” and “dry” as the same thing. Setting-type compound becomes hard through a chemical reaction, while ready-mixed compound primarily dries through evaporation. A coat that feels firm may still contain moisture, especially if it is thick or the bathroom is humid.
Drying Time Matters
Follow the timing printed on the exact compound you buy. For example, current USG Sheetrock Easy Sand 20 lists a 20-minute working time and a 25- to 35-minute setting time, while Easy Sand 45 lists a 45-minute working time and a 50- to 65-minute setting time. Those are setting characteristics, not universal paint-ready times.
Ready-mixed compound takes much longer. USG states that joint compound dries in about 24 hours at 70°F and 70% relative humidity, with higher humidity or lower temperatures slowing the process. A thin coat in a warm, dry room may dry sooner, while a deep patch in a humid bathroom can take longer.
Run the bathroom exhaust fan or provide gentle air circulation if practical. Avoid trying to force-dry a thick patch with intense direct heat; uneven drying can make finishing more difficult.
Recoat If Needed
After the previous coat is firm and dry enough for the next step, run a wide taping knife or straightedge across the repair. If you find a depression, apply another thin coat. If you find a ridge, scrape it down before adding more compound rather than burying the high spot under a thick layer.
Use a 6- or 8-inch taping knife for the final skim, extending the feathered edge several inches beyond the earlier coat. A wider, thinner transition is usually less visible after painting than a thick patch concentrated directly over the hole.
| Application Coat | Recommended Compound | Timing Guidance | Primary Purpose |
|---|---|---|---|
| Base Fill Coat | Setting-Type Joint Compound | Use the product’s listed working and setting times; Easy Sand 45, for example, lists a 50–65 minute setting time | Fill the supported opening and establish a firm base |
| Tape / Leveling Coat | Setting-Type for first coat over fiberglass mesh; compatible bedding compound for paper tape | Recoat according to the compound and tape manufacturer’s instructions | Reinforce seams and begin feathering the repair |
| Finish Skim Coat | Ready-Mixed Topping or All-Purpose Compound | Allow to dry completely before sanding; approximately 24 hours is a common manufacturer reference under moderate conditions | Create a broad, smooth transition into the existing wall |
Sand the Drywall Smooth
Once the final skim coat is completely dry, sand only as much as necessary to remove knife lines and blend the patch. A sanding sponge or block keeps the surface flatter than pressing loose sandpaper into the compound with your fingertips.
For noticeable ridges, start carefully with a medium grit such as 120 or 150. As soon as the surface is close to level, switch to a finer grit such as 180 or 220. Avoid sanding through the surrounding drywall face paper or exposing fiberglass mesh.
Drywall sanding creates a large amount of fine dust. The National Institute for Occupational Safety and Health notes that joint-compound sanding can expose workers to high dust concentrations and, with some products, respirable silica. Reduce dust with vacuum-assisted or other low-dust methods when practical, ventilate the room, wear eye protection, and use suitable NIOSH-approved particulate respiratory protection when dusty conditions warrant it. Follow the safety data sheet for the compound you use.
After sanding, run your hand lightly across the patch and view it from an angle under side lighting. Your fingertips and raking light can reveal a ridge or depression that is difficult to see straight on. Vacuum or wipe away the remaining dust before priming.
Prime and Paint the Repair
Joint compound is more porous than an already painted wall. Painting directly over an unprimed patch can create a dull or uneven area commonly called flashing.
Apply a drywall primer/sealer over the finished compound and slightly beyond the feathered edge. PVA drywall primer is a common option over new joint compound, but follow the primer manufacturer’s surface-preparation, drying, and recoating instructions. Remember that the damaged-paper sealer used earlier serves a different job: it stabilizes torn facing paper before mudding.
After the primer dries, apply the matching wall paint. Use the same application method and a roller nap that resembles the existing finish. A roller can reproduce the light stipple found on many painted drywall surfaces more naturally than brushing the center of a large patch. Apply one or two thin coats as needed for color and sheen uniformity, feathering the last passes into the surrounding wall.
Avoid Future Drywall Damage and Remount Securely
The original failure often happens because repeated outward and downward movement enlarges the anchor hole or crushes the gypsum around it. Do not simply insert the same lightweight anchor into the damaged location and expect the repair material to provide the same holding strength as intact wallboard.
Use one of these remounting methods:
- Mount Directly to a Wall Stud: If the holder can move enough to line up with framing, fastening the bracket into a stud provides a much more dependable substrate than damaged drywall. Use screws appropriate for the bracket and framing.
- Use the Integrated Wood Backer: If you installed wood blocking behind the repair, drive the mounting screws into that wood after the patch and finish have dried sufficiently. This is usually the best method when the holder must return to the exact same position.
- Use a Heavy-Duty Hollow-Wall Anchor in Sound Drywall: If no stud or backer is available, a metal strap-toggle system such as TOGGLER SNAPTOGGLE can distribute the load over the back of the wallboard. Select the anchor size to fit the bracket, wall thickness, and manufacturer’s installation requirements. Do not rely on published laboratory ultimate-load figures as the normal working load; TOGGLER advises applying a substantial safety factor and considering the condition of the substrate.
If a toggle’s required hole would land entirely inside weak patching material, do not count on the filler to carry the fixture. Move the mounting point into sound board, use the installed wood backer, or enlarge the repair enough to install proper blocking behind the wall.
Troubleshoot Common Drywall Repair Problems
- Brown paper bubbles under the compound: Cut away the loose blister, let the area dry, seal the newly exposed paper with a damaged-drywall sealer, and skim it again.
- The patch shows as a raised hump: Scrape or sand the high point lightly, then feather a wider, thinner finish coat around it instead of piling more compound directly on top.
- A depression remains after sanding: Apply another thin skim coat, let it dry fully, and sand again.
- A seam cracks around a drywall plug: Remove loose compound at the crack, make sure the plug/backing is rigid, reinforce the seam with appropriate drywall tape, and refinish it.
- The holder becomes loose again: Stop tightening the screw into a failing hole. Remove the bracket and change the fastening method to a stud, installed backer, or suitable anchor in intact drywall.
Frequently Asked Questions
How can I fix small dents and shallow dings in drywall?
If the facing paper is intact and the gypsum underneath is firm, clean the dent and spread a thin layer of lightweight spackle or joint compound over it with a flexible putty knife. Let the product dry according to its label, sand it smooth with fine sandpaper, spot-prime the repaired area, and touch up the paint.
What is considered minor drywall repair versus structural damage?
Drywall itself is normally a finish panel, so “structural damage” is not the best description for most anchor failures. Small dents, screw holes, and intact enlarged anchor holes are minor surface repairs. A fractured through-hole, large loose section, water-softened board, or opening that must support new hardware needs backing, a drywall plug, or replacement of the damaged section.
What drywall damage cannot be patched with joint compound alone?
Do not rely on joint compound alone when an opening is too large or broken to support the wet filler, when a section of board flexes or crumbles, when the drywall is soft from moisture, or when you need to reinstall a mounting screw in the same damaged spot. Those situations need backing, a drywall plug, a rated patch system, or replacement board.
How do I repair torn drywall paper without it bubbling under the mud?
Cut away only the loose or frayed paper, leaving firmly bonded facing in place. Seal the exposed brown paper with a product intended for damaged drywall, such as Zinsser GARDZ, or with a suitable shellac- or oil-based sealing primer. Let the sealer dry according to its label before applying joint compound.
Can I put the toilet paper holder back in the exact same place?
Yes, but the safest approach is to install wood blocking behind the damaged area while the wall is open and drive the new mounting screws into that block. Do not expect fresh joint compound by itself to provide a strong screw anchor at the old torn-out location.
Can I install a toggle bolt through the repaired patch?
Only when the anchor can clamp against sound wallboard that meets the anchor manufacturer’s requirements. If the required anchor hole falls in weak filler, fractured gypsum, or the center of an unsupported patch, use wood backing or relocate the bracket rather than depending on the repaired compound to carry the load.
How long should I wait before remounting the toilet paper holder?
Wait until the final compound, primer, and paint have dried according to their manufacturers’ instructions. If the mounting screws go into an installed wood backer, the fastener strength comes from the wood rather than the surface compound, but the finish should still be dry enough that the bracket will not mark or peel the new paint.
Conclusion
A pulled-out toilet paper holder is usually repairable without replacing an entire wall section. The key is to stop treating the problem as only a cosmetic hole. Remove loose gypsum and paper, seal exposed facing, support openings that need backing, build the surface back up with compatible joint compound, and feather the final coats smoothly before priming and painting. When it is time to remount the holder, fasten it into a stud or installed wood backer whenever possible, or use an appropriate hollow-wall anchor in solid, undamaged drywall. Giving the mounting screws a sound substrate is what keeps the repaired holder from pulling loose again.
Sources
- USG Sheetrock Easy Sand 45 Joint Compound — manufacturer specifications for setting-type compound, including working time, setting time, low shrinkage, and bond characteristics.
- USG Joint Compound Drying FAQ — manufacturer guidance on typical drying conditions and the effect of temperature and humidity.
- Rust-Oleum Zinsser GARDZ Problem Surface Sealer — manufacturer guidance for sealing damaged drywall and torn facing paper before skim coating.
- TOGGLER SNAPTOGGLE Heavy-Duty Toggle Bolt — manufacturer specifications and hollow-wall anchor information.
- NIOSH — Control of Drywall Sanding Dust Exposures — drywall sanding dust hazards and exposure-control guidance.

