Car fuses protect your vehicle’s electrical circuits by stopping excess current before it damages wiring, switches, lights, motors, or electronic modules. When a fuse blows, one electrical feature may stop working, such as a radio, power window, interior light, outlet, or headlight. Replacing a car fuse is usually simple, but you need the correct fuse type, the correct amperage rating, and a safe step-by-step process.
Quick Answer
To replace a car fuse, turn the vehicle off, locate the correct fuse box, identify the blown fuse, remove it with a fuse puller or needle-nose pliers, and install a new fuse with the same amperage rating and same physical type. Then test the affected electrical component.
Key Takeaways
- Car fuses protect electrical circuits from overloads and short circuits.
- Most vehicles have at least one fuse box under the dashboard or inside the engine compartment.
- Always replace a blown fuse with the same amperage rating and the same fuse style.
- A fuse that blows again right away usually means there is a deeper electrical problem.
- Never use foil, wire, or a higher-rated fuse as a shortcut because that can damage wiring or create a fire risk.
At a Glance
| Time Required | 5 to 15 minutes for most basic fuse replacements |
| Difficulty | Easy beginner task when the fuse location is clear |
| Tools Needed | Owner’s manual, fuse puller, needle-nose pliers, replacement fuse, flashlight, and optional multimeter |
| Cost | Usually low, especially if you already have a basic fuse assortment |
Understanding the Purpose of Car Fuses
Car fuses serve a critical role in your vehicle’s electrical system. They act as protective devices that help prevent damage to electrical components when too much current flows through a circuit. Each fuse is designed to break the circuit when the current exceeds a specific amperage rating, which helps prevent overheating, wire damage, and possible electrical fires.
This safety mechanism matters because modern vehicles use many electrical systems. These can include basic lighting, power windows, dashboard controls, audio systems, charging ports, sensors, and infotainment features. Without fuses, these components would be more vulnerable to damage from electrical surges, short circuits, or overloaded wiring.
The design of a fuse is simple but effective. A typical automotive fuse has a plastic body and a small metal element inside. When too much current passes through the fuse, the metal element melts. This stops electricity from flowing through that circuit and protects the connected component.
Fuses also help maintain the overall integrity of your vehicle’s electrical system. By isolating a fault to one circuit, they can prevent a small electrical issue from spreading into a more serious and costly repair. Understanding this purpose helps you maintain your car’s electrical health and respond quickly when one feature suddenly stops working.
Warning: Never replace a blown fuse with a higher-amperage fuse, foil, wire, or any homemade substitute. A fuse is a safety device. Bypassing it can overheat wiring and create a serious fire risk.
Identifying the Location of the Fuse Box
Locating the fuse box in your vehicle is the first step in addressing many electrical issues. Most cars have at least one fuse box, and some have two or more. The number and location depend on the vehicle’s design and the complexity of its electrical system.
The primary fuse box is often found under the dashboard on the driver’s side, near the steering column, or behind a removable interior panel. Many vehicles also have a secondary fuse box in the engine compartment. This box may contain fuses and relays for high-demand systems such as headlights, cooling fans, the starter circuit, or other engine-related components.
To find the correct fuse box, check your vehicle’s owner’s manual first. The manual usually includes fuse box diagrams, fuse ratings, and the circuits each fuse protects. Some vehicles also place a diagram on the fuse box cover itself, which makes it easier to identify the correct fuse.
Familiarizing yourself with these locations saves time and reduces frustration. It also helps you avoid pulling the wrong fuse or disturbing circuits that are not related to the problem you are trying to fix.
Selecting the Correct Replacement Fuse
Once you have identified a blown fuse, selecting the correct replacement is essential. Fuses come in different types, sizes, colors, and amperage ratings. The amperage rating tells you how much current the fuse can handle before it blows.
You must replace a blown fuse with one that matches the original fuse’s amperage rating. For example, if the old fuse is rated for 10 amps, use another 10-amp fuse of the same type. Using a higher-rated fuse can allow too much current through the circuit, which may damage wiring or electrical components.
In addition to amperage, the fuse must match the original fuse’s physical size and design. Common automotive fuse types include blade fuses, glass tube fuses, and ceramic fuses. Blade fuses are especially common in many modern vehicles because they are compact, easy to install, and easy to inspect.
When selecting a replacement fuse, check both the amperage number and the physical dimensions. Many auto parts stores sell fuse assortments with several ratings, but you should still compare the replacement carefully before installing it. A fuse that looks close but does not fit correctly may create a poor connection or fail to protect the circuit properly.
Note: Fuse colors can help you identify amperage quickly, but do not rely on color alone. Always confirm the number printed on the fuse and compare it with the fuse box diagram or owner’s manual.
Removing the Blown Fuse
| Steps | What to Check |
|---|---|
| Identify the blown fuse | Match the failed component to the correct fuse location |
| Turn off power | Switch off the ignition and affected electrical component |
| Remove the blown fuse | Pull it straight out with a fuse puller or needle-nose pliers |
| Replace with new fuse | Use the same amperage rating and same fuse type |
| Turn on power | Test the affected component and watch for repeat failure |
Removing a blown fuse requires care, but it does not usually require advanced tools. Most vehicles come equipped with a fuse puller, a small tool designed specifically for this purpose. You may find it clipped inside the fuse box cover or stored near the fuse panel.
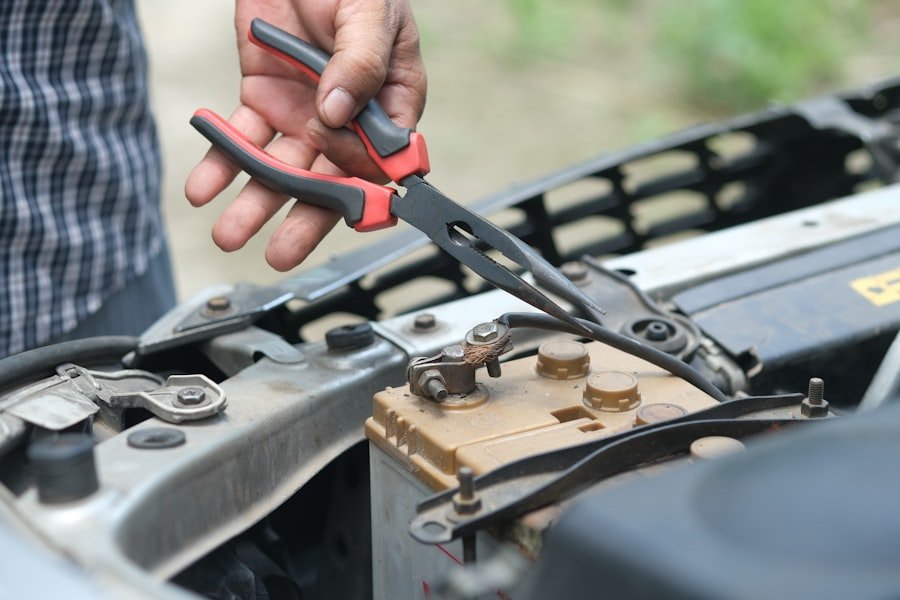
If your vehicle does not have a fuse puller, needle-nose pliers can work as an alternative. Use them carefully so you do not crush the fuse, slip against nearby parts, or damage the fuse box terminals.
Before removing the fuse, turn off the vehicle and switch off the affected electrical component. For basic fuse replacement, switching off the ignition is usually enough. If you are working near high-current circuits, see corrosion, smell burning plastic, or feel unsure, stop and contact a professional mechanic or automotive electrician.
To remove the blown fuse, first locate it within the fuse box using the diagram or labels provided. Once identified, gently grip the fuse with the puller or pliers and pull it straight out. Do not twist or force the fuse, as this could damage the surrounding connections or plastic housing.
If the fuse is stubborn, apply a slight rocking motion while pulling straight outward. After you remove it, inspect it visually. A broken metal strip, dark mark, or discoloration often indicates that the fuse has blown.
How to Confirm a Fuse Is Blown
A visual inspection is the quickest way to check a fuse, but it is not always perfect. Many blade fuses have a clear or translucent body that lets you see the small metal element inside. If the metal strip is broken, melted, or burned, the fuse has failed.
Some fuses are harder to inspect because the plastic body is dark, dirty, or cloudy. In that case, use a multimeter or test light if you know how to use one safely. A continuity test can confirm whether current can still pass through the fuse.
You should also connect the fuse to the symptom. For example, if only the radio stopped working, look for the audio, accessory, or infotainment fuse in the diagram. If several unrelated systems stopped at the same time, the issue may involve a larger fuse, relay, ground connection, or wiring fault.
Pro Tip: Take a quick phone photo of the fuse box before removing anything. This helps you remember the original fuse layout if you accidentally pull the wrong one.
Inserting the New Fuse
Inserting a new fuse is straightforward, but you still need to pay attention to fit and alignment. Begin by selecting a replacement fuse that matches both the amperage rating and physical dimensions of the original fuse. Once you confirm compatibility, align the new fuse with its slot in the fuse box.
A replacement fuse should match the original amperage rating exactly. The goal is not to make the circuit stronger. The goal is to restore the circuit’s original protection.
Most automotive fuses fit into the slot in a specific way because of their shape. Gently push the new fuse into place until it is securely seated. Avoid using excessive force because that could damage the fuse, bend the terminals, or crack the fuse box housing.
After insertion, visually inspect the fuse to make sure it sits evenly and fully in the slot. A correctly installed fuse will sit flush with nearby fuses and should not wobble when lightly touched. This matters because a loose fuse may create intermittent electrical problems or fail again soon after installation.
Testing the New Fuse
After inserting a new fuse, test the affected electrical component before closing everything up. The simplest test is to turn on the vehicle or accessory power and check whether the component works again. For example, if you replaced a headlight fuse, switch on the headlights and confirm that they illuminate properly.
If the component works normally, the blown fuse may have been a one-time failure. Still, keep an eye on it over the next few drives. A fuse that fails repeatedly is a warning sign that the circuit has another problem.
In some cases, using a multimeter can provide more detailed information. Set the multimeter to measure continuity and touch one probe to each end of the fuse while it is removed. If there is continuity, electricity can pass through the fuse. If there is no continuity, the fuse is blown or faulty.
If a new fuse blows immediately after installation, do not keep replacing it. The circuit may have a short, damaged wire, failing motor, faulty switch, water intrusion, or another electrical fault. Repeatedly installing new fuses without fixing the cause can make the problem worse.
Replacing the Fuse Box Cover
Once you have confirmed that the new fuse works, replace the fuse box cover. This step may seem minor, but the cover helps protect the internal components from dust, moisture, accidental contact, and damage from nearby objects.
Before replacing the cover, make sure all tools are removed from the area. Also check that no loose wires, trim pieces, or other obstructions are blocking the cover’s placement.
Align the cover with its designated position on the fuse box and press it gently until it clicks into place or fits snugly against the housing. Some vehicles use screws or clips to secure the cover. Tighten or fasten them only as needed because too much force can crack plastic parts.
Once the cover is secure, check nearby panels or trim pieces and reattach them if needed. Keeping the area properly closed helps prevent future electrical issues caused by dirt, moisture, or accidental fuse movement.
Troubleshooting Common Fuse Issues
Even after replacing a blown fuse and confirming everything looks correct, issues may still appear in your vehicle’s electrical system. One common problem is a fuse that keeps blowing. If you replace the same fuse more than once, the circuit may have a short, overload, or failing component drawing too much current.
Another issue may come from poor connections inside the fuse box. Corrosion, dirt, heat damage, or loose terminals can reduce electrical flow and cause intermittent failures. Cleaning light corrosion with a proper electrical contact cleaner may help, but heavy corrosion, melted plastic, or burned terminals need professional attention.
You may also run into a situation where the fuse looks fine, but the component still does not work. In that case, the issue could involve a relay, switch, wiring harness, ground point, connector, motor, bulb, or control module. A fuse protects the circuit, but it does not diagnose every part in that circuit.
If problems continue despite replacing the fuse correctly, consult a qualified mechanic or automotive electrician. More complex electrical problems require proper testing equipment and safe diagnostic procedures.
When You Should Not Replace the Fuse Yourself
Replacing a simple accessory fuse is often safe for many vehicle owners. However, some situations call for professional help. Stop and get expert service if you see melted plastic, smoke, sparks, repeated blown fuses, exposed wiring, water inside the fuse box, or a burning smell.
You should also be cautious around high-current systems, hybrid components, electric vehicle systems, airbag circuits, and unfamiliar electrical repairs. These systems can be dangerous if handled incorrectly.
Knowing when to stop is part of safe vehicle maintenance. A fuse replacement should restore a minor circuit issue. It should not become a guessing game that risks damage to your vehicle’s wiring or electronics.
Helpful Related Reading
If you’re looking to maximize space in your small bedroom, check out this helpful article here. Just like organizing a small space efficiently, knowing how to replace car fuses can also save you time and frustration. Make sure to learn the proper techniques and tools needed to replace car fuses safely and correctly.
Frequently Asked Questions
What are car fuses?
Car fuses are small protective devices that help protect a vehicle’s electrical circuits. When a circuit draws too much current, the fuse breaks the connection and stops electricity from flowing through that circuit.
Why would I need to replace a car fuse?
You may need to replace a car fuse when it blows because of an electrical fault, overload, or short circuit. A blown fuse can cause a specific component to stop working, such as the radio, lights, power outlet, or power windows.
How do I know if a car fuse needs to be replaced?
A fuse may need replacement if a specific electrical component stops working and the fuse diagram points to that circuit. You can inspect the fuse visually for a broken metal strip or test it with a multimeter for continuity.
How do I replace a car fuse?
To replace a car fuse, turn off the vehicle, locate the correct fuse box, identify the blown fuse, remove it with a fuse puller or needle-nose pliers, and insert a new fuse with the same amperage rating and same physical type.
What precautions should I take when replacing car fuses?
Turn off the ignition and the affected electrical component before replacing the fuse. Use the correct amperage rating, avoid touching damaged wiring, and do not use a higher-rated fuse. If the fuse blows again, have the circuit inspected.
Can I drive with a blown fuse?
It depends on which circuit the fuse protects. A blown fuse for a phone charger may not affect drivability, but a blown fuse for headlights, brake lights, wipers, engine controls, or safety systems can make the vehicle unsafe to drive.
What does it mean if the same fuse keeps blowing?
A fuse that keeps blowing usually means the circuit has a deeper problem, such as a short circuit, overloaded accessory, damaged wire, failing motor, or water intrusion. Do not keep replacing the fuse without diagnosing the cause.
Sources
- National Highway Traffic Safety Administration document referencing automotive fuse types — supports the use of automotive fuse classifications and vehicle electrical safety context.

