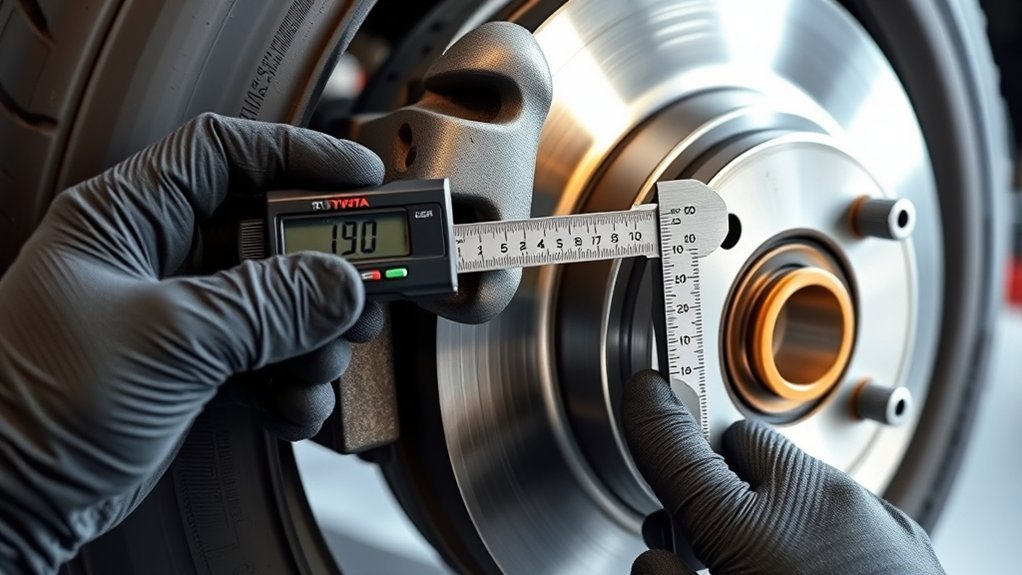
Checking Toyota Tundra rotor thickness and brake-pad thickness starts with identifying the exact model year, axle, and brake layout. Measure disc-brake pad friction material at the thinnest inner or outer pad, measure the rotor at multiple points with a micrometer, and compare the smallest valid reading with the specification for that exact application. Do not assume every Tundra uses the same limits or even the same rear brake type: documented first-generation configurations use rear drum brakes rather than rear discs.
Last updated: September 19, 2026. Technical references, generation differences, service-limit guidance, and schema were reviewed for this update.
Quick Answer
On a disc-brake axle, measure the friction material on both inner and outer pads, then measure rotor thickness at multiple evenly spaced points with a micrometer while staying inside the unworn outer lip. Use the smallest valid reading and compare it with the rotor marking or exact Toyota service information. First-generation Tundras can use rear drum brakes, so identify the installed brake type before applying a rotor-and-pad procedure to the rear axle.
Key Takeaways
- Toyota Tundra rotor, pad, drum, and shoe limits vary by model year, axle, and brake configuration.
- Documented first-generation Tundras can use rear drum brakes, so confirm the hardware before following a rear rotor procedure.
- Measure both inner and outer disc-brake pads because a sticking caliper or binding hardware can create uneven wear.
- Take rotor readings around the circumference and use the smallest valid reading when checking serviceability.
- Squealing and pedal pulsation are reasons to inspect the system, not proof that one specific part is defective.
- Do not drive a truck with grinding brakes, a fluid leak, a soft pedal, severe pulling, smoke, or visibly cracked brake components.
At a Glance
| Time Required | Varies with axle design, corrosion, access, and whether rotor runout is measured |
| Difficulty | Intermediate; accurate runout diagnosis requires additional experience |
| Tools Needed | Wheel chocks, floor jack, rated jack stands, lug tools, torque wrench, flashlight, brake gauge or caliper, micrometer, and optionally a dial indicator |
| Cost | Inspection alone requires no replacement parts; tool and professional inspection costs vary |
How Do You Measure Toyota Tundra Rotors and Pads Safely?

Warning: Never work on a Tundra supported only by a hydraulic or factory emergency jack. Use level, solid ground, chock the wheels that remain on the floor, support the truck at approved lifting points with stands rated for its weight, and keep hands clear until stability is confirmed. Let the brakes cool before touching or measuring them.
Applicability: The Tundra spans several brake configurations. Documented 2006 first-generation service information uses rear drum brakes, while later Tundras use rear disc-brake systems. The pad-and-rotor steps below apply to disc-brake axles. If your truck has rear drums, inspect the brake shoes, drum inside diameter, wheel cylinders, springs, adjuster, and related hardware using the repair information for that exact model.
Before removing a wheel, identify the truck’s model year and confirm whether you are inspecting the front or rear axle. The first generation covers 2000–2006, the second generation 2007–2021, and the third generation begins with the 2022 model year. Do not transfer brake specifications from one generation, axle, or hardware package to another.
Tools and Safety Equipment
- Wheel chocks
- Floor jack with enough capacity for the truck
- Properly rated jack stands
- Safety glasses and work gloves
- Lug-nut socket and breaker bar
- Calibrated torque wrench
- Flashlight or inspection light
- Brake-pad thickness gauge, vernier caliper, or suitable measuring tool
- Outside micrometer sized for the rotor
- Dial indicator and magnetic or rigid base when checking runout
- Clean lint-free cloth and an approved brake-cleaning product
Avoid blowing accumulated brake dust with compressed air. Keep lubricants and cleaning residue away from the pad and rotor friction surfaces.
1. Find the Correct Service Limits
First, look for a minimum-thickness or discard-thickness marking cast, engraved, or stamped on the rotor hat or outer edge. Clean only enough dirt or rust to read the marking. If the marking is missing or unreadable, use the exact year and model in the Toyota Manuals and Warranties portal. Detailed repair specifications are available through the Toyota Technical Information System.
Note: There is no universal Toyota Tundra rotor-thickness number. A documented second-generation disc setup uses 32.0 mm standard and 29.0 mm minimum at the front and 18.0 mm standard and 16.0 mm minimum at the rear, while earlier first-generation service information uses different front-disc dimensions and rear drums. Treat the figures below as identification examples only, not substitutes for the specification for your truck.
| Documented Example | Front Brake Reference | Rear Brake Reference |
| 2005–2006 first-generation service-manual example | Disc: 28.0 mm standard, 26.0 mm minimum; pad lining: 11.5 mm standard, 1.0 mm minimum | Drum brake; drum inside diameter 295.0 mm standard, 297.0 mm maximum; shoe lining 1.0 mm minimum |
| Documented second-generation disc-brake example | Disc: 32.0 mm standard, 29.0 mm minimum; pad lining: 11.9 mm standard, 1.0 mm minimum; runout: 0.05 mm maximum | Disc: 18.0 mm standard, 16.0 mm minimum; pad lining: 12.0 mm standard, 1.0 mm minimum; runout: 0.2 mm maximum |
Do not use the example table as a universal specification chart. Confirm that the referenced brake system matches the installed parts before making a service decision.
2. Prepare and Support the Truck
- Park on a flat, hard surface away from traffic.
- Shift into Park, switch off the engine, and remove the key or keep the smart key away from the truck.
- Allow the brakes to cool completely.
- Chock the wheels that will remain on the ground.
- Loosen the wheel’s lug nuts slightly before lifting the truck.
- Lift at the approved point stated in the owner information.
- Place a rated jack stand under the approved support point and lower the truck onto it.
- Give the truck a controlled stability check before removing the wheel. Keep the jack positioned as a secondary precaution without allowing it to carry the working load.
- Remove the lug nuts and wheel.
3. Inspect and Measure the Brake Pads
These steps apply to a disc-brake axle. Inspect both the outer pad and the inner pad. The inner pad can be harder to see and may wear faster if the caliper slides, piston, pad contact points, or hardware are binding.
- Use a flashlight to locate the friction material bonded to the steel backing plate.
- Measure only the friction material. Do not include the backing plate in the reading.
- Measure the thinnest accessible area rather than an unusually thick edge.
- Compare the inner and outer pads. A noticeable difference calls for inspection of the caliper slides, piston movement, pad contact points, and hardware.
- Check for cracking, crumbling, glazing, oil or brake-fluid contamination, and separation from the backing plate.
- Compare the thinnest pad with the exact service limit. Replace the pads before they reach or fall below that limit.
Brake pads should normally be serviced as an axle set so the left and right wheels have matching friction material and wear condition. If one pad is worn much more than the others, correct the cause instead of installing pads alone.
4. Measure Rotor Thickness Correctly
A single rotor measurement is not enough to evaluate the entire disc. Measure at multiple evenly spaced locations so you can identify the smallest reading and any meaningful variation around the rotor.
- Wipe loose dirt from the swept braking surfaces.
- Inspect the micrometer’s measuring faces and close it gently to confirm that it reads zero.
- Position the micrometer on the swept surface, generally near the outer portion of the pad path but inside the raised, unworn lip.
- Keep the micrometer square to the rotor faces. Do not clamp it at an angle.
- Measure at multiple evenly spaced positions around the rotor.
- Record every reading and identify the smallest value.
- Compare the smallest valid reading with the rotor’s stamped limit or the exact Toyota service specification.
A rotor at or below its discard thickness must be replaced. A rotor above the limit may still require service if it is cracked, severely corroded, deeply scored, heat-damaged, tapered, or affected by excessive thickness variation.
Pro Tip: Mark the first measuring position with chalk or a removable marker. This prevents accidentally measuring the same location twice and makes it easier to compare readings around the rotor.
5. Check Rotor Runout When Diagnosing Pulsation
Runout is side-to-side movement of the rotor as it turns. Accurate measurement requires the rotor to sit flat against a clean hub and to be secured in the same controlled manner specified by the repair procedure.
- Inspect and clean rust or debris from the hub-to-rotor mounting surface without removing metal from the hub.
- Install the rotor fully against the hub.
- Secure the rotor using the exact hub-nut count, spacer arrangement, and tightening procedure stated for the vehicle. Do not guess at clamping force or let a tapered lug nut damage an unprotected rotor face.
- Mount the dial indicator on a rigid base.
- Place the indicator tip at the location stated in the repair manual, away from grooves and the unworn lip.
- Apply a small amount of indicator preload and set the dial to zero.
- Rotate the rotor slowly through one full turn without pushing it sideways.
- Record the total movement from the lowest to the highest reading.
- Compare that total with the exact model-specific runout limit.
For one documented second-generation procedure, Toyota service information places the dial indicator 10 mm (0.394 in.) from the outer edge and lists maximum runout of 0.05 mm at the front and 0.2 mm at the rear. Those values describe that brake system only; use the specification and setup for the exact truck being inspected.
If runout is excessive, recheck the measuring setup, hub cleanliness, wheel-bearing condition, and rotor indexing before condemning the rotor. Rust trapped between the rotor and hub can create an inaccurate reading and may also contribute to pulsation after reassembly.
6. Reassemble and Perform Final Checks
- Confirm that no grease, lubricant, or cleaning residue remains on the friction surfaces.
- Inspect caliper slide boots, piston boots, hoses, clips, and pad hardware for damage.
- Install the wheel and hand-start every lug nut.
- Snug the lug nuts in a star or crossing pattern.
- Lower the truck according to the lifting procedure.
- Tighten the lug nuts in stages with a calibrated torque wrench using the specification for the exact model year and wheel.
- Before moving the truck, press the brake pedal several times until it feels firm. This is especially important if pads or calipers were moved.
- Check the brake-fluid reservoir and inspect for leaks. Do not assume a low fluid level is harmless; it may reflect pad wear or a hydraulic leak.
- If any parts were replaced, follow the component manufacturer’s break-in procedure and begin with a low-speed function check in a safe area.
What Signs Mean Tundra Pads or Rotors Need Inspection?
Noise, vibration, pulling, heat, or reduced braking should prompt an inspection, but no single symptom proves that a particular rotor, pad, caliper, or other component is defective. Measure and inspect the complete system before choosing parts.
| Symptom | Possible Causes | Recommended Action |
| High-pitched squeal | Wear indicator, vibration, glazing, contamination, or hardware contact | Measure all applicable pads and inspect clips, shims, slides, and rotor condition |
| Grinding | Friction material may be exhausted, or foreign material may be trapped in the brake | Stop driving and inspect immediately; towing may be appropriate |
| Pedal pulsation | Disc-thickness variation, lateral runout, uneven deposits, hub rust, or improper wheel mounting | Measure rotor thickness around the disc and check runout with the rotor secured according to the repair procedure |
| Pulling while braking | Sticking caliper, contaminated friction material, hose restriction, uneven brake wear, tire issue, or alignment problem | Compare both sides and inspect the full brake and tire system |
| Longer stopping distance | Worn or contaminated friction material, overheated brakes, hydraulic problem, tires, road conditions, or excessive load | Arrange a complete safety inspection rather than replacing parts by assumption |
| Burning odor, smoke, or one wheel much hotter | Dragging brake, seized slide or piston, parking-brake problem, or overheated bearing | Stop safely, allow the assembly to cool, and have the truck inspected before further driving |
Deep grooves, cracks, heavy flaking corrosion, blue or dark heat spots, and a pronounced wear ridge are additional reasons to inspect a disc rotor closely. A visible ridge alone does not determine whether the rotor is serviceable; its swept surface still must be measured.
What Rotor and Pad Thickness Specs Apply to a Toyota Tundra?
There is no single rotor-thickness chart that safely applies to every Toyota Tundra. Specifications change with the installed brake system. Use this order of authority:
- The marking on the installed rotor, provided it is legible and the rotor is the correct part for the truck.
- The Toyota repair information for the exact model year and configuration.
- Verified specifications supplied by the manufacturer of the exact replacement rotor.
The deciding measurement is the smallest valid rotor reading compared with the correct discard limit—not an average, a rule of thumb, or a specification borrowed from another Tundra brake system.
| Measurement | What It Shows | Decision Rule |
| Rotor thickness | Remaining rotor material | Replace at or below the exact discard thickness |
| Difference among rotor readings | Possible disc-thickness variation or taper | Compare the variation with the repair-manual tolerance and investigate pulsation |
| Rotor runout | Side-to-side movement during rotation | Correct the mounting cause or service the component if total movement exceeds the exact limit |
| Pad friction-material thickness | Remaining usable disc-brake pad material | Use the thinnest inner or outer pad and replace it according to the exact service limit |
| Drum inside diameter / shoe lining | Serviceability of a drum-brake axle on applicable Tundras | Compare both measurements with the exact drum-brake specification instead of applying disc-brake limits |
A rotor can be above minimum thickness and still be unserviceable because of cracks, severe corrosion, heat damage, excessive runout, or a surface that cannot be refinished correctly. Conversely, a smooth-looking rotor does not remain serviceable once it reaches its discard thickness.
How Often Should You Inspect Tundra Brakes?

Follow the maintenance schedule for the exact model year and operating conditions rather than one universal brake-inspection interval. Toyota notes that many of its vehicles use scheduled maintenance visits every 5,000 miles or six months, but the work required at each visit varies. Use the Toyota maintenance schedule or the correct warranty and maintenance guide for your Tundra.
Brake inspection is also sensible whenever the wheels are already being removed for tire service, before demanding towing or mountain use, or whenever noise, vibration, pulling, overheating, fluid loss, or an abnormal pedal develops.
- Compare all friction material on an axle: Do not judge a disc-brake system from only the easiest outer pad to see.
- Inspect caliper movement: Corroded or dry slide pins can cause tapered or one-sided pad wear. Use only lubricant approved for the specified brake contact points.
- Keep friction surfaces clean: Never apply grease or anti-seize to pad, shoe, rotor, or drum friction surfaces.
- Check protective boots: Torn slide-pin or piston boots allow water and road contamination to enter.
- Inspect the hub face on disc systems: Rust or debris between the hub and rotor can create runout.
- Use correct wheel torque: Tighten serviceable wheel fasteners evenly with a torque wrench rather than relying on an impact tool for final tightening.
- Consider operating conditions: Towing, mountain driving, heavy payloads, stop-and-go traffic, mud, water, and road salt can increase brake wear and heat.
Note: Brake-fluid level and condition are part of a complete inspection, but fluid should not be added repeatedly without finding the cause of a low level. The level can fall as disc-brake pads wear, while a sudden or continuing drop may indicate a hydraulic leak.
How Can You Extend Tundra Brake Life?
- Measure rather than estimate: Visual inspection is useful, but a micrometer and suitable friction-material gauge provide a more reliable basis for service decisions.
- Inspect both sides of the truck: One wheel may have a sticking caliper, binding drum hardware, or more corrosion than the opposite side.
- Do not use mileage as the only replacement rule: Friction-material life varies with vehicle use. Measurement, condition, symptoms, and the correct service limit matter more than a generic mileage estimate.
- Correct uneven wear: Replacing pads without repairing seized slides, damaged hardware, or a sticking piston can damage the new parts quickly.
- Keep mounting surfaces clean: On disc systems, debris between the rotor and hub can contribute to runout and pulsation.
- Follow the correct break-in procedure: After brake service, follow the pad or rotor manufacturer’s instructions rather than performing uncontrolled hard stops.
- Inspect sooner under severe use: Towing, hauling, steep grades, winter salt, off-road use, and repeated heavy braking justify closer attention to the brake system.
When to Replace or Resurface the Rotors
Replace a rotor if it is at or below its discard thickness, cracked, severely corroded, structurally damaged, or unable to meet the required finish and thickness after machining. Deep scoring, heat damage, excessive runout, or excessive thickness variation may also justify replacement.
Resurfacing may be an option only when the repair information permits it, the finished rotor will remain safely above the applicable machining and discard limits, and the shop can produce the required surface finish and runout. Rotors do not automatically need replacement every time pads are changed, but installing new pads against a damaged or unsuitable surface can cause noise, poor bedding, or rapid wear.
When one rotor on an axle must be replaced because of wear or damage, inspect the opposite rotor carefully. An axle-level repair decision should consider the measurements and condition of both sides so the braking surfaces remain comparable.
A Simple Pad-and-Rotor Decision Sequence
- Identify the exact model year, axle, and brake type.
- Measure all applicable inner and outer pad friction material or rear shoe lining.
- Inspect for contamination, cracking, glazing, abnormal heat, or uneven wear.
- Measure disc thickness at multiple points or drum inside diameter as applicable.
- Check disc runout and thickness variation when pulsation or service information calls for it.
- Inspect the caliper, wheel cylinder, hose, slides, hardware, hub, and mounting surfaces for the cause of abnormal wear.
- Compare every measurement with the exact service specification before deciding what to replace or machine.
When Not to Drive the Tundra
Warning: Do not continue driving if the brakes grind continuously, the pedal sinks or feels unusually soft, brake fluid is leaking, the truck pulls sharply, a wheel smokes, braking power drops significantly, or a rotor, drum, caliper, or other brake component is visibly cracked or loose. Have the truck towed for inspection.
If the measurements are close to a limit, the markings cannot be read, the truck has modified brake hardware, or you cannot safely perform the inspection, use a qualified brake technician. A measurement taken with the wrong tool, at the wrong location, or with the rotor mounted incorrectly can be more misleading than no measurement at all.
Related Guides
Frequently Asked Questions
What is the minimum rotor thickness for a Toyota Tundra?
There is no one minimum thickness for every Toyota Tundra. The correct value depends on the model year, axle, and installed brake system. Read the minimum-thickness marking on the correct rotor or check the exact Toyota repair information. Do not automatically apply a 29 mm front or 16 mm rear value to every truck.
How thick should Toyota Tundra brake pads be?
Pad specifications depend on the brake system. A documented second-generation service reference lists 1.0 mm as the minimum front and rear pad-lining thickness, but that figure should not be transferred to another Tundra application without confirming the correct service information. Measure friction material only, not the steel backing plate.
When should Toyota Tundra rotors be replaced?
Replace a rotor when it reaches its discard thickness or has cracks, severe corrosion, structural damage, excessive runout, excessive thickness variation, or a surface that cannot be refinished while remaining within specification. Pad replacement alone does not automatically prove that the rotors must be replaced.
How many millimeters thick should a Tundra rotor be?
The expected new thickness and minimum service thickness vary by rotor. One documented second-generation setup uses 32.0 mm standard and 29.0 mm minimum at the front and 18.0 mm standard and 16.0 mm minimum at the rear. Earlier and later brake systems can differ, so use the installed rotor marking or exact service information for the truck.
Does every Toyota Tundra have rear disc brakes?
No. Documented first-generation Tundra service information includes rear drum brakes, while later Tundras use rear disc systems. Identify the installed hardware and exact model year before applying rear rotor or brake-pad specifications.
Do Tundra rotors need to be replaced every time the pads are changed?
No. Measure rotor thickness and inspect the surface, runout, variation, corrosion, scoring, and heat damage. A rotor that remains within specification and can provide a suitable braking surface may remain serviceable, while a rotor at its discard limit or damaged beyond correction must be replaced.
Can brake-pad thickness be checked without removing the wheel?
An open wheel may allow a limited look at the outer pad, but that view can miss the inner pad, tapered wear, damaged hardware, and rotor defects. Removing the wheel and supporting the truck correctly provides a much more complete inspection.
Does brake squeal always mean the pads are worn out?
No. A wear indicator can cause squeal, but vibration, glazing, contamination, pad formulation, missing or damaged hardware, and dry or binding contact points can also create noise. Measure the friction material and inspect the complete assembly before choosing replacement parts.
Sources
- Toyota Manuals and Warranties — official model-specific owner manuals and maintenance information
- Toyota Technical Information System — official Toyota repair manuals, service information, and technical data
- Toyota Maintenance Schedule — official maintenance-schedule resource
- Toyota Tundra Service Manual — Front Brake Inspection — public service-manual reference for pad thickness, rotor thickness, and runout; confirm the exact application in Toyota TIS
- Toyota Tundra Service Manual — Rear Brake Inspection — public service-manual reference for pad thickness, rotor thickness, and runout; confirm the exact application in Toyota TIS
- 2006 Toyota Tundra Rear Drum Brake Service Reference — public service-manual reference demonstrating a first-generation rear drum-brake configuration
Conclusion
Accurate Toyota Tundra brake inspection starts with identifying the exact brake system. Disc-brake axles require measurements of both inner and outer pads, rotor thickness, surface condition, and—when needed—runout. Applicable first-generation rear drum systems require shoe and drum measurements instead. Use the specification for the exact model year and installed hardware rather than one generic Tundra number. If you find grinding, hydraulic leakage, a soft or sinking pedal, severe pulling, smoke, cracked components, or a measurement at its service limit, stop driving and arrange the appropriate repair.