As an Amazon Associate I earn from qualifying purchases.
A wacky rig is a simple bass setup built around a soft plastic worm hooked near its middle so both ends move freely as the bait sinks. The key details are balance, hook size, line control, and fall rate. Rig it correctly and the worm drops with a subtle horizontal shimmy that works around docks, grass edges, laydowns, shallow cover, and pressured bass.
Last updated: September 21, 2026. [VERIFY: confirm the real author byline and original publish date in the CMS.]
Quick Answer
To rig a wacky setup, tie on a small finesse or wacky hook, slide an O-ring onto the middle of a soft plastic stick worm, and run the hook under the O-ring or lightly through the worm’s center. Cast near cover, let it fall on semi-slack line, and watch for line jumps, sideways movement, or sudden slack before using a controlled reel-and-sweep hookset.
Key Takeaways
- A wacky rig works because the worm falls with both ends free to quiver.
- For many 4- to 5-inch stick worms, a size 1, 1/0, or 2/0 finesse/wacky hook is a practical starting range; adjust for hook pattern, bait diameter, and cover.
- Fish it slowly around docks, grass, laydowns, seawalls, shallow flats, and other high-percentage cover.
- Many bites happen on the fall, so watch the line instead of waiting for a heavy pull.
- Use weedless hooks around brush and grass. Add a weighted wacky hook for a faster center-weighted fall, or use a nail weight in one end when you specifically want a Neko-style presentation.
At a Glance
| Time Required | A few minutes once your tackle is ready |
| Difficulty | Beginner-friendly |
| Tools Needed | Spinning rod, reel, line, wacky hook, soft plastic worm, O-rings, and optional O-ring tool |
| Cost | Low compared with rigs that require several pieces of terminal tackle |
To rig a wacky setup, start with a soft plastic worm, such as a Senko-style stick bait. Tie a small finesse hook to your line, find the worm’s balance point near the middle, then hook it directly through the plastic or place an O-ring around that point and run the hook beneath the ring. The goal is a balanced horizontal fall with both ends free to move.
An O-ring reduces how often the hook tears through the soft plastic. Spinning gear is a practical choice because it handles light presentations well. A braid-to-fluorocarbon setup can provide good line visibility and sensitivity, but line strength should be matched to the cover, water clarity, rod, reel, and hook you are using.
| Situation | Start With | Why |
|---|---|---|
| Shallow, calm water | Weightless wacky rig | Keeps the fall slow and subtle |
| Brush, reeds, grass, dock cables | Weedless wacky hook | Reduces snagging around cover |
| Wind or more depth | Light weighted wacky hook | Improves depth and line control while keeping a center-hooked presentation |
| Deeper, bottom-oriented fish | Neko rig | A nail weight in one end creates a faster, nose-first fall and bottom-oriented posture |
| Fish holding above bottom | Drop-shot wacky rig | Keeps the worm suspended above the weight |
Understanding the Wacky Rig Technique

The wacky rig technique uses a soft plastic worm, usually a straight or stick-style bait, attached near its middle so both ends remain free. Unlike a Texas rig, the hook is normally exposed or protected only by a light weed guard.
The bait falls slowly with both ends moving independently. That subtle action makes the presentation useful around cover, suspended fish, and shallow areas where a faster lure may pass through the strike zone too quickly.
The wacky rig works best when you let the worm do most of the work. Give it time to fall, add only small shakes, and pause before moving it again.
Shallow docks, grass holes, laydowns, riprap, brush, and shaded banks are useful targets. The rig is widely used around spawning and post-spawn bass, but it is not limited to one season. Vermont Fish & Wildlife describes wacky rigs as a year-round finesse option and notes that they can be fished with or without weight. Vermont Fish & Wildlife’s wacky-rig guide provides a useful general reference.
You can improve bait durability with O-rings or a short section of heat-shrink tubing. Texas Parks & Wildlife specifically recommends both approaches as ways to reduce damage to soft plastic worms. See the Texas Parks & Wildlife fishing-rig guide.
A single O-ring is the simplest option. Two O-rings crossed in an X can create another hook attachment point and allow the hook to sit more nearly perpendicular to the worm. The best orientation depends on the hook and rigging accessory you use.
Note: A wacky rig is most closely associated with bass, but the basic center-hooked presentation can catch other freshwater species as well. Match hook, bait, and line strength to the species you are targeting.
Essential Equipment for Wacky Rigging

You do not need a complicated tackle system for wacky rigging. The goal is balanced gear that casts a light worm accurately, protects a finesse hook, and gives you enough line control to see or feel subtle bites.
A medium-power spinning rod is a practical all-around starting point. A medium-light rod can work with smaller worms, lighter line, and open water. Pair the rod with a spinning reel that balances comfortably and has a smooth drag.
For braid-to-leader setups, 10- to 20-pound braid with roughly 8- to 12-pound fluorocarbon is a useful starting range rather than a fixed rule. Clear, open water may call for lighter tackle, while dock posts, wood, and other abrasive cover may justify a stronger leader. Yamamoto’s published pro setups show that experienced anglers vary rod, line, leader, and hook choices for the cover they fish. See Yamamoto’s 5-inch Senko rigging guide.
For the wacky hook, start by matching the hook gap and wire to the worm rather than choosing by number alone. A size 1, 1/0, or 2/0 finesse/wacky hook covers many common 4- to 5-inch stick-worm setups, but hook dimensions differ between models. Use an open hook in cleaner water and a weedless model around grass, brush, docks, and laydowns. Gamakatsu, for example, offers its Finesse Wide Gap in multiple sizes and identifies the pattern for wacky rigging. See Gamakatsu’s Finesse Wide Gap specifications.
Use O-rings when bait durability matters. A rigging tool makes them easier to install without stretching or damaging the worm, but it is optional.
Add weight only for a reason. A weightless rig gives the longest hang time. A lightly weighted wacky hook helps control the rig in wind, current, or deeper water. If you insert a nail weight into one end of the worm, treat it as a Neko-style variation rather than a standard weighted wacky rig.
| Gear Item | Beginner Starting Point | Adjustment |
|---|---|---|
| Rod | Medium spinning rod | Move lighter for finesse/open water or stronger around demanding cover |
| Reel | Balanced spinning reel with smooth drag | Match reel size to the rod and line capacity you need |
| Line | 10- to 20-pound braid with an 8- to 12-pound fluorocarbon leader | Adjust for water clarity, cover, hook strength, and rod/reel ratings |
| Hook | Size 1, 1/0, or 2/0 finesse/wacky hook | Match actual hook gap and wire diameter to the worm and cover |
| Bait | 4- to 5-inch stick worm | Downsize for a smaller profile or pressured fish |
How to Rig a Wacky Rig Step by Step

Rigging a wacky rig is straightforward, but centering the attachment point helps the worm fall more evenly and keeps both ends free to move.
- Choose your bait. Pick a straight soft plastic or Senko-style stick bait that fits the fish and conditions.
- Tie on your hook. Use a reliable knot such as a Palomar or improved clinch knot. Wet the knot before tightening if appropriate for the line you are using.
- Find the balance point. Hold the worm and locate the point near the middle where both ends hang as evenly as possible.
- Add an O-ring. Slide the O-ring to the balance point if you want better bait durability. This step is optional.
- Attach the hook. Run the hook under the O-ring or lightly through the worm at the balance point. Keep the hook point exposed unless you are using a purpose-built weedless configuration.
- Check the fall. Drop the rig in visible water beside the bank, boat, or dock. Both ends should move freely rather than one end hanging dramatically lower because the hook is far off-center.
If you rig directly through the worm, pass the hook once through the middle section and leave the point clear. Direct hooking is simple but normally tears soft plastic faster than an O-ring or sleeve setup.
With a single O-ring, the hook may sit more inline with the worm depending on how it is attached. Crossed O-rings, saddles, and similar rigging accessories can provide a more perpendicular hook attachment when desired.
Pro Tip: Before making a long cast, drop the rig where you can see it. If the worm hangs badly off-balance, move the hook or O-ring slightly and check it again.
Fishing Techniques for Success
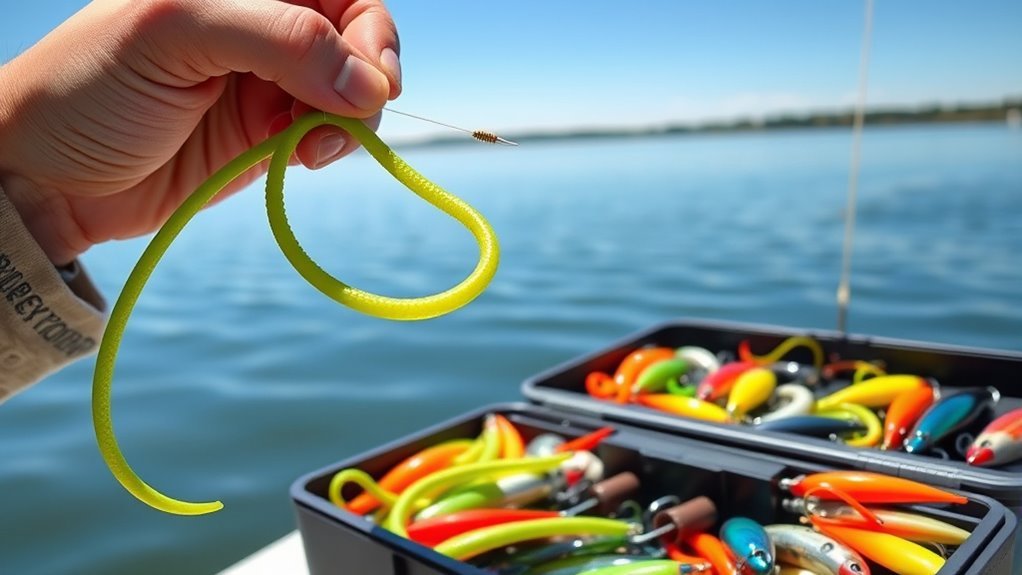
A wacky rig usually works best when the angler does less. Cast it to a specific target, let the worm fall with controlled slack, watch the line, and give the bait time before moving it again.
If bass are active, you can shorten pauses and use slightly more movement. If they are pressured or inactive, extend the fall and pause instead of repeatedly snapping the rod tip.
Rigging Techniques Overview
The classic wacky rig is a center-hooked soft plastic with little or no added weight. Its defining feature is the freedom of both worm ends to move during the fall.
Cross O-rings or heat-shrink tubing can improve bait durability and hook positioning. With two O-rings crossed into an X, you can place the hook beneath the crossing point instead of piercing the worm.
Weight changes both depth control and bait behavior. Use the lightest amount that solves the problem you have. A center-weighted wacky hook can speed the fall, while a nail weight placed into one end creates the nose-first behavior associated with a Neko rig.
A drop-shot can also hold a wacky-hooked worm above the bottom. It is a separate rig, but the center-hooked worm still produces movement at both ends.
Best Fishing Conditions
Wacky rigs are particularly useful when bass are positioned around defined shallow or mid-depth targets and you want a slow presentation. Calm water makes line watching easier, but the rig can still work in wind if you add enough weight or line control to stay in contact with the bait.
Clear or lightly stained water can make the subtle presentation easy for fish to track, but color, fall rate, target selection, and depth matter more than treating water clarity as an absolute rule.
| Condition | Rig Adjustment | Retrieve |
|---|---|---|
| Shallow / calm | Weightless wacky | Long fall, pause, light shake |
| Wind / more depth | Light weighted wacky | Maintain controlled slack and line contact |
| Grass / brush / cables | Weedless wacky hook | Work outside edges and openings first |
| Deep bottom-oriented fish | Neko variation | Let the weighted end reach bottom, then shake or drag lightly |
Effective Retrieve Strategies
The biggest retrieve mistake is moving a wacky rig too much. Its fall is already part of the presentation.
Start by allowing it to sink on slack or semi-slack line. Watch for twitches, jumps, sideways movement, or unexpected slack because a fish may take the worm without producing a hard strike.
After the rig reaches the target depth or bottom, gently shake the worm, pause, and let it settle again. Small movements preserve the action without pulling the bait away from the target.
Use a sidearm or skip cast when you need to place the rig under docks, overhanging cover, or shaded walkways. Avoid deliberately throwing an exposed hook into the thickest branches or cables; use a weedless hook or approach the edge of the cover first.
In cold, calm, or heavily pressured conditions, lengthen pauses. When fish are more active, a quicker lift-and-fall cadence can help you cover targets faster.
Keep watching line movement throughout the fall. Line watching matters because the fish may move sideways or toward you instead of pulling hard enough to feel immediately.
Warning: Avoid an unnecessarily violent snap hookset with light-wire finesse hooks. Reel up excess slack and use a controlled sweep while maintaining steady pressure. Follow the hook manufacturer’s instructions if your specific hook style calls for a different setting method.
Choosing the Right Bait and Hook

Straight soft plastics and stick baits are common wacky-rig choices because their shape leaves two free ends when the bait is hooked near the middle. A 4- or 5-inch bait is a practical starting point, with smaller profiles useful when you want a more finesse presentation.
Hook pattern matters as much as the size printed on the package. Finesse wide-gap, octopus-style, and purpose-built wacky hooks can all work. Select enough hook gap to clear the bait and penetrate cleanly without adding so much hook weight and bulk that the worm’s movement is restricted.
Use an open hook around clean targets. Around grass, reeds, wood, dock cables, and similar cover, a weedless wacky hook can reduce snagging. Gamakatsu’s Weedless Finesse Wide Gap, for example, uses a weed guard specifically for placing wacky rigs around cover. See the manufacturer description.
Use a reliable line-to-hook knot that matches your line. If the bite is difficult, changing worm size, color, fall rate, or casting angle may be more useful than making several tackle changes at once.
| Bait / Situation | Hook Starting Point | Adjustment |
|---|---|---|
| 4-inch finesse worm | Small finesse/wacky hook | Keep hook weight and bulk low |
| 5-inch stick worm | Size 1 to 2/0 range depending on pattern | Choose enough gap to clear the bait |
| Grass, brush, wood | Weedless wacky pattern | Balance snag resistance with hook exposure |
Best Colors for Wacky Rigs
Color choice depends on water clarity, light, forage, and fishing pressure. In clear water, natural colors such as green pumpkin, watermelon, smoke, or subtle baitfish tones are sensible starting points.
In stained water or low light, darker colors such as black and blue or junebug can create a stronger silhouette. More visible colors can also be tested when fish have difficulty locating the bait.
Change one variable at a time when possible. If bass follow the worm without committing, a color or fall-rate change is quicker to evaluate than rebuilding the entire setup.
Where to Fish a Wacky Rig
A wacky rig is most efficient when you cast it at specific targets where its slow fall can remain in the strike zone instead of randomly covering open water.
- Docks: Skip the bait under walkways, floats, and shaded edges.
- Grass edges: Drop it into holes, lanes, and outside weed lines.
- Laydowns: Cast beside branches instead of immediately dropping an exposed hook into the thickest wood.
- Riprap: Let it fall along irregular rocks, transitions, and shade.
- Seawalls: Work the bait parallel to the wall and around corners, drains, or shade changes.
- Shallow flats: Target visible cover, depth changes, isolated grass, and other distinct features instead of fan-casting without a target.
When you get a bite, repeat the presentation from several casting angles before moving on. A small change in entry angle or fall path can put the worm back through the same strike zone.
Exploring Alternative Rigging Methods
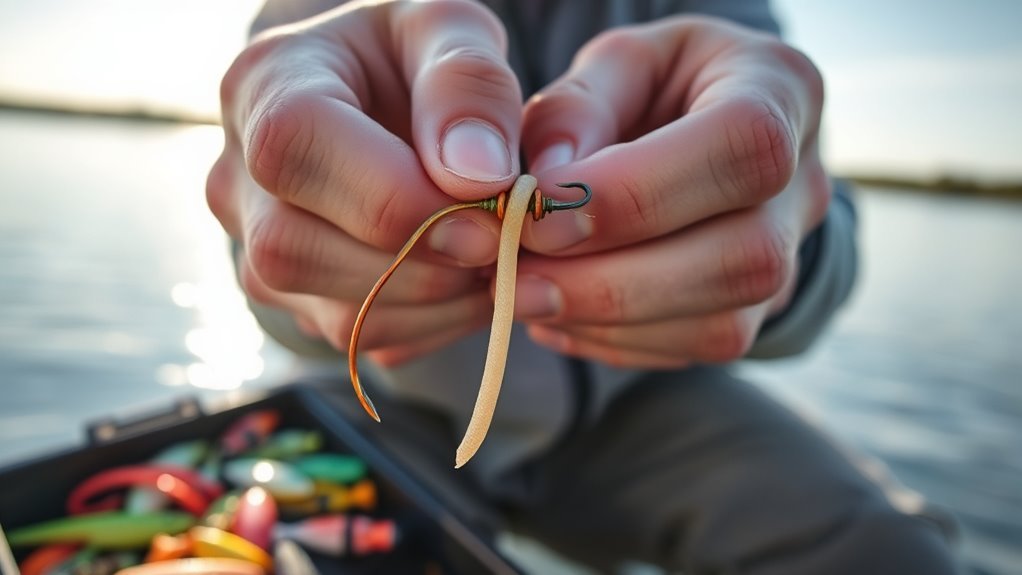
The standard center-hooked wacky rig is only the starting point. O-rings, weed guards, weighted hooks, drop-shot weights, and Neko-style nail weights change durability, snag resistance, depth, or bait posture in different ways.
O-Ring Technique Benefits
Placing an O-ring at the worm’s balance point lets the hook attach to the ring instead of repeatedly piercing the soft plastic. The main benefit is durability: the hook is less likely to tear directly through the worm during a cast, strike, or fight.
A single ring is simple and fast. Two O-rings crossed into an X create another attachment angle and can let the hook sit more nearly perpendicular to the worm. Heat-shrink tubing or purpose-built sleeves are other durability options.
| Benefit | What Changes | Practical Effect |
|---|---|---|
| Less Plastic Damage | Hook attaches to the ring instead of piercing the worm repeatedly | The same bait can survive more casts and hookups |
| Consistent Attachment Point | Ring stays around the worm’s selected balance point | Makes rerigging the hook straightforward |
| Hook-Angle Options | Crossed rings create an X-shaped attachment point | Can allow a more perpendicular hook orientation |
| Simpler Bait Replacement | Hook does not have to be buried deeply in the plastic | Reduces unnecessary tearing while rigging |
Weightless Rigging Advantages
Weightless rigging gives the worm maximum hang time and is a natural starting point in shallow water. With no added sinker, the hook and the bait’s own mass control the fall.
It is useful around docks, grass openings, shallow laydowns, shade, and other targets where you want the worm to remain in the water column rather than hurry to the bottom.
Moving the hook slightly away from the exact midpoint changes the bait’s balance and may alter its glide, but make small adjustments and watch the bait beside you before assuming the change improves the presentation.
After a twitch or short lift, pause again. The next fall is often more important than the rod movement itself.
Weighted Wacky Rig
A weighted wacky rig uses weight at or near the hook to speed up the center-hooked presentation. It is useful when wind, current, or depth makes a completely weightless rig difficult to control.
Start with the least weight needed to maintain useful contact with the bait. Extra weight changes the fall rate and can reduce the slow hang time that makes the standard rig useful.
Do not confuse a weighted wacky hook with a Neko rig. A Neko rig places a nail-style weight into one end of the worm, making that end lead the fall and changing how the bait works near the bottom. Texas Parks & Wildlife describes this nose-weighted setup as a modification of the wacky rig.
Weedless Wacky Rig
A weedless wacky rig is useful around brush, grass, reeds, laydowns, and dock hardware. Its guard helps the exposed hook move through cover with fewer snags.
Do not treat “weedless” as snag-proof. Cast to edges and openings first, especially around heavy wood or cables. When a fish bites, reel up slack and use a controlled hookset that matches the hook’s wire and guard design.
Drop-Shot Wacky Rig
A drop-shot wacky rig keeps the worm above a separate bottom weight while leaving both worm ends free. It is useful when bass are holding at a specific distance above bottom around points, bluff walls, bridge pilings, or offshore cover.
Nose-hooking and wacky-hooking are both possible on a drop shot. The wacky version produces movement at both ends of the worm. Use small shakes and pauses instead of dragging the bait continuously.
Common Wacky Rig Mistakes to Avoid
The wacky rig is simple, but several mistakes reduce its strongest advantage: a controlled, natural fall.
- Working the bait too aggressively: Let the worm fall before adding another shake.
- Using more hook than the bait needs: Excess hook size and weight can change the presentation.
- Ignoring cover when choosing line: Match leader strength to visibility, abrasion, hook strength, and the rod/reel setup.
- Ignoring slack-line movement: Bites may appear as jumps, ticks, sideways movement, or unexpected slack.
- Direct-hooking every worm when durability matters: O-rings or sleeves reduce repeated tearing.
- Using an unnecessarily violent hookset: Light-wire finesse hooks generally need controlled pressure rather than a full-power snap.
Troubleshooting Your Wacky Rig
If your wacky rig is not producing bites, change one variable at a time. Start with target location and depth, then adjust fall rate, color, bait size, or retrieve before abandoning the presentation completely.
| Problem | Likely Cause | Quick Fix |
|---|---|---|
| Worm tears too fast | Hook repeatedly tears directly through soft plastic | Use an O-ring, cross O-rings, or a sleeve |
| Bait falls badly off-balance | Hook or ring is far from the balance point | Move the attachment point closer to the worm’s balance point |
| Fish follow without biting | Profile, color, fall rate, or cadence may not match the fish’s response | Change one variable at a time, starting with pause length or bait size |
| Too many snags | Open hook is contacting heavy cover | Switch to a weedless hook and target edges or openings |
| Hard to detect bites | Excess uncontrolled slack, wind, or poor line visibility | Use controlled slack, watch the line, and add minimal weight if conditions require it |
Frequently Asked Questions
How do you properly fish a wacky rig?
Cast near a specific target, let the bait sink on slack or semi-slack line, and watch for unusual line movement. After the initial fall, gently shake or lift the worm, pause, and let it fall again. Avoid working the bait continuously.
Do you need an O-ring for a wacky rig?
No. You can hook a wacky rig directly through the middle of the worm. An O-ring is mainly a durability aid because it lets the hook attach without repeatedly tearing through the soft plastic. Crossed O-rings can also provide another hook orientation.
Is a wacky rig good for beginners?
Yes. It uses very little terminal tackle and does not require a complicated retrieve. The main skills are centering the worm, controlling slack line, watching for bites, and giving the bait enough time to fall.
How do you rig a Senko for beginners?
For a simple wacky setup, place an O-ring near the Senko’s balance point and run a suitable finesse/wacky hook beneath the ring. You can also pass the hook directly through the middle of the worm, but the plastic will usually tear faster.
Should a wacky rig be weighted or weightless?
Start weightless when you want the slowest fall, especially in shallow water. Add a lightly weighted wacky hook when wind, current, or depth makes line control difficult. A nail weight inserted into one end creates a Neko-style presentation rather than the same center-weighted wacky fall.
What size hook is best for a wacky rig?
For many 4- to 5-inch stick worms, a size 1, 1/0, or 2/0 finesse/wacky hook is a practical starting range. Hook dimensions vary by pattern and manufacturer, so match the actual gap and wire strength to the worm, line, and cover instead of relying on the size number alone.
Conclusion
A wacky rig is simple to assemble, but its effectiveness depends on a few details: attach the hook near the worm’s balance point, use an O-ring when durability matters, match the hook to the bait and cover, and watch the line carefully as the worm falls.
Start with a 4- or 5-inch stick worm, a small finesse/wacky hook, spinning gear, and a weightless fall-and-pause retrieve. Switch to a weedless hook around snaggy cover, add a lightly weighted wacky hook when you need more depth control, or move to a Neko or drop-shot variation when the fish’s depth and position call for a different presentation.