
To change an ignition coil on a Toyota RAV4, diagnose the misfire first, confirm the affected cylinder, and verify the replacement coil and tightening specification for your exact model year and engine. With the vehicle fully off and the engine cool, remove the engine cover, disconnect the confirmed faulty coil, remove its hold-down fastener, install the VIN-matched replacement, torque it to the applicable Toyota specification, reconnect it, and verify the repair with a scan tool and road test.
Last updated: September 22, 2026 — cost data, Toyota owner information, diagnostic guidance, external links, and structured data rechecked.
Quick Answer
To change a Toyota RAV4 ignition coil, first confirm the failed cylinder with an OBD-II scan and inspection. With the engine cool and vehicle off, remove the engine cover, unplug the affected coil, remove its hold-down bolt, install a VIN-matched replacement, torque it to the exact service specification, reconnect it, and verify the repair.
Key Takeaways
- A misfire code identifies an affected cylinder or misfire pattern, but it doesn’t automatically prove the ignition coil has failed.
- Confirm the model year, engine, VIN fitment, fastener torque, spark-plug type, and plug specification before starting.
- You can normally replace a failed coil without replacing every coil or automatically changing the spark plugs.
- Stop driving if the check-engine light flashes, the engine shakes severely, or the vehicle loses substantial power.
- After installation, scan for codes, check the idle, inspect the work area, and complete a careful road test.
At a Glance
| Time Required | About 30 to 60 minutes after diagnosis for an easily accessible coil; longer when other components block access |
| Difficulty | Moderate; accurate diagnosis and model-specific torque information are required |
| Tools Needed | OBD-II scan tool, ratchet, correct sockets, extension, inch-pound or low-range torque wrench, flashlight, gloves, and eye protection |
| Cost | Varies by year, engine, coil brand, number of coils, local labor, and related repairs; RepairPal’s September 3, 2026 average estimate is $238 to $319 for a RAV4 ignition-coil replacement |
Note: Many later-model RAV4 engines use one coil-on-plug unit above each spark plug. Owners often call these units “coil packs.” Older RAV4 ignition layouts may differ, so inspect your engine and verify the applicable repair information before following a coil-on-plug procedure.
Symptoms of Ignition-Coil Problems in a Toyota RAV4

A weak or failed ignition coil can prevent one cylinder from receiving a reliable spark. The engine may still run, but combustion becomes uneven.
Common warning signs include:
- Rough or shaking idle
- Hesitation or reduced power during acceleration
- Engine misfire, sputtering, or occasional backfiring
- Hard starting or unexpected stalling
- Reduced fuel economy
- A steady or flashing check-engine light
- Misfire codes such as P0300 or a cylinder-specific P0301, P0302, P0303, or P0304
- Ignition-coil circuit codes such as P0351 and related cylinder-specific P035x codes
Warning: Stop driving if the check-engine light flashes, the engine shakes severely, the vehicle stalls, or power drops sharply. An active misfire can send unburned fuel into the catalytic converter and cause additional damage. Arrange a tow when the vehicle cannot be driven smoothly and safely.
These symptoms can also come from worn spark plugs, a damaged connector, an injector problem, an intake leak, low compression, contaminated fuel, or oil or coolant inside a plug well. Diagnose the cause before ordering coils.
Diagnose the Misfire Before Replacing a Coil
Start with an OBD-II scan. Record every stored, pending, and permanent code, plus available freeze-frame data, before clearing anything. A cylinder-specific code tells you where the computer detected a misfire, but it doesn’t identify the failed component by itself.
Inspect the Affected Cylinder
With the engine off and cool, inspect the suspected cylinder for:
- A loose, broken, or corroded electrical connector
- Cracked wiring or damaged insulation
- A split, swollen, burned, or carbon-tracked coil boot
- Oil or coolant inside the spark-plug well
- Water intrusion or corrosion
- A loose coil hold-down bolt
- A worn, fouled, cracked, or incorrect spark plug
Oil or coolant in the plug well can damage the coil. Replacing the coil without correcting the leak may lead to another failure.
Use a Controlled Coil-Swap Test When Appropriate
If your RAV4 uses identical individual coils and the service information permits the test, move the suspected coil to a known-good cylinder. Clear or record the codes as appropriate, run the engine, and scan it again.
If the misfire follows the coil to the new cylinder, the coil is a strong failure candidate. If the misfire remains on the original cylinder, inspect the plug, injector, wiring, compression, and air-fuel system instead.
| Test result | What it means | Next step |
|---|---|---|
| Misfire moves with the swapped coil | The coil becomes the leading suspect. | Confirm fitment and replace the failed coil, then rescan. |
| Misfire stays on the original cylinder | The coil is less likely to be the cause. | Check the plug, injector, connector, wiring, compression, and intake leaks. |
| Several cylinders misfire | A shared electrical, fuel, air, or mechanical problem may be involved. | Avoid buying multiple coils without broader diagnosis. |
Pro Tip: Photograph the original coil positions and connector routing before moving anything. Clear labels help you return every coil to the correct cylinder after testing.
Confirm the Correct Parts and Specifications
Toyota has used different engines, ignition systems, plugs, and fastener specifications across the RAV4’s production history. Before purchasing a coil, enter the full VIN into the Toyota Genuine Parts fitment system or verify fitment through a trusted parts catalog.
Use Toyota’s manual and warranty portal to select the correct vehicle. For repair-manual procedures, connector diagrams, tightening values, and diagnostic details, consult the Toyota Technical Information System.
Confirm all of the following:
- Model year and production market
- Engine size and engine code
- Gasoline, hybrid, or plug-in-hybrid configuration
- Ignition-coil part number and connector shape
- Coil hold-down fastener torque
- Spark-plug part number, gap specification, and tightening method if plug service is needed
A correct misfire diagnosis saves more money than replacing every ignition part and hoping the warning light stays off.
[Amazon Products Picked for You]

FITMENT:1)Compatible with 2011-2016 Scion tC 2.5L L4 (For vehicle built in USA), 2010-2017 Toyota Camry 2.5L L4 (only fit gas models , not for FHEV models), 2009-2019 Toyota Highlander 2.7L L4, 2009-2018 Toyota RAV4 2.5L L4 (only fit gas models , not for FHEV models), 2011-2013 Toyota Sienna 2.7L L4, 2009-2016 Toyota Venza 2.7L L4

Compatibility: Coil Pack for 2010-2015 Toyota Camry 2.5L L4 | 2009-2015 Toyota RAV4 2.5L L4 | 2009-2015 Toyota Highlander 2.7L L4 | 2011-2013 Toyota Sienna 2.7L L4 | 2011-2015 Scion tc 2.5L L4 | 2013-2015 Toyota Avalon 2.5L L4

[Vehicle Fitment-1]: Compatible with Toyota Corolla 2009-2010 L4 2.4L (Built In Japan), Camry 2002-2002 L4 2.4L (Built In U.S.), Camry 2003-2003 L4 2.4L (Built In U.S.; Built In Japan), Camry 2004-2009, 2011 L4 2.4L (Built In Japan), Camry 2010-2010 L4 2.4L Hybrid (Built In Japan), Highlander 2001-2007 L4 2.4L (Built In Japan), Matrix 2009-2013 L4 2.4L (Built In Japan), RAV4 2001-2003 L4 2.0L, RAV4 2004-2008 L4 2.4L, Solara 2002-2006 L4 2.4L (Built In Japan)
Tools and Parts You Need
Gather the correct tools before opening the engine compartment:
- OBD-II scan tool capable of reading stored and pending codes
- VIN-matched replacement ignition coil
- Ratchet and the correct sockets for the engine cover and coil fastener
- Extension suitable for the coil location
- Low-range torque wrench that covers the specified fastener torque
- Flashlight
- Clean lint-free cloths
- Protective gloves and safety glasses
- Replacement spark plug only if inspection, mileage, or the maintenance schedule calls for one
- Spark-plug socket and a suitable torque wrench if plug replacement is required
A magnet may help retrieve a loose fastener, but don’t place a tool inside the spark-plug well unless the plug is being removed. Keep dirt, hardware, and liquids away from the open well.
[Amazon Products Picked for You]
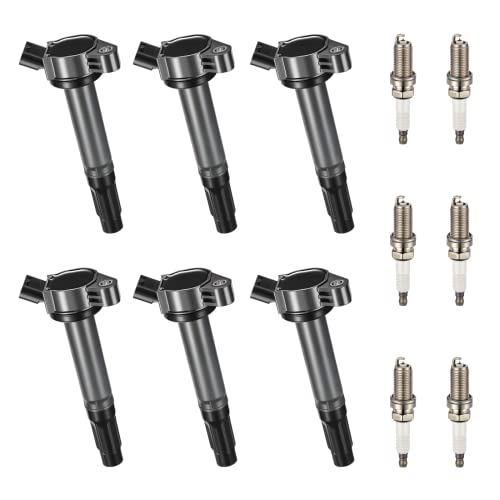
【Basic Info:】Ignition Coil UF487 & Spark Plug 6619 are Compatible with Toyota Camry 2.5L l4 2010-2017, Toyota Highlander 2.7L l4 2009-2019, Toyota RAV4 2.5L l4 2009-2018, Toyota Sienna 2.7L l4 2011-2013, Toyota Venza 2.7L l4 2009-2015.ect. Please check detail fitting info from pics or detail page. OE checking is necessary before buying.

[Important Reminder] Ignition Coil UF333 is only compatible with Japan-manufactured vehicles (VIN starts with letter "J"). It does NOT fit US-manufactured vehicles (VIN starts with a number). Please verify your vehicle VIN prior to purchase to ensure proper fitment

[PRECAUTIONS PURCHASE]: Please use Amazon's Your Garage function and verify the fitment of the autopart by the year/make/model of your vehicle and the OE number of the replaceable part.
Prepare the RAV4 Safely
- Park on a level surface, select Park, and apply the parking brake.
- Turn the ignition completely off and let the engine cool.
- Move the key or smart key away from the vehicle so the system cannot be activated accidentally.
- On a hybrid or RAV4 Prime, confirm that the READY indicator is off. Don’t touch orange high-voltage cables, connectors, or covers.
- Follow the exact Toyota repair procedure concerning the 12-volt battery. Don’t assume battery disconnection is required for every model and procedure.
- Remove loose jewelry and keep tools away from battery terminals and exposed electrical conductors.
Never disconnect a coil, probe its connector, or place your hands near the ignition system while the engine is running. The ignition system generates high voltage when energized.
How to Replace an Ignition Coil in a Toyota RAV4
1. Remove the Engine Cover
Release the cover using the attachment method fitted to your engine. Some covers pull upward from rubber grommets, while others use fasteners. Don’t force the cover if it doesn’t release easily.
2. Identify the Confirmed Faulty Coil
Match the scan result and your diagnostic findings to the correct cylinder. Avoid removing every coil when only one has been confirmed faulty.
3. Disconnect the Electrical Connector
Press or release the connector lock as designed, then pull on the connector housing. Don’t pull on the wires. Stop if the locking tab is brittle or stuck because a broken connector may require a separate repair.
4. Remove the Hold-Down Fastener
Before removing the fastener, clear loose dirt and debris from around the coil and plug-well opening with a clean cloth, soft brush, or suitable vacuum. Then use the correct socket to remove the coil hold-down fastener. Keep the fastener in a clean container so it cannot fall into the engine compartment.
5. Remove and Inspect the Old Coil
Twist the coil gently to release the boot, then pull it straight upward. Inspect the boot and coil body for cracks, burn marks, carbon tracking, swelling, moisture, oil, or coolant.
Use a flashlight to inspect the plug well. Don’t install the replacement coil into a wet, oily, or contaminated well until the source has been corrected and the area has been cleaned safely.
6. Compare the New and Old Coils
Check the connector, body length, boot shape, mounting point, and part number. The new coil should seat without modification or force.
7. Install the New Coil
Lower the coil directly over the spark plug and press it down until the boot seats fully. Don’t apply grease to electrical terminals, the spark-plug electrode, or random surfaces. Use dielectric grease only where the coil or plug manufacturer specifically directs it, normally as a very thin film inside the boot opening.
8. Tighten the Fastener Correctly
Start the hold-down fastener by hand to avoid cross-threading. Tighten it with a torque wrench to the exact value listed for your RAV4’s model year and engine. Don’t substitute a universal torque value.
9. Reconnect the Electrical Connector
Push the connector into place until the locking tab engages. Give the housing a light pull to confirm that it is secure.
10. Reinstall the Engine Cover
Align every grommet, clip, and fastener before pressing or tightening the cover. Confirm that no tools or loose hardware remain in the engine compartment.
Should You Replace the Spark Plugs Too?
You don’t have to replace a spark plug simply because you replaced its ignition coil. Inspect the plug or review the maintenance schedule before deciding.
Replace the plug when it is:
- Due under the maintenance schedule for your exact RAV4
- Fouled by fuel, oil, or deposits
- Cracked, chipped, overheated, or physically damaged
- Worn beyond its specification
- The wrong part number or heat range
- Linked to the misfire through testing
If you remove a spark plug, confirm the correct replacement, socket, gap, and torque through Toyota service information. Many fine-wire iridium and platinum plugs can be damaged by careless gap adjustment. For example, Toyota’s 2024 U.S. RAV4 owner’s manual specifies a DENSO FC16HR-Q8 iridium plug with a 0.031-inch (0.8 mm) gap and explicitly says not to adjust the gap. Treat that as a model-year example, not a universal RAV4 specification.
Don’t apply anti-seize compound unless the applicable plug manufacturer or Toyota procedure calls for it. Lubricated threads can change the clamping force produced by a given torque value.
[Amazon Products Picked for You]

Bosch OE Fine Wire Double Platinum Spark Plugs feature a platinum firing pin and ground electrode inlay that provide 3X longer service life compared to standard copper plugs
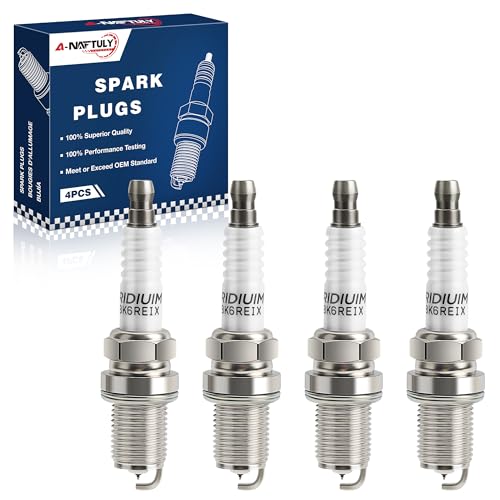
[Reference Number]: 7092, BKR6EGP, 3764, BKR6EIX11, 5553, BKR6ES11, 6741, IFR6E11, 2756, BKR6E11, 4115, PFR6G13, XP3923, 22401AA500, 980795614EHE, 9900079K60KR6, 99906910X9007, BY481BKR6E

This 4 pack NGK Iridium IX Spark Plug is compatible with Toyota RAV4 2018, 2017, 2016, 2015, 2014, 2013, 2012, 2011, 2010, 2009 2.5L L4
Verify the Repair
- Check that every connector, coil, fastener, cover, hose, and wiring clip is secure.
- Start the vehicle and listen for a smooth, stable idle.
- Watch for warning lights, unusual sounds, fuel smells, smoke, or severe vibration.
- Scan for current and pending codes.
- Clear codes only after recording them and completing the repair.
- Complete a short road test under light and moderate load when the vehicle runs normally.
- Scan again to see whether the misfire or circuit code returned.
A permanent diagnostic trouble code may remain visible until the vehicle completes enough successful self-tests. Don’t keep clearing codes to hide a fault that is still active.
Understanding Toyota RAV4 Ignition-Coil Replacement Costs
Ignition-coil replacement costs depend on the model year, engine, number of failed coils, parts brand, local labor rate, taxes, and any related damage.
As of September 3, 2026, RepairPal estimates an average RAV4 ignition-coil replacement cost of $238 to $319, including an estimated $50 to $73 for labor and $188 to $246 for parts. The estimate excludes taxes and fees, does not factor in your location, and may not include related repairs.
Your total can be lower or higher. Replacing several coils, servicing spark plugs, repairing damaged wiring, correcting an oil leak, or diagnosing a fuel or compression problem will change the bill.
Should You Replace One Coil or All of Them?
Replace one coil when testing clearly identifies one failure and the remaining coils show no problems. Replacing every coil is not a universal maintenance requirement.
You may discuss broader replacement with a technician when:
- Several coils fail testing
- Multiple same-age coils have failed within a short period
- Heat, oil, coolant, or water damaged more than one coil
- Access is unusually difficult and labor overlaps significantly
- You prefer preventive replacement and understand the added cost
Keep any working original coil as an emergency spare only if it remains undamaged, clean, correctly labeled, and suitable for your exact engine.
Common Mistakes to Avoid When Replacing Ignition Coils
- Replacing a coil without scanning the vehicle: A misfire has several possible causes.
- Assuming every RAV4 uses the same specifications: Parts, plug gaps, fasteners, and tightening values vary.
- Clearing codes before recording them: This removes useful diagnostic evidence.
- Pulling on connector wires: Always release and pull the connector housing.
- Ignoring oil or coolant in the plug well: The contamination can damage the replacement coil.
- Overtightening the hold-down fastener: Small fasteners and mounting ears can break.
- Cross-threading a spark plug: Start plugs by hand and follow the exact installation procedure.
- Applying excessive dielectric grease: Use only a thin film where the manufacturer permits it.
- Replacing all coils automatically: Base the decision on testing and vehicle condition.
- Working on a hybrid while READY is active: Confirm the vehicle is fully off and avoid all orange high-voltage components.
When to Call a Professional
Arrange professional diagnosis when:
- The check-engine light flashes
- The engine stalls or runs too roughly to drive safely
- The misfire remains after moving or replacing the suspected coil
- Several cylinders misfire at once
- The connector, wiring harness, or coil driver circuit is damaged
- You find oil, coolant, water, or heavy corrosion in a plug well
- A spark plug is seized, broken, or cross-threaded
- Compression or fuel-injector testing is needed
- Engine components must be removed for access
- You cannot obtain reliable torque or wiring information for the exact vehicle
A technician can use live data, coil-control testing, injector testing, smoke testing, and compression or leak-down testing to find faults that a basic code reader cannot identify.
Related Guides
Frequently Asked Questions
How long do ignition coils typically last in a Toyota RAV4?
Toyota RAV4 ignition coils don’t have one dependable replacement mileage for every model. Many last for a substantial portion of the vehicle’s life, while heat, moisture, worn plugs, leaks, and electrical stress can cause earlier failure. Replace a coil after diagnosis confirms it is faulty rather than using a universal mileage interval.
Can I clean an ignition coil instead of replacing it?
You can clean moisture, oil, or dirt from the outside of a coil boot and plug well after correcting the source of contamination. Cleaning won’t repair failed internal windings, cracked insulation, severe carbon tracking, or a damaged terminal. Replace the coil when electrical or physical testing confirms failure.
What causes ignition-coil failure in a RAV4?
Possible causes include age, repeated heat cycles, moisture, oil or coolant leaks, damaged wiring, loose connections, vibration, and worn or incorrectly fitted spark plugs. Correct the underlying leak, plug, or wiring problem so it doesn’t damage the replacement coil.
Will changing an ignition coil improve fuel efficiency?
Replacing a confirmed faulty coil can restore normal combustion, power, emissions, and fuel economy. Installing new coils won’t improve mileage when the original coils are working correctly or when another problem is causing the poor fuel economy.
Are aftermarket ignition coils reliable for a Toyota RAV4?
Quality varies among aftermarket brands. Confirm VIN fitment, connector design, warranty coverage, seller reputation, and compliance with original-equipment specifications. Avoid unidentified coils with incomplete fitment information because an incorrect or weak coil can create recurring misfires.
Should I replace one ignition coil or all of them?
Replace the confirmed failed coil when the remaining coils pass inspection and testing. Consider replacing several only when multiple coils are failing, contamination affected more than one unit, or repeated same-age failures make broader replacement reasonable.
Can I drive a RAV4 with a bad ignition coil?
Avoid continued driving with an active misfire. Stop and arrange a tow if the check-engine light flashes, the engine shakes heavily, the vehicle stalls, or power drops sharply. Even a mild misfire should be diagnosed promptly because unburned fuel can damage the catalytic converter.
What does a P0301, P0302, P0303, or P0304 code mean on a RAV4?
These codes identify the cylinder where the engine computer detected a misfire: P0301 is cylinder 1, P0302 is cylinder 2, and so on. The code does not prove that the ignition coil is faulty. Confirm the cause by inspecting the plug, coil, connector, wiring, injector, plug well, and other possible misfire sources.
What is the ignition-coil bolt torque on a Toyota RAV4?
There is no single torque value that should be applied to every RAV4 engine and model year. Use Toyota service information for your exact year, engine, and fastener. A low-range torque wrench is preferable because overtightening a small coil fastener can damage the mounting ear or threads.
Conclusion
Replacing an accessible Toyota RAV4 ignition coil is manageable when you diagnose the misfire first and use the correct vehicle-specific information. Scan the codes, inspect the plug well and wiring, confirm VIN fitment, install only the parts the testing supports, and follow Toyota’s exact tightening specifications.
After the repair, check the idle, rescan the vehicle, and complete a careful road test. If the misfire remains, don’t keep replacing coils. Move to plug, injector, wiring, intake, and compression testing or arrange professional diagnosis.
Sources
- Toyota Manuals and Warranties — vehicle-specific owner, warranty, and maintenance information
- Toyota Technical Information System — Toyota repair manuals, wiring diagrams, service bulletins, and diagnostic information
- Toyota Genuine Parts — VIN-based parts and fitment lookup
- RepairPal Toyota RAV4 Ignition-Coil Replacement Estimate — current cost context, symptoms, and diagnostic considerations
- RepairPal Toyota RAV4 Spark-Plug Replacement Estimate — spark-plug service context and related misfire information
- Toyota 2024 RAV4 Maintenance Data — verified spark-plug type, gap, and no-gap-adjustment note used as a model-year example
